

How to create a DIY distressed desk for your child. This Lego desk offers storage space and the desk can be updated as they get older.
This post may contain affiliate links which may earn me commissions should you click through them and take certain actions. As an affiliate for Amazon, Cricut, xTool, Home Depot, and other sites, I earn from qualifying purchases. Please DIY carefully. View my full legal disclosures here.
The majority of my content is generated by me, as are 99% of the photos and videos, but I utilize technology for titles, descriptions, video editing out all of my ums, and occasionally for text overlay on images.
Please read the whole post so you don’t miss any important information!
Originally published April 21, 2015
Bear with me… this is a two part post. I initially took this desk and transformed it into a Lego desk when my oldest son was little. It was perfect for art projects and Lego play.
If you’re here for the version with the pink top, keep scrolling… it’s at the end! I transformed this into a regular desk later on.
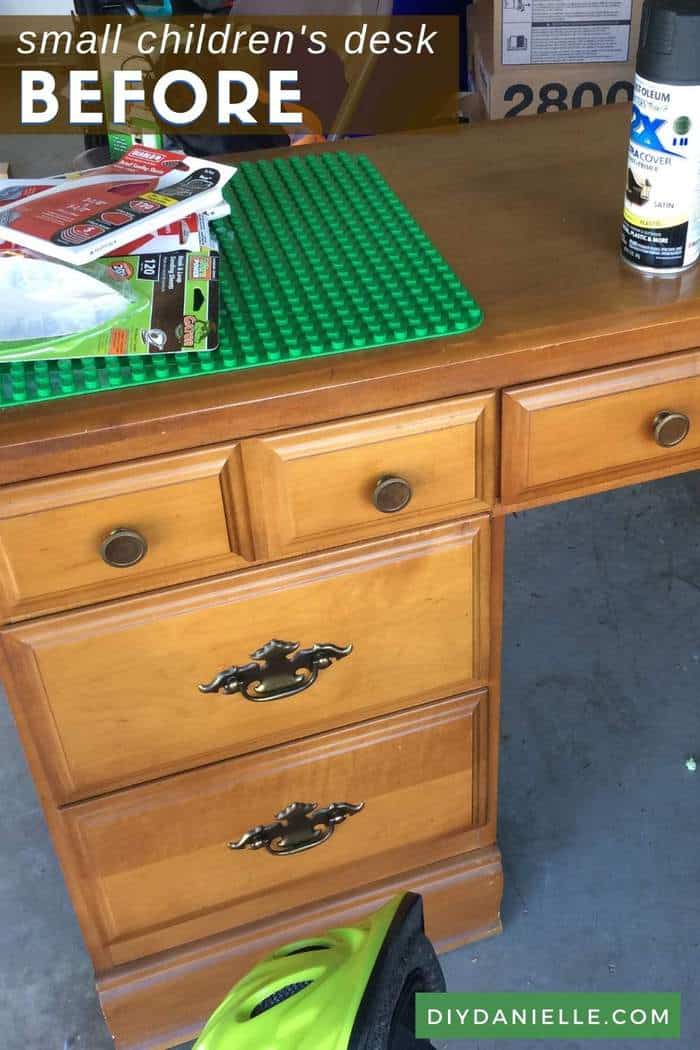
This is what I started with on this project.
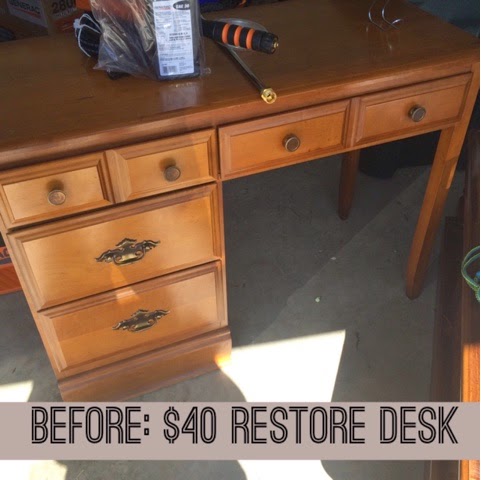
Let me take a moment to blame my mother-in-law… I was going to come home with a side table until she pointed this out. It’s always fun to go thrift shopping with her. We’d gone out the day before and came home with nothing, and the guys all let out a big cheer about it. My father-in-law and my husband literally cheered. Football game style. Lame.
Needless to say we went back for round two and found this gem. My big plan was to use this black spray paint, then to finish the top with whiteboard paint. I was using the spray paint on another project though and I decided to save it for a different project. Wood just distresses so nicely.
I painted my dining room a while back and I had the paint leftover from that project. The paint looks so different on this furniture piece than it did on my walls.
The big key with finding pieces to redo is knowing how much work you want to do. I wanted an item with drawers that worked well… I don’t like to gamble on my ability to fix the drawers. Many people just remove drawers and fix so they can use baskets, but I just think a sign of a good furniture piece is drawers that slide smoothly. And I don’t want to go hunting for baskets that fit. So this needed no fixing.
Want to repair the furniture too? Here’s one helpful tutorial —> Learn how to make drawer stoppers.
DIY Lego Desk
Supplies
All paint is no VOC Valspar satin paint from Lowes. Both of the paints were leftover from painting my dining room, half bathroom, and family room.
- Paint Choice (top): Seine, 6005-2B
- Paint Choice (rest of desk): Presidential Suite, AR1326
- Stain Choice: s Ebony Wood Stain)
- Poly Choice: Minwax Water Based Oil-Modified Polyurethane, Clear Satin
- Microfiber cleaning gloves
- Black Rustoleum 2x Spray Paint for the Lego Plate
- Gorilla Glue
- Foam Brushes
- Paint brush
- Drop cloth (or scrap cardboard to protect your floor)
- Mouse sander with sandpaper assortment pack
- Lego plate: Gray Lego Brand | Rainbow Assortment Pk, Off Brand |Lego Road Plates
- Mask for protecting your lungs when you’re painting and sanding: I use this respirator which I LOVE because it does the best job of protecting my asthmatic lungs. If you blow your nose after spray painting and spray paint comes out, you should be wearing a better mask.
- Gloves
Step by Step Tutorial
Here’s a video showing my process. Keep scrolling for step by step text instructions.
1. Pull off the cardboard backing. Remove drawer hardware. Spray paint hardware and cardboard backing black.
2. Remove drawers and place face up, along with the desk, on something that will protect your floors.
3. Sand with 80 grit going WITH the grain of the wood. Be careful because this has the potential to take off too much wood… I just used it so that I could rough up all the sides. You may be able to skip this step depending on your paint or if you prime first.
4. Brush off the dust. I love using microfiber cleaning gloves for this.
5. Paint with the color of your choice.
6. Let dry.
7. Add another coat of paint and let dry.
8. Sand lightly with 120 grit paper in places that would get normal wear and tear. This is the “distressing” part… I usually get around the edges and corners the most. Don’t go crazy on big flat areas or it will look fake. You want to go WITH the grain of the wood.
9. Clean off any dust.
10. Apply your stain. I like to apply my stain with clean, lint free socks (I save socks with holes for this purpose). I use gloves then pull the sock on over my glove. I can then dip the tip of my fingers/sock into the stain, then use my hand to brush along the grain. It sounds weird but it works really well.
Let sit for a few minutes, then rub off with an old rag (t-shirt material works well, paper towels don’t work super well). When you rub the stain off, make sure that you go in the same direction… it’ll show if you go every which way.
11. Let dry. I gave mine 24 hours.
12. Paint on your poly. Let dry.
I used foam brushes for applying the poly… I find both stain and poly are difficult to clean off brushes so I prefer a cheap option to apply it so I can throw the foam brushes out after.
13. Sand very, very lightly. Then apply poly again and let dry.
14. Add a minimum of one more layer of poly.
15. Replace hardware and cardboard backing.
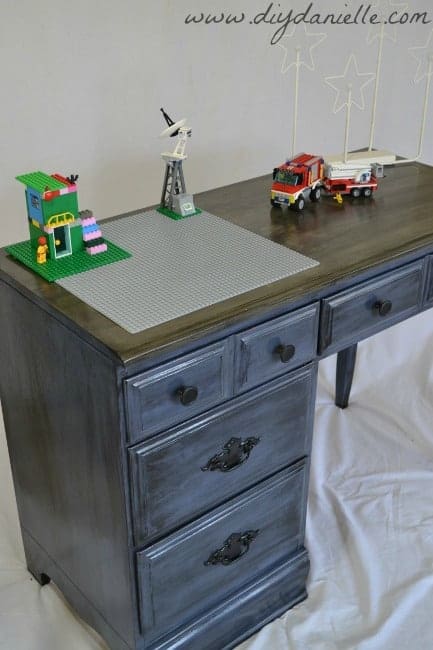
16. Glue down your Lego plate with Gorilla Glue.
Note: For the Lego board, I purchased a green one and painted it. They had a couple color choices that I didn’t love, and the ones I liked better were higher priced. This was a quick, easy project. Check out Customizing the Color of Your Lego or Duplo Building Plate for the instructions.
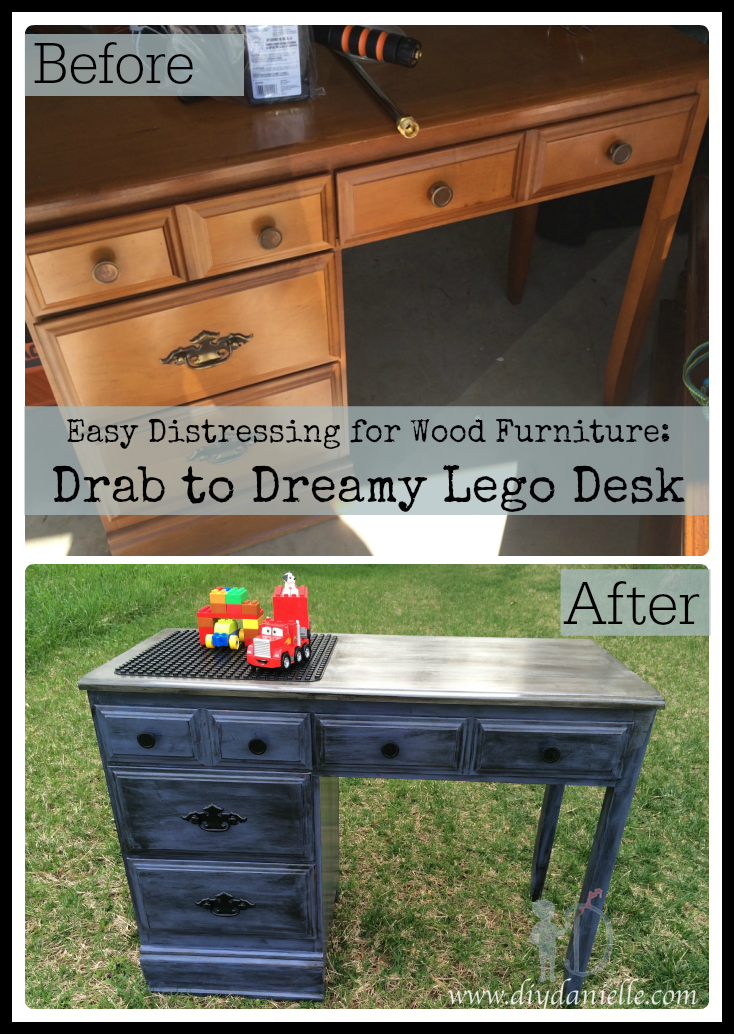
Here’s the side by side picture of the before and after.
Updating the Desk for Future Use
My sons’ Lego collection eventually outgrew the desk and we needed a bigger area for all three kids to work. I didn’t want to get rid of the desk though- I’m OBSESSED with the blue distressing.
Instead I decided to remove the Lego plate, and redo the finish on the top. We’ll be using this for our au pair who will hopefully come to stay with us in 2021. I had so much fun updating this for a woman; boy stuff is cool, but I’m grossly outnumbered.
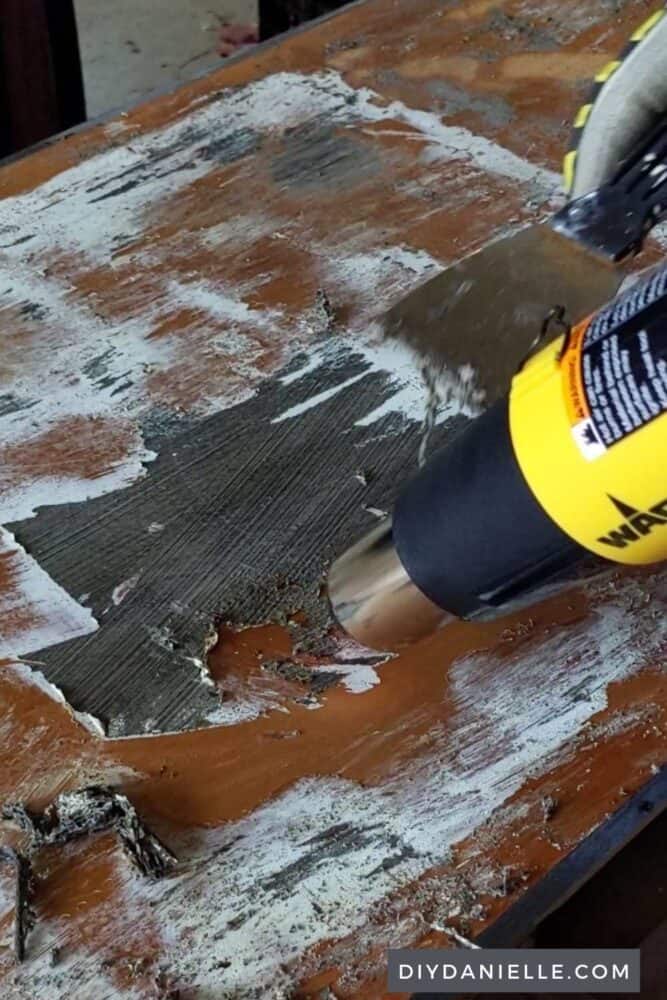
First, I removed the Lego plate. I wanted to save it to reuse elsewhere and although this was adhered using Gorilla Glue, I was able to loosen the adhesive using the heat gun. Heat tends to loosen adhesives, allowing you to carefully peel up the item that is stuck on. You have to be careful not to burn your fingers though.
I used a mouse sander and a paint scraper to scrape away some of the dried glue that remainded.
Once that was done, I hit the top of the desk with a heat gun to remove the paint from the top. Make sure to check out my tutorial on how to remove paint from wood.
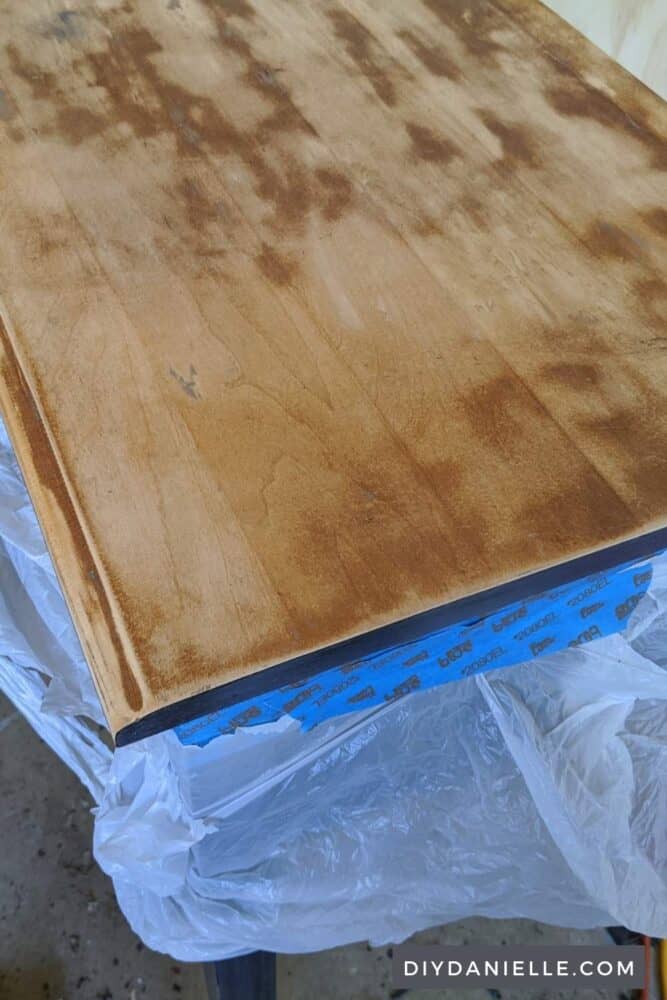
Once the paint was all off, I sanded lightly and cleaned the top off. I taped the top off so I wouldn’t get paint on the distressed blue below.
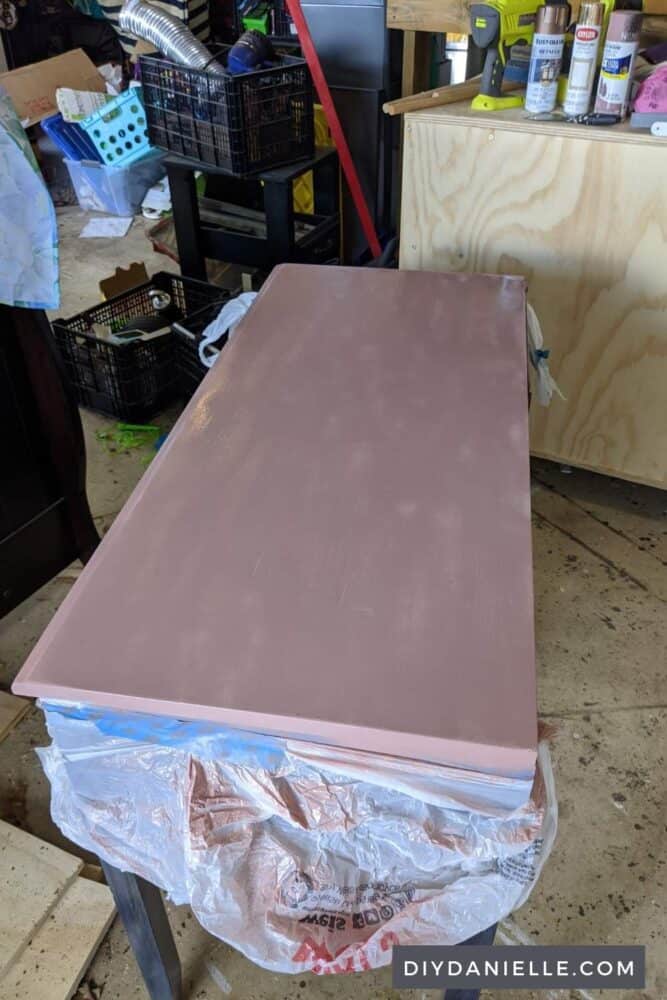
I used Satin Blush Rustoleum Painter’s Touch 2x Spray Paint; I freaking LOVE this pink. I used it on my toothbrush cabinet too. This took a couple of coats.
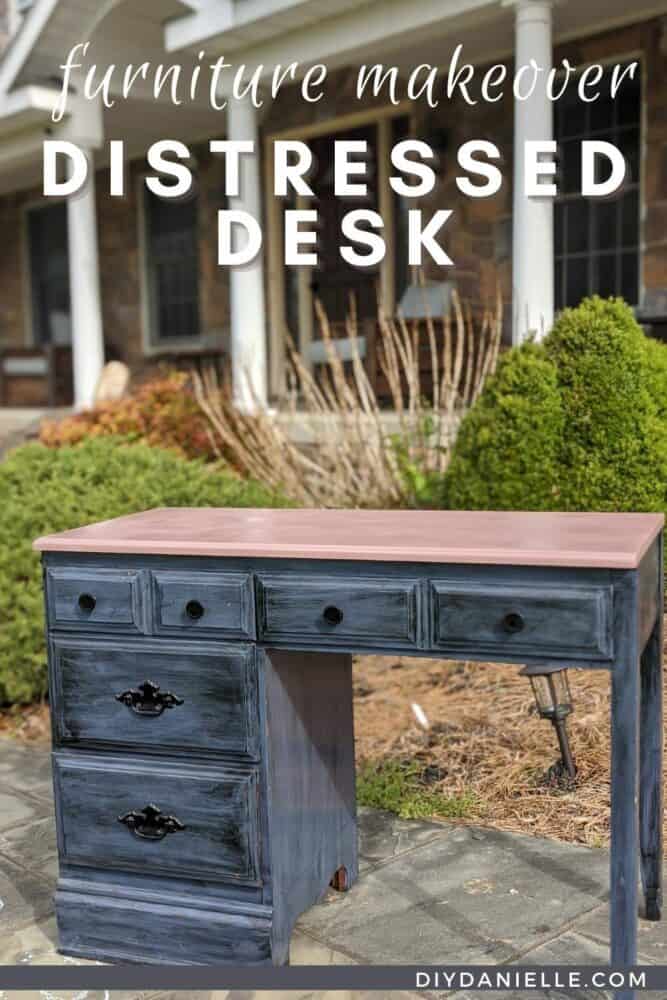
And this is the final desk! I love that it has both blue and pink in the finishes… they match so beautifully.
Love furniture? Here are some other furniture projects we’ve done: Distressed Lego Desk | Easy Living Room Storage Cabinets | Built In Entertainment Center | Quick and Easy Drawer Stoppers | Gaming Table | DIY Rustic Outdoor Chairs
Please share and pin this post! You can also post your project and tag the DIYDanielle team on Instagram @doityourselfdanielle!
So clever 🙂 Love it!
This is so cool! My sister has two boys and LOVES doing stuff like this! I am totally passing it on!
What a great transformation. Love the color and your technique. I also love the legos incorporated into it. Such an awesome idea. Cathy
This is AWESOME!!! Great transformation! The lego feature is the "cherry on top"! 🙂
This is so awesome! Just love the color. So much fun for boys and girls. Can you picture this in pink