What is hook and loop? How do I use it when I sew? Can I just stick it on? All of your questions answered.
This post may contain affiliate links which may earn me commissions should you click through them and take certain actions. As an affiliate for Amazon, Cricut, xTool, Home Depot, and other sites, I earn from qualifying purchases. Please DIY carefully. View my full legal disclosures here.
Please read the whole post so you don’t miss any important information!
HOOK AND LOOP! Unless you’re an experienced sewist- and even if you are- you may be absolutely perplexed about what I’m talking about. The funny thing is that you KNOW what hook and loop is! You likely use hook and loop all the time in your daily life. It’s on your clothing, bags, and many other places.
Here’s a video to clue you in that was created by The Holderness Family for the VELCRO® brand …
YES! Hook and loop is simply the generic term for VELCRO® brand. I THINK these words are called Synecdoche. My stepmother brought it up a few years ago and everyone at our dinner party had to come up with brand names that are used in place of the generic term. THIS IS A FUN GAME! Anyways my contribution is VELCRO® brand and it’s my favorite because nobody knows what hook and loop is… most people know Kleenex = Tissue Paper, Xerox = To Photo Copy, etc.
So this video is my favorite, particularly as the reason I know about it is that VELCRO® brand’s lawyers might send bloggers a letter if you use their name in a generic manner. I try to avoid the word, but it becomes an issue when people aren’t familiar with the term!
I’m writing this post so I can point people in the right direction when they ask. Plus, I feel like there’s a lot to learn about how to properly use and sew on hook and loop.
Table of contents
What are the Parts of Hook and Loop?
Loop
This is the fuzzy soft part. It is what the hook sticks to.
You want a small bit of hook to stick to a bigger area of loop- never vice versa. The reason is that stuff tends to get stuck in hook so it helps to reduce how much area worth of hook you have on an item you’re sewing.
Hook
Hook is the scratchy part that catches on the loop. It will also catch on other things, like the fabric, lint in your washer, and other items in your washer. It tends to collect gunk over time if you aren’t careful about how you wash it.
It’s important to always wash hook when it’s completely connected to the loop. This keeps it from catching on your other laundry. Some people add a laundry tab on items like cloth diapers so you can close the tab (covering the hook) when you put it through the wash.
Hook and Loop FAQ
Hook and loop is thicker to sew through than fabric alone. You should use a size 14 or 16 needle, and you can consider using a microtex, denim, or leather needle if you’re still having problems.
Read more about sewing needles here.
A zig zag stitch seems to be the preferred method for sewing hook and loop on cloth diapers as you can zig onto the hook/loop, then zag onto the fabric.
That said, you can also use a straight stitch. I recommend smaller stitches on hook and loop, and sewing an X across the middle for longer pieces of hook and loop to hold them on.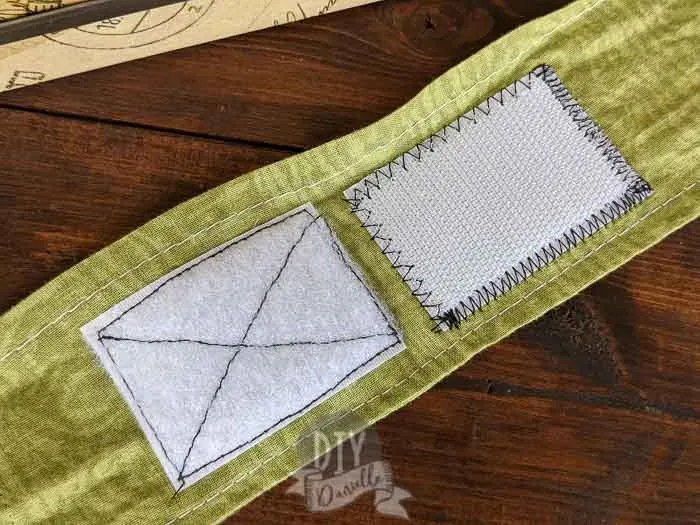
Personally, I prefer sew on hook and loop. I try to find a highly rated brand, avoiding cheaper options. You get what you pay for here, similar to what you’ll experience with thread quality.
This depends entirely on the project. Stick on hook and loop is good for situations where you aren’t able to sew it on. But it may not stay on permanently.
For items like cloth diapers, it’s important to sew on heavy duty hook and loop as they will get a lot of wear and tear.
You can wash hook and loop! Check the instructions on the brand you use, but I usually wash my cloth diapers on hot. While the hook and loop has certainly had wear and tear over time, it’s lasted well considering how much use the diapers get.
For stick on hook and loop, I would be careful to avoid HEAT because it may melt the adhesive and make it more prone to come off.
If the edges of hook and loop begins to fray, you could possibly use some Fray Check to prevent further fraying. I would recommend seam ripping the hook/loop and replacing it, however. Usually it’s easier to fix it than trying to band-aid the problem.
Here’s a good visual on old hook and loop on some diapers. These diapers are OLD so you can see the loop has looked better. I sewed these probably back in 2012 so they’ve seen better days. 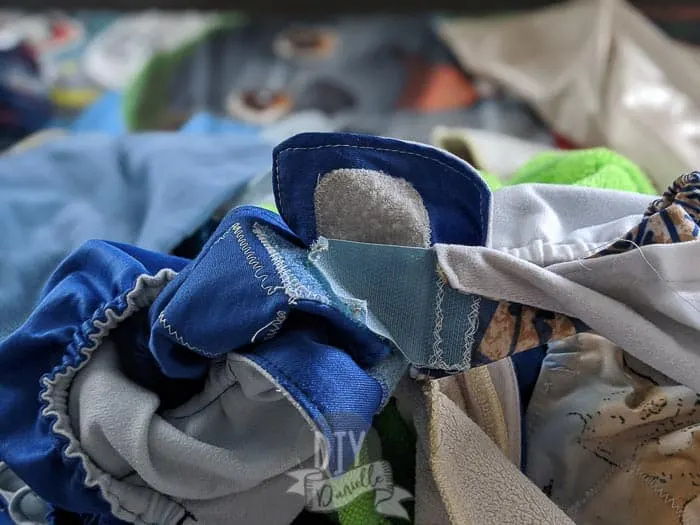
You should read the instructions on the hook and loop that you purchase, but generally it is okay to put it through the dryer.
As for the microwave, my understanding is that only 100% cotton should be put through the microwave. This means the fabric AND the thread used to sew it must be 100% cotton. Even then, you can start a fire if you put completely dry materials in the microwave; it’s safest to put those items through with a cup of water. Hook and loop is made of nylon and I would avoid microwaving it, just to be safe.
If you want to risk it, you could always test a scrap of the hook and loop on a plate (include a microwave-safe mug full of water) and see if it melts.
Hook and loop that’s stick-on may come off when heated. Adhesive tends to unstick when there’s a lot of heat from a hair dryer, dryer, etc.
Hook and loop will stop sticking if the hook gets a lot of gunk caught up in it. Things like lint from the dryer can get stuck in the hook and prevent it from allowing a good latch.
To fix this, you can either replace the hook or try to clean the hook out with tweezers.
Your loop shouldn’t ever stop “sticking” because it’s simply some fluff for the hook to latch onto. It will, however, wear down over time. You’ll notice it doesn’t look as nice and if you care, you can remove it and replace it with new loop.
This loop below is pretty worn out (sewn in 2012 or so). The hook was loose and grabbed onto the PUL fabric underneath the loop. 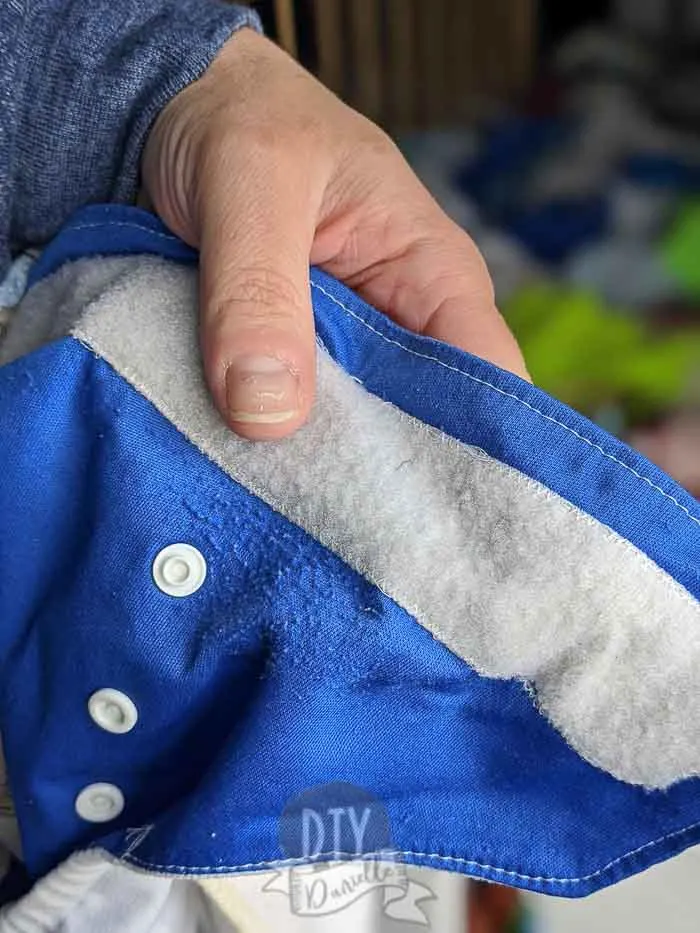
If you’re using stick on hook and loop, it’s better to use it as intended. The adhesive can get on your needle and cause issues.
How to Sew Hook and Loop
There’s a few things to remember when sewing on hook and loop.
- Use a heavy duty needle (size 14-16 is ideal).
- Sew slowly
- Use clips to hold the Velcro in place. You can pin it, but it’s tough to get the pins through it. Some people use a glue stick to put it on, then sew once it’s stuck in place; just note that you don’t want to get glue all over your needle and thread.
- You can sew with a straight stitch or with a zig zag along the edges. Some people sew an X through the middle to help provide stability.
Below, I’ve sewed on my loop with a straight stitch and an X across it. The left piece is hook that was sewed on with two different zig zag stitches (both with a width of 4. The tighter stitch has a length of 1).
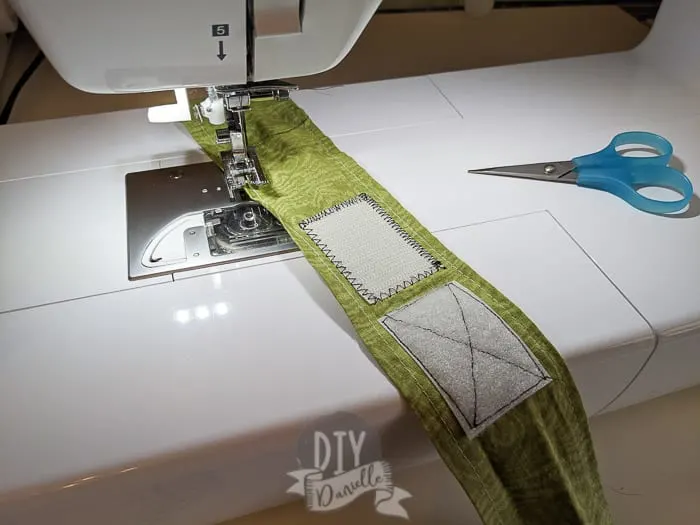
Here’s a video to show you how to sew on hook and loop!
Types of Hook and Loop
There are different brands of hook and loop with Velcro being the leader in terms of brands.
Velcro makes a number of different products that are stick-on versions, but their options for sew on hook and loop are fairly limited.
You need high quality hook and loop for cloth diapers. They get a lot of wear and tear on them so you want something intended for this use. Babyville makes a hook and loop intended for cloth diapers, but I can’t really testify to the quality. I was purchasing all of my hook and loop from DiaperSewingSupplies, but they recently closed down their shop. In the recent years, I haven’t been happy with the quality. I’ve heard other cloth diaper sewers recommend Wazoodle for hook and loop.
How to Replace Hook and Loop
Replacing hook and/or loop is pretty simple compared to replacing snaps. You can use your seam ripper to remove the stitching, making sure not to tear the fabric underneath. Then cut replacement pieces of hook and loop to replace the originals. Sew on as normal.
Storing Hook and Loop
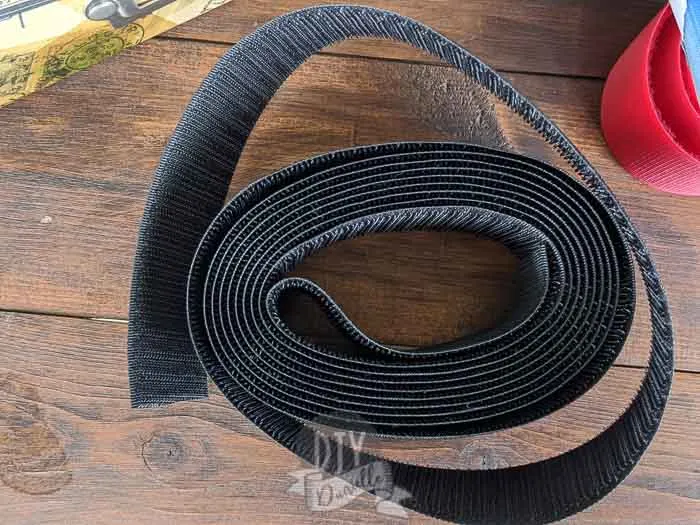
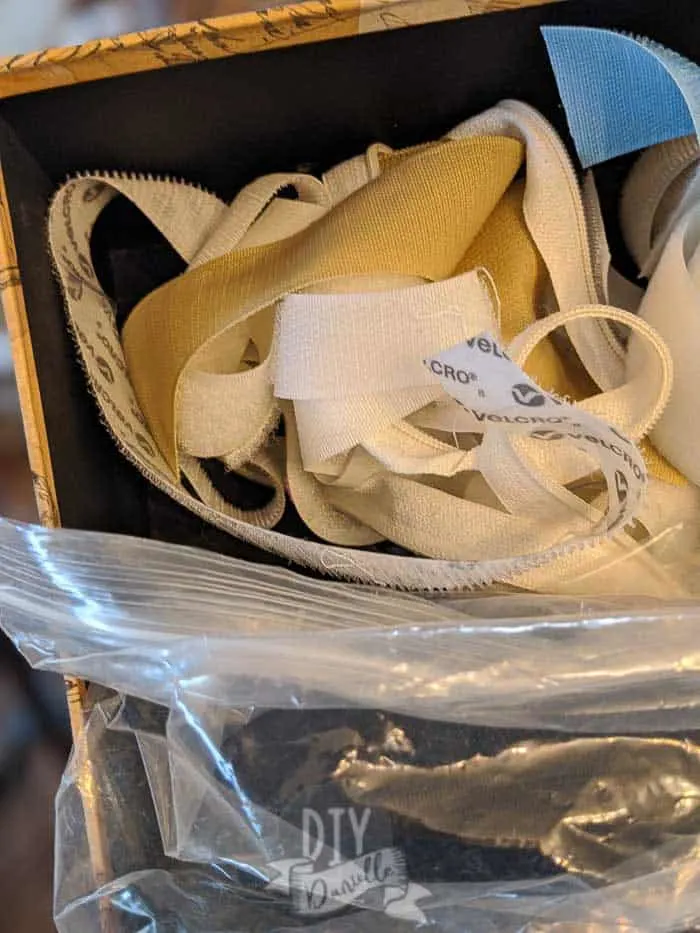
One of the challenges to hook and loop, in my opinion, is storing it so it won’t catch on itself or gather dust. While I normally avoid plastic bags, they are IDEAL for storing hook; if you use a fabric bag or store the hook with the loop, the hook will get caught on everything and get jumbled together.
Store your hook in a separate bag from your loop to keep your supplies neat and in good shape!
This is a good testament to how tangled they get if you don’t store them carefully!
Pros and Cons of Hook and Loop
Pro’s
- Easy to sew on
- Affordable closure
- Easy closure to use for everyone, but especially for people with disabilities, arthritis, etc.
Cons
- Catches on things in the wash
- Needs to be replaced after a lot of wear and tear.
- Can collect fuzz and other ickyness.
Alternatives to Hook and Loop
You have a few alternatives to hook and loop. You can use snaps, zippers, or buttons to create a closure for your project.
All of my “learn to sew” tutorials and projects can be found here: List of DIYDanielle Tutorials on How to Sew and this is a basic Sewing 101 post!
Please share and pin this post! If you make this project, share it in our Stuff Mama Makes Facebook Group. We have regular giveaways for gift cards to craft stores. You can also tag me on Instagram @doityourselfdanielle; I love seeing everything you make!
