

.How to paint a plastic playhouse to add character and make it unique. Such an easy DIY to keep this Little Tikes house out of the landfill!
This post may contain affiliate links which may earn me commissions should you click through them and take certain actions. As an affiliate for Amazon, Cricut, xTool, Home Depot, and other sites, I earn from qualifying purchases. Please DIY carefully. View my full legal disclosures here.
The majority of my content is generated by me, as are 99% of the photos and videos, but I utilize technology for titles, descriptions, video editing out all of my ums, and occasionally for text overlay on images.
Please read the whole post so you don’t miss any important information!
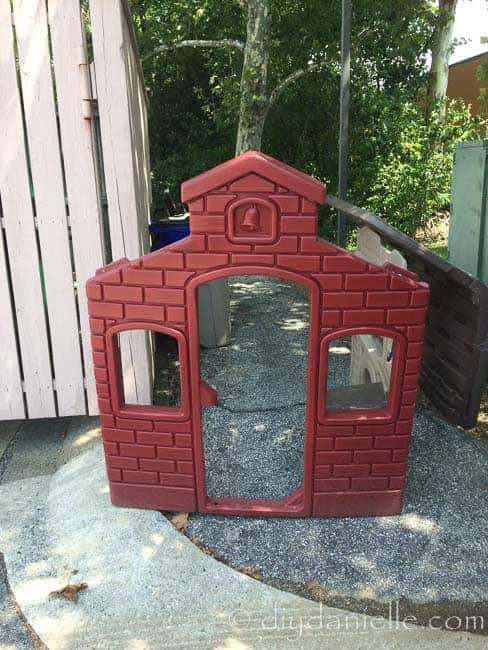
I was leaving my gym the other day and saw this big playhouse sitting by the dumpster. I wanted to call and ask if they were actually tossing it, but I was embarrassed to ask and running late so I didn’t. The next day it was STILL THERE.
So okay, this is just fate telling me I NEEDED this playhouse, right?! I asked and the child care in the gym said they were told to get rid of it. I asked if I could take it and they said sure. SO EXCITING. This is a DIY project that I’ve been EAGER to attempt!
I’ve been wanting a playhouse for the kids, even though there’s a playhouse portion of their swing set (which I upgraded with accessories last year).
These plastic playhouses are way cool and seem to have more to them than the wood ones that come with the swing set. There’s something about plastic playhouses that calls out to the little girl in me, but I certainly wouldn’t have dropped the $300-400 that this particular playhouse costs new.
But free? Heck yes. I’m doing the world a favor… no toys going in the landfill around this lady.
And really… it’s for the good of the blog right?
How to Update a Plastic Playhouse
So I couldn’t just leave it looking like it was. It was dirty, pieces were missing, and hey why not paint it too. I was able to order many of the accessories from the Little Tikes website for around $25. This project didn’t cost me a ton and my sons LOVE it.
Supplies for Painting a Plastic Playhouse
Below are a list of the supplies I used or recommend (I made some adjustments or suggestions for supplies in situations where the product I used wasn’t awesome). Many can be bought on Amazon and I’m including affiliate links to the products.
- Rustoleum 2x Painter’s Touch: Satin. I used deep blue, seaside, and warm yellow.*
- Acrylic Paints
- Mod Podge
- Paint Brushes
- UV Krylon UV Resistant Spray Paint in Clear: I used matte. I didn’t love this stuff and it seems to take off some of the paint underneath a bit. Not sure how well it will work. If you can find something better, I recommend trying that instead, but this was the only thing I found that others seemed to have used. Most people don’t appear to use a spray to seal the paints on their redone playhouses, but I was feeling reallllllly paranoid after all the detailed painting I did.
- Lettering if desired
- Replacement accessories if needed
- Reusable Respirator for use while spray painting (protect your lungs y’all!)
- Drop cloth or spray tent
*Order SATIN spray paint, not gloss. I was reading this blogger’s post about spray painting her plastic chairs and how they looked a year later. She said the gloss faded. I saw this AFTER I’d already spray painted with gloss, of course. Darker colors are easier to paint on with less coats, but are harder to paint details on after.
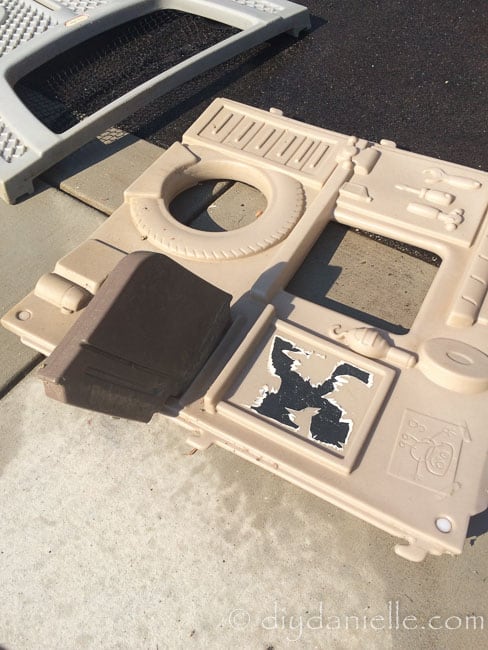
Step 1: Take the playhouse apart. Wash (we power washed ours) and let dry.
Step 2: Did you know that Little Tikes and Step2 offer replacement parts for their toys? Order any new parts that are necessary. It will take a few days for them to come in. They offer replacement decals, but I decided to paint and mod podge some lettering on instead. This may come off as well, but they’re items I had on hand. If I did it again, I’d use this special outdoor vinyl and my Cricut Maker.
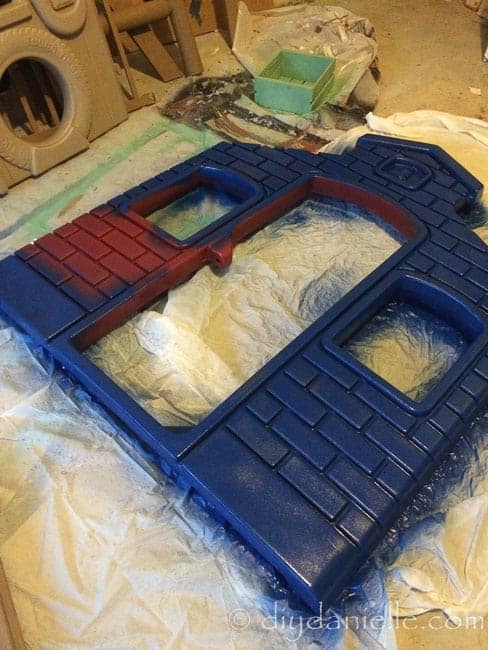
Step 3: Spray paint the large areas. You need special spray paint for plastic and keep in mind that darker colors offer better coverage, *but* if you want to paint the details, then it will take you much longer if you spray painted the sides darker colors.
The yellow did a terrible job covering up the tan color, although I think my yellow paint was just awful compared to other colors of the same product. Do additional layers of spray paint as necessary. I needed 2-3 cans of each color that I used. The dark blue needed the least because it was only one side and had great coverage. I didn’t spray paint the inside of the ceilings to conserve paint.
I also spray painted the hoop.
Let it dry before moving on to the next step.
Step 4: Optional– You can use acrylic paints for the plastic to add detail to the playhouse. It’s so odd, but the playhouse we found had all these really cool details, but they didn’t have anything on the original product to make those things pop. I saw an Amazon reviewer had done this with her playhouse so I figured I’d give it a try.
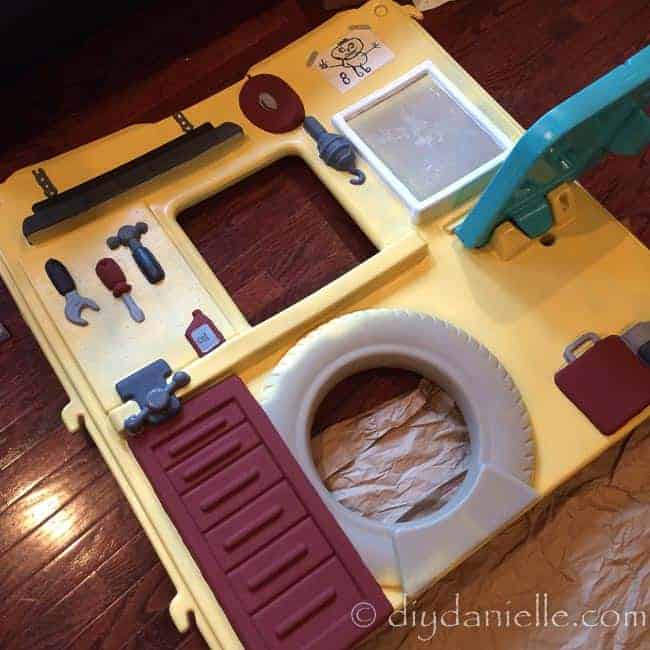
This job is not for the weak. It took me 2 episodes of Orange is the New Black, 6 episodes of The Newsroom, and 1 episode of Supernatural to finish the details I did (I wasn’t really watching the shows either, just needed the story in background to keep me from dying of boredom. Haha.).
And I didn’t do all of them because the dark sides were harder to paint over. This was a lot of work, but I think it was lots of fun too.
I spray painted the tire black… any larger item would do well with spray paint if you can properly cover the other areas. It would make things MUCH faster and the paint just went on easier. I wish I’d realized that before I painted the tool chest and safe by hand.
I tried magnetic paint for the board above the table… total fail. I’m gonna try that stuff on wood at some point, but I think it’s fair to say it will not work on this.
- Use stickers and mod podge to add lettering and other details. A Cricut Air 2 and some outdoor vinyl would work even better.
- Cover with UV sealant spray paint. Pray. No seriously… I’m so worried. I hope this stuff works. I only needed 2 spray cans of this.
- Replace accessory parts.
- Rebuild in area you want to put your playhouse.
Additional options: My husband made a replacement half door from wood.
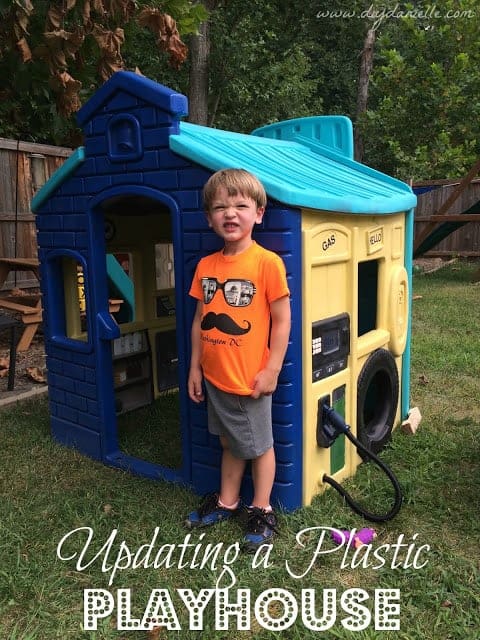
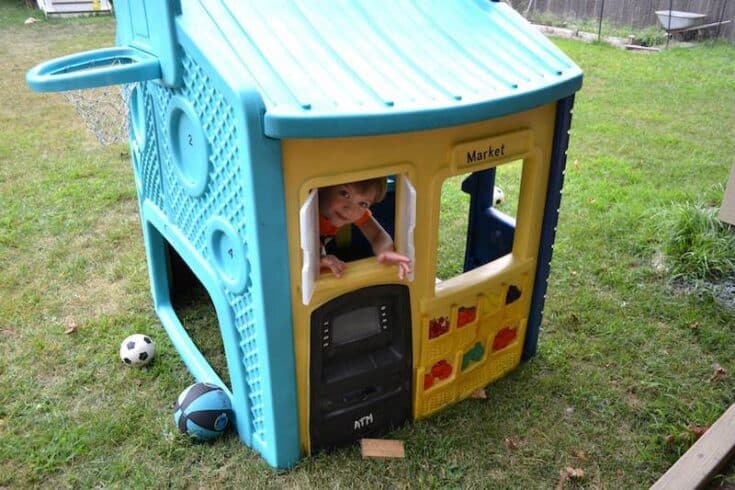
Final Pictures


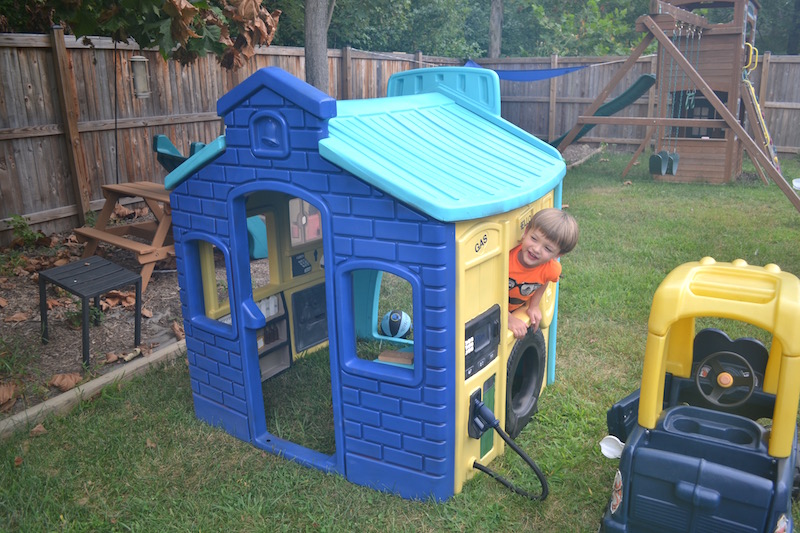


It’s about 90 degrees here and my kids want to spend all their time outside in this house. Obviously, I made bad choices to take this project on during the hottest part of the summer, haha. But I’m about as patient as my 3 year old so hey. I’m still excited!
If you’re on the fence about whether or not to redo a plastic playhouse or a wooden one, I’m currently (2021) updating the wood playhouse that came with our new home. I made DIY wood cleaner to clean it, then stained and painted. I’ll have a new post with the final photos coming soon!
Update: I wrote another post, Painting Plastic: Does it Last?, if you want to see updated photos of this playhouse and recommendations on how to best paint plastic toys. I also have recommendations for storing the toys and types of paint.
Do your kids have a playhouse? Do they LOVE it? Do you keep it inside or outside?
Plastic Playhouse Makeover: How To Paint Plastic
See how easy it is to paint a plastic playhouse to add character and make it unique with this simple tutorial.
Materials
- Rustoleum 2x Painter’s Touch: Satin
- Acrylic Paints
- Mod Podge
- UV Krylon UV Resistant Spray Paint in Clear
Tools
- Reusable Respirator for use while spray painting
- Drop cloth
- Paint Brushes
Instructions
- Take the playhouse apart.
- Powerwash and let dry.
- Paint and mod podge the old lettering.
- Spray paint the large areas.
- Use acrylic paints for the plastic to add detail to the playhouse.
- Spray paint the tire black.
- Use stickers and mod podge to add lettering and other details.
- Cover with UV sealant spray paint.
- Replace accessory parts.
Recommended Products
As an Amazon Associate and member of other affiliate programs, I earn from qualifying purchases.
-
 Krylon K01305 Gallery Series Artist and Clear Coatings Aerosol, 11-Ounce, UV-Resistant Clear Gloss
 -
 Complete Acrylic Paint Set – 24х Rich Pigment Colors – 12x Art Brushes with Bonus Paint Art Knife & Sponge – for Painting Canvas, Clay, Ceramic & Crafts, Non-Toxic & Quick Dry – for Kids & Adults
 -
 Mod Podge Original 16-Ounce Glue, Matte Finish and 16-Ounce Gloss Finish. Includes 25 1-inch Foam Brushes. Never Be Stuck Without The Right Finish!
 -
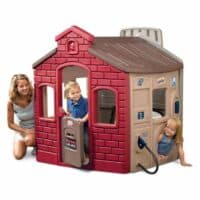 Little Tikes Town Playhouse, Features Market, Gas Station, and Sports Center - Walmart.com
Love it? Pin it!
This is outstanding! I love the letters to add that much more personalization!! So cute. 🙂
Thank you!
Danielle,
WoW!!!
Amazing transformation!!!
Having taught Early Childhood before retiring. . .
I'm thrilled to see the Labeling of words on the playhouse!!!
Also, that these two are out~of~doors learning and playing!!!
Thank you for your sweet visit and comment today!!!
Here's wishing you a wonderful week of exploring!!!
Fondly,
Pat
Thank you for your kind words!
Hi Danielle!
I'm so glad I saw this article on Pinterest! I just recently bought the exact model playhouse off Craigslist and I was just going to spray paint it and spend a bunch of money ordering parts/stickers. This looks so Awesome! You did a great job. I didn't even notice all the molded details on the inside of the plastic until I saw how you painted it and boy does it pop! Thanks so much for inspiring me! I can't wait to get started. I have friends that love to do projects, so hopefully they will help me with the detailing part.
Awesome! I hope you had fun with it! 🙂 If you want to share your final results, feel free to post it on the "Show & Tell" section of my blog! I love seeing everyone else's work.
This looks amazing! I'm getting ready to paint my sons Little Tykes house and wanted to ask how yours is holding up and if you had it to do over again, is there anything you would have done differently? Thanks in advance!
Thanks for your comment! Yes. It's holding up fairly well. However there's a few things I'd suggest.
1. If it's outdoors in the winter and you get snow, probably wouldn't hurt to put it away in the shed.
2. Use the SATIN version of the Rustoleum 2x. I recommend only this spray paint- it's the only spray paint type I've had good luck with. I've heard the gloss (which is what I used- sigh) doesn't stand up as well over time.
3. If you can, I would THINK that prepping it with a primer would make the rest of the job a LOT easier- particularly if you plan to hand paint any details. Some of the dark colors on mine made for a lot of layers of spray paint. Yes, the Rustoleum 2x is paint/primer in 1 and it does a decent job of that. But I just think a regular primer by itself first might be extra helpful and allow you more color choices and less layers of paint.
Good luck! 🙂 Also, Amazon has the Rustoleum 2x for the best price I've seen on spray paint if you get the cheaper colors. Some colors seem to be high in price, but I can usually find some colors I like for $3-5 per can. They're "add on" items, but I just buy a ton of spray paint. Teehee.
Also, if you have a Silhouette or Cricut, I'm guessing permanent adhesive (651) would work better for labels than what I used and be a cheaper option.
When you finish, feel free to post your final results on the "Show & Tell" section of the blog. I love seeing everyone's final products. 🙂
I have painted plastic toys before but the pain just ends up wearing off. Doesn’t last more than a month or two. What’s the trick to making sure the paint stays on?
I have a post on painting plastic that shows before and afters if you’re interested: https://diydanielle.com/does-plastic-paint-work/
Lots of tips. Mostly getting the right paint and storing it properly. Anything outdoors will fade. Etc.