
How to apply Boy Scout patches to a shirt with a sewing machine or without. Tips for where to apply the patches and more.
This post may contain affiliate links which may earn me commissions should you click through them and take certain actions. As an affiliate for Amazon, Cricut, xTool, Home Depot, and other sites, I earn from qualifying purchases. Please DIY carefully. View my full legal disclosures here.
The majority of my content is generated by me, as are 99% of the photos and videos, but I utilize technology for titles, descriptions, video editing out all of my ums, and occasionally for text overlay on images.
Please read the whole post so you don’t miss any important information!
My husband signed the 6 year old up for Boy Scouts last year, right after the baby was born. He did it the same day that I cried the whole way home from the gym because the baby wouldn’t let the childcare workers there hold him and I was tired and overwhelmed and exhausted.
I probably wouldn’t have signed him up for another activity so I decided that seeing daddy signed him up, daddy could take him. As much as I love the idea of my kids participating in things, it gets a bit overwhelming to be running everywhere, particularly with a newborn.
Needless to say, I’ve been really hands off this year about Boy Scouts- But I did volunteer to sew on the patches for his ceremony. So, if you’re a bit stuck on sewing on patches, here’s three ways you can apply a Boy Scout Patch. THIS I can do.
The badges we received LOOKED like they were iron on but heck if I could get them to stick. So I gave up and did my own thing.
Supplies for Applying Scout Patches
- Iron On
- Light Steam a Seam 2
- Iron
- Scissors
- Glue On
- Sew On
- Matching thread or you can try invisible thread.
- Sewing machine or hand stitch with a sewing needle.
- Optional: Iron on supplies
Where do I Sew on Boy Scout Patches on a Shirt?
Good question! The Boy Scouts website has this helpful guide to where to place your patches. You can click over, click the branch of Boy Scouts your child belongs to, and then it will tell you where to place the patches.
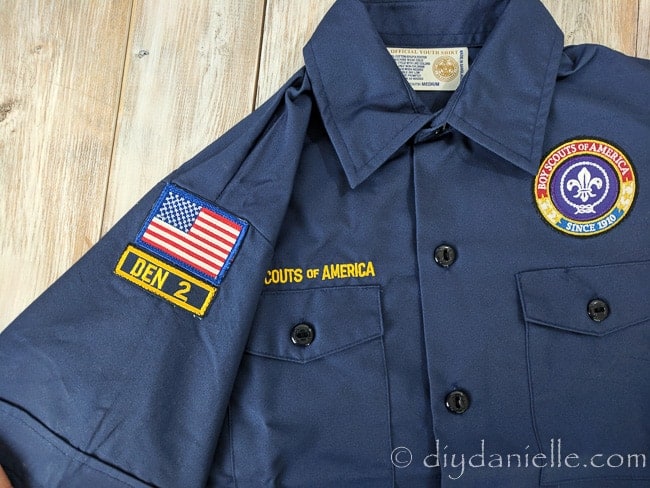
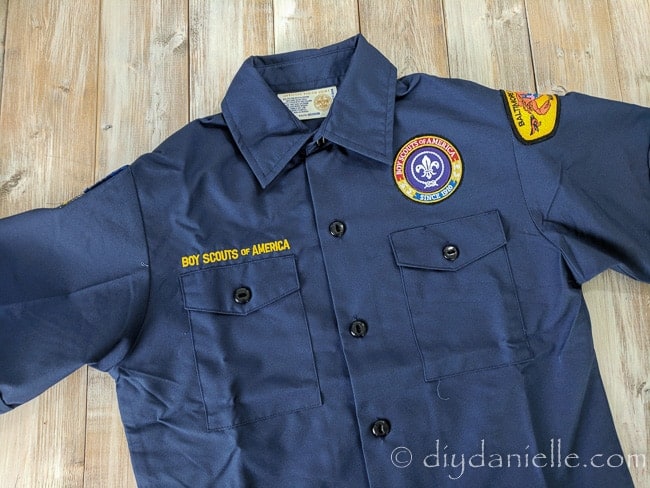
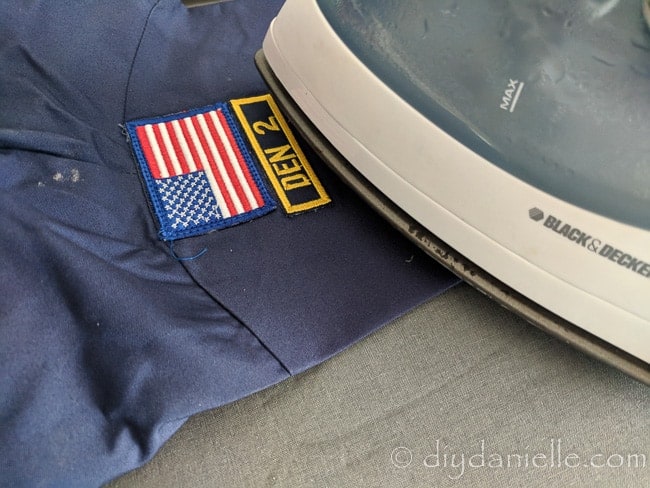
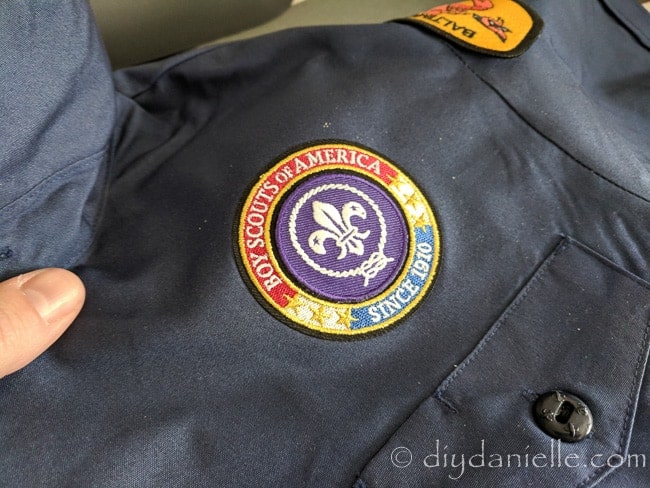
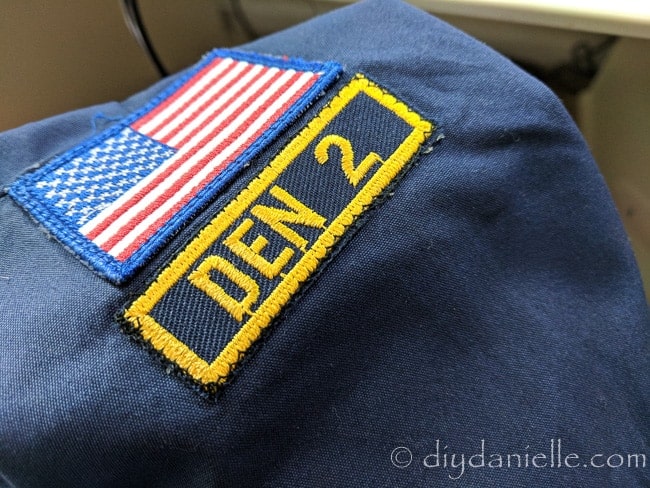
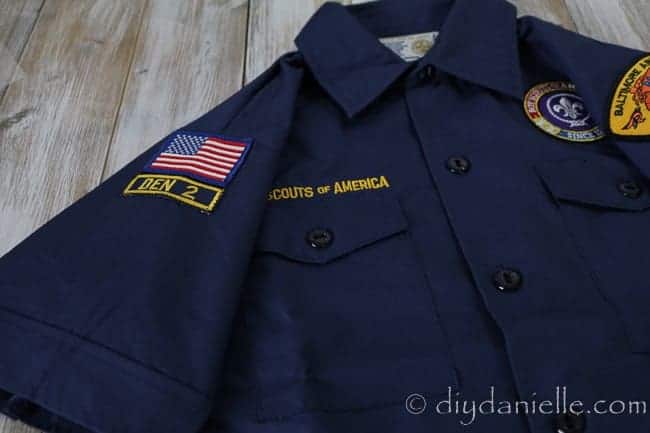
For the Tigers, my son’s branch, the patches were placed like this… you can’t see on the left but the American flag has the den number patch under it :
Here’s a video on Scout patch placement:
How to Iron on Boy Scout Patches
So I’m going to show you how to iron on the patches WITHOUT using the iron on backing on the patches. It didn’t seem to work for me- are they really iron on?! I have no idea. Anyhow, there’s this cool stuff we use for double that is double sided fusible web. That’s this stuff below!
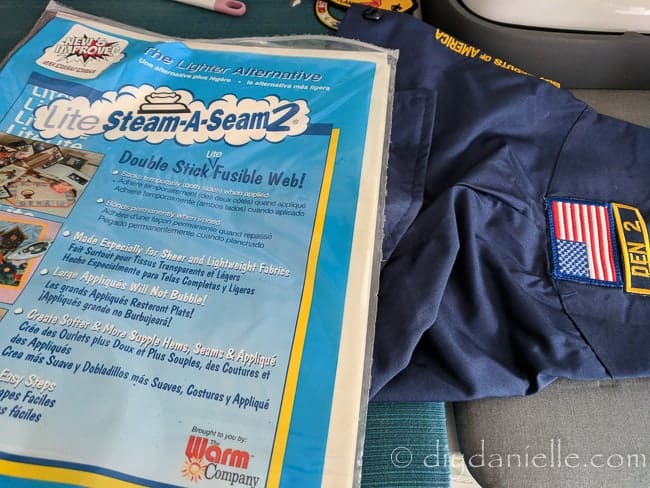
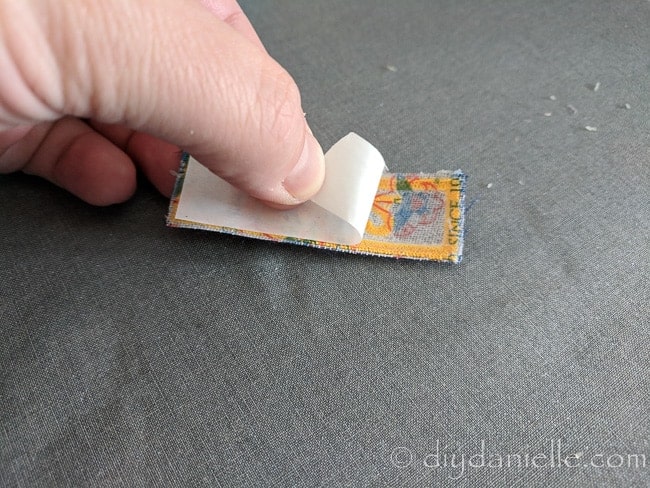
I had this package of it sitting around. There’s a few sheets in there and it worked perfectly. I cut a piece of it the size of my badge. Then I stuck the sticky side to the back of my badge.
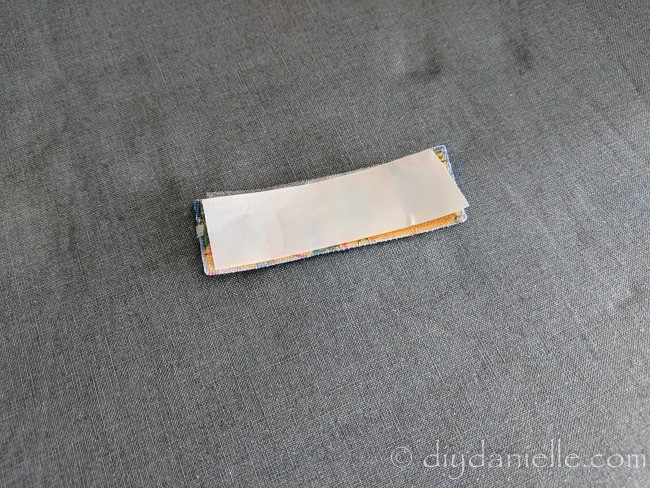
Ironed it on to the back of my badge. Keep some tweezers nearby in case it sticks to your iron.
Once you iron it onto the badge, you can peel the backing off the other side. Place it in the proper spot on your child’s shirt.
Iron on.
For the circular badge, I put the outer ring on first, then ironed on the middle ring.
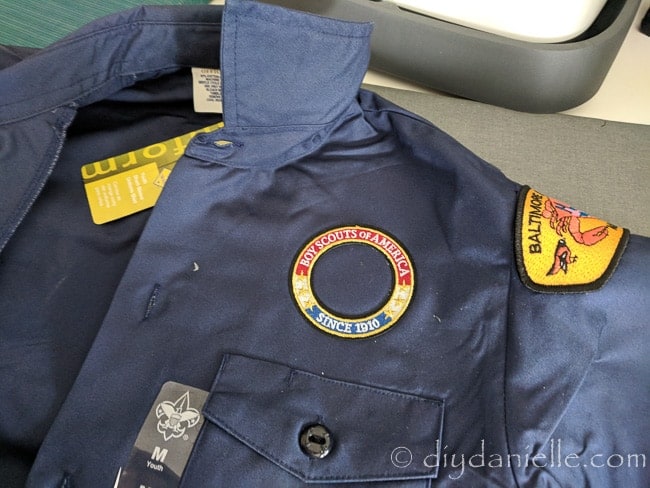
There was a method to my madness… I was struggling to cut my fusible web perfectly around the inside of the badge. By placing the circle last, it would cover any slight overlap.
Now if you don’t have a sewing machine and don’t want to hand sew the badge on, you can stop here but BE AWARE that you may need to repeat this if/when it eventually falls off. I can’t promise it will stay on forever.
I followed up by sewing the patch on. I think it’s more sturdy.
How to “Glue” on Boy Scout Patches
So I keep hearing ‘badge magic’ works and I haven’t tried it. It looks, according to the product info on Amazon, a lot like the stuff I use for ironing on the badges. So it sounds like more of an iron on thing than a gluing thing. You could, however, use fabric glue. You would just squeeze glue onto the back of the badge and put in in place. My theory is that this won’t hold up long term through a lot of washes. For something like the Girl Scouts sashes, it might work because those don’t get laundered as much. But these shirts for Boy Scouts will likely get washed after every wear. Or so I’d guess.
The one thing I’d mention about fabric glue is that I’ve found it dries out fairly fast so I’m not sure if you’d be able to save the container to use for another round of badges. But I usually use Fabric Tac and I didn’t add that to my supply list because I haven’t had great luck with it. I added a fabric glue that has better ratings instead. If you try it, let me know how it goes.
How to Sew Scout Patches with a Sewing Machine
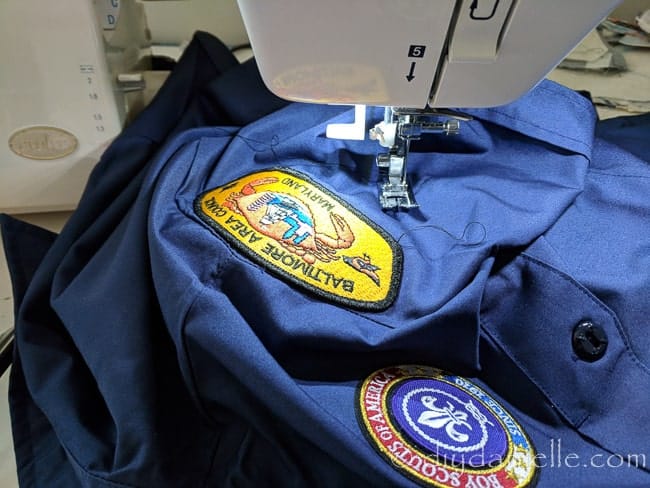
I like to use the iron on first for placement… it helps hold everything in place correctly while I sew. It’s hard to pin a thick patch on and I don’t want the patch to shift while I’m sewing. Ironing on the patch keeps it in place while I zig zag the patch on. It works really well for me.
To sew your patch on using a sewing machine, you want to make sure you have matching thread or an invisible thread. Some people say that light gray thread works for most things too. I find matching thread to be fairly low effort so I just used purple for one patch and black for the others.
If your machine lets you pull off part of the case so it is easier to sew the patch onto the sleeve, pull that part off. I think most machines have that option and it’s really nice to be able to slide the sleeve right under the needle without worrying about sewing the sleeve to itself.
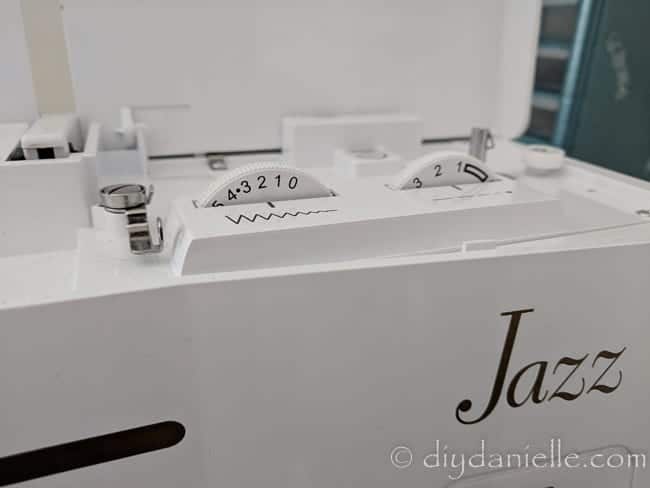
I like to use a zig zag stitch. I set my stitch width so that it’s just wide enough to drop the needle right on the outside of the patch and then right on the inside of the first embroidered line of the patch. I hope that makes sense… I like to play with my settings and then manually turn the knob to see where the needle falls in that position. If it looks good, I use that setting. This is what I used for most of my patches this time.
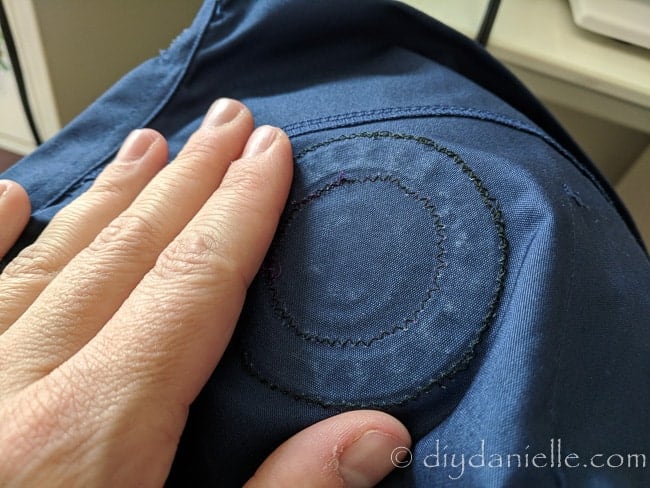
This is one of the patches I sewed on. You can see the dark thread a bit but it’s not too bad. I go slow when I sew to make sure the needle drops in the right places and sometimes I’ll go around extra just to make sure it stays on well.
The round patches came out much better. I zig zagged the outer badge, then I also sewed the inner badge down. It was very simple. Here’s the stitching on the opposite side of the shirt. Dark blue thread might have blended better but it’s fine.
If you’re hand sewing the circular badge, the Boy Scout store recommended sewing the inner circle to the outer circle first, then sewing it all on to your shirt. I didn’t mind doing them separately though.
Here’s a video that I found on YouTube that shows how to sew a patch on if you prefer a video.
Here are some other sewing tutorials that you might like if you’re new to sewing: How to Choose a Sewing Machine | Sewing Tools | How to Thread a Serger | How to Babyproof a Sewing Room
Boy Scout Fabric
It came to my attention that some of you may be getting to my blog because you’re searching for Boy Scout fabric. I figured I’d help you out a bit and share some fun resources for cute Boy Scout themed fabric that you can get online.
Fabric.com has a collection of Boy Scout fabric available.
How to Sew or Iron on Boy Scout Patches
Tips for where to apply the patches to a shirt with a sewing machine or without.
Materials
- Iron On
- Light Steam a Seam 2
- Glue On
- Badge Magic
- Sew On
- Matching thread
Tools
- Iron
- Sewing machine or hand stitch with a sewing needle.
- Scissors
Instructions
Without a sewing machine
- Cut a piece of double sided fusible web to the size of the badge.
- Place the sticky side to the back of the badge.
- Add double sided fusible web.
- Iron
- Peel the backing off the other side.
- Place it in the proper spot on your child’s shirt.
- Iron
With a sewing machine
- Use matching thread or an invisible thread.
- Attach the patch using a zig zag stitch.
- Set your stitch width so it’s wide enough to drop the needle on the outside of the patch and inside the first embroidered line of the patch.
- Go slow and go around extra to make sure it stays on well.
Recommended Products
As an Amazon Associate and member of other affiliate programs, I earn from qualifying purchases.


Please pin and share this!
You wrote “Then I stuck the stinky side to the back of my badge.” I have never noticed any odor to the product.
LOL thanks, fixed it.
As a Girl Scout Grandma I volunteered to do the badges for my Daughter’s co leader’s girls as well. ALL of the badges that had been glued on with Badge Magic on their vests previously had to be sewn down eventually. I have managed to iron on the Girls Scout badges that are labelled iron on and get them to stick but eventually they are going to come off, I use the iron on to hold them in place while I stitch them on the machine.
I figured. NOTHING works as well as sewing. 🙂 Although I guess it depends on how much wear and tear and washing the stuff gets.
Thanks Danielle! I found your instructions and pictures very helpful when I sewed the patches on my grandson’s Boy Scout shirt. 🙂
Glad to help! 🙂
I am glad to find it. There are so many bloggers working on this part but this is one of the best innovative post ever. Thanks for such post.
I came here because I have the same question about whether the patches are really iron on! I do the sewing at a dry cleaners and we get a lot of patches in for Girl Scouts and sports teams, and I ALWAYS iron before I sew to hold the patch in place. A 15-second pass with the industrial iron is all it takes. But then yesterday we got in the first Boy Scouts uniform since I started there and those damn patches were utterly impervious to ironing! They had a plastic backing, which in my previous experience has always meant iron on, but it would not melt. And here’s the truly bizarre thing – they would not adhere to the fabric, but when I put the pins back in before the patches were fully cooled, the pins got gummed up with glue! I would love for someone to figure out what’s up with that… or for the Boy Scouts to just change their patches.
My son likes to pin them to his vest like the other kids do… haha. I should be ashamed but I never remember to sew them on for him- our scouts troop doesn’t do a lot of events where he wears them and I always remember when he pulls out the shirt covered in pinned on patches… 5 minutes before we have to leave.
I just don’t understand why they won’t iron on. Or why the patches go on shirts that they’re going to outgrow…