

Looking to add natural light to your shed space? Here’s a basic tutorial on how to install windows in a shed.
I didn’t want to install windows in my shed. It seemed like it would be a big project that would delay finishing the she shed for a month or two, and I thought I could live without them if I installed a door with a window. I have been having HORRIBLE ADHD paralysis for this entire project where each step felt too big, and I’d procrastinate getting them done. But the cost to have someone else do it was FAR beyond my budget.
The old shed I am using for my she shed had ONE long, short horizontal window and not a lot of light. The original structure had a big garage door that we removed. We finished the majority of that wall, then we installed a door that had a window. Unfortunately, the door’s window didn’t provide quite enough natural light and the space still felt a bit like walking into a tomb.
My husband INSISTED we do the windows and I am SO glad that he pushed me to add them. They let in some fantastic natural light, making photography much nicer, and I can watch deer in the forest out the back two windows as well. While this felt like a big scary job, it really wasn’t bad once I understood the process. This is going to be a basic guide to the process for installing windows in a wall.
Please make sure to figure out your local codes and rules regarding how to install a window and if you need permits. We aren’t professional contractors, and I’m not sure I would have tackled this in my house.
This post may contain affiliate links which may earn me commissions should you click through them and take certain actions. As an affiliate for Amazon, Cricut, xTool, Home Depot, and other sites, I earn from qualifying purchases. Please DIY carefully. View my full legal disclosures here.
The majority of my content is generated by me, as are 99% of the photos and videos, but I utilize technology for titles, descriptions, video editing out all of my ums, and occasionally for text overlay on images.
Please read the whole post so you don’t miss any important information!
We bought THE WRONG WINDOWS and had to return them THREE TIMES before we finally got the right thing.
Supplies
- (4) 23.375 in. x 35.25 in. 50 Series Single Hung White Vinyl Window with Nailing Flange.
- AZEK Trim 0.75 in. x 3.5 in. x 8 ft. White PVC Traditional Trim
- Ryobi Brad Nailer
- Level
- Safety Gear: Quality Mask (it’s not safe to breathe in the bits of MDF that are thrown around when you’re cutting it)
- Shims
- 2×4 Studs
- Caulk: paintable
- Wood glue
- Miter saw
- Spray foam insulation
- Aluminum Flashing Tape
- J Trim for the Siding
Tutorial
First, your window needs to be attached to a frame of 2x4s. You want to use your current studs as much as possible. Those studs were placed so that they can support the structure and roof. If you remove any studs, you need to add additional supports for the structure.
We decided on a window that would take up about 1.5 stud bays in our shed. We marked out the window on the interior of the shed, placing it RIGHT next to the right stud. We marked the top and bottom, then used a drill bit to make a hole through the wood and exterior siding in those two spots.
Starting out, we knew that the middle stud (under the arrows) would interfere with the width of our window.

The holes through allow us to see where the window placement will be and avoid cutting into the 2×4. We used a ruler to draw a straight line between the two points, then cut the siding up that line. We repeated for the right side, then the top and bottom.
My husband is using the angle grinder with a cutting wheel/disc attached.
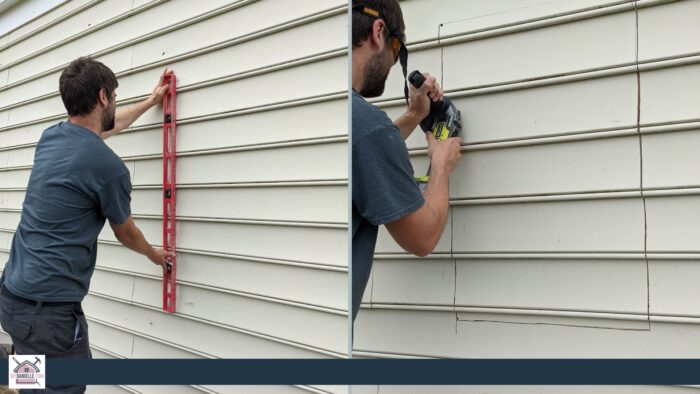
Right Photo: Cutting along the line to cut off the vinyl siding.
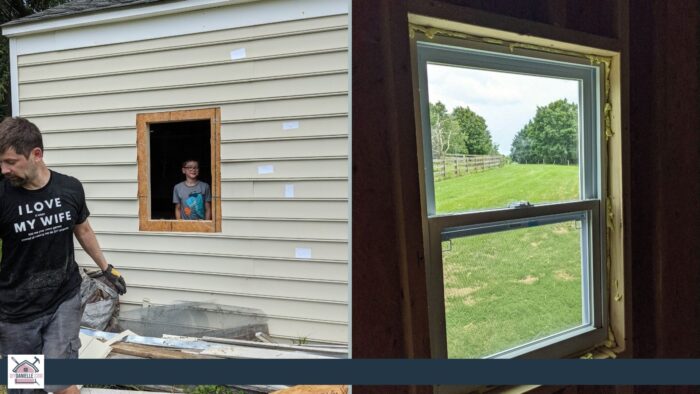
Once we removed the vinyl siding from the center of the rectangle we cut, he used a circular saw to cut through the wood behind. He used the reciprocating saw inside to help cut the area where the middle stud was.
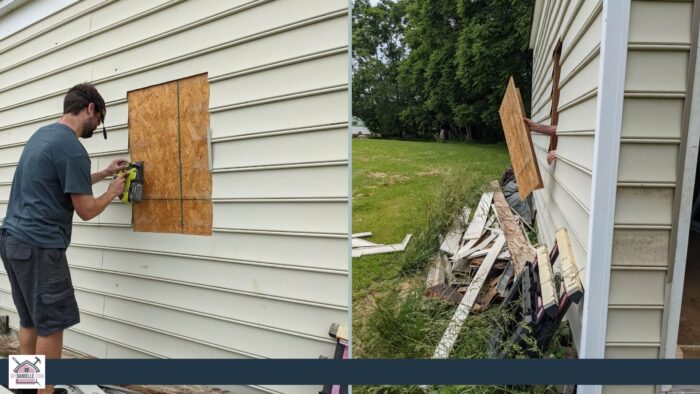
Now that the opening was cut out, he used a combination of the circular saw and reciprocating saw to cut down the 2x4so there was room for a 2×4 above and below the window. A multitool may have worked well here as well. He was struggling to find the best tool for the job. DO not cut the wood behind the stud.
He also added a 2×4 stud to the left of the window. This stud is replacing the one that we cut. That 2×4 will provide support for the roof and structure while also giving us something to attach the left side of the window to.
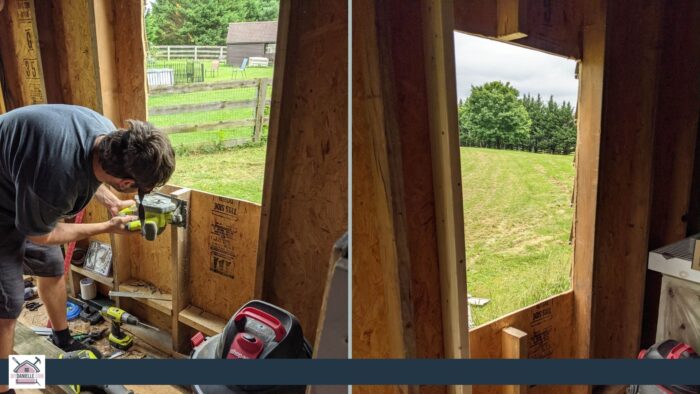
When you’re putting the 2×4 frame around the window, make sure that each 2×4 in the frame is level and plumb. This ensures that your window isn’t crooked. You’ll insert your window, then use shims under one side or the other to level your window.
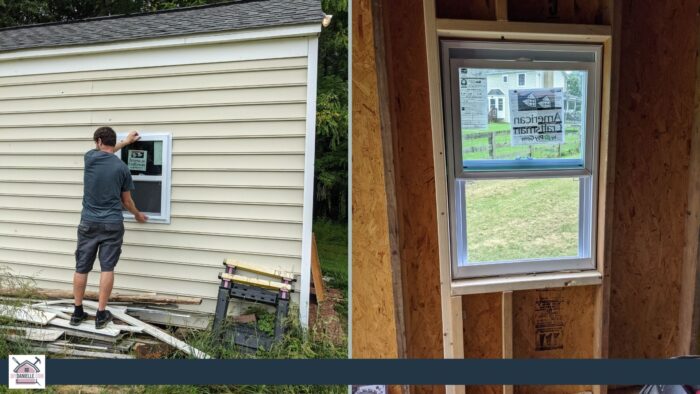
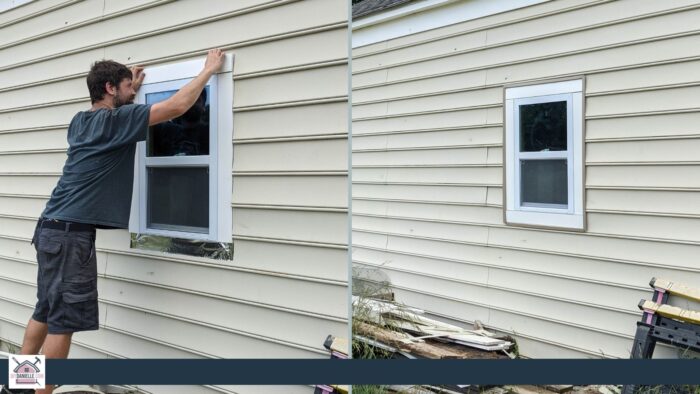
Once level, you can screw your window onto the building from the outside (left photo). If you look at the right photo, you can see the shims we placed under the right side of the window to level it.
To finish the exterior of the window, we carefully cut a border around the window that was the correct width for our trim. I used Aluminum Flashing Tape tucked under the siding on the far sides and over the edges of the window. This helps keep water and bugs from getting through the gaps around the window.
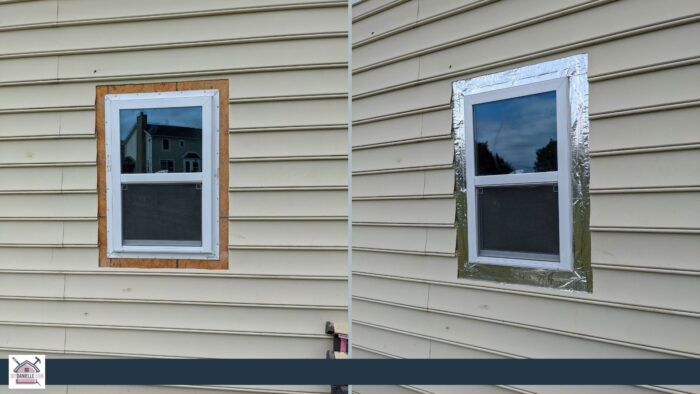
Right picture: We applied aluminum flashing tape around the window to help water/weatherproof.
To finish, we used white PVC exterior trim around the window. This was attached using our nail gun.
We also used J Trim that matched our vinyl siding; the J Trim slips over the edge of the siding to help give a finished look around the raw edges we cut. We attached the J Trim by screwing through the J trim and vinyl siding.
We used exterior grade caulk to caulk around the windows (again, helps keep weather and bugs out).
On the interior of the windows, we used spray foam insulation around any gaps. You can see that in the right picture below.
Okay, I hope that gives you a basic idea of what we did to add the four windows to our shed. I think these windows took us 1-2 hours per window to install. It’s a bit scary to do, but it was not TOO bad once we actually figured out the process and got started.
Video on Installing a Window in a Shed
Here are some before and after photos of the front and inside of the shed.
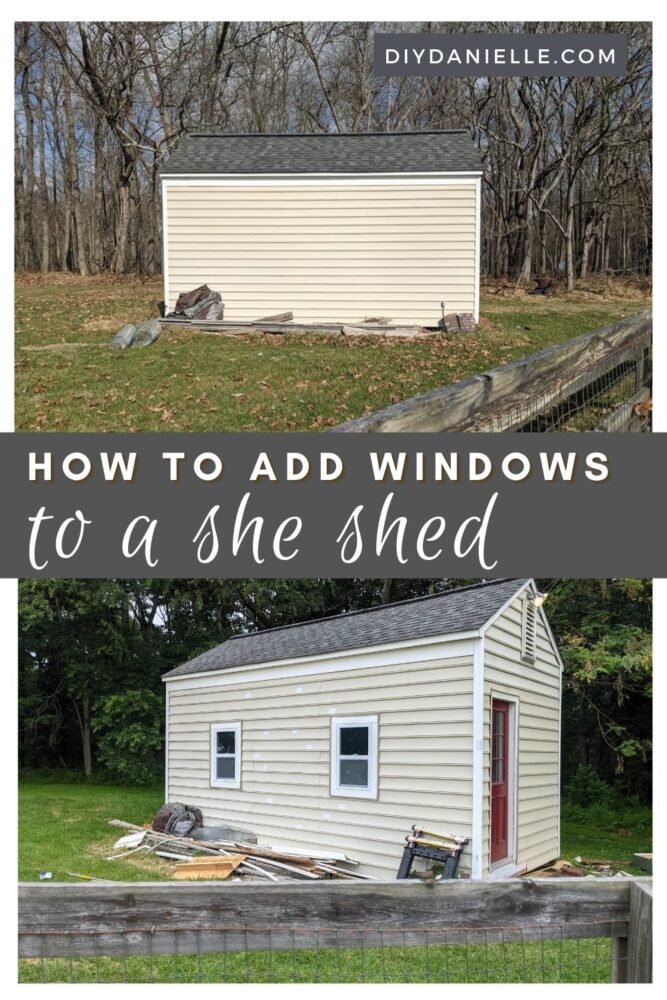
Bottom Photo: Shed with two windows on the front.
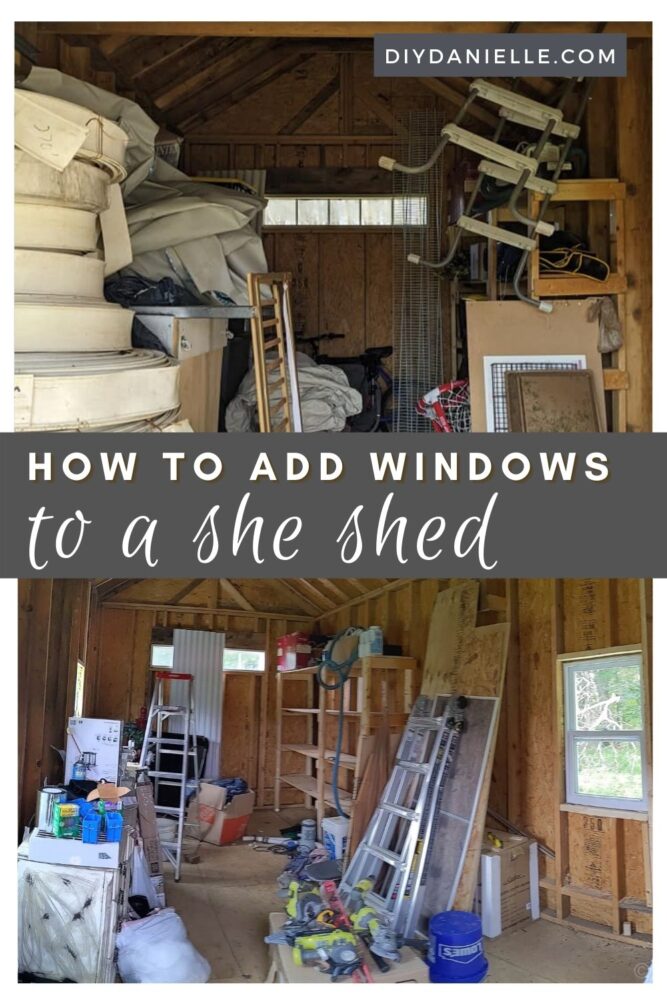
Bottom Photo: Shed interior with four windows.
More she shed posts:
Please share and pin this post! You can also post your project and tag the DIYDanielle team on Instagram @doityourselfdanielle!