
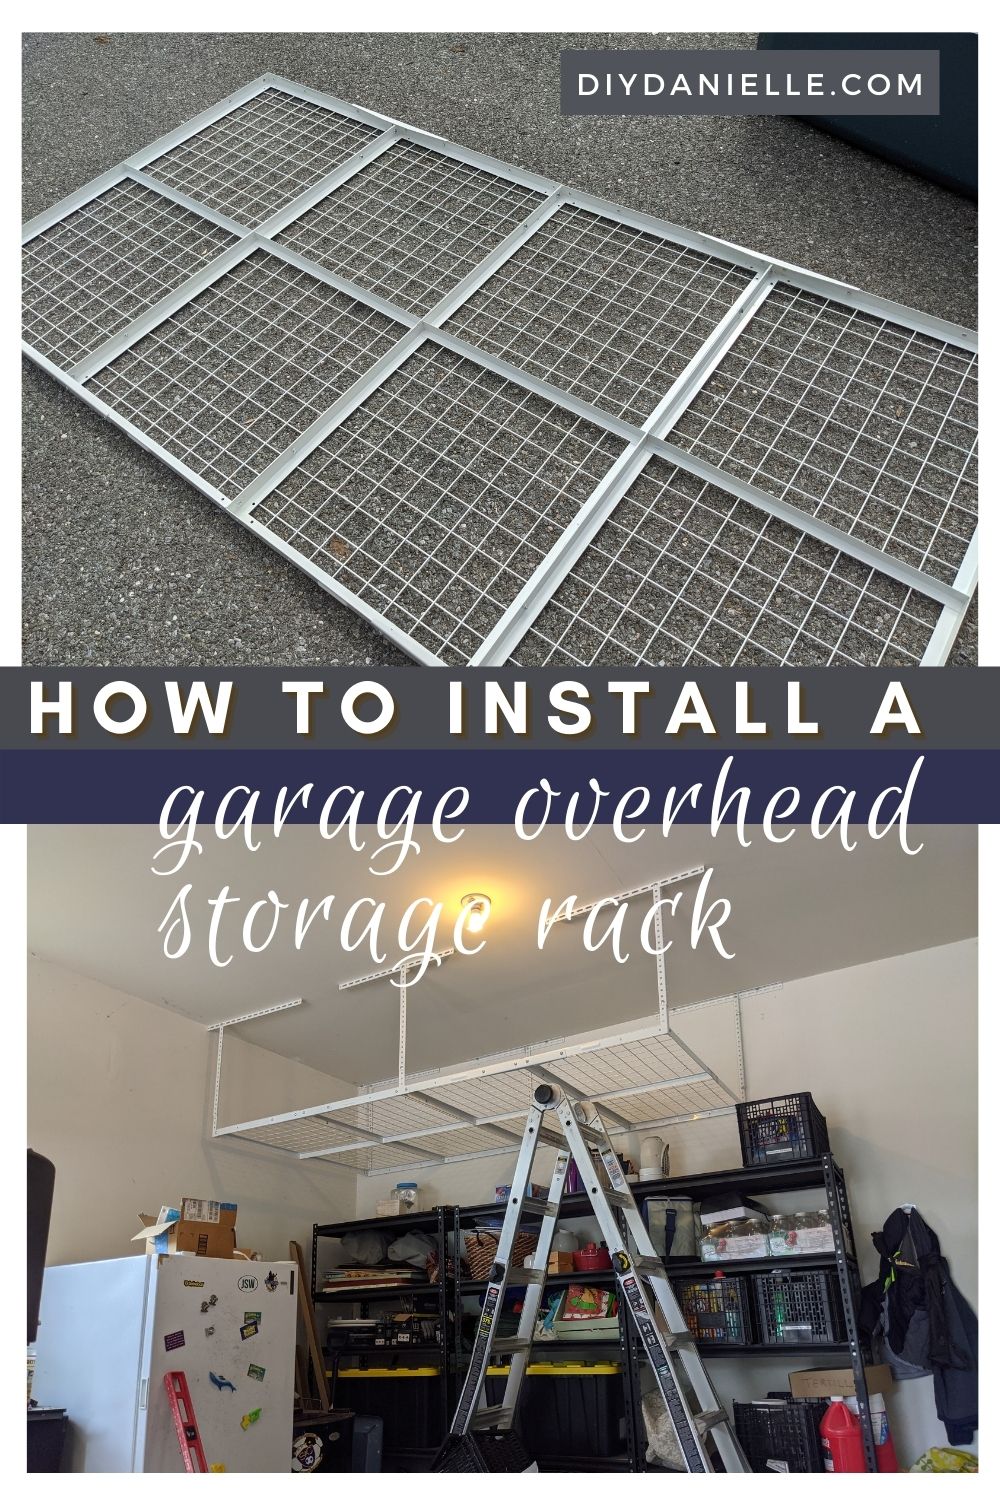
How to install a overhead garage storage rack. These ceiling mounted storage systems are a perfect way to get stuff out of the way.
My garage has become an EPIC disaster. Beyond the typical garage mess, the stuff from the shed I’m converting into a she shed has all been relocated to the garage until I was able to move my sewing room to the shed. We have been unable to walk through our garage for months at this point, but there’s FINALLY an end in sight. I’ve finished 95% of the shed interior, and I started moving stuff out there. As a result, we’ve been able to shuffle items around to other places. It’s not quite finished, but we are WELL on our way to being able to walk through our garage- we might even be able to park a car or two inside it.
Many thanks to Fleximounts for sponsoring this post. As a partner with Fleximounts, I received a free product for sharing information about their products. As always, I will provide an honest review of products. This post contains affiliate links which may earn me commissions should you click through them and take certain actions. As an affiliate for Cricut, Amazon and other sites, I earn from qualifying purchases. Please DIY carefully. View my full legal disclosures here.
Please read the whole post so you don’t miss any important information!
When Fleximounts contacted me to ask me if I’d like to receive a free overhead garage storage rack to share in a blog post, I was pretty excited. We had a similar product at our last house and it was SUPER helpful for storing items that we wanted to keep, but didn’t need access to frequently. Items like seasonal decor, canning supplies, extra bulk items like toilet paper/paper towels, sports equipment, etc. are perfect for storing above. We keep stuff we use more frequently on the edges… like the extra toilet paper… because I can use a grabber to pull them down.
Today I’m going to talk a bit about how to install these racks, as well as about the best ways to use them. The best thing about these racks is that they keep items out of reach of mice, although ideally you want to storage items in tightly closed plastic containers as other types of critters might still be able to get in otherwise. I have had birds nest in open baskets that we left in our garage, and we are constantly battling stink bugs in any container that isn’t properly stored.
Keep an eye out: 15% OFF on November 26-29, 2021
Garage Rack Installation
Installing these ceiling mounted racks is easy, but it WILL take an hour or two. It really helps to have two or three people to help lift the rack up; although it’s lightweight, it’s helpful to have someone holding the rack up while another person attaches it.
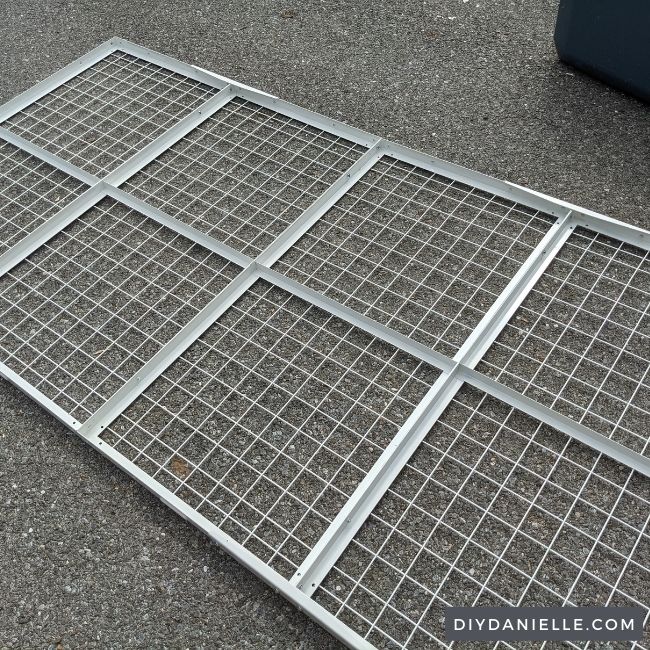
We’re installing Fleximount’s Classic Overhead Garage Storage Rack. This is their basic model and it comes in several colors, as well as different sizes. Ours is 4×8.
I HIGHLY recommend using an impact driver and socket set to assemble this. The rack comes with the screws and a hex key, but the socket set and driver made the process a lot faster. We own this large tool set with sockets which is excellent for most projects, as well as Ryobi’s Impact Driver.
You’ll also want a stud finder.
Step 1: Assemble your rack base (the wire grid). The 4×8 size comes with 4 panels that attach together with the included Hex Key (Allen Wrench) and screws.
The impact driver (or a regular electric screwdriver) and socket set help to make this process faster.
Step 2: Identify where your ceiling joists are, decide on perpendicular or parallel installation, and mark your joists/studs.
If your screws don’t hit the studs at EVERY single point, your rack WILL NOT support the weight of your storage items. This rack can support up to 600 lbs when installed properly. Make sure to do it right.
Step 3: Install ceiling brackets on the studs.
Step 4: Assemble and attach vertical posts.
Step 5: Place and attach your wire grid.
Lifting the grid up took three of us. It’s light, but large enough to be difficult to lift alone.
The corners have a bracket that allow you to hold the grid up while you’re attaching your screws, We also used a ladder to help support the grid while we were installing
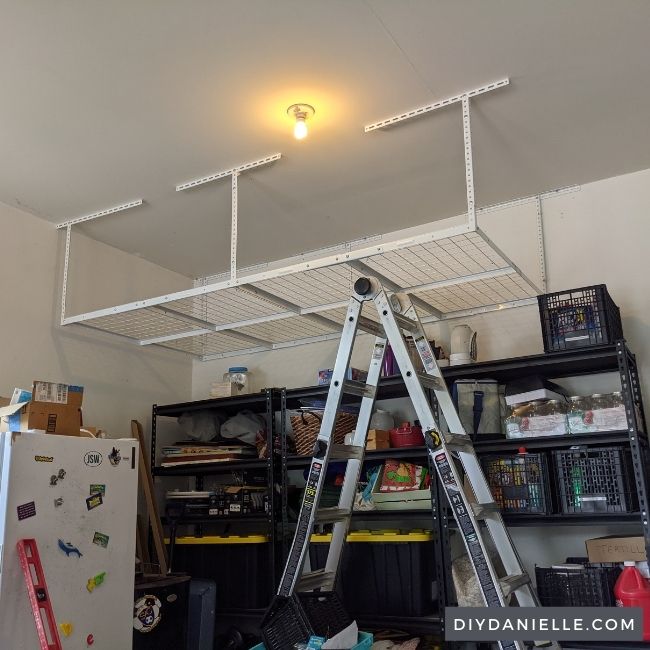
I recommend installing the shelf so that there’s a big enough gap between the rack and the side walls to use your screwdriver to attach the wire grid to your vertical posts. We put ours pretty close to the wall and it made it tricky to attach everything.
Here’s a video showing our process. I have been super sick so my husband did most of the work while I supervised from the garage floor. It’s been a rough month.
Garage Rack Accessories
Hooks allow you to hang items like bikes, strollers, etc. off the rack. We have shelving below our garage rack so this wasn’t a great option for us, but it’s a great idea if you don’t have anything in the way. I’d love to be able to hang up our bicycles because they are ALWAYS in the way. Fleximount offers the Classic Overhead Storage Rack with the Hooks Included or you can buy the hooks separately.
Fleximounts also offers a 4×4 Storage Rack with a lift that can be moved up and down. I love this option if you’re nervous about ladders. There’s a pulley system that can move the rack up and down without any expensive electronics.
They sell a few other products for garage organization including:
Tips for Storing Things in Your Garage
#1: Don’t store items that can freeze or melt in your garage.
Don’t store anything with water in it that could freeze UNLESS your garage is weather proofed, insulated, and heated/cooled. It’s easy to forget about that snow globe- but they will break if you leave them in the garage or shed. Similarly, don’t store items that could melt or explode in the heat.
Items like paint, particularly spray paint, are supposed to be stored within a certain temperature range or they will go bad.
#2: Buy quality storage containers.
Plastic containers that seal properly are worth the money for anything you store long term. Mice and bugs are very clever about getting into containers, and roaches will actually lay eggs in cardboard… so if you move, you could end up moving your roach problem from one house to your new house. These bins are my favorite because I’ve never had one break. They come in different sizes.
- 27 gallon tote ($16 currently)*
- 38 gallon tote ($32 currently)*
- 55 gallon tote ($42 currently)*
- 70 gallon tote ($70 currently)*
*I am giving the current price. Prices fluctuate through the year, by location, and for various reasons. I don’t update these posts with new prices.
#3: Get small containers for high shelves. Get large containers for lower shelves.
For the garage rack, the smaller containers are easier to lift up and down. Larger containers are perfect for items that are stored on a regular wall shelf. I love the 70 gallon tote on wheels for our bounce house. I’m able to roll it out by myself to setup. If it was on a shelf, however, I’d never be able to get it down.
Also, if you’re storing light items, a larger totes works for high shelves. But if you’re storing heavy items, you’ll want to go with the smallest totes you can.
Honestly, just try lifting the box.
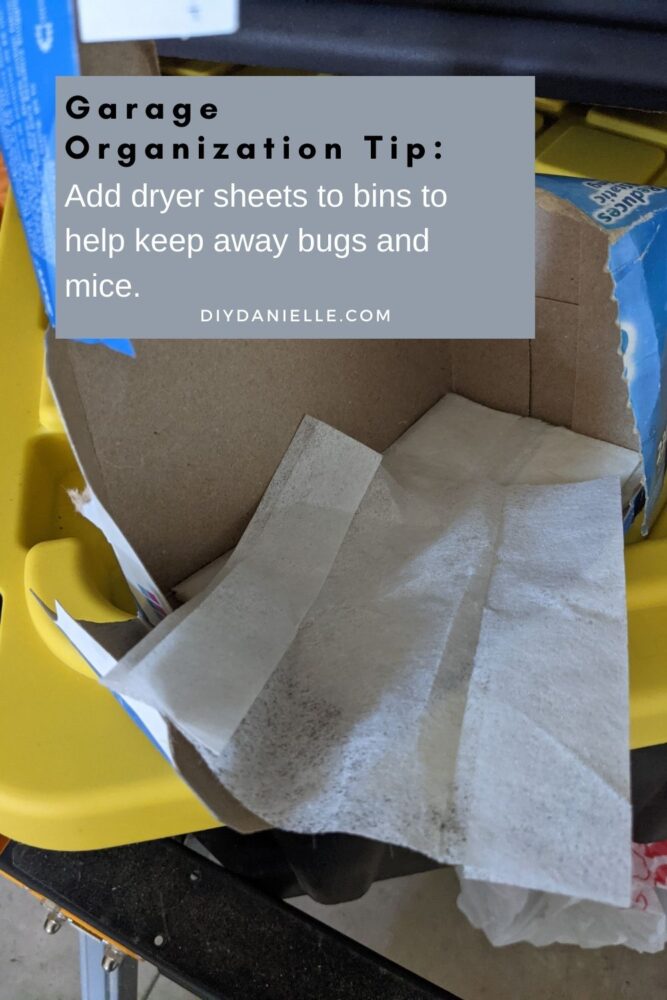
#4: Scare bugs and other critters off.
I’ve had birds and wasps nest in open boxes. Seriously. It’s not ideal. Generally you won’t have this issue with closed bins or boxes, but if your bins aren’t 100% closed (and plastic), you’ll probably still get mice and bugs inside. To prevent this, I buy Dryer Sheets— the stinkier the better. Brand doesn’t matter, but you don’t want the free & gentle kind. You want the kind that knocks you off your feet a little because the smell is so strong.
Place a few in each box and it’ll help ward off bugs and other critters. It’s not 100% but it works pretty well.
#5: Label your boxes!
Label. Your. Bins. Organize items so they’re easy to find. Buy a cheap label maker or use your Cricut Maker (and permanent vinyl) to label your bins. If you label them and make sure your label is facing out, it’ll always be easy to grab the bins you want to take down. We have all of our Christmas and Fall decoration bins labeled, then we also label bins for seasonal clothing, hand me downs, etc.
Pro tip: Add a * to the label on the bin where you hid the Elf so you don’t accidentally open that bin in front of the kids.

#6: Store bins in smart places.
If you use an item a lot, store it on a lower shelf. Seasonal items go on the garage rack. I store poisonous chemicals on the top shelf where I can reach them, but the kids cannot.
Seasonal clothes stay in the basement storage. Christmas decorations are in the garage.
#7 Pad fragile items to prevent breaking.
Don’t forget to keep padding for fragile items so they don’t break. If you don’t have the original containers, you can ask on Facebook for bubble wrap or buy it new. For Christmas items, I use my reusable Christmas gift bags and seasonal linens to wrap breakable items.
And that’s all I’ve got! Any tips you’d like to add? Leave a comment below!
Please share and pin this post! You can also post your project and tag the DIYDanielle team on Instagram @doityourselfdanielle!

Google Web Stories: Garage Organization Tips
Great installation topic. Overhead racks are one of the best ways to reclaim garage floor space, but placement matters. They work best for lightweight or seasonal items, not things that need to be accessed every few days.