

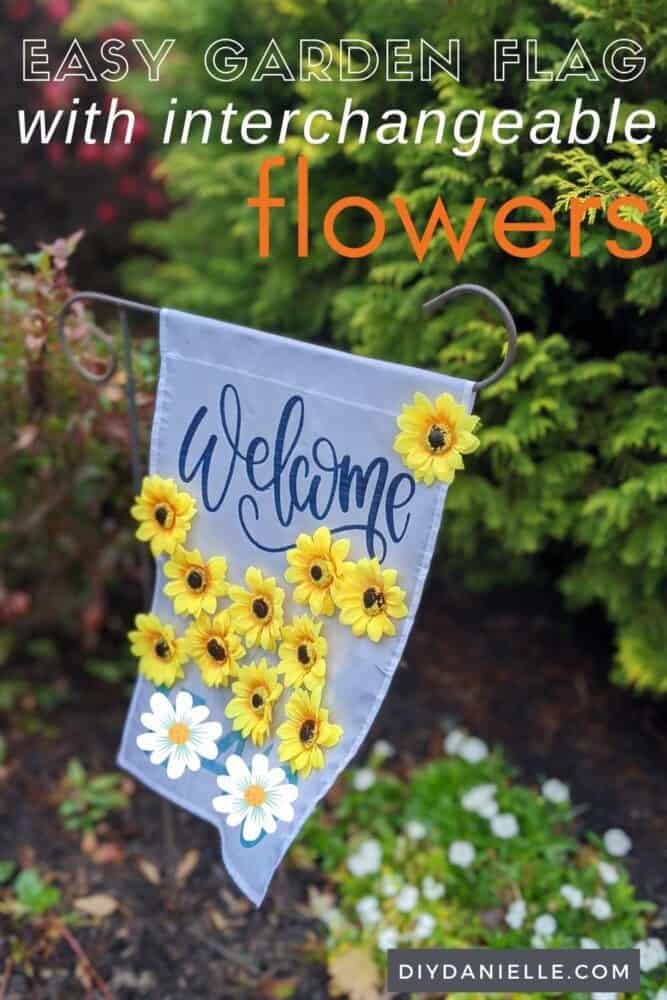
Learn how to use your Cricut and Infusible Ink Transfer Sheets to make your own garden flag. You can swap out the flowers for different seasons!
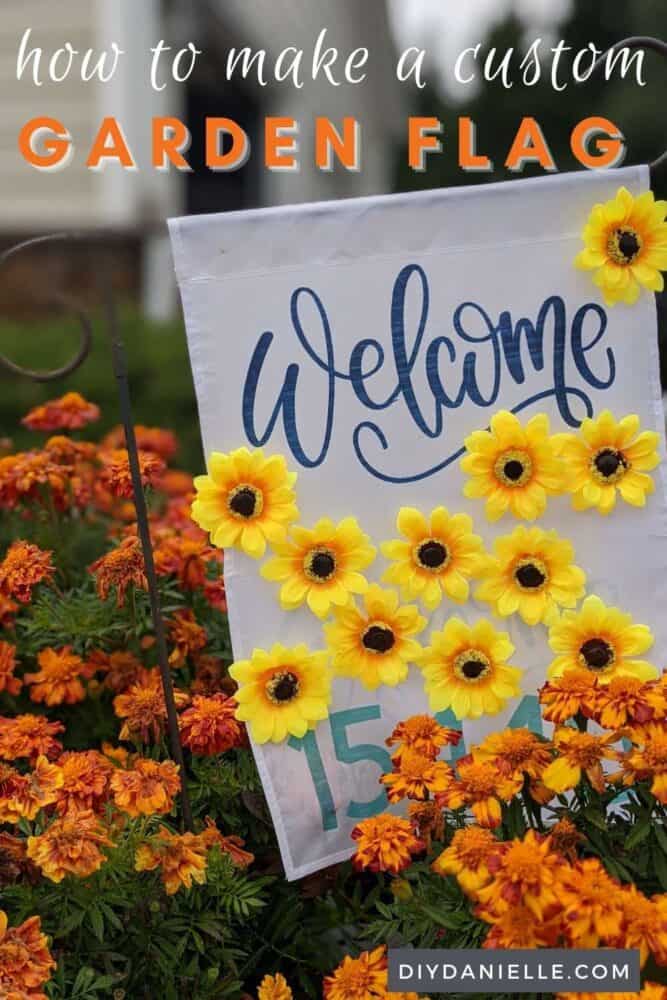
I’ve been wanting to make a new garden flag; there’s so many cute designs for sale, but I wanted something with our street number on it. One of the numbers fell off our wood sign and rather than fix it, I figured I’d just make a fabric sign. I’ll fix the wood sign eventually, right?
I purchased some sublimation blank garden flags on Amazon, then used snaps to attach the sunflowers. The snaps allow me to snap each flower on and then remove them to exchange the flowers for something more seasonally appropriate. I can use these sunflowers for Fall, but switch to something else in the Spring, Summer, and Winter. What do you think the flower for each season should be? Leave me a comment!
This post may contain affiliate links which may earn me commissions should you click through them and take certain actions. As an affiliate for Amazon, Cricut, xTool, Home Depot, and other sites, I earn from qualifying purchases. Please DIY carefully. View my full legal disclosures here.
The majority of my content is generated by me, as are 99% of the photos and videos, but I utilize technology for titles, descriptions, video editing out all of my ums, and occasionally for text overlay on images.
Please read the whole post so you don’t miss any important information!
DIY Garden Flag with Infusible Ink
Supplies:
- Snaps
- Snap Pliers
- Infusible Ink Transfer Sheets
- Faux Flowers
- Cricut Maker
- Cricut Easy Press 2
- Garden Flag Blank
Use the Discount Code DIYDANIELLE on cricut.com for 10% off any cutting machine or heatpress (no minimum). Excludes: materials/accessories/mystery boxes/etc. Applies to US/CA only, code expires 12/31/23.
Tutorial:
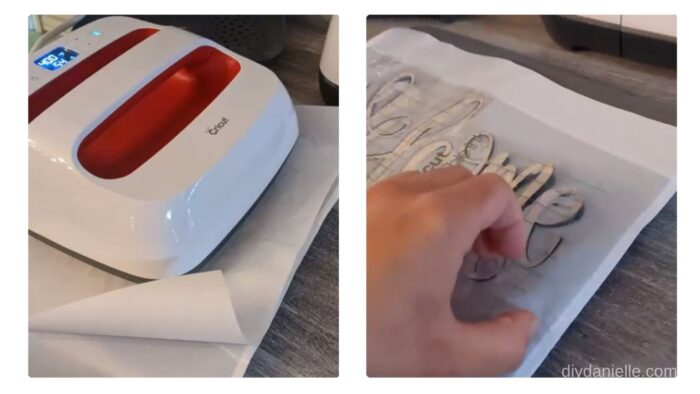
Step 1: Cut the infusible ink sheets and weed away excess around your design.
Step 2: Set your EasyPress to 400° and 60 seconds.

Step 3: Prep your flag blank. Use a lint roller to clean off any lint.
Step 4: Place your design.
Step 5: Cover design with included paper. Press 60 seconds.

Step 6: Carefully remove your transfer sheet.
Step 7: Repeat on bottom for your house number, if desired.
Step 8: If you want to add snaps, take apart your faux flowers. If you want to skip the snaps, you could sew these directly on.
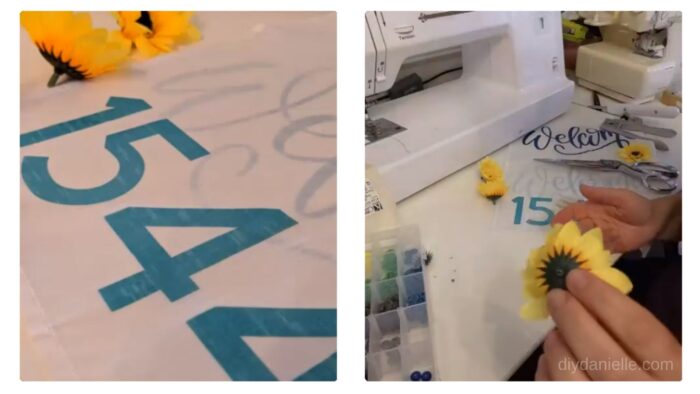
Step 9: Attach a matching male snap to the middle of your flower.
Step 10: Attach a female snap to your flag, using a small piece of felt in between.
Step 11: Place the rest of your flowers.
Video Tutorial
Love Sunflowers? Check out my other sunflower posts: hanging sunflower balls | sunflower wreath | sunflower Christmas Tree
Please share and pin this post! You can also post your project and tag the DIYDanielle team on Instagram @doityourselfdanielle!
Google Web Story: DIY Garden Flag with Cricut

How to Make a Garden Flag with the Cricut
Materials
- Snaps
- Snap Pliers
- Infusible Ink Transfer Sheets
- Faux Flowers
- Garden Flag Blank
Tools
- Cricut Maker
- Cricut Easy Press 2
Instructions
- Cut the infusible ink sheets and weed away excess around your design.
- Set your EasyPress to 400° and 60 seconds.
- Prep your flag blank.
- Place your design.
- Cover design with included paper. Press 60 seconds.
- Carefully remove your transfer sheet
- Repeat on bottom for your house number, if desired.
- Take apart your faux flowers.
- Attach a matching male snap to the middle of your flower.
- Attach a female snap to your flag, using a small piece of felt in between.
- Place the rest of your flowers.
Love this project! Love the idea of infusible ink for the garden flag.
My only concern is everything I have read online says the infusible ink is not meant for outdoors. Could give any input or an update on how yours has held up. Thank you!
If I reply twice, excuse me… I think the first reply didn’t go through. I didn’t track how long it lasted until it faded… I’m not even sure it did. I swap my garden flags out seasonally and I’m not quite sure where I put this one. TBH I’ve never had a store bought one NOT fade so I ASSUME this faded too. But not 100%… if I find it, I’ll try to update. I’m curious now. 😉 But if it fades all the way, I guess you could just reuse the blank, lol.