

How to make a DIY card box and birthday cards to send each month! These are organized by month and are a great way to stay organized!
Do you have difficulty keeping up with holidays and sending out birthday cards? I do. I get so overwhelmed each year, and I always feel a bit guilty about it. Honestly, our Christmas cards didn’t make it out this year until JANUARY. I am hoping to do better this year- I made this DIY Card Box and organized the box by month of the year. I added cards for every person’s birthday and for other holidays, organized them under the month, and now I can just pull all of the cards at the beginning of the month!
I find that if things are neatly organized, I’m better able to keep up with routine tasks. And while making cards for the ENTIRE YEAR was an enormous task, it’s a lot more fun to do it all at once than it is to try to squeeze in making one card here and there between other activities.
And making lots of cards was easy with my DIY Card Box, my Cricut Maker 3, and the 2×2 Card Mat from Cricut!
This post may contain affiliate links which may earn me commissions should you click through them and take certain actions. As an affiliate for Amazon, Cricut, xTool, Home Depot, and other sites, I earn from qualifying purchases. Please DIY carefully. View my full legal disclosures here.
The majority of my content is generated by me, as are 99% of the photos and videos, but I utilize technology for titles, descriptions, video editing out all of my ums, and occasionally for text overlay on images.
Please read the whole post so you don’t miss any important information!
Many thanks to Cricut for sponsoring this post and providing many of the materials for the project!
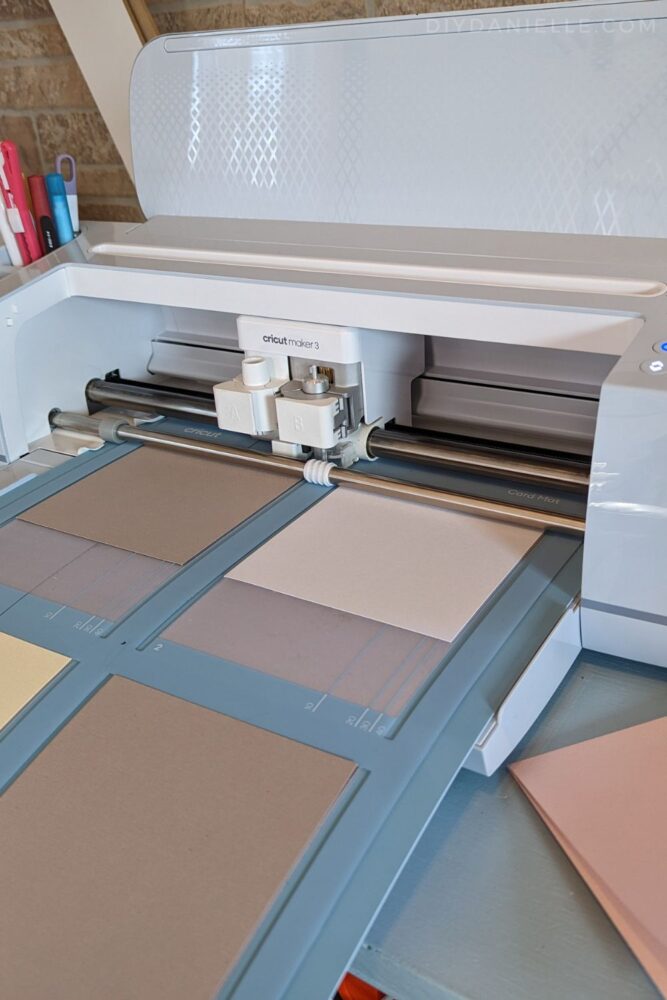
I used my Cricut Maker 3 to make an assortment of greeting cards to use through the year, addressed envelopes to everyone on my list, and put the card in the card box for the correct month. While I could have used my Cricut Joy to make greeting cards, I wanted to make four at a time using Cricut’s new 4 card mat.
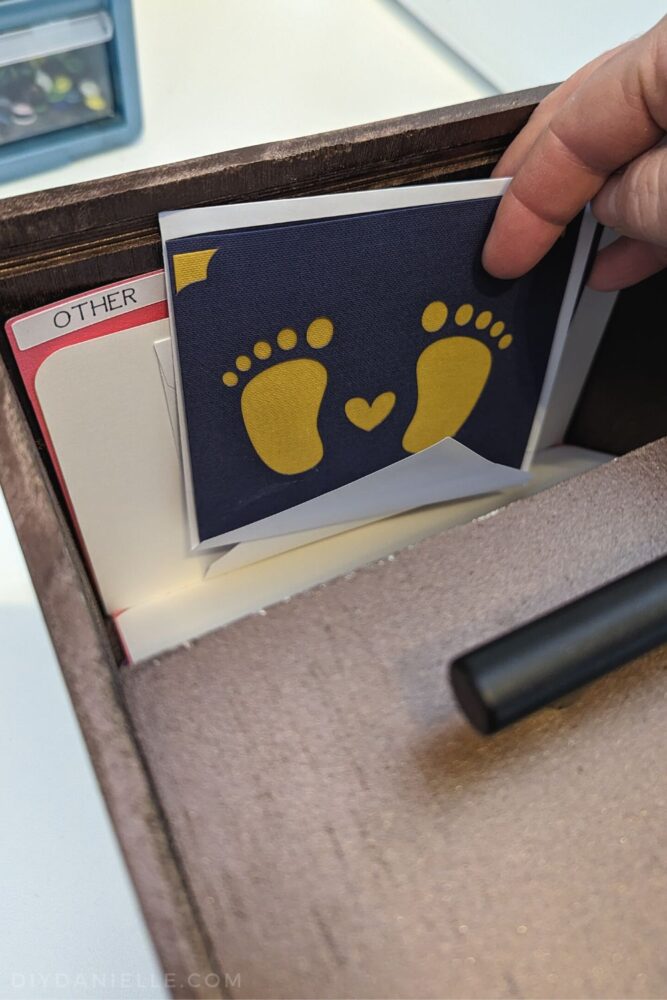
I also added dividers for extra birthday cards, thank you cards, and sympathy cards.
This is a BIG PROJECT to do. But the nice thing is that you can do other projects and listen to an audiobook while your Cricut machine is working on four cards (or organize your craft room) at a time.
Use the Discount Code DIYDANIELLE on cricut.com for 10% off any cutting machine or heatpress (no minimum). Excludes: materials/accessories/mystery boxes/etc. Applies to US/CA only, code expires 12/31/23.
How to Make Birthday Cards with the Cricut 4-Card Mat
At the time of this writing, the 4-card mat does have some limitations:
- Cutting four different cards at once can be tricky. It’s possible, but you need to make a lot of tweaks
- If you make those tweaks, you’ll end up having to navigate some tricky brain work to get through the process.
The best way to make multiple cards with the 4-card mat is to cut four of the SAME card. This works pretty well. You likely have a lot of birthdays over the course of a year and people don’t compare cards. You can make four of several designs, or even just two of several designs, and still make the process quite a bit faster than normal.
For some card designs, you need to swap out blades and foil tips for many of the cards. If you cut four of the same at once, it will make life a lot easier because the machine can deal with the foil piece for all four cards, then the cutting piece, etc.
To customize the card design for each person, you can often swap out the color of the card and the backing card!
Card Sizes
Cricut offers several different card sizes and you need designs to match the size card you’re using. I’m working with R40 and S40 cards.
Choosing Pre-Existing Card Designs
If you go into the Design Space projects, you’ll see tons of really awesome cards. Those are fine to use if you want to print four of each design at a time.
If you want four different designs, it can be tricky; with lots of copying and pasting from one project to another, you can put four designs on one mat. It’s just tricky.
The better option is to start a NEW PROJECT. This is the typical blank page you can start with. If you go into IMAGES –> THEME —> CARDS, you’ll see some cards available and usually they mention the size if you hover over the image. You can select many of these and pull them up in the same project space.
This DOES NOT mean that you can (or want to) cut them all on one mat. But you may get lucky and have some that will work well for doing so.
Making Your Cards
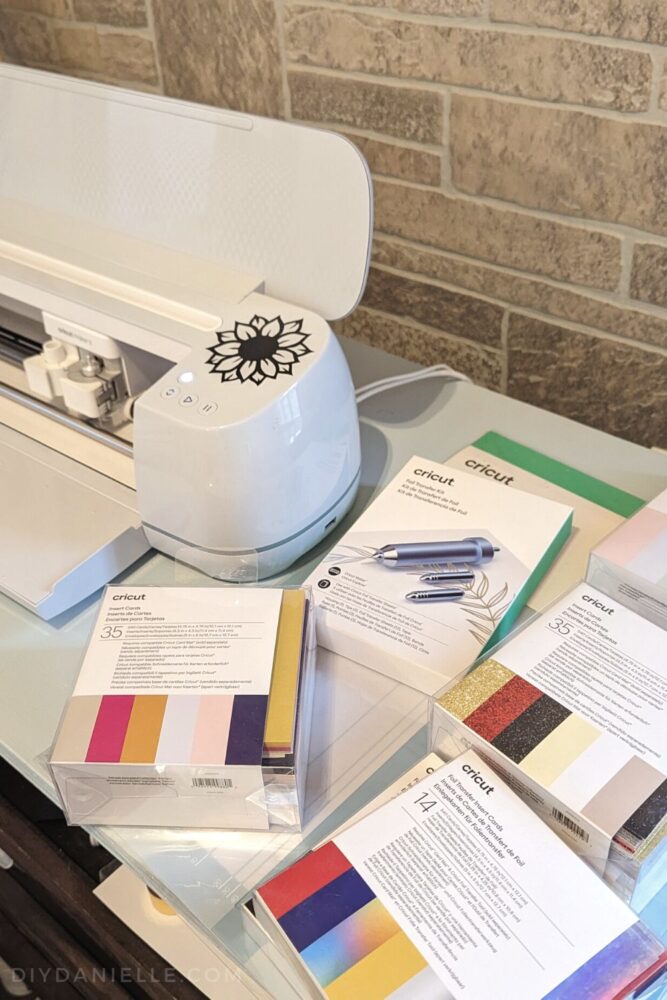
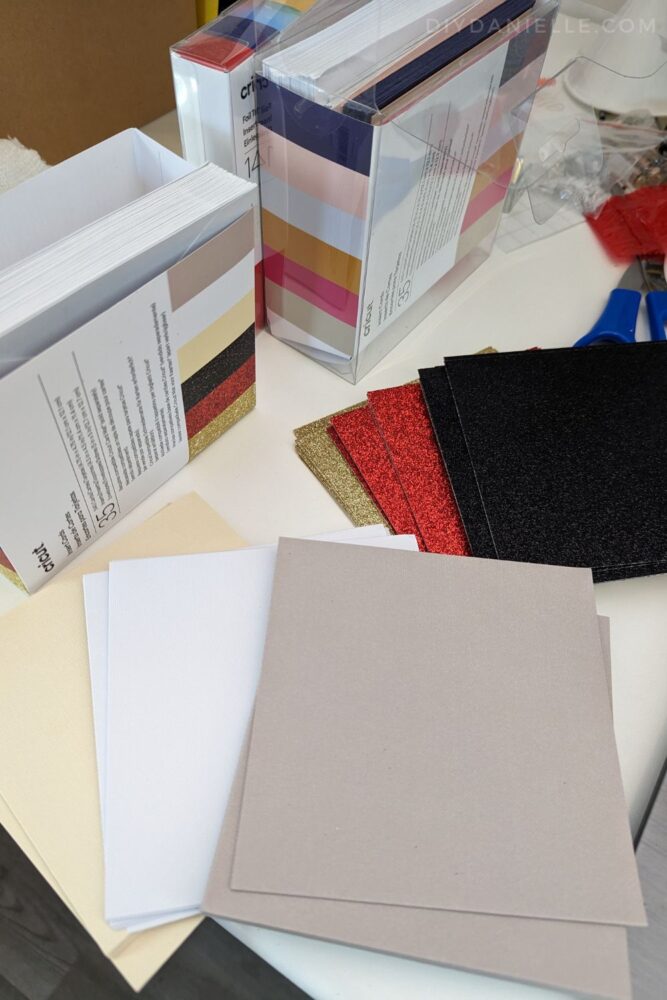
I got a mix of cards and supplies to make these, and I also occasionally used scrapbook paper from my collection as a backing, instead of using the card inserts. This allowed me to make four cards that were the same, but also unique.
I found that there were a limited number of designs in some sizes so FIND THE DESIGNS you like best and buy cards accordingly! The Sensei sampler comes in R10 and R40 so there are different size options for each card set.
Supplies
- Card Mat – 2×2 (2 ct) #2009488-2pack
- Foil Transfer Insert Cards, Royal Flush Sampler – S40 (14 ct) #2009481
- Insert Cards, Princess Sampler – R40 (30 ct) #2009468
- Insert Cards, Sensei Sampler – S40 (35 ct) #2009473
- Foil Transfer Insert Cards, Celebration Sampler – S40 (14 ct) #2009478
- Insert Cards, Glitz and Glam Sampler – S40 (35 ct) #2009474
- Foil Transfer Kit #2008726
- Set of Fine Point Pens
As this isn’t a full tutorial on how to make cards, you may want to check out my post: How to Make Cards with the Cricut Joy. It isn’t a complicated process, however. The 2×2 card mat allows you to place 4 cards on the mat, then the machine walks you through the process. It will cut and/or write with pens on the front of the card.
Once it’s finished, you can pop an insert behind the cut areas, or substitute a piece of scrapbook paper.
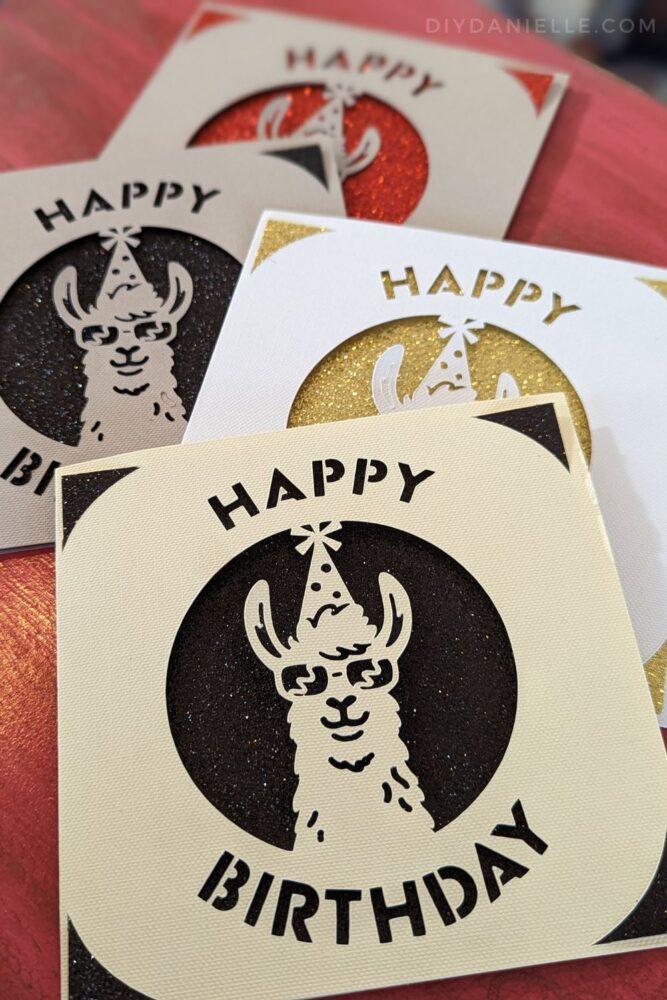
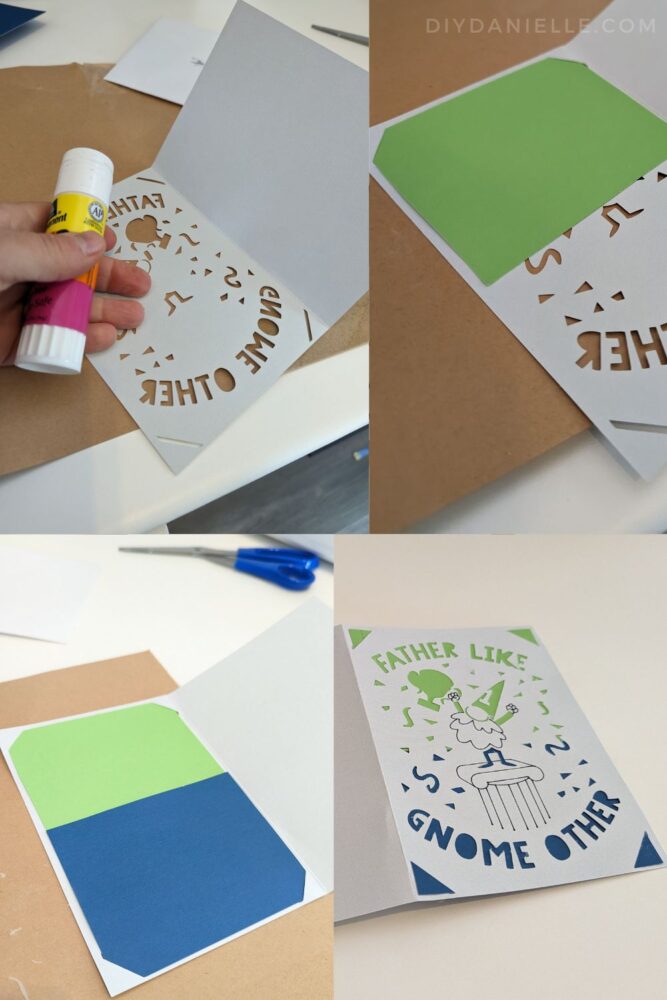
With the cards below, I cut four of this Happy Birthday Llama card. I used two gray, one beige, and two white cards, then choose different colors for the insert piece. This meant that I finished with four completely different cards.
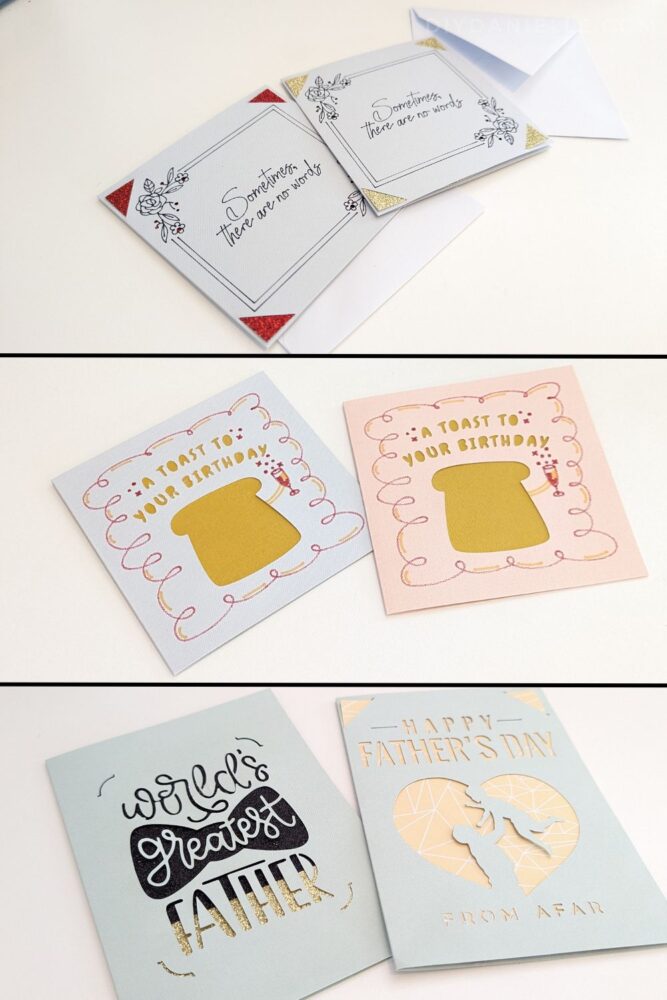
For this Father’s Day card, I used two different colors of scrapbook paper in lieu of the typical inserts. As I couldn’t use the slots for holding both separate pieces, I applied glue.
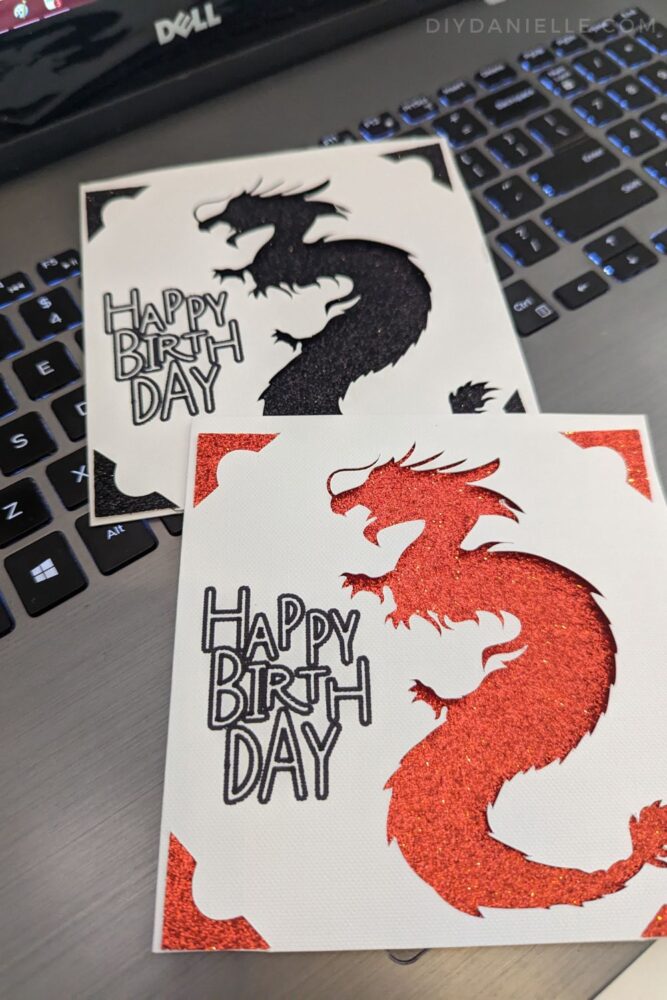
These dragon cards came out really cute. They required a black thin tipped marker and I used two different colors of sparkly inserts.
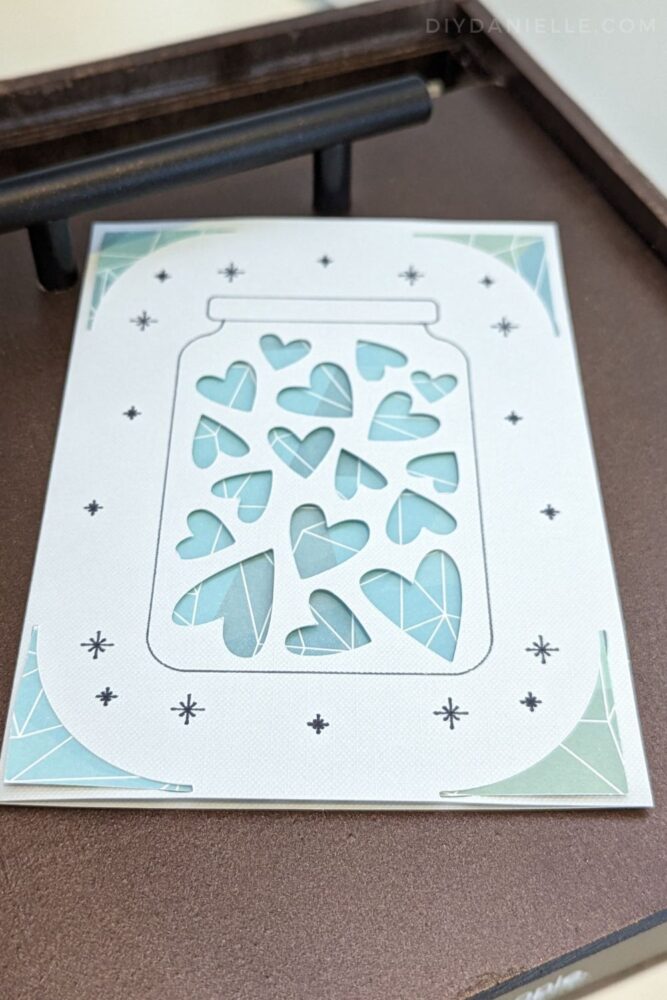
While the Cricut inserts work really well and they have some great colors, I LOVE mixing it up by using leftover scrapbook paper for the backing.
I love these three different Mother’s Day cards that I found! I kept the normal insert/card for the left and right ones, but I used yellow scrapbook paper for the middle card.

And here’s a few more that I made… as you can see, I tried to mix things up so I wasn’t making duplicate cards, even though I often used the same design.
Organizing Your Cards
If you don’t have everyone’s birthday recorded somewhere, you can actually use Facebook to get all of your cards setup!
Search BIRTHDAYS on Facebook and “See upcoming birthdays” will pop up. Click that and you’ll see a list of your friends and their birthdays for the year. This is an EASY way to go through month by month.
The only downside to this is that you may have some friends who aren’t on Facebook or who don’t share their birthday on there. Just double check that you aren’t missing anyone!
As I went through, I grabbed a card for that person, wrote their name on the envelope, and put it under the divider for the month their birthday is in.
Don’t forget: Valentine’s (February), Mother’s Day (May), Father’s Day (June), or anniversaries. I added a few cards at the end of the box for babies and sympathy cards, as well as extra birthday cards (for the birthday parties my kids often get invited to).
DIY Dividers
These dividers are easy to make and they’re a MUST HAVE for organizing your card box.
Supplies:
- Cricut Maker
- LightGrip Mat
- Smart Sticker Cardstock
- Cricut Pens: I picked up the full set AFTER doing this project because I realized how badly I needed colors other than black.
- Cardstock
- Cricut File: Dividers for the DIY Card Box
Step 1: Cut your cardstock. Use this Cricut File if you are making the same box that I did. These will fit in there. You can use multiple colors or all the same color, it’s up to you!
Step 2: Cut/write the labels on your Smart Sticker Cardstock. You can use mine, or make different labels! Not sure how? Check out: How to Use Cricut Smart Sticker Cardstock.
Step 3: Peel off the labels for each tab and place them on your dividers!
DIY Card Box
Supplies:
- 1/4″ Plywood
- Wood glue
- Nail gun
- Table saw
- Cricut Maker
- Cricut Transfer Tape
- Cricut Permanent Smart Vinyl (2 Shades of Blue and White)
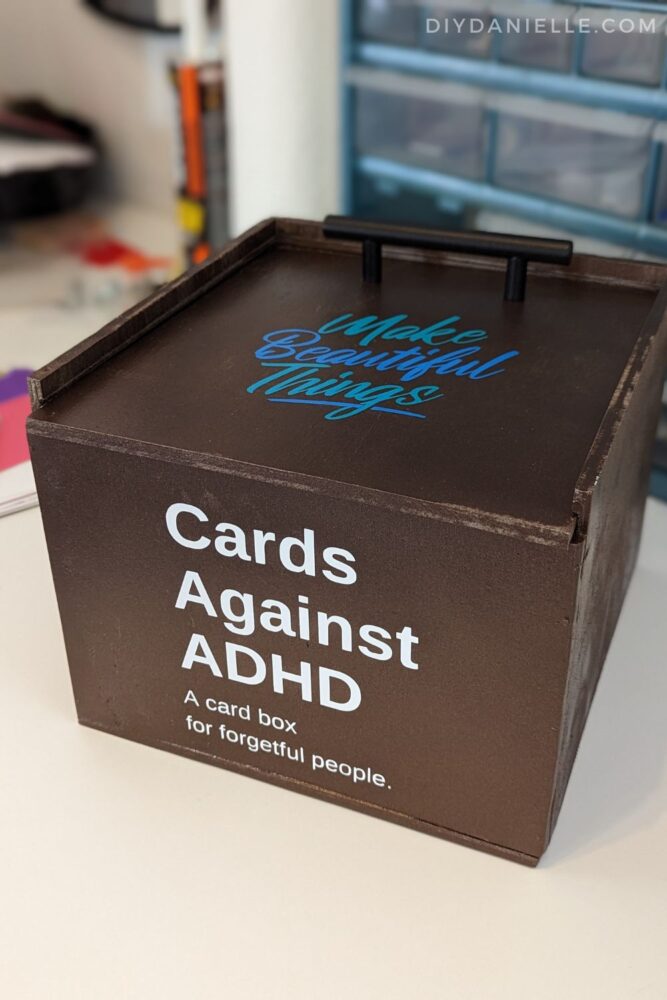
- Design: Cards Against ADHD and also the Make Beautiful Things design from Design Space
Step 1: Cut your 1/4″ plywood to 9″ width… from this cut your sides and back at 7×9″.
Step 2: Use your table saw with a lowered blade to cut a groove on the sides and back. The groove should be towards the top of your wood. I needed to run my wood through several times so the groove would be wide enough to hold the wood lid. Please see the video.
Step 3: Cut your front piece so it will be shorter than the bottom of the groove. Mine was 6.25″ x 9″ wide.
Step 4: Cut your bottom piece 9 x 9.5″.
Step 5: Use wood glue and nails from your nail gun to assemble your box sides, back, front, and bottom.
Step 6: Cut a piece of wood for your top that fits inside your groove.
Step 7: Prime and paint your box.
Step 8: Add your handle to the top of the box. Not sure how? Read: How to Install a Cabinet Handle
Step 9: Cut and apply your permanent vinyl to the top and front of your box. Not sure how? Read: How to Use Permanent Cricut Vinyl
And you’re finished! Add your dividers and cards. Slide the lid on! I LOVE how this came out.
Here’s the final result! The top slides off easily and I LOVE the text that I chose.
Please share and pin this post! You can also post your project and tag the DIYDanielle team on Instagram @doityourselfdanielle!
