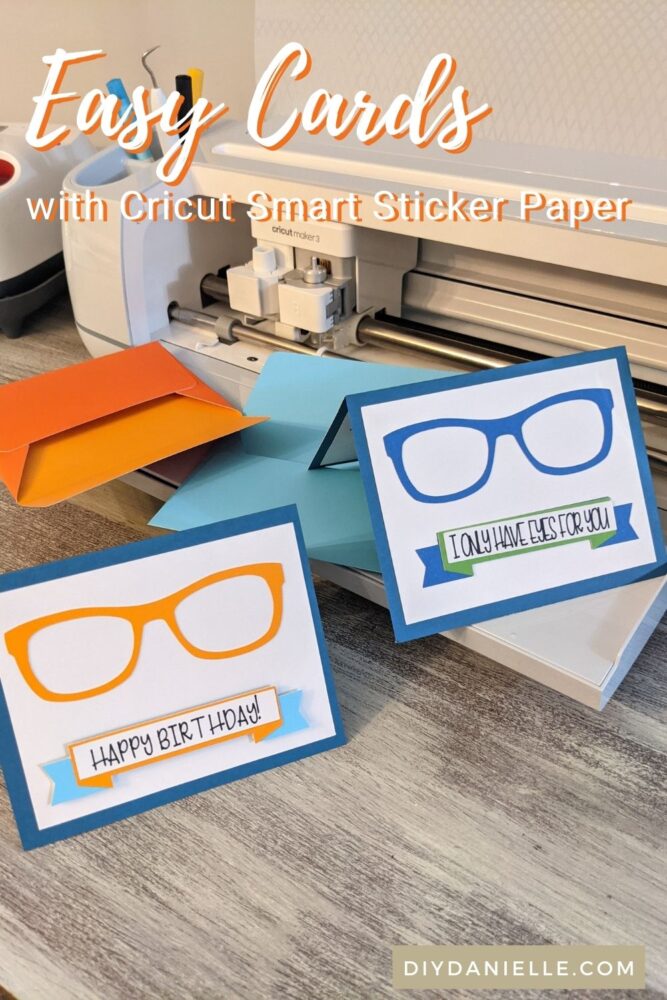
This is a quick tutorial on how to use Smart Paper Sticker Cardstock. Demo projects: Blippi themed birthday card and an anniversary card.
This is my FIRST Cricut Maker 3 project with the new Smart Materials! On the day I opened it, I absurdly decided to make a regular cardstock cards instead of giving these a try… disaster. I hate glue. I made a mess and it was miserable. Needless to say, I was a bit hesitant to tackle another paper project but the sticker cardstock had me intrigued. WOULD this make life easier? The answer is YES! I’m going to make ALL THE CARDS now. This was so much fun to use and I only needed the glue to assemble the envelope for the card. It was fantastic.
This post may contain affiliate links which may earn me commissions should you click through them and take certain actions. As an affiliate for Amazon, Cricut, xTool, Home Depot, and other sites, I earn from qualifying purchases. Please DIY carefully. View my full legal disclosures here.
The majority of my content is generated by me, as are 99% of the photos and videos, but I utilize technology for titles, descriptions, video editing out all of my ums, and occasionally for text overlay on images.
Please read the whole post so you don’t miss any important information!
If you haven’t heard of Cricut’s new Smart Paper, it’s one of their Smart Materials. These all can be fed into the Cricut Maker 3 and the Cricut Air 3 without a mat. The machine can cut directly on the “paper” which makes doing projects that much easier.
The Smart Paper is a cardstock-like thickness, but the cut item can be pulled off the backing, similar to peeling a sticker up. This eliminates the need for glue. It’s PRETTY DAMN COOL! Okay here’s the video… it has my #1 tip for conserving the Smart Sticker Paper so you don’t need to waste even a tiny bit. Keep scrolling for the photo tutorial.
How to Use Cricut Smart Sticker Cardstock to Make Easy Cards
Supplies
- Cricut Smart Sticker Cardstock
- Cricut Maker 3
- Regular Cardstock
- Foam mounting tape
- Glue stick
- Scoring Tip
- Cricut Pens
- Light Grip mat
Use the Discount Code DIYDANIELLE on cricut.com for 10% off any cutting machine or heatpress (no minimum). Excludes: materials/accessories/mystery boxes/etc. Applies to US/CA only, code expires 12/31/23.
Tutorial
Step 1: Start with the “I only have eyes for you” card in Design Space.
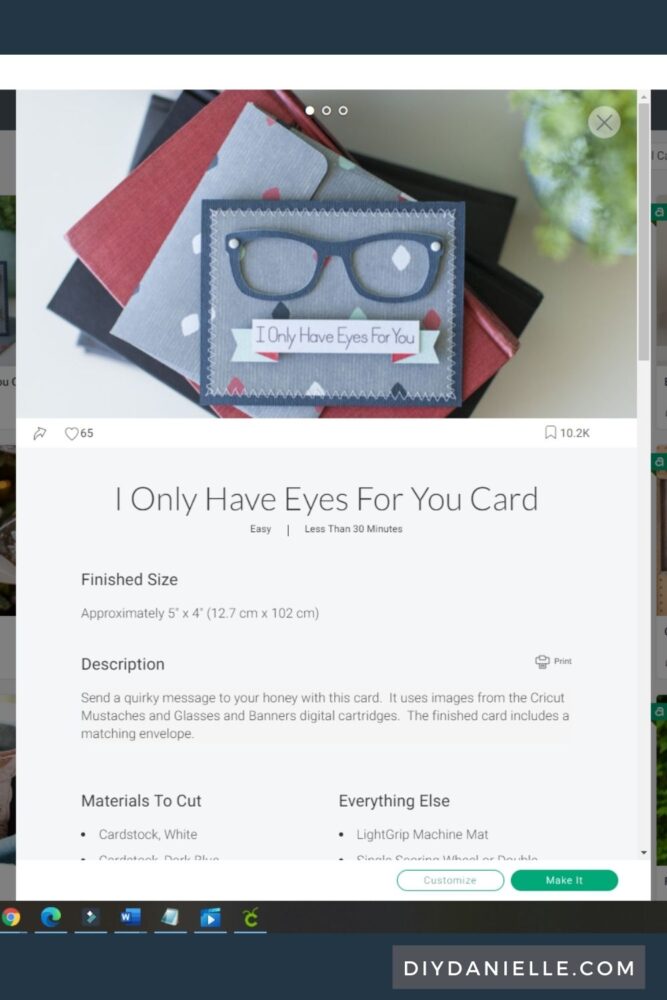
Click CUSTOMIZE and adjust as needed. I added “Happy Birthday” in writing to one section of the card, and duplicated the white rectangle so there’d be 3 of them: one for the front, and two for the inside of the card.
I also switched the “I only have eyes for you” text to “Happy birthday!” for my son’s birthday card (I made an anniversary card for my husband using the original design). The card currently has you print the “I only have eyes for you” on printer paper- I deleted that. I don’t like using my normal printer.
I added a white rectangle and used writing with a pen on the rectangle to do the Happy Birthday.

I changed all of my colors to the ones I planned to use for the card- this is unnecessary but it helps me keep track. When you go to cut the file, Design Space will ask if you want to use a mat or not. Select “Multiple ways.” You can adjust your design on the virtual mats to waste less Smart Paper.
Step 2: The first color to cut for me was the white. For this, I used the White Smart Sticker Cardstock. I needed to insert a Cricut pen to write the text and my regular blade cut the design out.
Step 3: Next was the orange Smart Sticker Cardstock. This cut out the glasses and a piece for the banner.
Step 4: I used regular cardstock for the larger banner because I didn’t have Smart Sticker Cardstock in light blue. I cut this using the regular blade and a regular light grip mat.
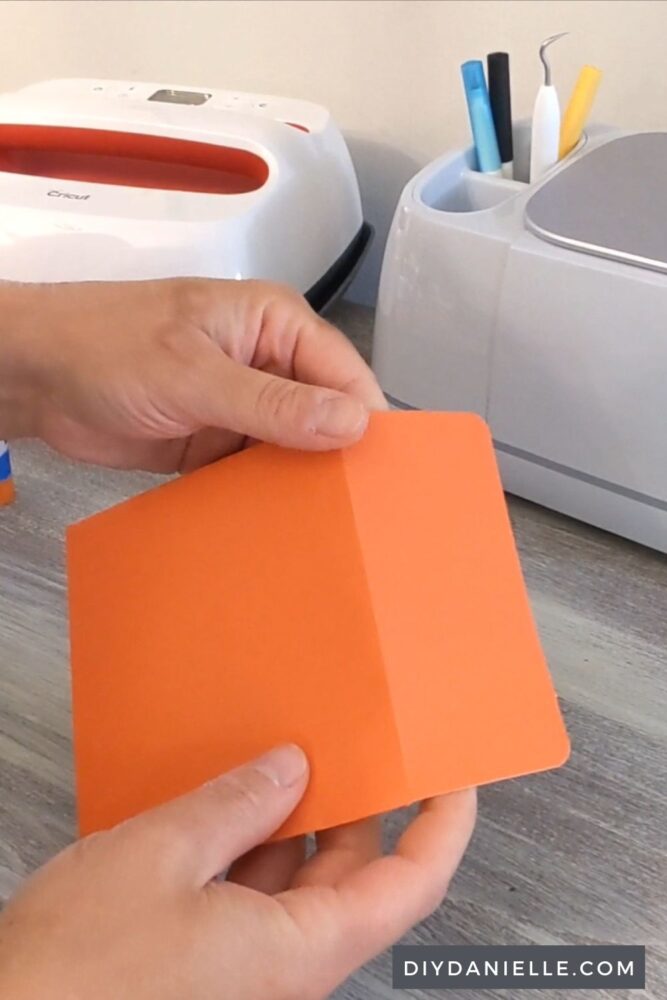
Step 5: For the envelope, I also used regular cardstock. You’ll need to use a scoring tip for this part. The scoring tip will make marks where you need to fold the paper. After it does the scoring, you’ll swap your blade back in to cut the outline of the envelope.
You can assemble the envelope when you’re waiting for the rest of the sections to cut. Fold where the score lines are and glue the bottom three pieces together. Leave the top flap open so you can slip a card inside. I use binder clips to hold the pieces together while the glue dries.
Step 6: The main card is also cardstock and I used dark blue. You don’t want to use the Smart Sticker product here because it’s a waste of good materials. You don’t need the main card to stick to anything.
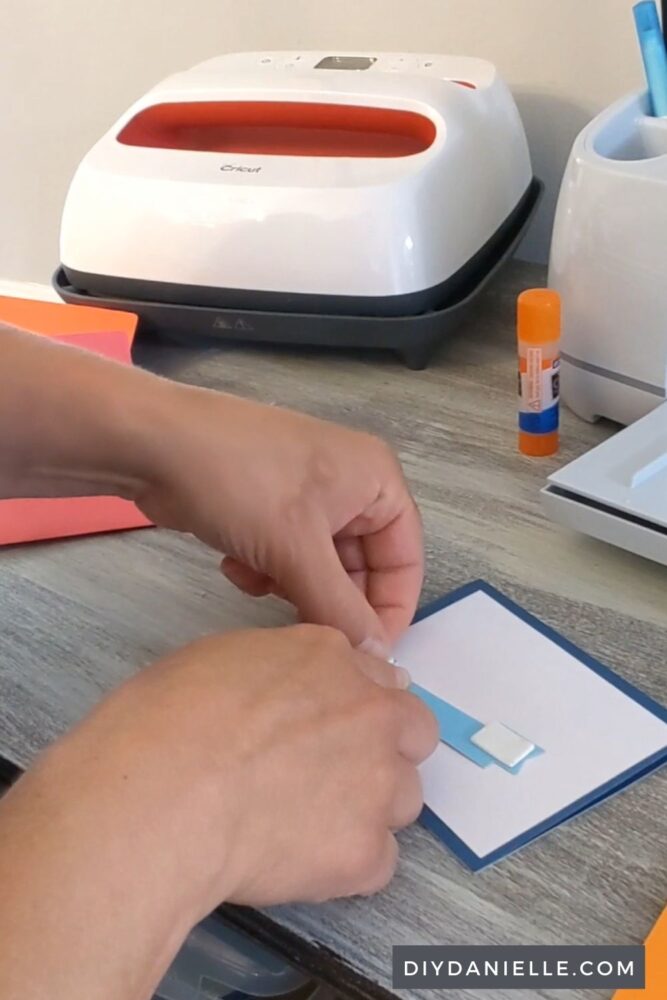
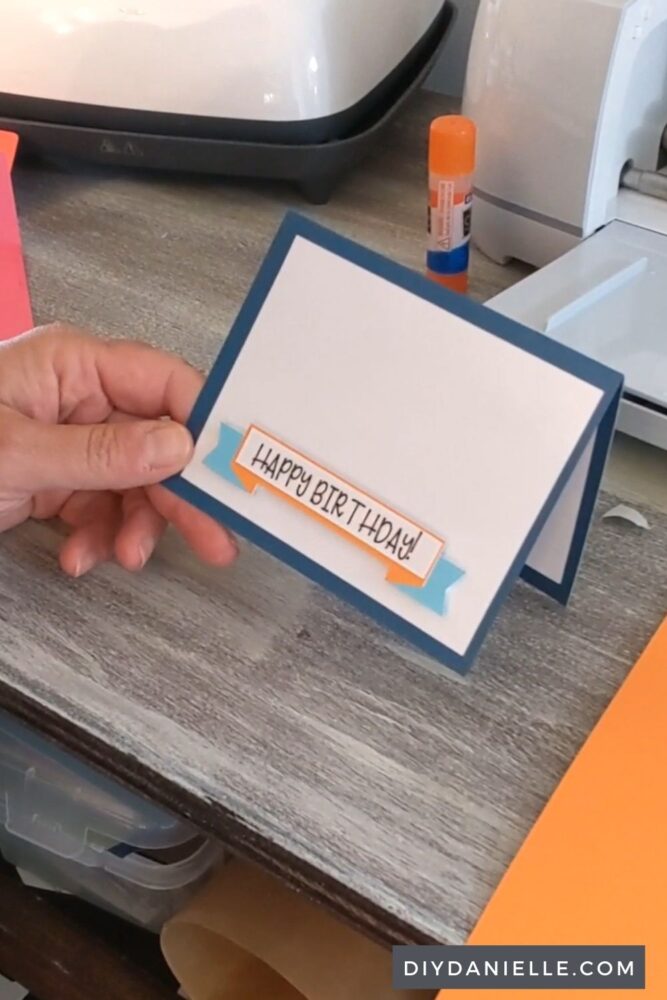
Step 7: Assembling the card is REALLY easy with the Smart Sticker Paper. Start by folding your main card along the scored line. You can peel your white rectangle off and stick it on the front of the card, making sure to center it. I duplicated the white rectangle so I had a total of 3 white rectangles: one for the front, and two for the inside of the card. The white rectangle with the writing went on the top inner section of the card.
For the front of the card, I used foam mounting tape to stick on my light blue banner piece.
The orange sticker piece for the banner goes on top of that, then the white “Happy birthday!” banner sticks on top of that. You can peel off the orange glasses and center them over that.
And that’s all there is to it! Very simple. I really love how this came out and I’m looking forward to making more cards with this paper. If you don’t own the Cricut Maker 3 yet, I think you could probably still use the Smart Sticker Paper on a mat, although I haven’t tested that.
Check out my review of the Cricut Maker 3. Here’s my Google Web Story about Cricut Smart Sticker Paper.
Please share and pin this post! You can also post your project and tag the DIYDanielle team on Instagram @doityourselfdanielle!