

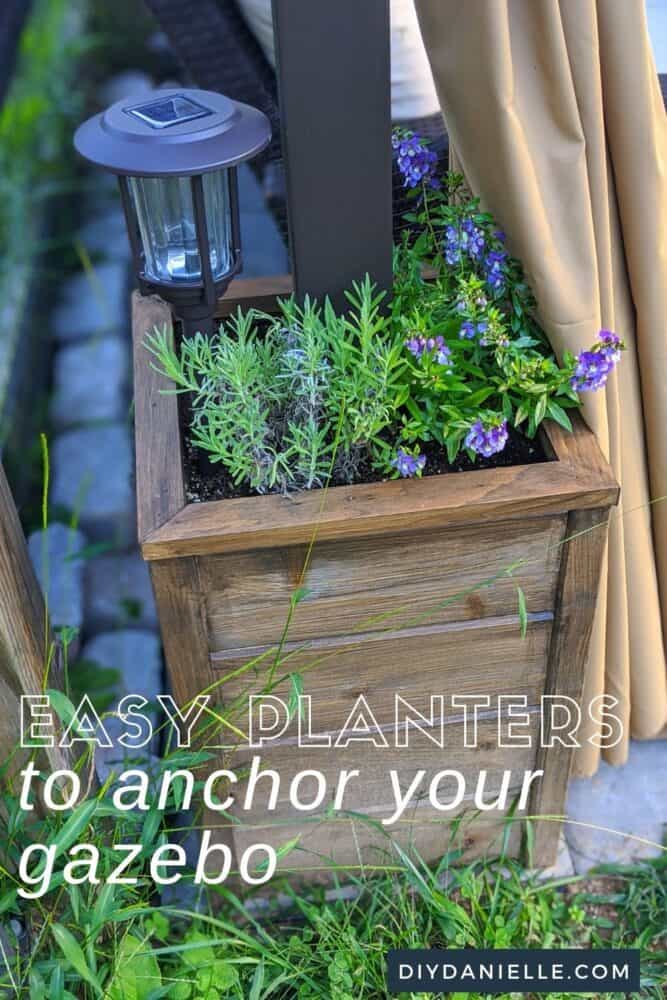
Learn how we built four easy DIY flower boxes to go around our gazebo posts to help weigh the gazebo down. Get the DIY Planter Box Plans!
Last summer we decided to have some hardscaping added to our backyard. We’d like to add a deck eventually, but that was well over our budget. It made sense to add a smaller patio area, then eventually attach the deck and patio with more hardscaping. It will be AWESOME when the whole thing is finished.
In the meantime, we finally got the gazebo set up on the new patio… but this brought up an IMPORTANT question…
How can I anchor a gazebo WITHOUT drilling into concrete or pavers?
This post may contain affiliate links which may earn me commissions should you click through them and take certain actions. As an affiliate for Amazon, Cricut, xTool, Home Depot, and other sites, I earn from qualifying purchases. Please DIY carefully. View my full legal disclosures here.
The majority of my content is generated by me, as are 99% of the photos and videos, but I utilize technology for titles, descriptions, video editing out all of my ums, and occasionally for text overlay on images.
Please read the whole post so you don’t miss any important information!
We didn’t want to ruin the new patio, but we get some wicked wind here. I don’t want the gazebo flying and hitting our home or car during a bad storm.
At our last house, we screwed the gazebo into the wood deck with no issues. This time, we decided to get creative.
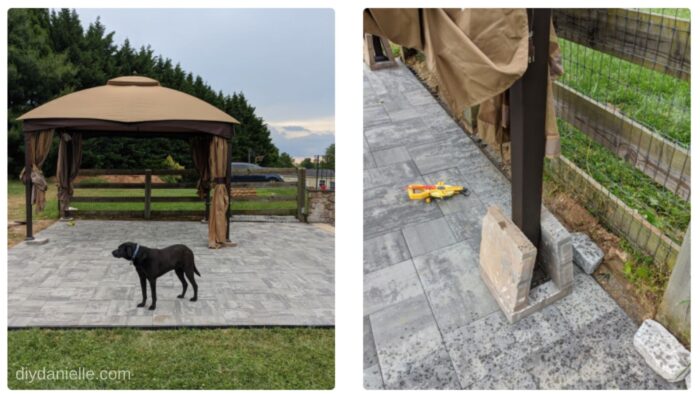
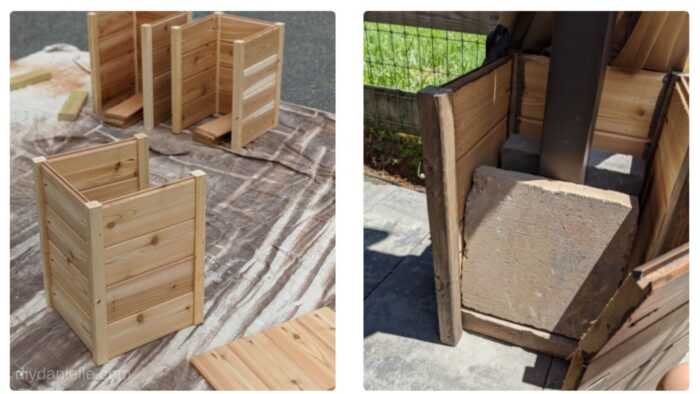
Each leg of the gazebo is screwed into a cheap $3.19 paver from Home Depot. Then there’s two more pavers on top. The pavers each weigh 27.1 lbs, giving each leg 81 lbs holding it down, to a grand total of 243 lbs (along with the weight of the gazebo itself.
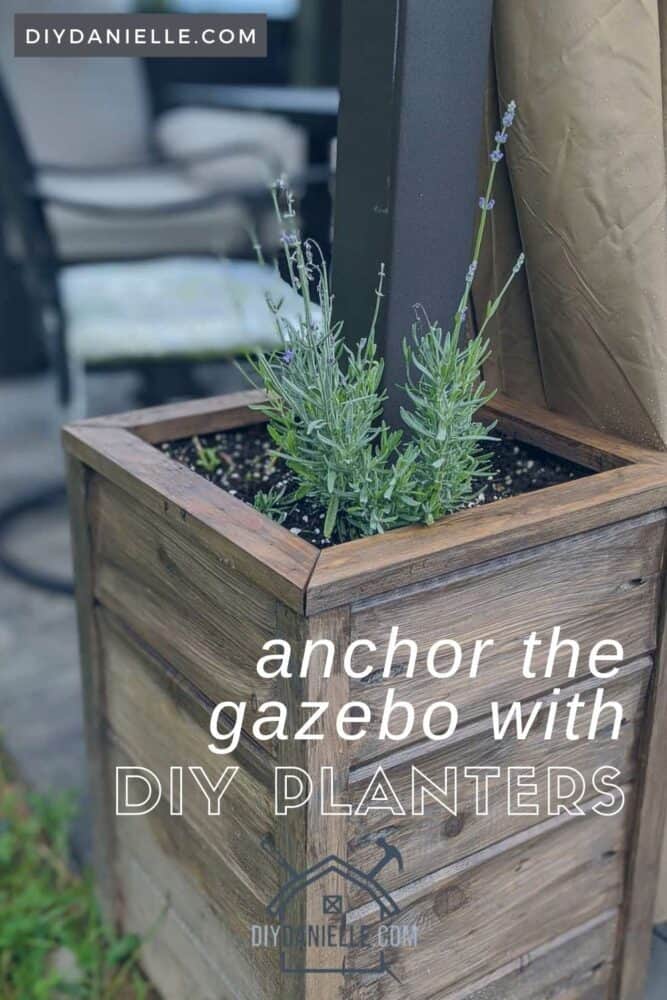
But this is obviously an ugly hack and we wanted it to look nice. We created these simple planters to go around the pavers and hide them. They look GREAT.
DIY Gazebo Box Planters to Anchor Your Gazebo
Here’s the video tutorial, or keep scrolling for the photo tutorial.
How to make your own gazebo box planters
Supplies:
- Wood Glue: https://homedepot.sjv.io/5b4JQo
- Hammer Drill
- 12×12 Pavers
- Ryobi Drill: https://homedepot.sjv.io/a1EdkQ
- Miter Saw: https://homedepot.sjv.io/BXrdaL
- Ryobi Nail Gun: https://homedepot.sjv.io/qn7Zbj
- Wood Stain, Outdoors
- Kreg Pocket Hole System with Screws: https://homedepot.sjv.io/2rPRxg
- Cedar Tongue & Groove Boards: https://homedepot.sjv.io/ORRnAz
Step by Step Tutorial
- Check out your legs for your gazebo.
2. Slip a piece of paper under there and mark where the holes are. This creates a template you can use to mark your pavers.
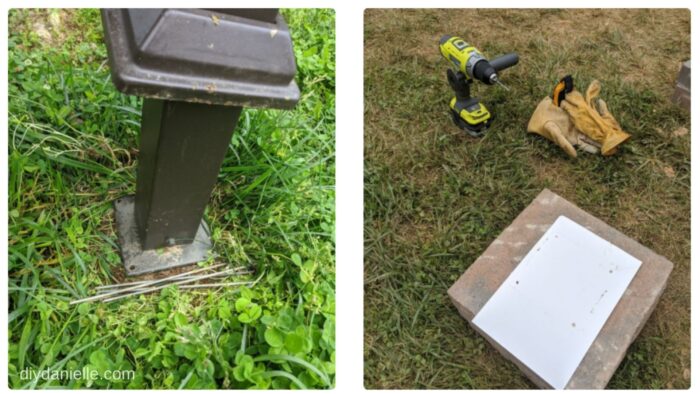
3. Pre-drill the holes for mounting your gazebo on your pavers. You’ll need a special drill bit meant for concrete and a Ryobi Hammer Drill
4. Once pre-drilled, place all of your pavers in approximately the right area.
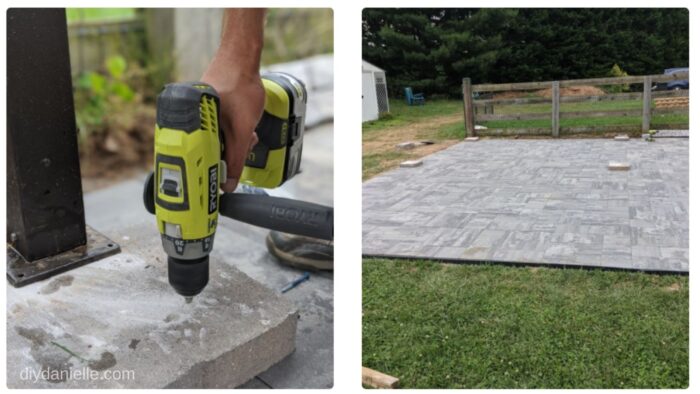
5. Move your gazebo onto the pavers.
6. Screw the gazebo into the pre-drilled holes and use two additional pavers on top of the flat paver.
7. Cut all of your wood and add at least one pocket hole to each side. Two pocket holes would be better.
8. Connect your four pieces of wood and screw them into a 2×2. Use wood glue.
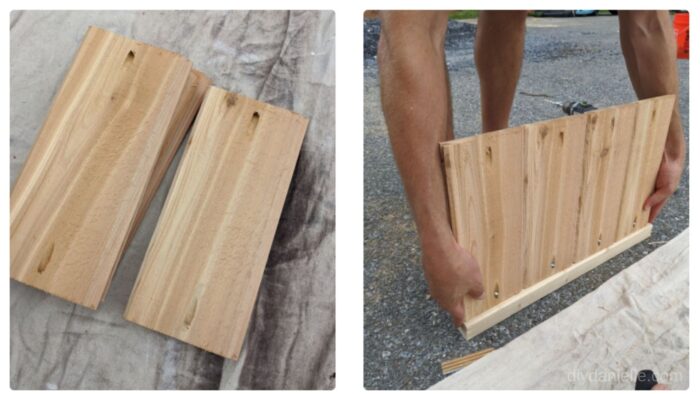
9. Connect three sides. The middle side should have the pocket holes facing out if your boxes are as small as mine.
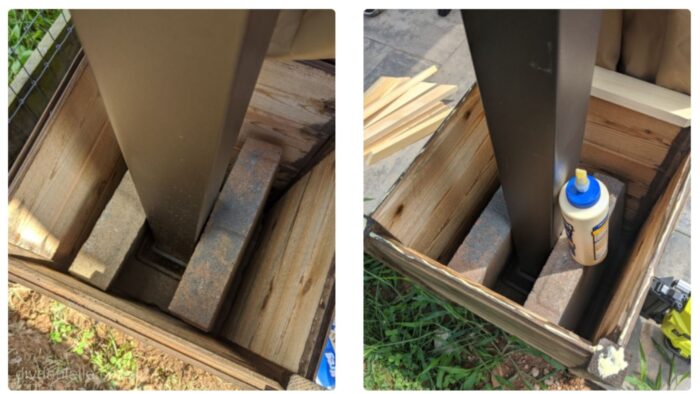
10. Slide your three-sided planter around the leg of the gazebo. You can attach your fourth side now.
Here’s what it looks like from above.
11. Add glue along the top of your planter.
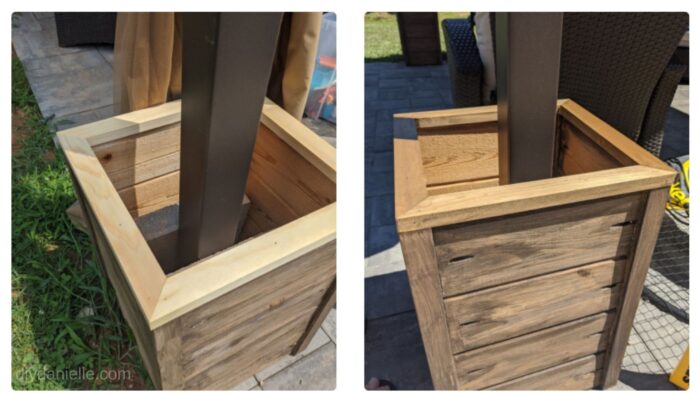
12. Add your trim. Use a nail gun to attach the frame to the planters.
13. Stain or paint your whole box. You can use pocket hole plugs first if you want to hide the pocket holes.
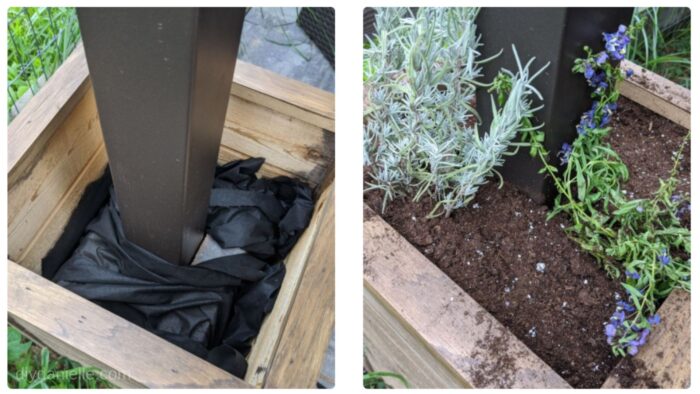
14. Add landscape fabric to the inside of your planter.
15. Add soil and plants. Keep watered.
Notes on this project:
It may seem a little odd that there are pocket holes on the outside of the box, but we couldn’t have fit the screwdriver inside to attach those sides so we were sort of stuck with it. If you don’t like the look, you can insert plugs, cut and sand them, then stain or paint over the “patched” holes. You could also make the box a little larger so your screwdriver would fit.
When finished, these boxes were 15″ x 15″ and 21.25″ tall.
Now I just hope 243 lbs of weight is enough! So far, so good!
Want the woodworking plan? Sign up for the email list below for a free coupon to purchase the plan, or you can buy it in our store!
If you love gardening and being outdoors, you might like these posts:
- How to Clean Your Hummingbird Feeder
- DIY Outdoor Bars
- DIY Solar Light Projects
- Gardening Tips for Beginners
- Growing Strawberries in Gutters
- 26 Educational Articles about Gardening and Composting
- How to Use LED Grow Lights for Indoor Gardening
- Landscaping Ideas for the Front of Your House
- Indoor Plants that Will Clean Your Home’s Air
Please share and pin this post! You can also post your project and tag the DIYDanielle team on Instagram @doityourselfdanielle!
Google Web Story: DIY Planter Boxes for a Gazebo
Hi, how has your gazebo held up a year later?
@Carmen, No issues whatsoever with the gazebo and the planters (the fabric top ripped thanks to our wind, but that’s something we can reorder!)
I’ve read one review where it was recommended to put 4×4 into the post of the legs or another was to put cobble stones into the legs as well increasing the strength and weight. However, I do love your idea as well! I’ve been looking at creative ways to increase the weight of a “cheaper” pergola. No thank you liability (pergola flying off into a neighbors home). Thank you for sharing this fantastic idea!
@Jay Armstead, You’re welcome! Our main priority was trying to weigh it down without screwing anything into our new patio. It’s done the trick so far with no issues. 🙂 Stones would probably look nice inside it too though, particularly towards the bottom to help provide draining and hold in the soil at the top.
Your planters turned out beautifully. Do you remember what color stain you used? It’s perfect.
Stain: Behr Premium Waterproof Stain-Semi Transparent Cordovan Brown 1 gallon $37.98.. I used it on this project too! https://diydanielle.com/diy-outdoor-wood-chairs/
I love this idea, It looks great! We are in the middle of trying to implement this with a new gazebo we are putting up. However, we are having trouble finding the right screws to put into our concrete pavers. Is there any way you could tell me which ones you used? I was concerned the pavers would not be big enough and crumble, but yours seemed to work just fine.
It’s been a while, but they were meant for going into stone. If you ask at the help desk at the store, they may be able to point you in the right direction. Good luck!
@Gretchen and @Danielle
Hi!
I came here to ask the same question!
I am currently planning my project; ordered the pergola, have the materials for the planters and the pavers.
I have the drill and concrete drill bits, and wanted to also make sure I have the appropriate size concrete screws.
I am planning to do all assembly the first or second weekend of May.