

How to update an old storage ottoman that has been chewed on. Once this was completely redone, this storage ottoman was perfect as a Lego table and toy chest.
This post may contain affiliate links which may earn me commissions should you click through them and take certain actions. As an affiliate for Amazon, Cricut, xTool, Home Depot, and other sites, I earn from qualifying purchases. Please DIY carefully. View my full legal disclosures here.
The majority of my content is generated by me, as are 99% of the photos and videos, but I utilize technology for titles, descriptions, video editing out all of my ums, and occasionally for text overlay on images.
Please read the whole post so you don’t miss any important information!
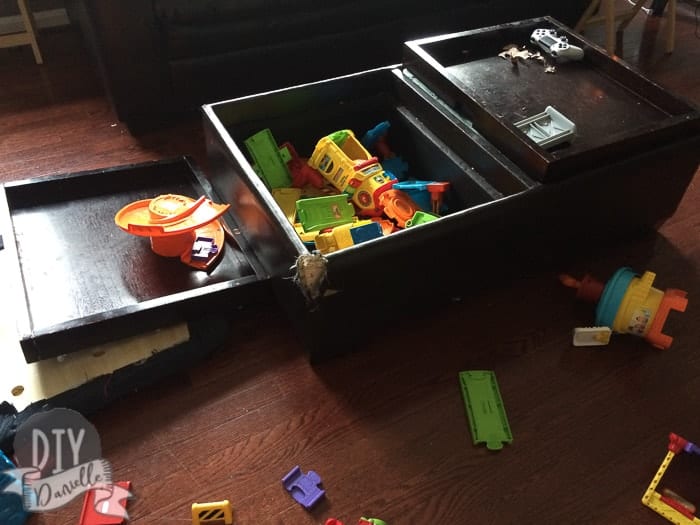
Back when I was single with two cats I bought this nice storage ottoman. Then my cats sharpened their claws on their leather top. So recently I replaced the leather with fabric. Then my new puppy chewed the side of it. Yikes.
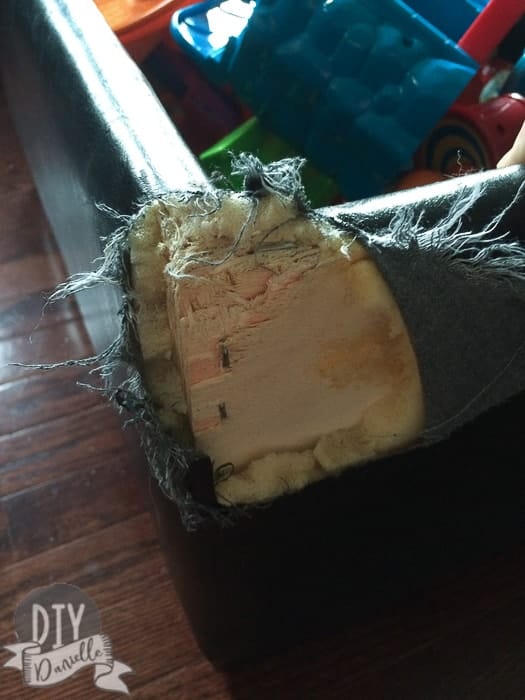
As you can see below, the padding leather exterior has some ugly wood underneath it.
For the record, this ottoman has inspired a couple of posts including reupholstering your ottoman and a post I wrote on repairing leather. The problem with the reupholstered version was that my kids like to eat snacks on it and fabric is harder to keep clean with kids and pets.
It was time…
…time to throw it away?
No. Time to refinish the whole thing because *meh* to buying new furniture when I still have a puppy and two toddlers.
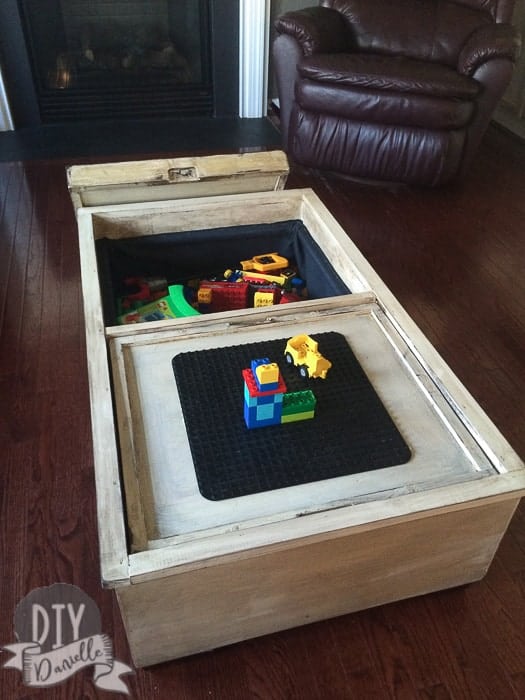
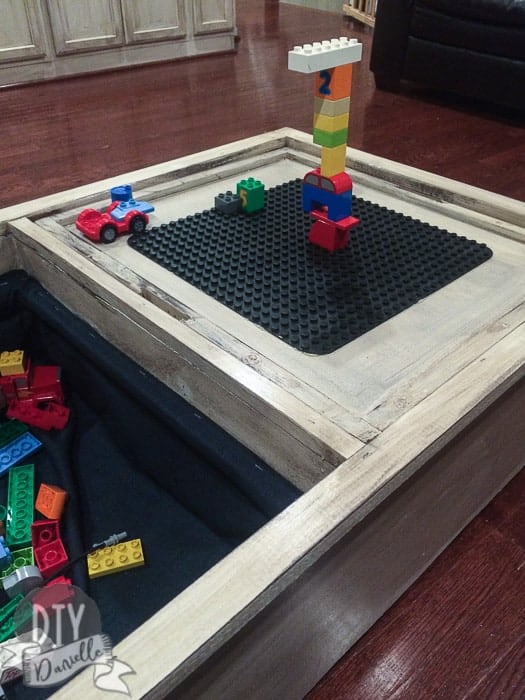
And I love it. Even better, the kids love it. They spend HOURS playing with the legos at the ottoman. It is attractive and doesn’t look like a toy box which is even more awesome- and I can flip the lego side down to use the other side as a coffee table if I’ve got adults coming over.
Leather Storage Ottoman Update
Supplies
- Fabric for lining
- Paint, stain, polyurethane
- Wood trim
- Wood for sides
- Staple gun
- Lego plate: Duplo or regular Lego
- Gorilla glue
How to Repair the Leather Ottoman
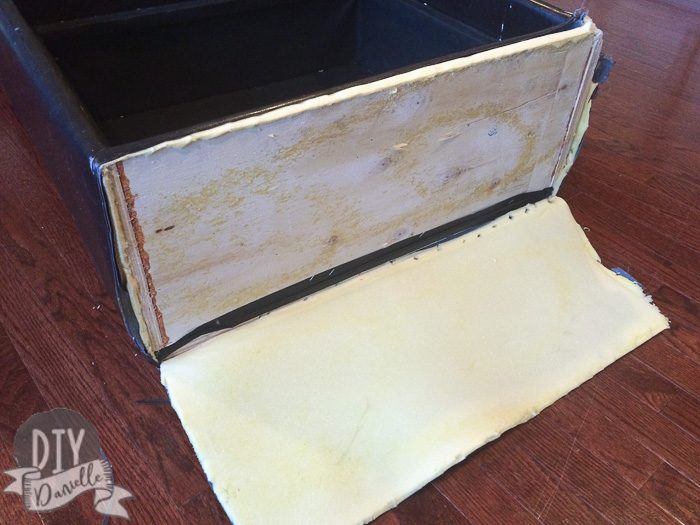
I cut off all of the old leather and padding. I removed the padding from the top of the ottoman. I decided to use this without the padding now. My husband says it’s more toy chest than ottoman now because there’s no padded place to put your feet. Whatever. I still plan to put my feet on it!
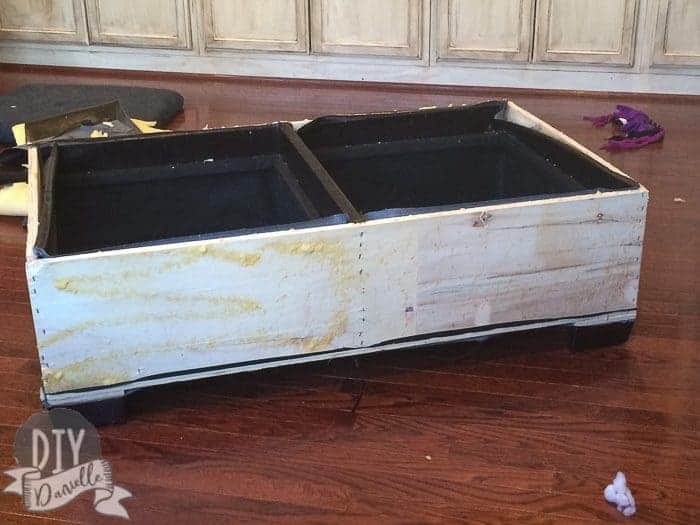
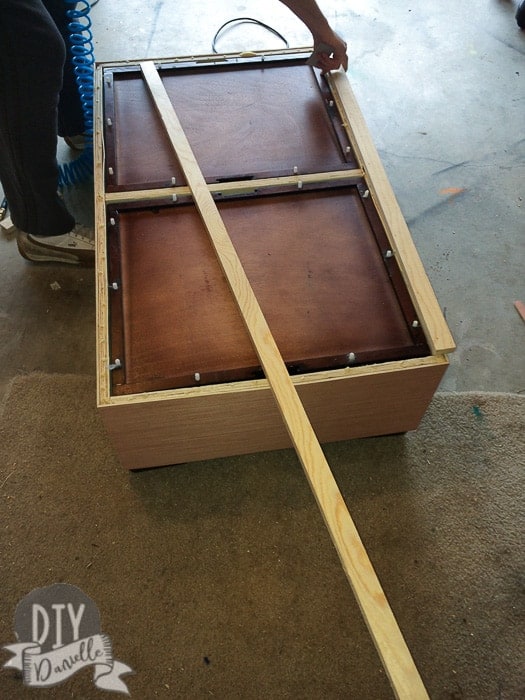
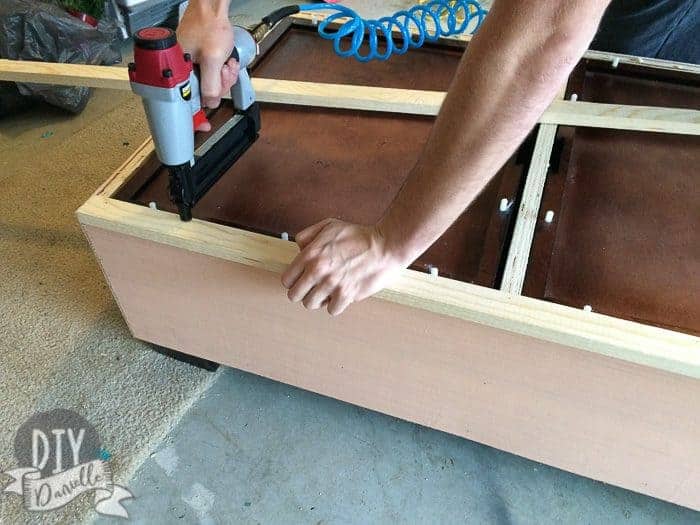
We cut a thin lightweight wood to the right size for the sides- we used a $13 utility panel. My husband used his nail gun to attach it.
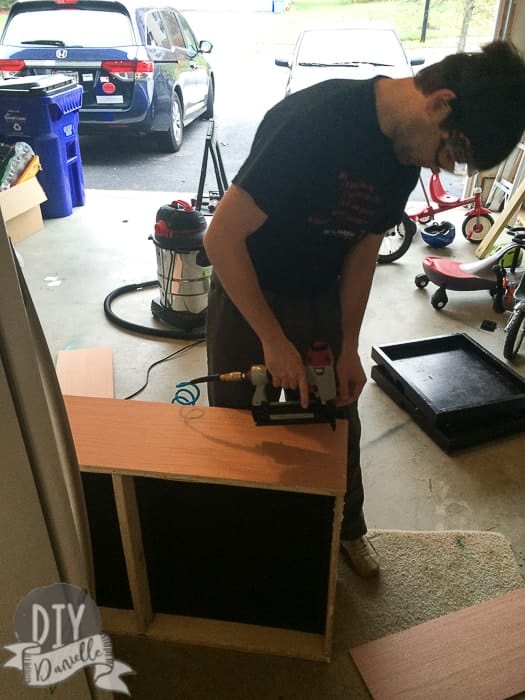
My husband also added some wood trim around the top of the ottoman.
Painting/Distressing the Ottoman
Here’s a tutorial on distressing furniture: Distressed DIY Lego Desk, How to Distress Furniture.
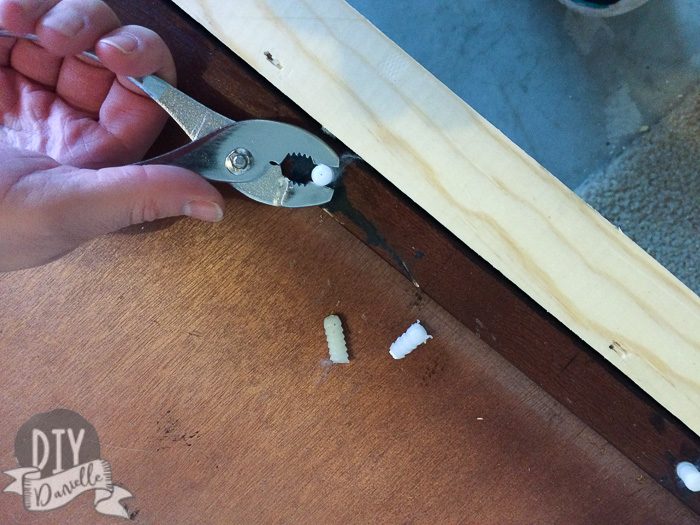
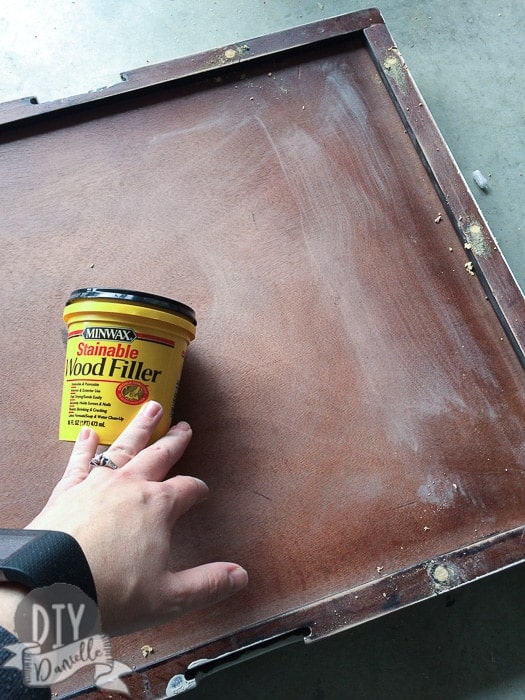
For the tops, I removed the little plastic pieces that held on the top padding. I filled the holes with wood filler and let dry before I painted.
I painted and distressed the whole piece… including the tops. Once distressed, I used poly to seal it.
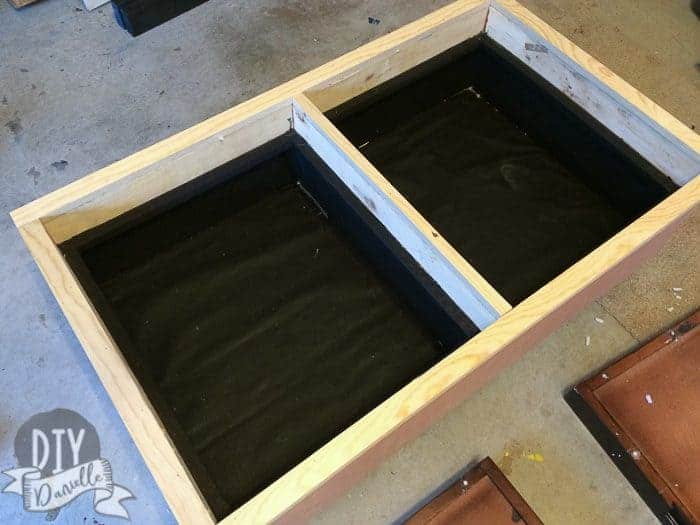
Adding the Liner
I wasn’t super careful so I got paint on the inside liner- which was pretty beat up anyways. I decided to just replace it. I actually put my new liner over it instead of removing the old liner, but I made sure to vacuum it out thoroughly first.
Just real quick, I’ll put my measurements here in case anyone has a similar piece.
I measured 2.5″ to wrap around the lip that was inside the chest.
Bottom was 24.5 x 21.5″, two sides were 6 x 24.5″ and 2 sides were 6 x 21.5″.
Cuts of fabric were (2) 25 x 22″, (4) 9 x 25″, (4) 9 x 22″.
What I did was sew my side pieces right sides together, then sewed the two ends together- this creates a big circle of fabric. I pinned that, right sides together, to the bottom fabric. Then I sewed around it all.
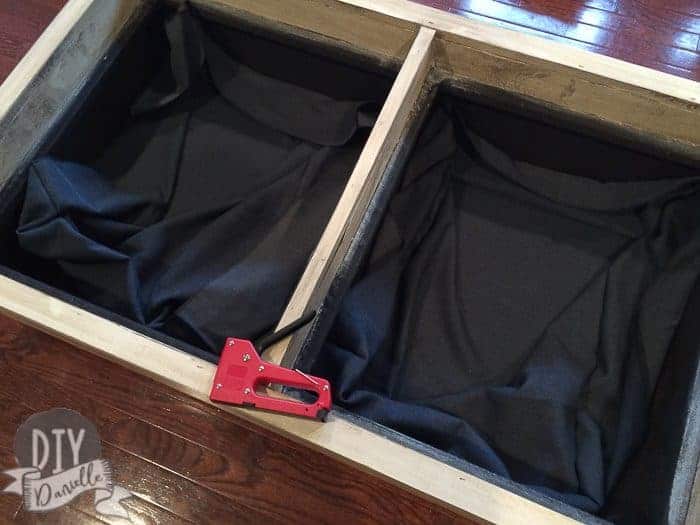
Once I made my liner, I just used my staple gun to put it into the toy chest.
Adding a Lego Plate
For the top of one side, I added a Lego plate. You just take the Lego plate, use some Gorilla glue for the back, and plop it down where you want it. I centered mine. There are lots of fun ideas to do with the tops of this- I’ll probably add on some at a later time.
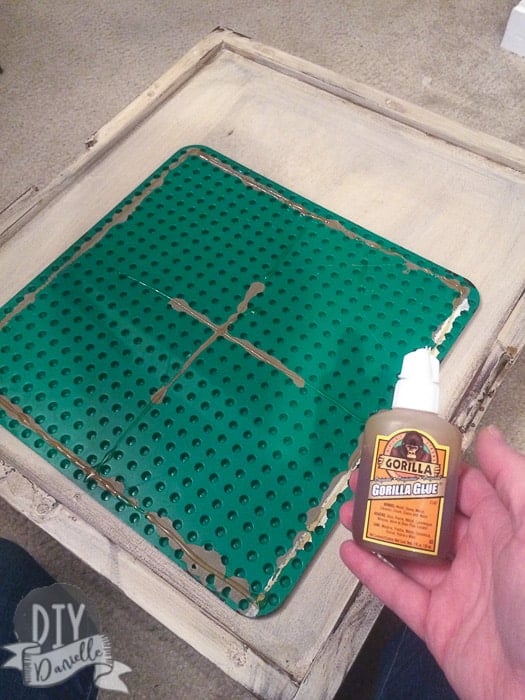
I did paint the Lego plate black with spray paint first.
Here it is completed.
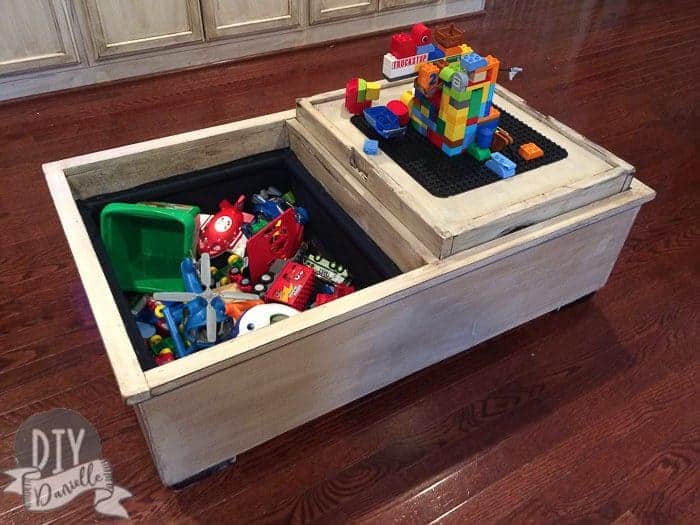
I didn’t take a picture with the Lego side flipped over, but if you flip it, it looks like a regular coffee table. My kids use this Lego side every. single. day. though so the other side doesn’t ever see the light.
Love furniture? Here are some other furniture projects we’ve done: Distressed Lego Desk | Easy Living Room Storage Cabinets | Built In Entertainment Center | Quick and Easy Drawer Stoppers | Gaming Table | DIY Rustic Outdoor Chairs
Please share and pin this post! Thanks!
wow, very impressive!
That looks awesome Danielle! You did a great job – and good idea stripping it back to wood. I love the lego table on the side too – brilliant.
so clever!! what a great idea!
I am not even kidding I have the same table destroyed by my chihuahua lol Final product is a beauty! 🙂
That's so funny! It must be the tasty leather 😉 Thanks! I hated to see it go to waste.
And does it not PAIN you to realize how much money they chewed?! Haha. Maaaan I stopped buying even remotely expensive furniture since cats/dogs/kids destroy everything. Yay thrift stores.
What a fun project!