

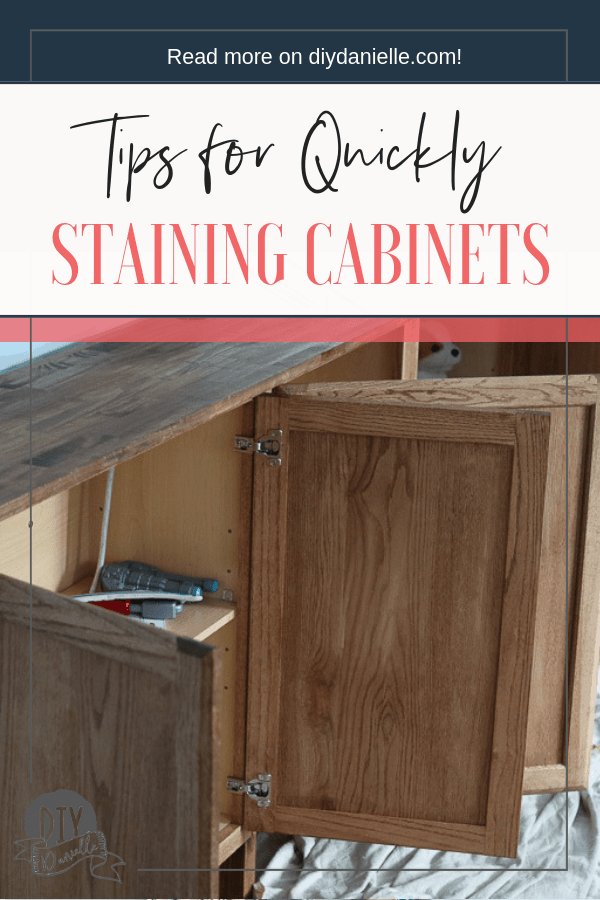
Learn the trick to staining kitchen or bathroom cabinets faster. These unfinished cabinets were completed with less dry time by staining them with the doors on.
This post may contain affiliate links. If you make a purchase using an affiliate link, I may receive a commission. This does not impact your price for the product. Thank you.
We installed a gorgeous built-in entertainment center with bookshelves at our old house and we’re missing them since we moved in November. Quite frankly, we don’t know what to do without the extra storage space. Our new family room is a bit smaller so the built-ins are smaller, but we’ve started working towards installing something similar at the new house.
Instead of painting then distressing the entertainment center this time, I decided to stain, dry brush, then poly it. This should be slightly less work. The only problem is that I’m REALLY short on time and I needed to get the stain on FAST. I didn’t have time to remove cabinet doors and let each side dry. So here’s what I did.
Here are my tips for staining cabinets quickly. I am using Minwax Red Mahogany.
Tip #1: Use disposable gloves. This keeps your hands from getting saturated in stain, saving you time for cleanup and it’s probably healthier for your body too. I find that stain does sometimes still sneak through, but it’s not nearly as bad.
Tip #2: Use clean, old socks. Buy your spouse a new set of socks and steal a pair of their old holey socks. They’re perfect for applying the stain. Just wear them on your hands over the gloves. You can toss the socks when you’re done- NO cleaning paint brushes and no feeling guilty about creating garbage, seeing you were able to repurpose socks that would have been thrown out anyways.
Tip #3: Stain the counter top first, making sure to pull it away from the wall if it’s not attached (mine will be attached later). This saves time so you don’t need to tape the wall. Make sure to get the underneath of the counter top too.
Tip #4: Use your fingers to help get into crevices when applying the stain.
Tip #5: As usual, when applying stain you need to go with the grain. Aka, wipe in the same direction that the wood design goes. For the frame on the front of my cabinets, the top and bottom parts are right to left, the left and right frame pieces are up and down, and the main front is up and down.
Tip #6: You’ll need to get behind the hinges. Normally, you would want to remove the doors to do this. Because we’re trying to save time, you want to take advantage of your sock. When you sock is dry-ish, squish it behind the door so you can grab one side of the sock on either side of the hinge. Now floss like you would floss your teeth. The sock should apply the stain to both the unseen edge of the door, as well as the area by the hinge. You can verify this visually before moving onto the next section. A thinner sock is helpful to make sure it can fit through the small gap.
Tip #7: Remove the shelves before you start and you won’t have to worry about getting stain on them. Whoops, I forgot this step.
Tip #8: You want to dip the tip of your sock (which is on your hand) in the stain, then squeeze your hand into a fist to get any excess stain out. Your stain should NOT be dripping from the sock. You don’t want splatters.
Tip #9: If you apply a thin enough coat of stain, you won’t need to return to wipe excess stain off. If you want a darker coat of stain though, you’ll want to apply two or more layers of stain.
Tip #10: Do not touch areas with dirty (stain on them) finger tips. Anything you touch will leave a stain shaped design if you aren’t careful. I stabilize the door to the cabinet by a small corner and a finger usually.
Tip #11: Leave the cabinet doors open to dry.
Overall, the sock gives you more freedom and dexterity to get in nooks and crannies without accidentally spilling/dripping stain.
Here’s a video of my process:
I hope this is helpful! Please pin this post- sharing is caring!
Hi, I’m having a hard time finding where you got these cabinets? Trying to figure the type of wood you’re staining on. Thanks!