Learn how to craft unique small gifts for hosts and roommates with this tutorial! Customize small burlap bags with Iron On for your next trip.
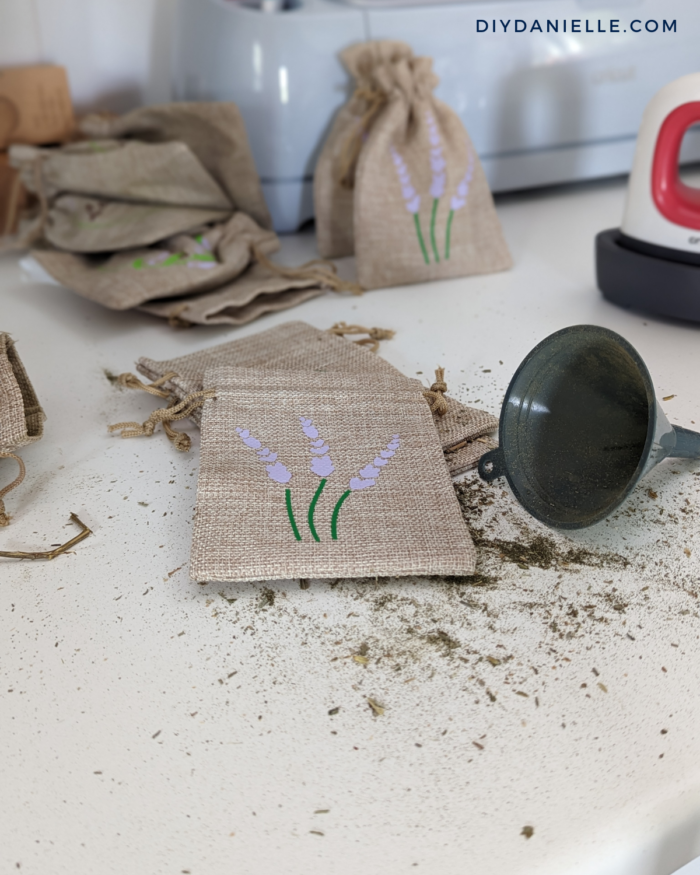
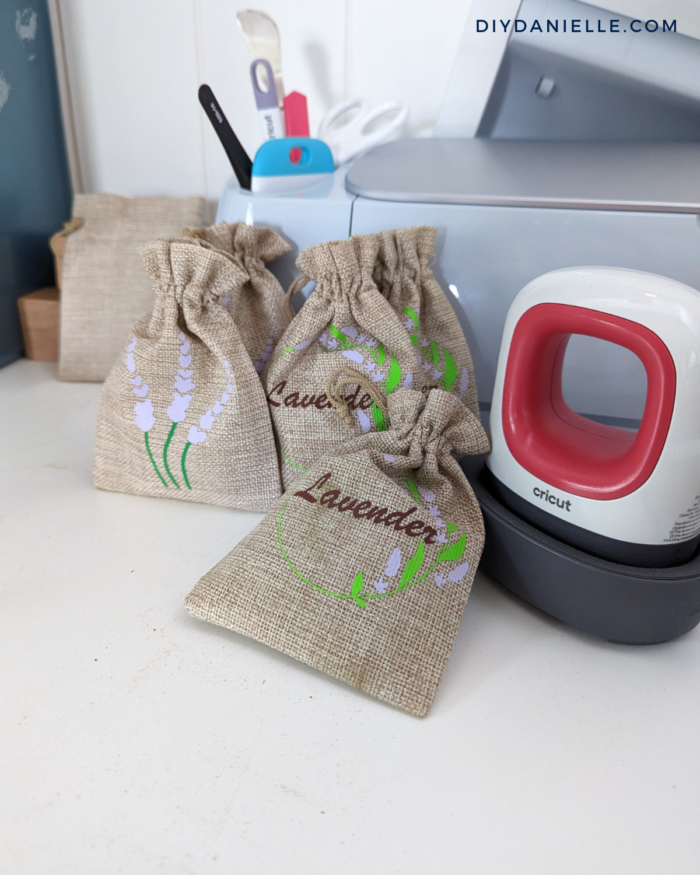
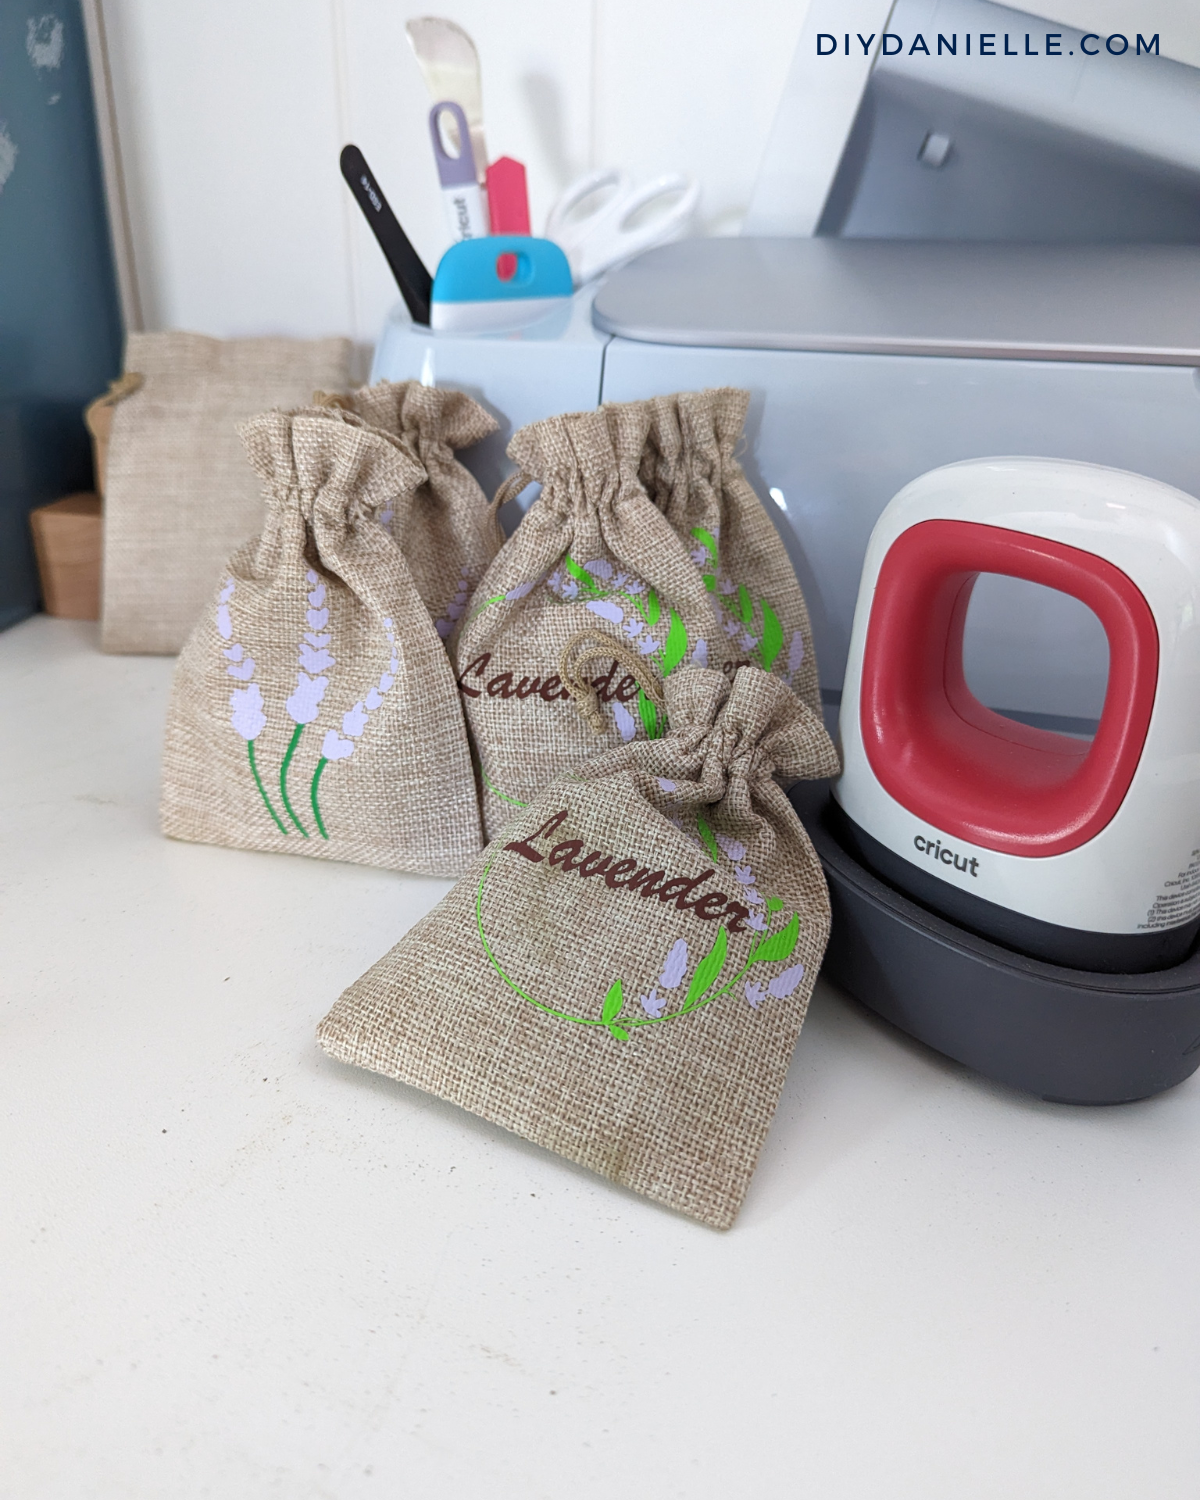
Recently, I traveled to the UK for ten days, which included a week at a local cottage in Northumberland with a lovely hostess. I wanted to bring a little something from home for both the hosts and my roommates who shared the cottage with me. We keep sheep and garden so I put together small burlap bags decorated with my Cricut Maker 3, the Cricut Mini Press, and Smart Iron On Vinyl. These bags held small gifts such as felted soap, lavender from my garden, and I also included some Old Bay Seasoning, a Maryland favorite.
Here is a tutorial on how to make the bags! If you want to make some of the other items, here are guides on felting soap (if you’d like to dry felt the soap too, here’s a cute Christmas tree soap tutorial), harvesting lavender, or making custom lavender sachets (without the burlap bag).
Small DIY Thank You Gifts in Burlap Bags
Design Space Project: https://design.cricut.com/landing/project-detail/64889c879d31658014cd0879
Supplies
- Cricut Maker 3: https://cricut.pxf.io/GjNaNm
- Cricut Mini Press: https://cricut.pxf.io/1r1g5m
- Small Burlap Bags: https://amzn.to/3J2C7Em
- Muslin Bags: https://amzn.to/43TnNpT
- Smart Iron On Vinyl
- Smart Iron On Vinyl, Green: https://cricut.pxf.io/JrN5ke
- Smart Iron On Vinyl, Pink: https://cricut.pxf.io/JrN5ke
- Smart Iron On Vinyl, Black: https://cricut.pxf.io/ZQXGrk
Use the Discount Code DIYDANIELLE on cricut.com for 10% off any cutting machine or heatpress (no minimum). Excludes: materials/accessories/mystery boxes/etc. Applies to US/CA only, code expires 12/31/23.
I used some scrap light purple iron on for my project because Cricut didn’t have light purple in the Smart Iron On that I purchased, but they apparently have HOLOGRAHIC purple Smart Iron On which would be amazing: https://cricut.pxf.io/Wq4e4X
I want to make a couple of notes on the supply choices.
- I prefer to use Smart Iron On Vinyl… I think it might cost a bit more than normal iron on, but I don’t need to use a mat for it. This saves me money on mats because I wear them out FAST. I also like that it saves me time. I recently helped make 16 basketball jerseys for a school event with normal iron on and it SUCKED. I had to load something like 16+ mats worth with blue iron on. If I’d had Smart Iron On, this would have taken me a LOT less time. For small projects like this, it’s probably better to use a mat because you can use smaller scraps. But I made 5 of each so I was able to use a thin horizontal strip on many of the colors, allowing me to get the most bang for my buck.
- The MiniPress is useful for small designs. I have a larger EasyPress for shirts and such, but this is useful for small iron-on cuts. In the photos and video, you’ll notice that I am able to press directly on the burlap bag without protecting the surface underneath. If I’d used my EasyPress, I would have needed a mat underneath or else risked burning the countertop if the press came into contact with it. It’s small and doesn’t take up much space. It’s affordable. It’s convenient.
- These burlap bags are AWESOME. They’re very well made. However, I had a bunch of small muslin bags and because my lavenders was a bit too ground up, I want to double bag to avoid lavender from leaking out. The muslin bags aren’t particularly useful on their own, however.
- The BrightPad might have come in handy here for weeding. It’s a light box that helps light up your design from underneath so it’s easier to weed. In the video, you’ll notice that I used it with the light off. That is because I couldn’t find my cord. I really need to clean my she shed.
- I had my business logo converted into an SVG. What. A. Pain. I ended up simplifying the design for this purpose because it simply wasn’t easy enough to weed and apply when the design was on such a small item. I tried it on some tool belts (with a slightly bigger logo design) and it was an absolute nightmare).
Tutorial
Step 1: Design the images that you want on your bag and resize them so they’ll fit on your bag. The max height is 3.5″ and the max width is 2.5″.
Step 2: Cut your iron on vinyl.
Step 3: Weed your iron on vinyl.
Step 4: Apply your iron on vinyl. This is a multi step process. First, preheat the area on your bag where you will be applying your design. Place the first part of your design on top. If you use the same design that I did, you need to layer the iron-on vinyl. This means that you’re thinking through the order in which you apply each color of iron on. In my case, I applied my green stems, then I applied the purple flowers. For my business design, I applied the green circle and text, then the black circle on top, and last the pink flower in the middle.
Apply your iron-on to your burlap bags using the medium setting on your Mini Press for 30 seconds. Then flip the bag and press the back of the design.
Tip: If you’ve already done one side of the bag, you MUST cover the back side so you don’t melt your iron on. Touching the heat press directly to iron on vinyl without a barrier between can melt it.
Remove the clear film from your design once pressed properly.
Step 5: Fill bags with lavender, soap, or other items!
Step 6: Add tag if desired.
YouTube Tutorial
Ideas for Your Small Burlap Bags
There are a number of things you could put inside these small burlap bags that would make great gifts.
- Lavender or other herbs: With lavender or other herbs inside, you could gift these as sachets which are placed inside linen drawers to help keep clothing fresh. They’re also excellent for inside luggage while you’re traveling.
- Felted Soap: Felted (or regular) soap fits well inside these bags and it makes a great gift because it’s useful, pretty, and
- Spices from Your Area: I gifted my roommates some Old Bay Seasoning which is a local favorite in Maryland. I wish it would have fit inside the bags, but I bought a tin for each instead. If I’d had time to go shopping, I would have tried to find a smaller container that could have fit in the bags!
- Vanilla Extract (or other types of extract): A small container of vanilla extract should fit inside one of these bags!
- Essential Oils
- Dried Flowers
- Bath Salts
- Small Canned Jars of Jam
- Small container of lavender scented bubbles for kids.
I think it would be fun to add a tag to your gift with some information. I wanted to add a tag to my sachets that said “Lavender is thought to help calm the mind and help improve sleep. Add sachets to your drawers to keep linens fresh. This Lavender was harvested and dried by Danielle in Maryland,” but my plan to gift lavender sachets derailed because it leaked through the burlap bags a bit. That’s why I opted to double bag them after I got home. They’ll be gifts for another time, I suppose!
Please share and pin this post! You can also post your project and tag the DIYDanielle team on Instagram @doityourselfdanielle!