How to make felted soap using both dry and wet felting techniques. This is a great introduction to felting soap and an easy project!
I have two sheep and I LOVE Love love them so much. Between the goats and the sheep, I think the sheep might be my favorites, although they certainly each have their own personalities and things that I love about them! The problem with sheep- and it’s actually a good thing, if you know what to do with it- is that they produce a LOT of wool each year.
This post may contain affiliate links which may earn me commissions should you click through them and take certain actions. As an affiliate for Amazon, Cricut, xTool, Home Depot, and other sites, I earn from qualifying purchases. Please DIY carefully. View my full legal disclosures here.
The majority of my content is generated by me, as are 99% of the photos and videos, but I utilize technology for titles, descriptions, video editing out all of my ums, and occasionally for text overlay on images.
Please read the whole post so you don’t miss any important information!
For their comfort, my sheep are sheared twice per year, and that starts to add up fast! While I could weave wool fabric, spin the wool into yarn, and knit or crochet, I’m not particularly skilled at spinning, nor do I have the money or space for spinning tools and a loom. It’s been my GOAL to find an easy craft to do with the wool from my sheep- and I discovered felting! I learned to wet and dry felt the wool and it’s a lot of fun.
But felted soap is my favorite- it feels useful. Unlike decorative wool projects, I feel confident that soap will get used if I give it as a gift. And after the soap underneath the wool is used, the wool can be composted or used to scrub pots and pans. It’s ecofriendly.
These felted soaps are a great alternative to using the plastic “luffas” that you can buy that harbor bacteria and get icky fast.
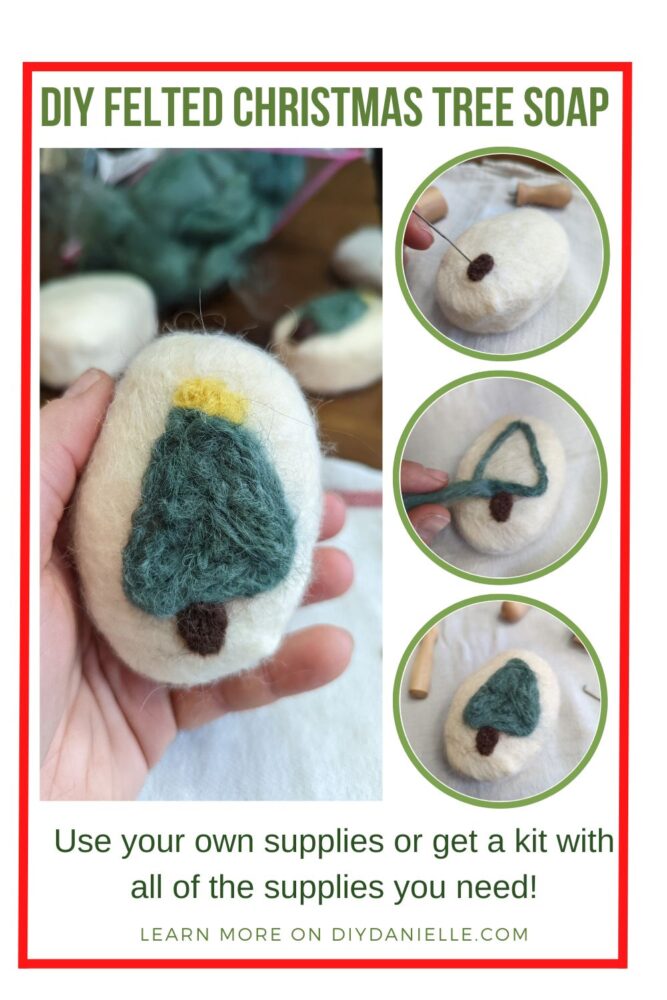
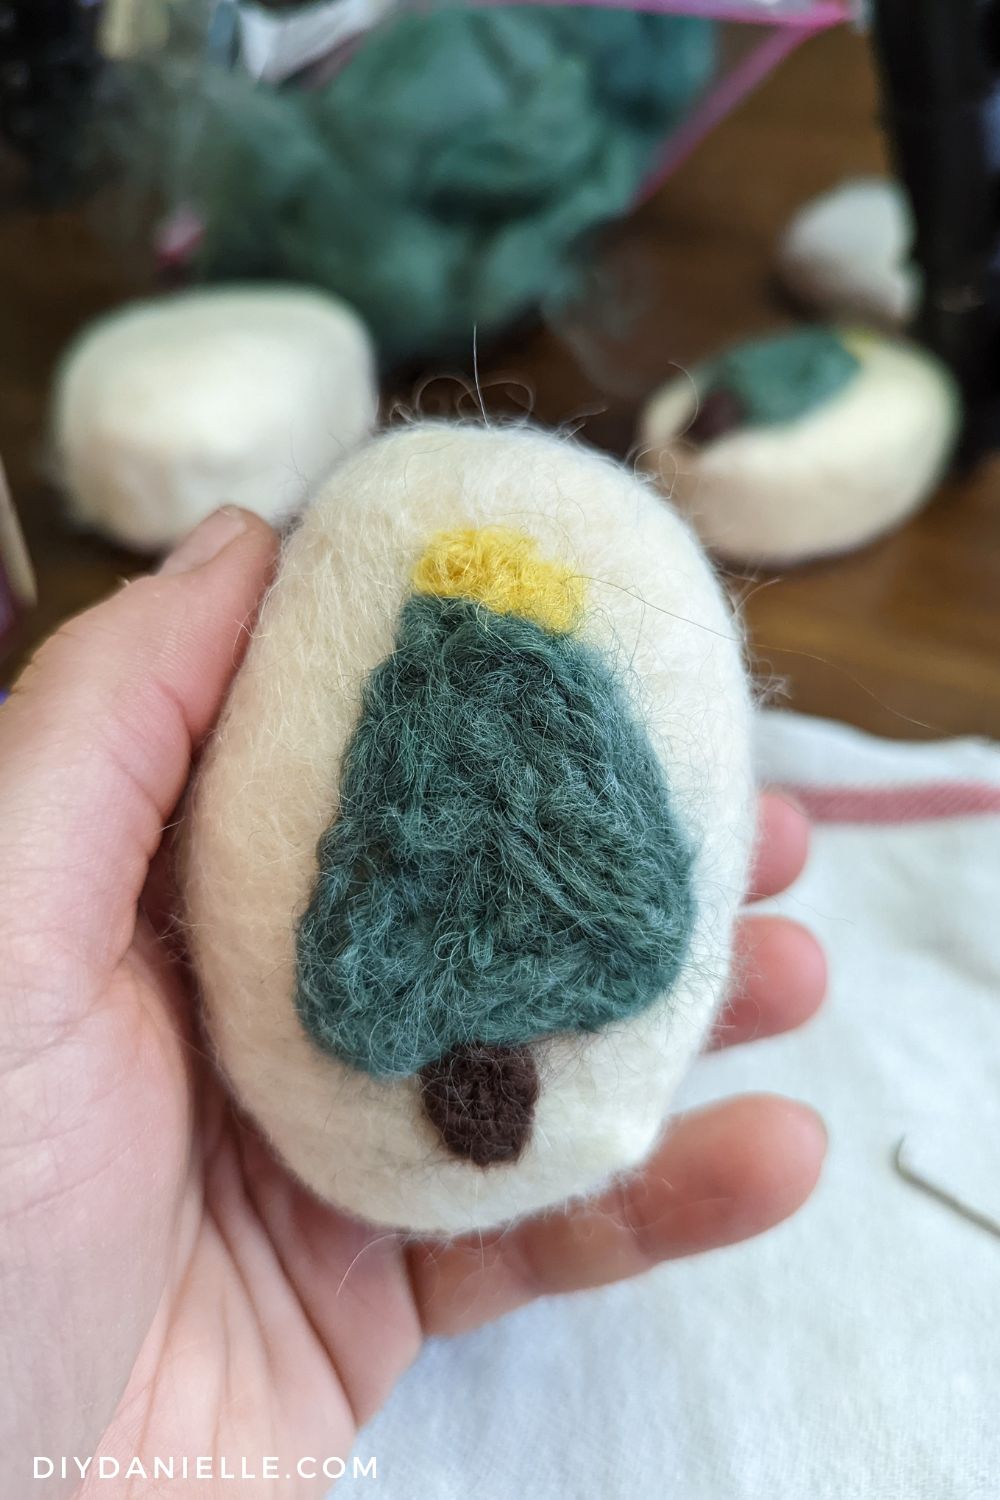
Making felted soap is quite easy! I have a tutorial on how to wet felt soap, but this tutorial will specifically cover how to start from scratch with a piece of soap and wool roving, and turn it into felted soap with a Christmas tree design.
DIY Felted Soap with Christmas Tree Design
Supplies
This craft uses a LOT of little supplies that sort of add up quickly- if you just want to try the craft once to see if you like it, consider supporting my farm and buying a felted soap making kit! This Christmas Tree Felted Soap Kit has everything you need to make one bar! Each kit comes with 2 needles, an instruction sheet, wool roving in natural, green, brown, and yellow, a bar of soap, an organza bag, and a Ziplock bag. My hope is that this makes it easier for people to try a new craft without ending up with enough supplies for a small army.
Otherwise, feel free to individually purchase the items below:
- Needle Felting Kit
- 1 Bar of soap
- Pantyhose or organza bags
- Wool Roving:
- Plastic Ziplock bag (freezer bags)
Here’s the video showing how to do it, but keep scrolling for a tutorial:
Step 1: Spritz your soap with warm water. Wrap your soap in thin layers of the natural colored roving, spritzing occasionally to help the roving lay flat. Cover completely. I cover the soap lengthwise, then widthwise. Try to avoid lumps.
Step 2: Place the wrapped bar inside the mesh bag. Place the mesh bag with the bar inside the Ziplock bag, add HOT water, then seal, trying to get any air out of the bag in the process.
Massage the soap inside the bag for about 5-15 minutes, making sure to get all around the soap. The massaging process helps the wool felt together around the soap.
Step 3: Remove from the Ziplock bag, open the mesh bag, and see if the wool has felted to your desired amount. If not, replace and repeat process. Once ready, remove the felted soap from the bags. Rinse soap with cold water. Leave the soap to dry OR you can begin the “dry” felting process while the soap is still wet. Some people prefer one way or the other.
Step 4: Once dry, you will begin DRY FELTING your design onto the soap. To dry felt, you will poke your felting needle through the colored roving into the natural colored roving that’s covering the soap. You want to angle the needle so it does NOT hit the soap itself. Make sure your fingers aren’t in the way! You make lots of tiny pokes through the colored roving into the natural roving, following the design you wish.
I switch up what I felt on first- sometimes I’ll felt on the tree shape first, then fill in the green in the middle. Then I add the trunk and star. But you can start with the trunk and work your way up too!
Please share and pin this post! You can also post your project and tag the DIYDanielle team on Instagram @doityourselfdanielle!