
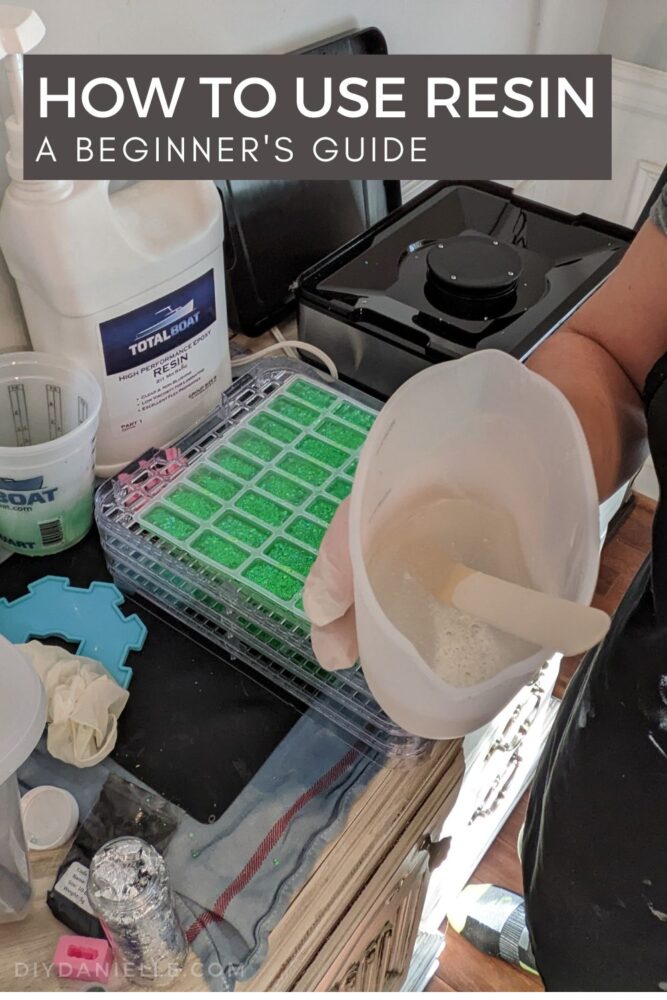
Resin is a fun to craft with, but a lot can go wrong if you don’t have the right supplies and knowledge. Here’s a beginner’s guide to resin!
I have recently begun exploring crafting with resin, and it is SO much fun! It’s easy to do once you have the basic supplies and understand how it works. If you try to use it without reading the instructions though? You can ruin your project. Here’s a guide to resin that will explain how to use it and what supplies you need to get started.
What is resin?
When referring to resin in crafts, we are usually talking about epoxy resin. Epoxy resin is made of two separate liquids, the resin, and the hardener, that need to be mixed to form a hard, solid material. The resulting clear glossy surface has become very popular in the art world and is used to make a variety of objects including jewelry, boards, plates, coasters, and many more.
This post may contain affiliate links which may earn me commissions should you click through them and take certain actions. As an affiliate for Amazon, Cricut, xTool, Home Depot, and other sites, I earn from qualifying purchases. Please DIY carefully. View my full legal disclosures here.
The majority of my content is generated by me, as are 99% of the photos and videos, but I utilize technology for titles, descriptions, video editing out all of my ums, and occasionally for text overlay on images.
Please read the whole post so you don’t miss any important information!
Choosing the Type of Resin
Epoxy resin is available in different ratios and qualities. Depending on the type of craft you want to create you can choose the resin accordingly. There are also separate resins like deep pour resin and surface pour resin that can be used depending on how deep they are going to be poured. In general, art resin that has a ratio of 1:1 is the best choice for beginners. Not only is easier to use with its longer working time, but it is also safer to use at home than most other resins.
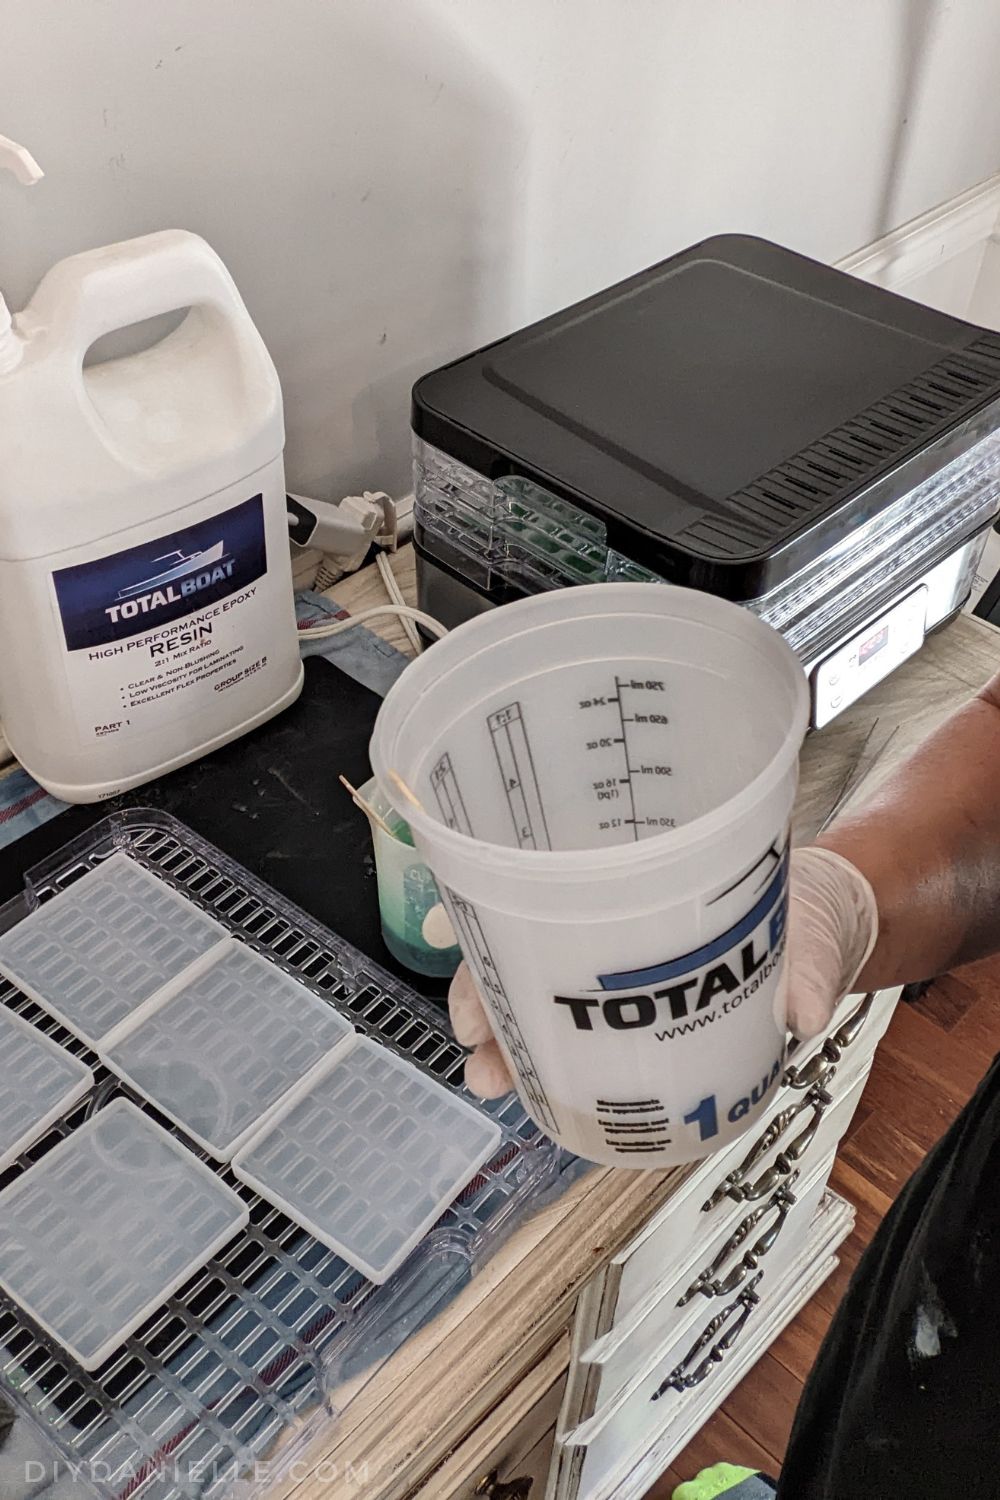
I use Total Boat’s Clear High Performance Epoxy Kit for a lot of my small craft projects as I like that it dries clear. There’s three types of hardeners for this kit: Fast, Medium, and Slow Hardener.
I use medium. The speeds impact how soon the resin is fully cured, the maximum pour depth, etc. It also impacts how soon you can do a second pour after the first. This is a good guide from Total Boat on the three types of hardeners they offer for this product.
ALWAYS read the instructions for your resin because each type varies. Resin is a bit tricky and there’s special kinds for crafts, table tops, and deep pours.
How to Use Resin
It might be a little intimidating to start working with resin since there are so many materials we see being used for resin crafts. While some of them are necessities and even nice-to-haves, some of them are also just personal preferences.
So, let’s break down these into different categories.
Supplies for Resin Crafts
Essentials
• Resin and hardener
• Cups for mixing and pouring: Silicone measuring cups are reusable
• Popsicle or silicone sticks for stirring and spreading
• Protective gear (masks, gloves, goggles, apron)
• Toothpicks
Optional
• Masking tape
• Measuring scale
• Table mat: I use reusable silicone mats
• Dust cover
• Sandpaper or sanding surface: I like this resin sandpaper kit.
• Heat gun
Resin Additions
• Colors, inks, or pigments: I’ve got this dye set.
• Glitter
• Beads
• Stickers
• Dried flowers
• Gold/silver flakes
• Shells
• Charms
I found a resin starter kit with a storage box that is SO perfect for getting started. It has a variety of products including: dried flowers, mica powder, shells, glitter, sequins, butterfly stickers, gears, stones, foil, measuring and dispensing cups, straws, stirring sticks, and more. This is a GREAT set if you’re new to resin and want to try a bunch of things out.
Materials you might need depending on the project
• Molds of different sizes
• Canvas
• Accessory bases (e.g. hairclip base, earring base, pop socket base, etc.)
• Casting surface (if not using molds to cast)
Fun Molds to Buy
These are some of the molds I’ve purchased. There are good options if you want to do a variety of projects: I like practical projects more than decorative ones so that’s been my focus. Leave me a comment if you’ve seen any resin molds for practical projects!
- Mexican Dominoes Silicone Set: It only comes with one mold for the train and you need 8-9 so I bought an extra 4-pk of the train molds so I could make more of them at once. There are also regular Domino sets.
- I freaking LOVE this mold for making little resin containers with a lid. These would be perfect for gifts- ie. putting a bunch of wrapped candy inside. They are NOT food-safe though to put pudding in or anything where the food comes into direct contact with the dried resin. It’d be fun for using for storing buttons, safety pins and other craft items too!
- 12 piece coaster mold set: round and square coasters
- 8-pk of resin molds: 2 of the molds are ashtrays which don’t seem that practical as we don’t smoke, but I suppose they could be used for holding water and a paint brush, or as a soap holder. I liked that the set included 4 molds for necklace pendants, and a round and square mold for a small candle holder.
- 6-pk of decorative resin molds: These molds are really neat and probably intended for more decorative projects. The sphere mold is neat, but I’d probably save that to make bath bombs or hot cocoa bombs. Or you could make a resin sphere for a Labyrinth themed baby photo shoot!
Disposable Products vs. Silicone
I use a lot of silicone products with my resin instead of using disposable products. For example, silicone measuring cups are perfect to use because once you’re done making your resin craft, you can let the excess resin in the cup dry and then peel it off and dispose of the dried resin. This allows you to save money and reuse the cup for more crafts. These reusable products should ONLY be reused for resin projects so I keep all of mine together in one labeled container.
I really like thin silicone mats when crafting with resin because they won’t cause issues with the product being level and they’re easy to cleanup and reuse.
The one disposable thing that I use is gloves. I like to be able to throw away the gloves when I’m done to make cleanup easier. It’s easier to flip them inside out while removing them, then toss them in the garbage. I keep a small bag nearby to toss any disposable products, paper towels, or dried resin bits.
Working with Resin
Preparation
It is very important to have a clean, covered surface when working with resin. A dusty surface might ruin the smooth finish of the resin surface and any resin spill could ruin your work-surface material. You can use silicone mats or a simple plastic covering to cover your workspace. While it is not essential, having a warm surface will significantly create a better surface on the final product and also reduce the curing time.
Protection
Never skip wearing the protective gear while working with epoxy resin, especially at home. The fumes released during mixing the two liquids are toxic so make sure to wear goggles, masks, gloves, and other protective gears even if you are doing a simple touch-up.
A quality respirator mask is important to keep your lungs safe.
Additionally, if possible, try to create a space away from your regular working or living space to set up the materials. Since the resin casting and curing process take a long time you will need a dedicated space for it, but due to its fumes, it is best to not let it sit around in a space where you’ll be eating or even just staying around for a long time.
I frequently work on my covered front porch because it provides plenty of ventilation.
How Much Resin Should I Use?
If you’re not sure how much resin to use for a project, you can use this handy calculator from Total Boat to figure that out.
The main thing to remember is that you can only pour so much resin at once before you run into the issue of it solidifying too quickly. For example, when I make my Mexican Domino Sets, it’s hard to pour all of the resin and place the gears/shells/etc for all of the pieces at once. Where my first layer of resin is clear, I simply mix smaller amounts of the clear resin, pour, set the items in the resin, then use my heat gun to pop the bubbles. Then I repeat this process for more of the silicone trays. For the second layer of resin which is colored, I mix the batch for the entire set of Dominoes and pour at once because I want to make sure the colors all match. The second layer doesn’t take as long to pour because I don’t need to add any items in the resin for the bottom of the Dominoes. I’ll discuss this more in my post about making Resin Dominoes.
Mixing
Depending on the ratio of your resin, take the appropriate amount of resin and hardener in separate cups. If using 1:1 resin, you would be taking the same amount of resin and hardener. You could either measure the portions by volume using mixing cups, or you could use a weighing scale to measure them by weight.
Once both the cups are ready, mix these two portions together with a silicone or popsicle stick. Stir until the mixture is no longer streaky and looks clear. MAKE SURE you mix for the full two minutes (or whatever length of time your resin brand specifies).
Some products are mixed 2:1 or have another ratio. Companies like Total Boat have special pumps that dispense the ratio properly. For example, the mix might be 2:1 but the “2” is dispensed in one pump with their special product pumps. Just make sure you don’t put the pumps on the incorrect container; Total Boat color coordinates their pumps with their resin and hardener to make this easier.
Always make sure to read the instructions on the resin packaging since different resins might have specific timings for mixing, working, and curing.
Coloring
If you want to use any add-ins like colors, glitters, beads, or anything similar, mix it in with the resin mixture.
For colors, different forms will create different effects in the resin. Liquid pigments will give color to the resin and maintain a clear look, while alcohol inks are more likely to create a marbled effect. Mica powders might be preferred if you don’t want the different colors to mix together too much, but always wear a mask when working with this fine powder.
Pouring
Once the mixture is thoroughly stirred, pour it onto your desired surface like a mold. Use the stick to guide the resin into the mold so that there isn’t too much of an overflow. Most epoxy resin will allow you about 30 mins to work with it so make sure to add anything you want to add to it within this time.
Bubbles
If any bubbles form at this stage, use a toothpick or a heat gun to pop them and create a smooth surface. I find the heat gun works a lot better, and that the toothpick can do some damage if you try using it to pop bubbles when the resin has already started to harden.
I also have tried spritzing the resin with isopropyl alcohol which seems to work well too. Alcohol dries quickly so it doesn’t seem to interfere with the resin.
Curing
Once you are done pouring the resin and adding anything needed, now is the time to set it aside and allow it to cure.
You can find the best curing time for your resin written on its packaging. Usually, the epoxy resin cures within 24 hours but depending on the thickness of the casting and type of resin, the time might vary a bit. The curing time might be greater in colder temperatures. If you want to work with several layers repeat the pouring and curing process a couple of times, adding an additional layer at each stage.
Final product
When the resin has completely cured, remove it from the mold if you used one. If there are any rough surfaces you could slightly sand that portion to make it smoother. Sanding with a larger grit might make the clear resin opaque, so make sure to sand in a way that does not affect the look of the final product too much.
I purchased a kit for sanding resin. It includes some high grit sandpaper that you might not have on hand. You may find it cheaper to purchase the high grit sandpaper separately, but I thought the kit was a nice way to get all of the sandpaper I needed without purchasing them all in individual packs.
Trial and Error
Resin crafts are all about experiencing different ways of working with it. The more you work with this material the more you will know what works and what doesn’t. Since it is affected by conditions like temperature, resin quality, proportions, and many others, do not worry too much if there are any slight problems on your first try.
Cleanup
I let excess resin dry in the silicone containers or on the silicone mats. After they dry, I can usually peel the rest of the silicone off. Anything left behind can be wiped clean with baby wipes.
Please share and pin this post! You can also post your project and tag the DIYDanielle team on Instagram @doityourselfdanielle!
References
I want to have a keychain made using a beaded baby bracelet. Would you be willing to do that for me. I’ll pay you of course. If you are interested I’ll send you a picture of the bracelet. It’s about one inch around. Depth is the depth of little beads.