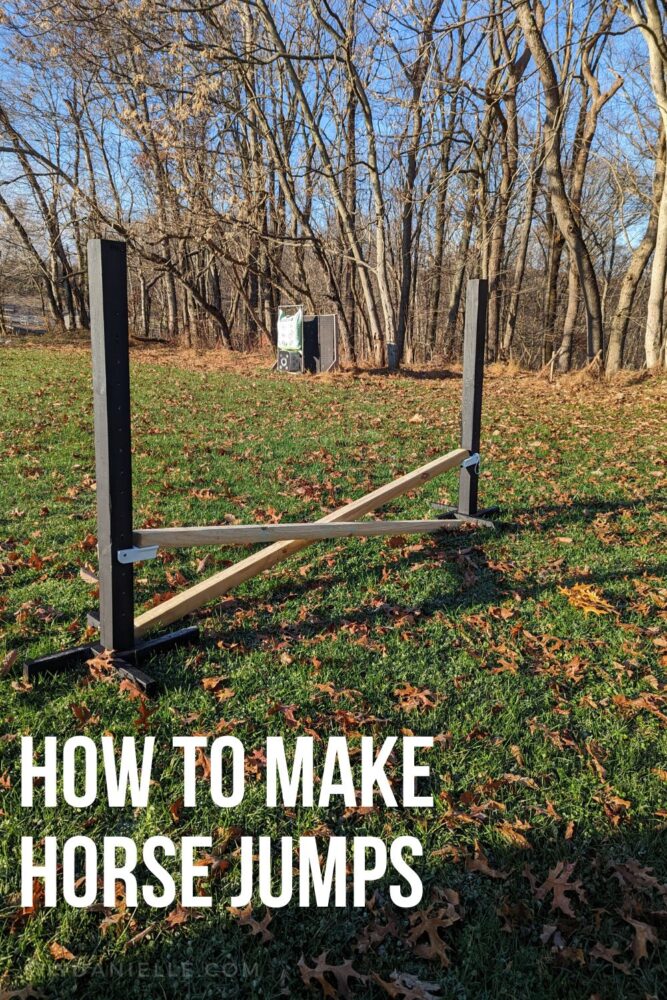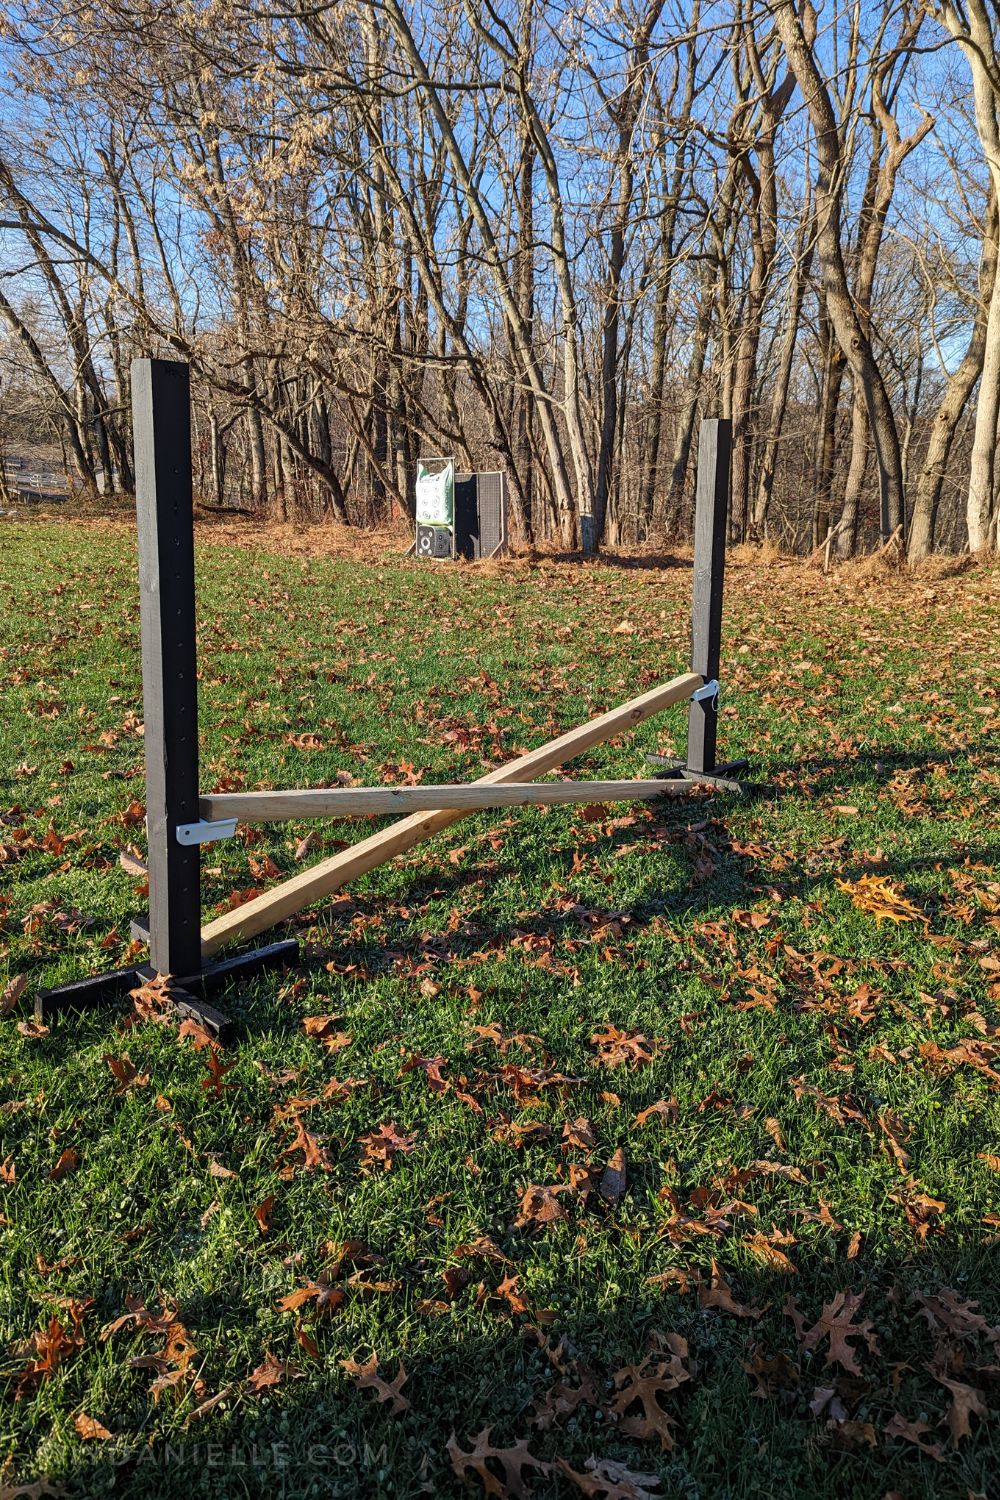
How to make TWO quick and easy jump standards for jumping your horses using a 10′ 4×4 and scrap 2x4s! These were painted to match my barn.
I used to LOVE jumping, but my horse, up until recently, didn’t really know how. I’ve been meaning to make these horse jumps for a while, but just hadn’t prioritized it because she thinks walking over ground poles is too much work. After sending her away for training for two months, she knows what she’s doing though so I was finally ready to get to work on these! Spoilers: She still thinks walking over them is too much work.
This post may contain affiliate links which may earn me commissions should you click through them and take certain actions. As an affiliate for Amazon, Cricut, xTool, Home Depot, and other sites, I earn from qualifying purchases. Please DIY carefully. View my full legal disclosures here.
The majority of my content is generated by me, as are 99% of the photos and videos, but I utilize technology for titles, descriptions, video editing out all of my ums, and occasionally for text overlay on images.
Please read the whole post so you don’t miss any important information!
While buying standards would obviously be easier, these jump standards run over $350 AND most of the colors are out of stock!
DIY Horse Jumps
I have far too many woodworking supplies laying around so I built these with supplies that I already had on hand. The only thing I needed to purchase was the jump cups. Note that you want 10′ 4x4s… this allows you to get 2 posts from one 4×4. If you get 8′ 4x4s, you’ll have scraps leftover.
- Plastic jump cups or metal jump cups: I bought plastic. I am not sure if there is a benefit to one vs. the other.
- 2″ or 3″ 10′ Length of PVC pipe ($18 vs $38 currently) OR 8′ Landscape Timbers
- 10′ 4×4 (pressure treated)
- 2×4s (I used scraps)
- Drill press or Kreg Drilling Guide: We have a drill press but it wasn’t big enough to work with the 4×4
- Exterior screws
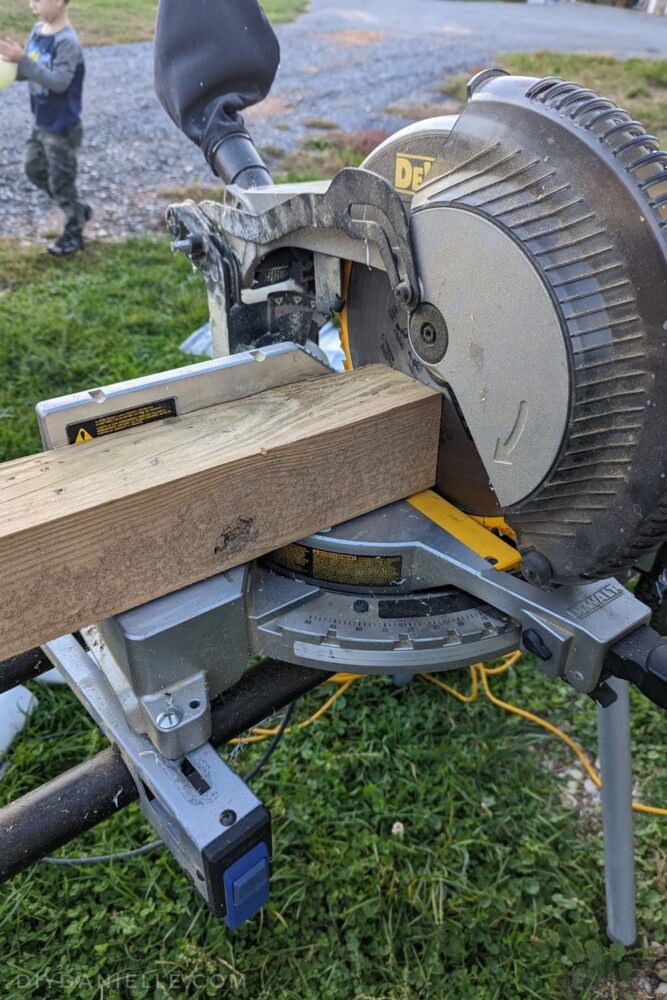
Step 1: Mark 5′ on your 10′ 4×4 and cut at the 5′ mark. This gives you two posts for two standards.
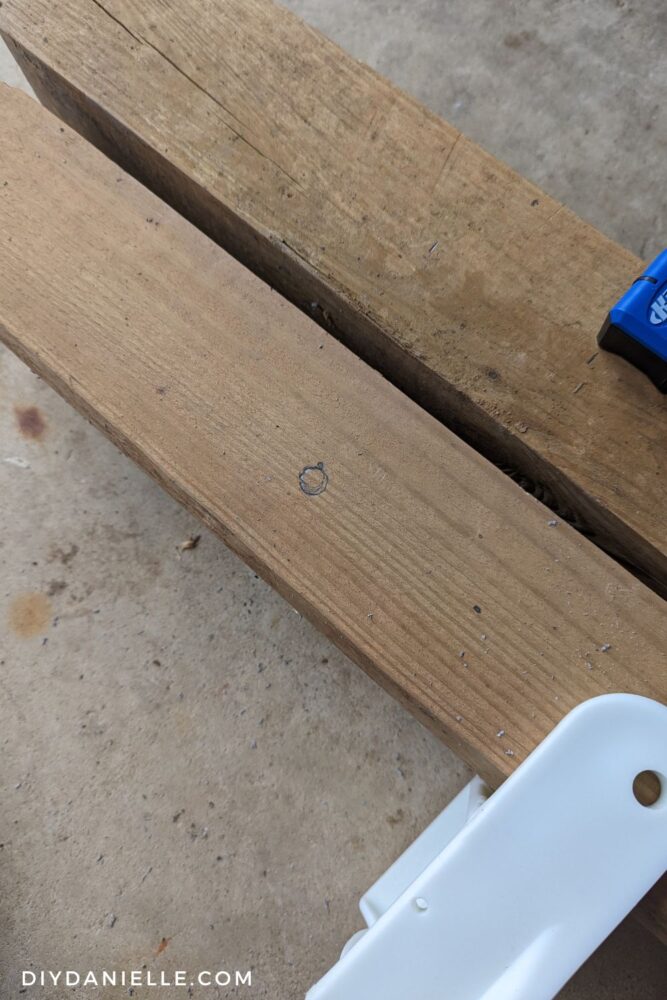
Step 2: Get your measuring tape and mark 9″ from the bottom, then mark every 3″ until you get to the max height you want. These are LOOSELY marking where you need to drill your holes. BUT DO NOT DRILL THEM YET!
Step 3: Take your jump cups and hold the FLUSH to the 4×4. Make sure they’re straight and then mark your TRUE drill hole spot at the same heights… the only thing impacted is how far into the 4×4 you drill.
You can see below that I made tiny dots for Step 2, but big round circles for Step 3.
Step 4: Drill your first hole with a drill press or the Kreg Drilling Guide. These tools help you make a STRAIGHT hole. Otherwise the hole may be crooked and your peg won’t fit through. A drill press would have been nice here, not going to lie. Mine couldn’t deal with the depth of the 4×4 though.
Test to make sure the jump cup will install on that first hole. If it does, you’re probably good to drill the rest of your holes.
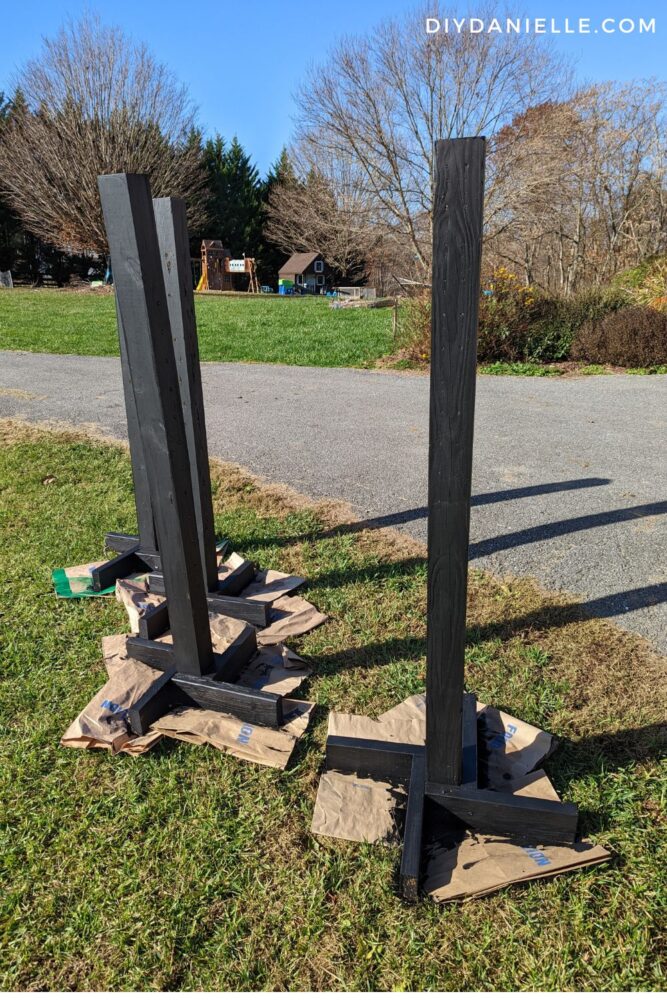
Step 5: Cut 2x4s to use for the base of your standard. I used a bunch of scraps and they were all roughly 14-16″ long. This seemed to be a good length. You’ll need four cuts per standard.
Step 6: Attach your first 2×4 to the bottom of your 4×4 post. Work your way around the post, adding each 2×4 until all four are attached (it’ll be easier if you watch the video to see how I did this).

Where the wood is pressure treated, it would probably be fine without paint or any finishing, BUT if you’re going to go through all the effort of making them, then make them BEAUTIFUL!
Step 6: Prime and paint your standards, if desired. I had black barn paint which doesn’t require primer, leftover from the barn that I purchased. They gave me the extra bins and it was nice to use the paint before it went bad!
I also bought some plastic jump blocks because I wanted additional options when I’m working with clients for equine assisted psychotherapy. But the standards are just so much prettier.

Please share and pin this post! You can also post your project and tag the DIYDanielle team on Instagram @doityourselfdanielle!