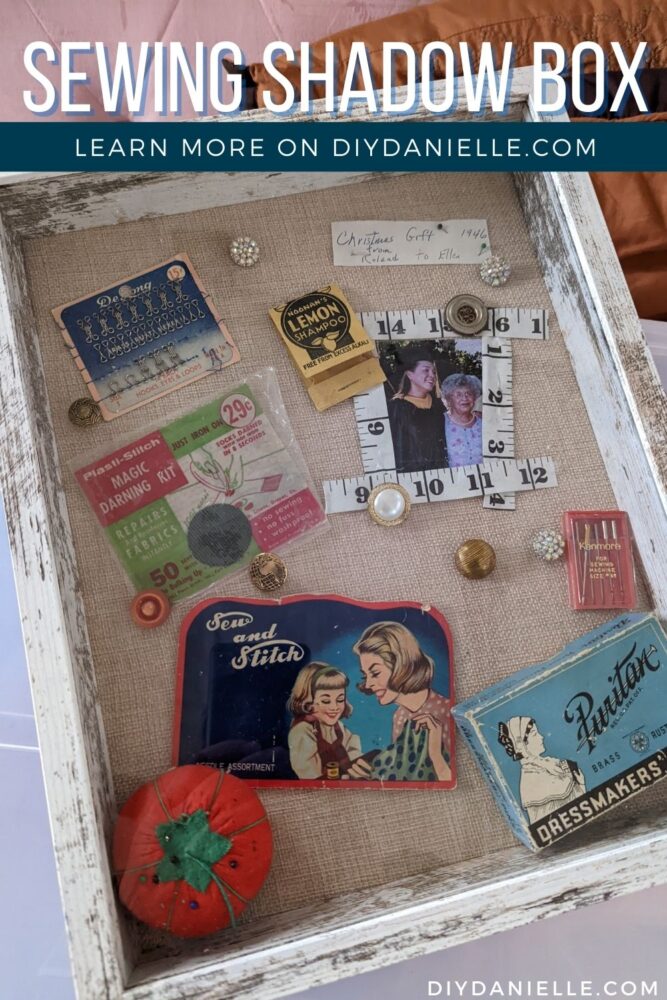
How to create a shadow box with antique sewing supplies to decorate a she shed, sewing room, or other craft space.
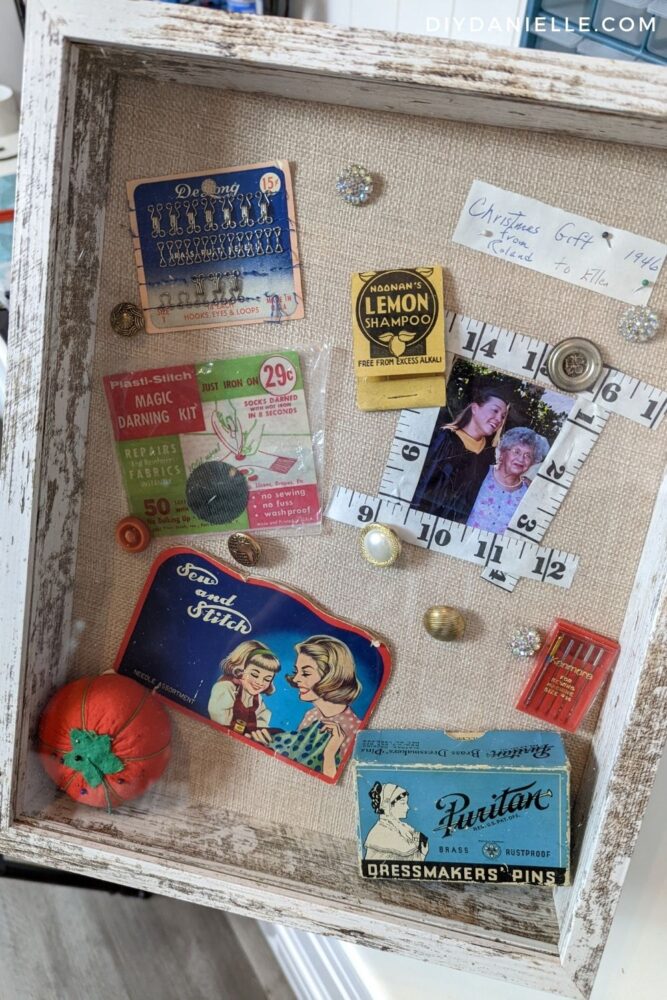
Many years ago my mom sent me all of my grandma’s old sewing supplies. My grandma has a special place in my heart because she lived with us for much of my childhood. She was a very practical woman, but steadfast and reliable. When she passed away from breast cancer, it broke my heart. While the supplies were largely not usable— did you know thread expires!? It actually degrades with time and is more likely to snap. As I couldn’t use a lot of the supplies, or had duplicates, I decided to make a shadow box with her antique sewing supplies in it. I LOVE how it came out and it’s the perfect décor for my she shed.
This post may contain affiliate links which may earn me commissions should you click through them and take certain actions. As an affiliate for Amazon, Cricut, xTool, Home Depot, and other sites, I earn from qualifying purchases. Please DIY carefully. View my full legal disclosures here.
The majority of my content is generated by me, as are 99% of the photos and videos, but I utilize technology for titles, descriptions, video editing out all of my ums, and occasionally for text overlay on images.
Please read the whole post so you don’t miss any important information!
DIY Sewing Supplies Shadow Box
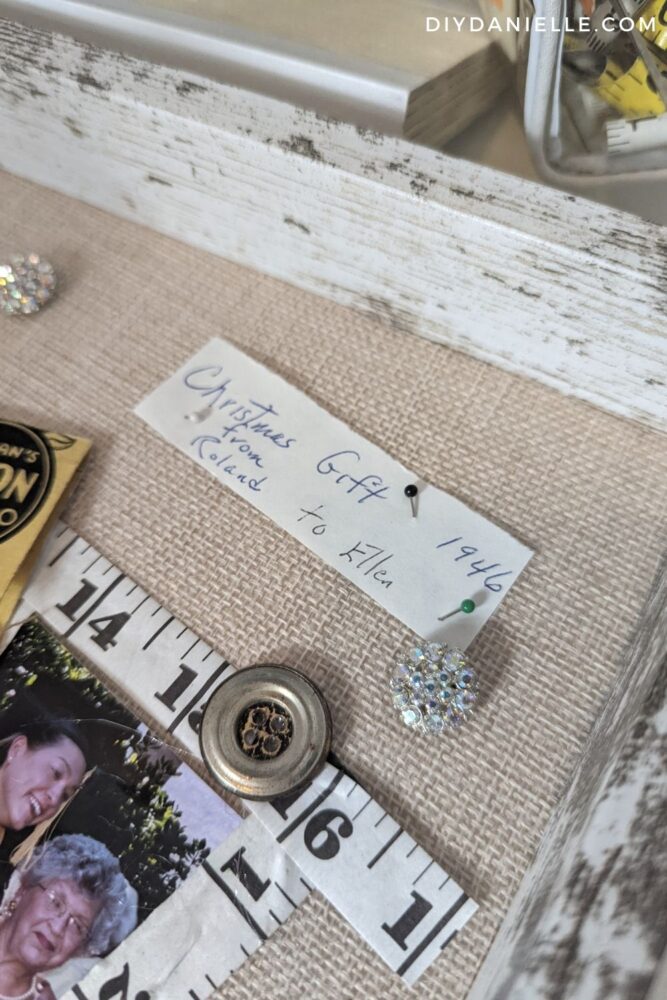
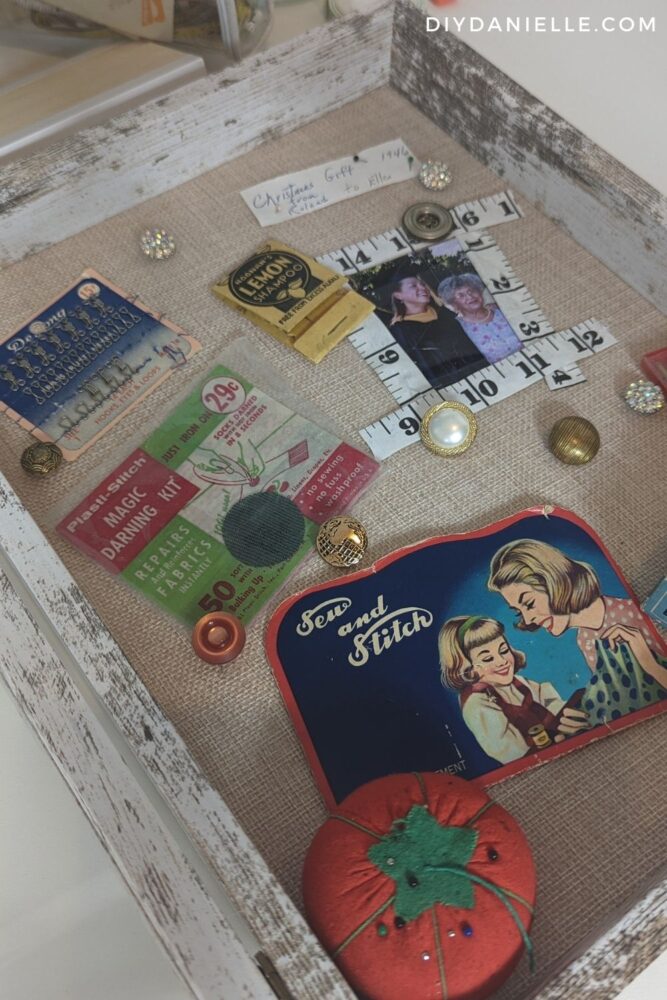
I had a bundle of sewing supplies from her, including some sewing needles, and antique metal containers. I LOVE LOVE LOVE all of it. One pouch of sewing supplies is labeled “Christmas Gift 1946, to Ellen from Roland.”
Roland was my grandpa, and I wonder why she labeled this particular gift… a piece of me chuckles and wonder if she was memorializing a “thanks for the vacuum cleaner” type gift, or if she genuinely was pleased. I remember her sewing and having lots of fabric that I enjoyed playing with as a child, but I don’t remember if she sewed because she liked it or out of necessity.
Either way, I really enjoyed sifting through the old buttons and sewing kit items. It
Supplies
- Shadow Box
- Antique sewing supplies
- Photo of my grandma and I
- Sewing pins (antique is perfect)
- Glue gun (it’s cordless!)
Tutorial
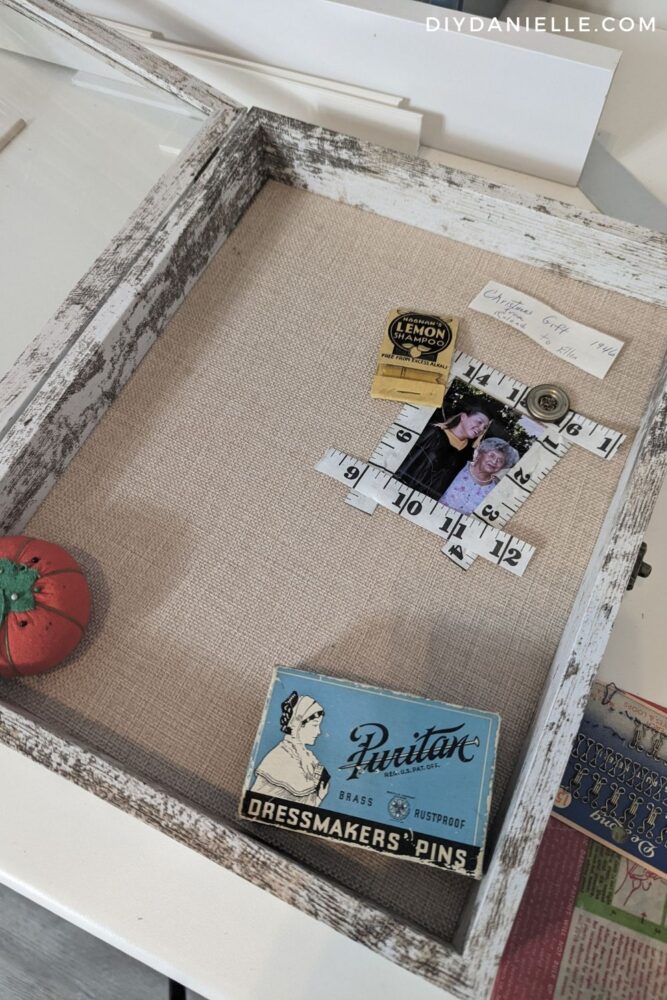
Step 1: Organize your antique sewing supplies and prioritize what you’d like to display. I laid everything out in the box before I glued or pinned anything down.
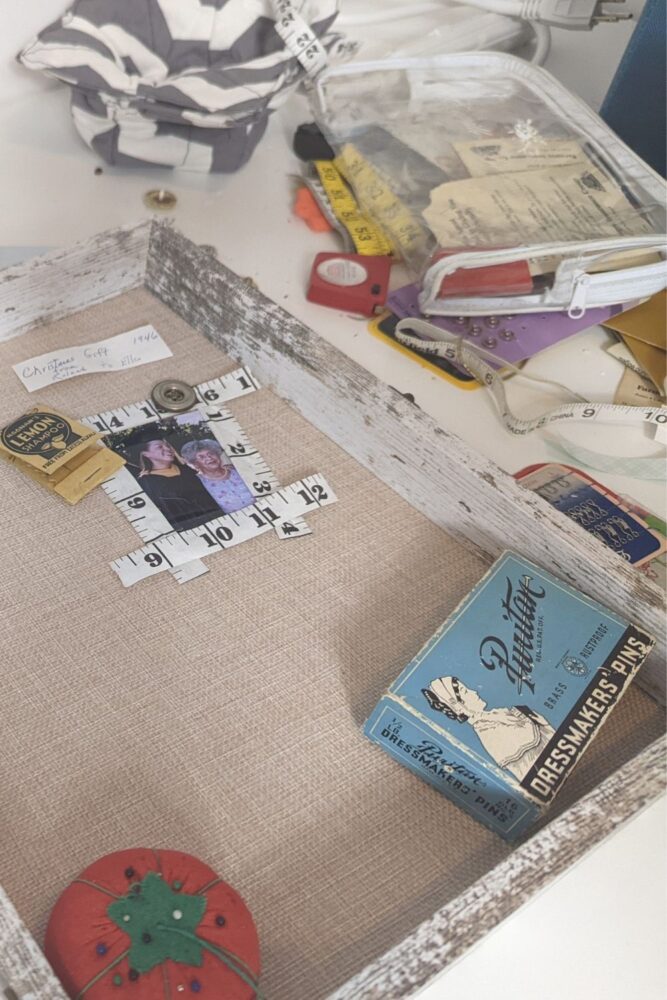
Step 2: Glue or pin the items in place. I like glue for light weight items, but pins for items that might look bad with glue holding them.
Step 3: Hang and display!
Please share and pin this post! You can also post your project and tag the DIYDanielle team on Instagram @doityourselfdanielle!