
How to engrave metal with the Cricut Maker. This easy process is a great way to make custom items for your home and garden!
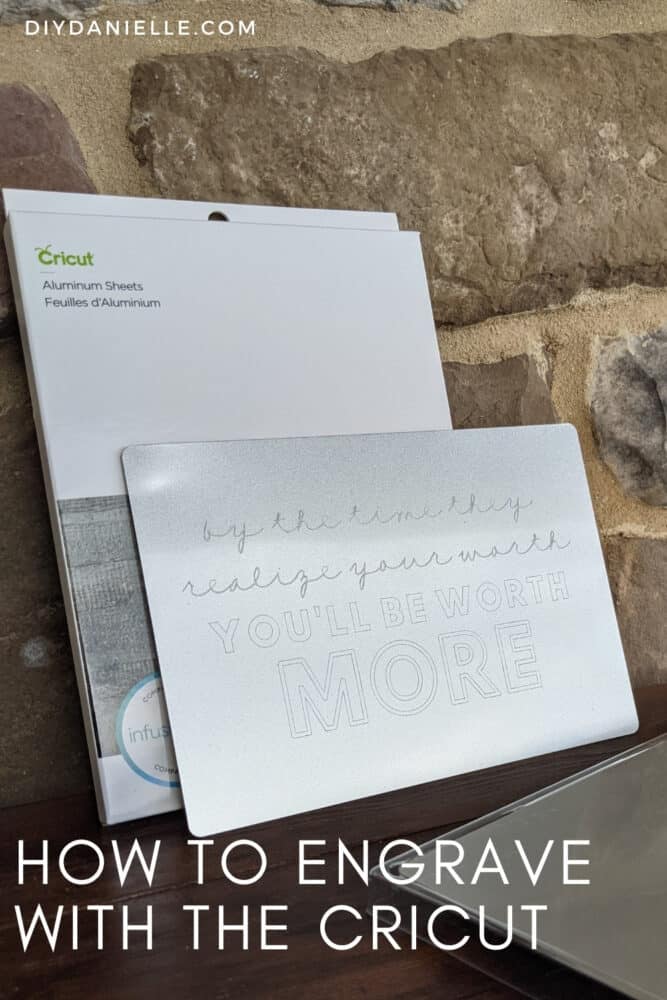
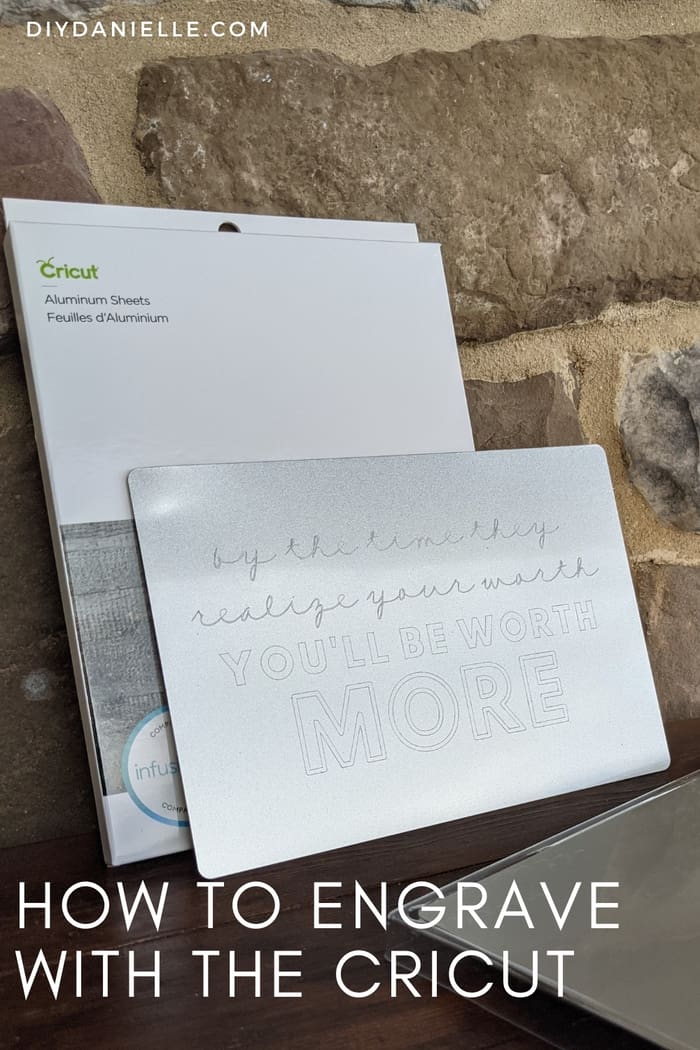
I’ve been pretty excited to experiment with the engraving tool on my Cricut Maker. I engraved acrylic keychains first, but decided to move onto aluminum sheets for marking areas of my garden. These will help identify plants that I’m growing, although at this point I’m usually able to identify what I have. It’s fun though and these look FANTASTIC!
This post may contain affiliate links which may earn me commissions should you click through them and take certain actions. As an affiliate for Amazon, Cricut, xTool, Home Depot, and other sites, I earn from qualifying purchases. Please DIY carefully. View my full legal disclosures here.
The majority of my content is generated by me, as are 99% of the photos and videos, but I utilize technology for titles, descriptions, video editing out all of my ums, and occasionally for text overlay on images.
Please read the whole post so you don’t miss any important information!
I saw a friend share this quote and I haven’t puzzled out where it’s from yet, but I LOVE it. So feel free to drop the quote ‘author’ in the comments!
How to Engrave Metal with Your Cricut Maker
For this project, I’m engraving 5×7 aluminum sheets to use for my garden. When I start making something for my Cricut, I usually make a 5×7 light gray rectangle, then design the image to be within it. That way, my design will be the correct size. When I’m ready to engrave, I just delete the rectangle. Sometimes I use Canva to make my SVGs though and then upload them to Cricut Design Space.
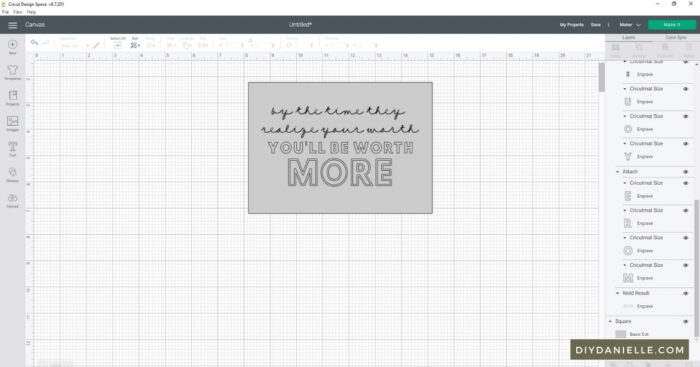
Don’t forget that you need to leave some extra space around your design for this particular project. The metal plate needs to be taped down to hold it in place; this helps prevent slipping during the engraving process.
Supplies
- Cricut Strong Grip Mat: https://cricut.pxf.io/doz4R3
- Cricut Engraving Blade: https://cricut.pxf.io/MXLaQY
- 4×4 Aluminum Sheets : https://cricut.pxf.io/15NEDD
- 8×8 Aluminum Sheets : https://cricut.pxf.io/Vy5ob6
- 5×7 Aluminum Sheets : https://cricut.pxf.io/GjNr0n
- Lint Roller
- Duct Tape
- Cricut Maker
Use the Discount Code DIYDANIELLE on cricut.com for 10% off any cutting machine or heatpress (no minimum). Excludes: materials/accessories/mystery boxes/etc. Applies to US/CA only, code expires 12/31/23.
Tutorial: Using Cricut Aluminum Sheets
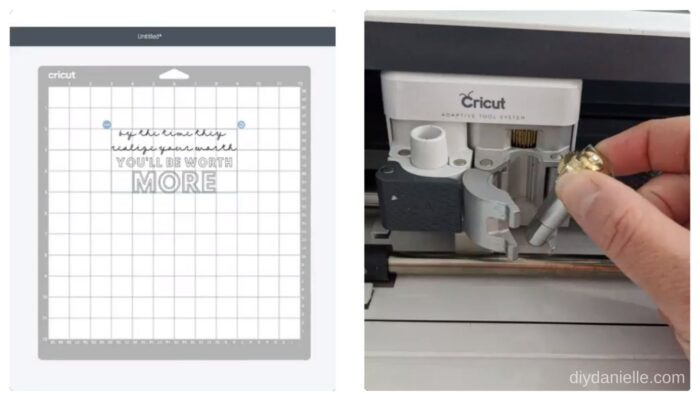
- Remove protective film from your aluminum sheets. Place your blanks on a Strong Grip Cricut Mat. Tape material down on all sides.
2. Design and resize your project in Design Space. Make sure it matches your placement of your metal on your mat.
3. Place your Cricut Engraving Tool in your Cricut Maker.
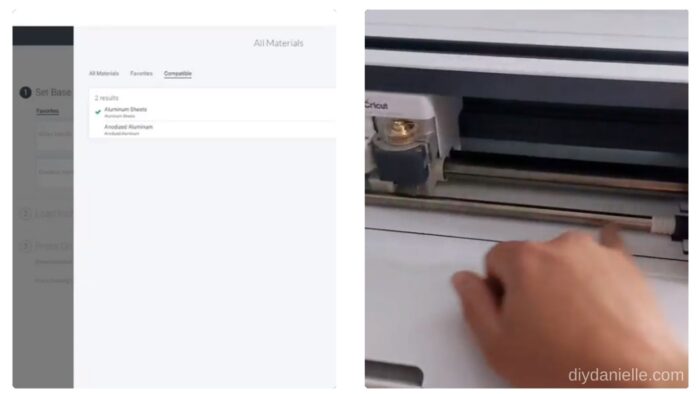
4. Select the correct settings on Design Space and hit the blinking Cricut button on your machine.
5. Push the white pieces on your metal bar all the way to the right.
6. Let your machine engrave the aluminum. Support the mat if needed.
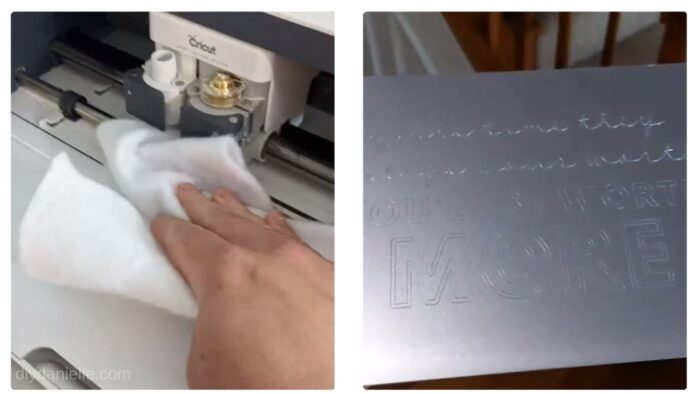
7. Eject the mat and use a lint roller to remove metal debris from the sheet.

8. Wipe your machine area with a soft cloth to remove any debris.
9. For metal, you can smooth any rough edges using a polishing cloth or 360-600 grit sandpaper.
Here’s a video of the process.
Please share and pin this post! You can also post your project and tag the DIYDanielle team on Instagram @doityourselfdanielle!
How to Engrave Metal with the Cricut Maker
Learn how to engrave Cricut aluminum sheets using the Cricut Maker and the engraving tip.
Materials
- 4×4 Aluminum Sheets: https://shrsl.com/2yvyv
- 8×8 Aluminum Sheets: https://shrsl.com/2yvyx
- 5×7 Aluminum Sheets: https://shrsl.com/2yvyy
- Lint Roller
- Duct Tape
Tools
- Cricut Maker
- Cricut Strong Grip Mat: https://shrsl.com/2yvyn
- Cricut Engraving Blade: https://shrsl.com/2yvyp
Instructions
1. Remove protective film. Place your blanks on a Strong Grip Cricut Mat. Tape material down on all sides.
2. Design and resize your project in Design Space. Make sure it matches your placement of your metal on your mat.
3. Place your Cricut Engraving Tool in your Cricut Maker.
4. Select the correct settings on Design Space and hit the blinking Cricut button on your machine.
5. Push the white pieces on your metal bar all the way to the right.
6. Let your machine engrave the aluminum. Support the mat if needed.
7. Eject the mat and use a lint roller to remove metal debris from the sheet
8. Wipe your machine area with a soft cloth to remove any debris.
9. For metal, you can smooth any rough edges using a polishing cloth or 360-600 grit sandpaper.
Web Story: Easiest Way to Engrave Metal at Home