
How to engrave acrylic with the Cricut Maker. This easy process allows you to make engraved signs, keychains and more!
Engraving acrylic with the Cricut Maker and an engraving blade is easy and fun. I love how these keychains came out, and I’m planning to use the keychain blanks to make labels for my fruit trees as well.
This will allow me to tag each tree with a label that won’t fade in the sun or fall apart in the rain.
This post may contain affiliate links which may earn me commissions should you click through them and take certain actions. As an affiliate for Amazon, Cricut, xTool, Home Depot, and other sites, I earn from qualifying purchases. Please DIY carefully. View my full legal disclosures here.
Please read the whole post so you don’t miss any important information!
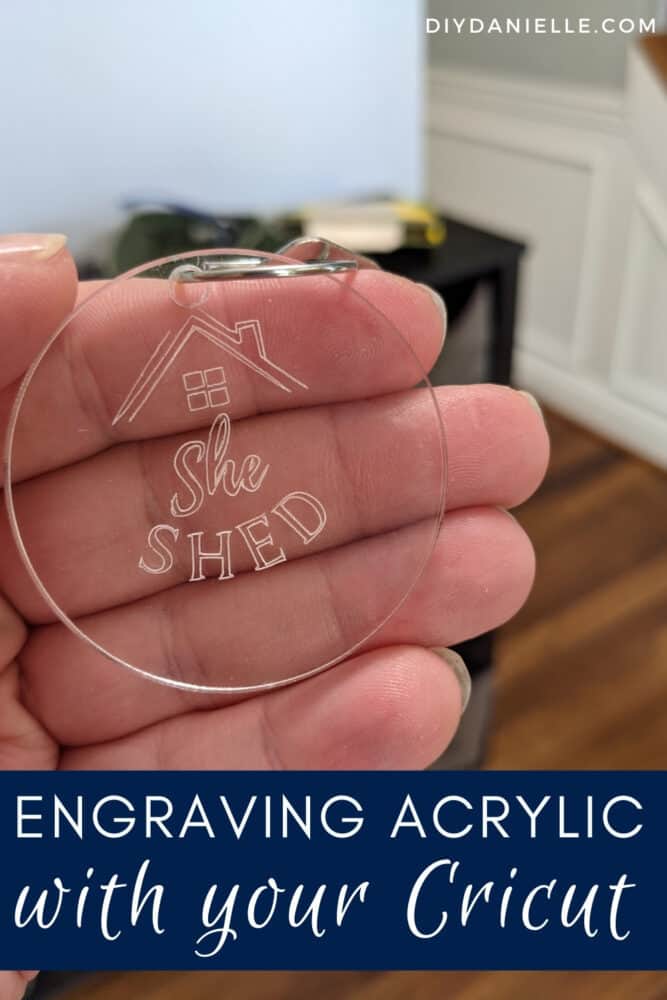
I needed a couple of keychains for my new she shed keys! I installed a new doorknob, but I wanted to make sure I didn’t lose the keys.
Getting locked out of my craft space would be a crisis! I also made a couple more keychains for fun.
How to Engrave Acrylic with the Cricut Maker
This is a pretty basic process. I found that the most difficult part was lining up the design correctly.
The keychain blanks that I used were fantastic; they looked icky out of the bag, but I realized that they had a protective film on both sides that made them look weird.
You may also consider cutting acrylic with your Cricut Maker. It is capable of cutting materials up to 2.4 mm thick.
I removed those and they were crystal clear. Use your weeding tool to scrape the edge of the film up; it’s a lot faster than using your fingernails.
You’ll notice that the text tends to be cut like an outline. Some fonts are better than others about that. The only Cricut font that I found will cut as ONE LINE and not as an outline is Millennial.
PLEASE let me know in comments if you’ve found other fonts that work- I tried a bunch and nothing else did it!
Supplies:
- Acrylic Keychain Blanks: https://amzn.to/3fvbetl
- Cricut Strong Grip Mat: https://cricut.pxf.io/doz4R3
- Engraving Blade: https://cricut.pxf.io/MXLaQY
- Cricut Maker: https://cricut.pxf.io/GjNaNm
- Lint Roller
- Duct Tape
Use the Discount Code DIYDANIELLE on cricut.com for 10% off any cutting machine or heatpress (no minimum). Excludes: materials/accessories/mystery boxes/etc. Applies to US/CA only, code expires 12/31/23.
Tutorial
- Remove film from acrylic blank if necessary. My acrylic tags had a film on each side.
- Place your blanks on a Strong Grip mat. Duct Tape material down on all sides.
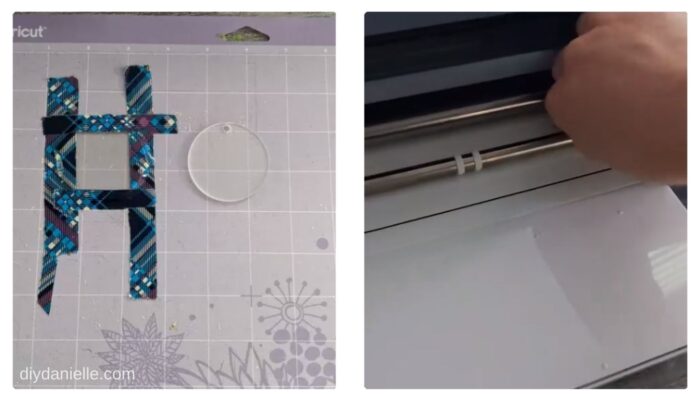
3. Move the roller balls on your Cricut Maker to the right. These can interfere with cutting thicker materials if they’re left as is.
4. Change your design on Cricut Design Space to “engraving.”
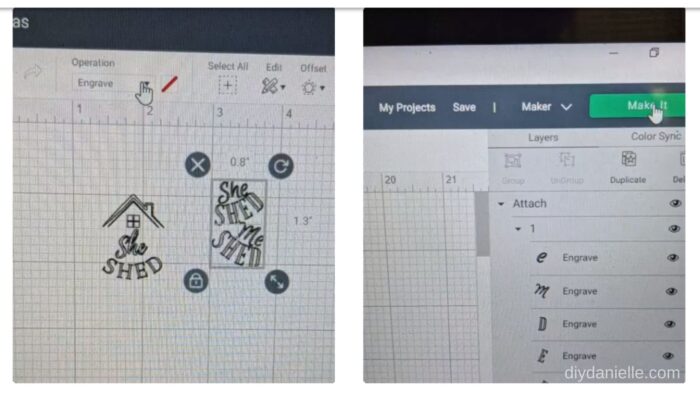
5. Click “make it,” and select the material.
6. Insert your engraving blade in your Cricut.

7. Once you click “Make It,” you can actually reposition your materials and design on the virtual mat. You’ll want to eyeball your placement on the real mat and move the design around accordingly. Hit continue. Select acrylic, 2 mm.
8. Clean any dust or debris from your machine with a soft cloth. Use a lint roller to remove any plastic debris from your keychain.

Here’s a video of the process.
Ideas for Acrylic Keychain Blanks
The set of blanks comes with 50 keychains so you’re probably wondering what to do with them all. Here are some ideas!
- Keychains for everyone and everything!
- Tags for trees to identify them! I’m using some to keep track of my fruit tree varieties (you need different varieties to help cross pollinate each other).
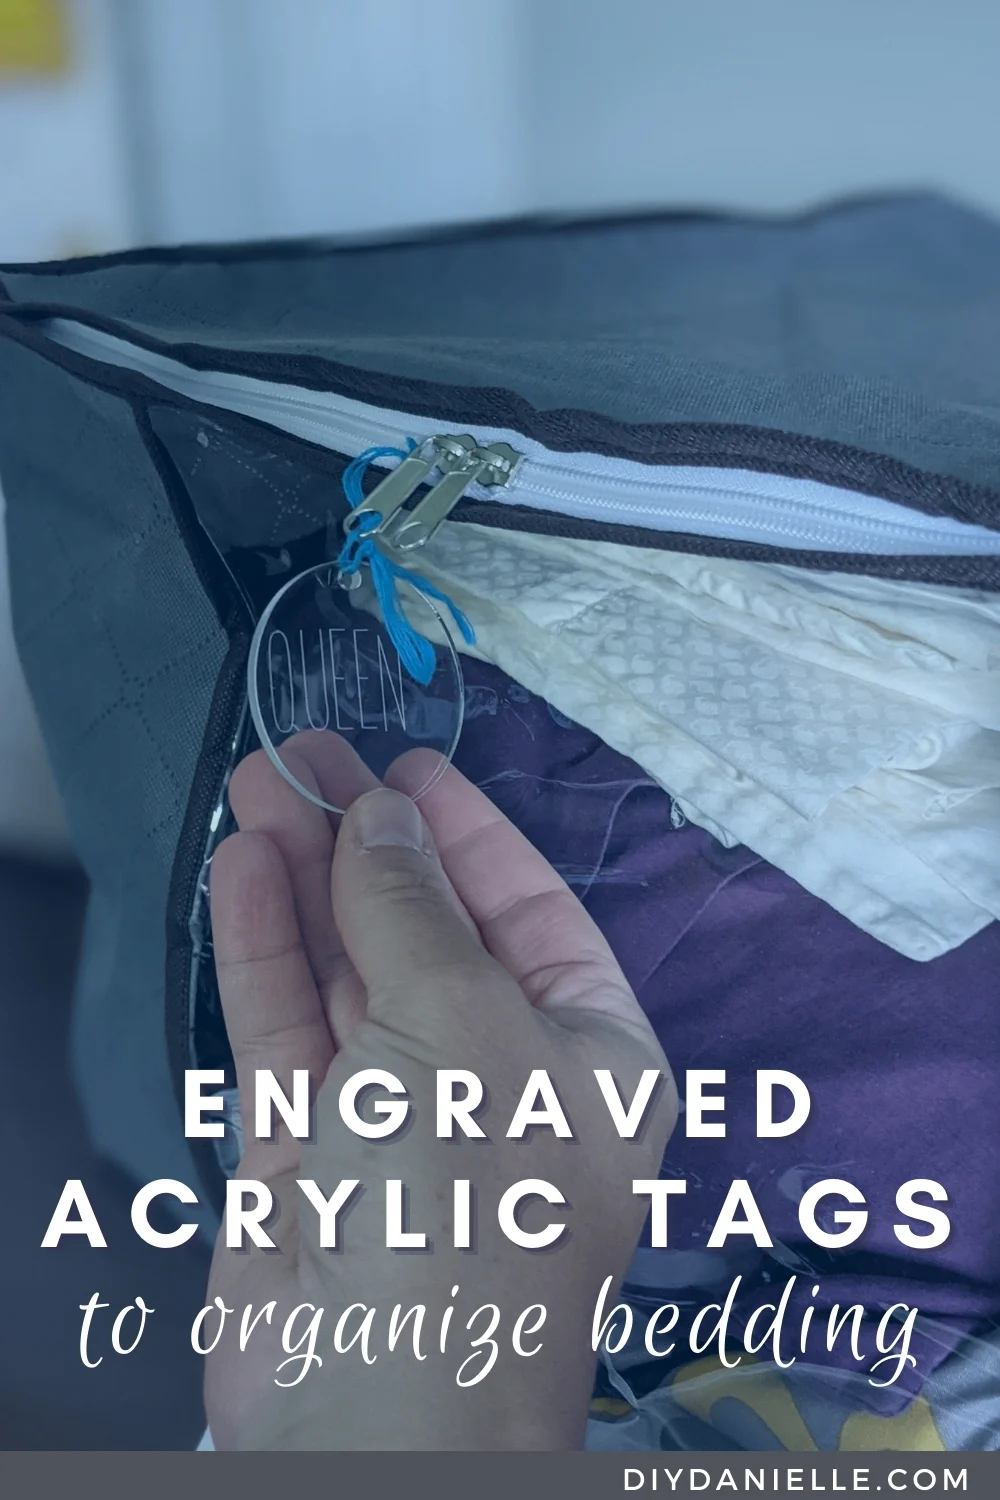
- Storage Tags! I used some to label bins for bedding. I was losing track of which sets were twin vs. queen vs. king size so I separated them into different bins and used these to label them.
- Pet Tags
- Luggage tags
- Medical Alert Tag
- Backpack tag with parent’s phone number.

Please share and pin this post! If you make this project, share it in our Stuff Mama Makes Facebook Group. We have regular giveaways for gift cards to craft stores. You can also tag me on Instagram @doityourselfdanielle; I love seeing everything you make!

How to Engrave Acrylic with the Cricut Maker
Here's a tutorial on how to engrave acrylic with the Cricut Maker. This is an easy, quick and satisfying project. I LOVE how these all came out.
Materials
- Acrylic Keychain Blanks: https://amzn.to/3fvbetl
- Lint Roller
- Duct Tape
Tools
- Cricut Strong Grip Mat: https://shrsl.com/2yvyn
- Engraving Blade: https://shrsl.com/2yvyp
- Cricut Maker: https://shrsl.com/2h1d1
Instructions
1. Remove film from acrylic blank if necessary.
2. Place your blanks on a Strong Grip mat. Duct Tape material down on all sides.
3. Move the roller balls on your Cricut Maker to the right.
4. Change your design on Cricut Design Space to "engraving."
5. Click "make it," and select the material.
6. Insert your engraving blade in your Cricut.
7. Position your materials and design in the right spot. Hit continue. Select acrylic, 2 mm.
8. Clean any dust or debris from your machine with a soft cloth. Use a lint roller to remove any plastic debris from your keychain.
Google Web Story: Engraving Acrylic DIY with the Cricut Maker
Whitney Wilson
Saturday 4th of February 2023
Can you engrave with the protective film on in order to add paint after engraving?
Danielle
Saturday 4th of February 2023
@Whitney Wilson, I wonder if the film will gum up the blade. I did cut a little with it on accidentally but I can't recall if it caused issues.