
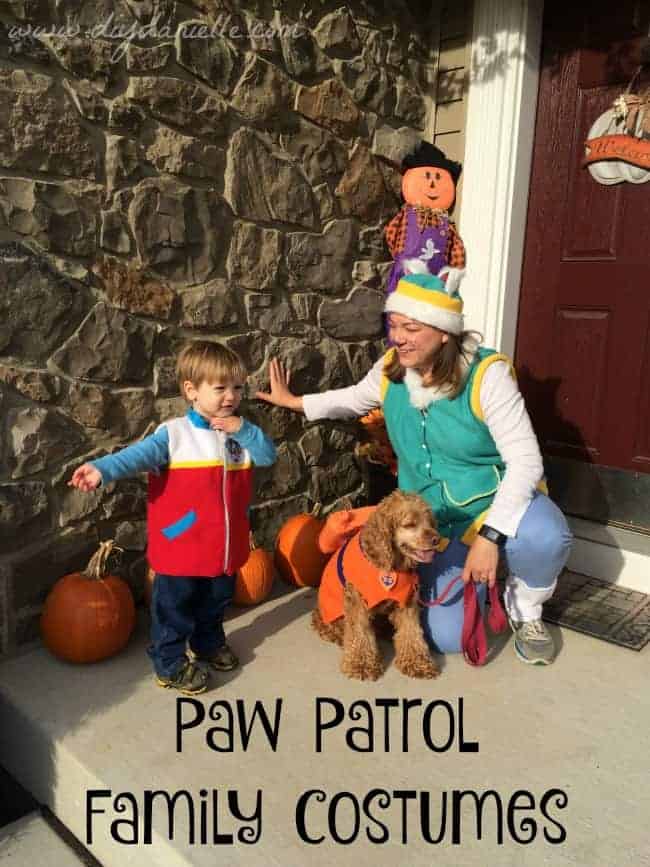
How to make an easy Everest Paw Patrol costume. This adult Paw Patrol costume could easily be adjusted to make a children’s costume too!
This post may contain affiliate links which may earn me commissions should you click through them and take certain actions. As an affiliate for Amazon, Cricut, xTool, Home Depot, and other sites, I earn from qualifying purchases. Please DIY carefully. View my full legal disclosures here.
The majority of my content is generated by me, as are 99% of the photos and videos, but I utilize technology for titles, descriptions, video editing out all of my ums, and occasionally for text overlay on images.
Please read the whole post so you don’t miss any important information!
This site is not affiliated with Nickelodeon or any of its subsidiaries.
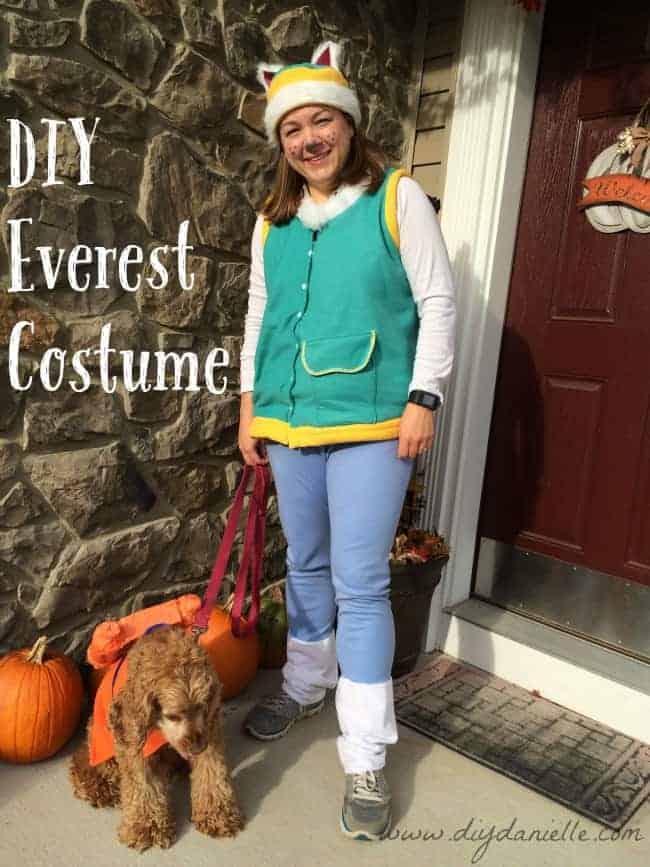
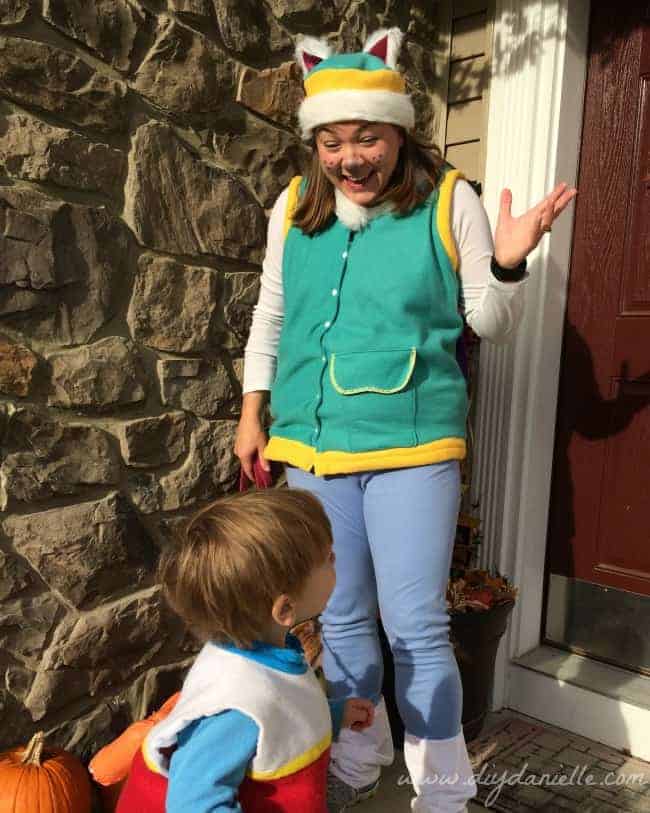
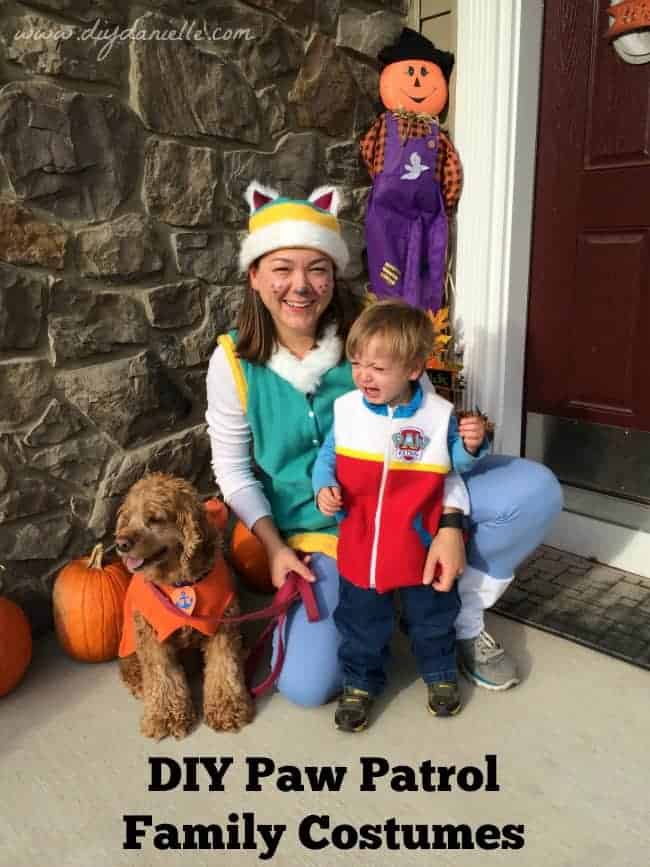
I made myself this DIY Paw Patrol Halloween costume (adult size!) so I could be Everest to match with my son’s DIY Ryder vest. The dog dressed up as Zuma. I’m so excited to actually have a costume to wear this year.
I was working on it a bit last minute, despite my promise not to do so, because we took a vacation this month… and THEN of course, I ended up with food poisoning (or a bug?) on the day my kids were in preschool. This has knocked me out for a few days and I’m currently typing my post with an extremely sore back and a still slightly nauseous stomach. Because gosh darnit I *will* finish this by Halloween!
Supplies for an Everest Costume
I am linking to supplies that I think will work from Amazon or other sources. Double check to make sure they’re the color/size that you want. A lot of times I’m working with stuff I already have in my sewing room (or that I bought at store) so I don’t necessarily have a link to the exact product I own.
- Teal/turquoise fleece fabric
- Yellow fleece fabric
- White fur fabric (note: this is exactly what I used on the hat, but not on the collar. I bought collar fabric at store, but ran out for hat so I ordered this)
- Periwinkle fabric (stretch fabric if you make them yoga pants like mine)
- Old shirt- or a vest pattern (highly recommended) and liner.
- Snaps, a zipper, or buttons to close the front of the vest. I think a zipper would look sharp. Make sure you get the right size zipper.
- Pink fabric (tiny amount for the inside of the ears)
- Glue gun
No time to make it now? Pin it for later: https://www.pinterest.com/pin/48554502210553830/
DIY Everest Vest
Before I even get into making your pattern, this would be WAY easier if you had a great vest pattern to use. Mine came out all wonky because I made a mistake creating my pattern, but hey… I’m on a time line and this vest wasn’t going to ever get finished if I redid it. If you have a pattern, you just need to get the colors right for your vest- and do the fur collar.
Patterns to Use
If you want to buy a pattern, I found this super cute animal hooded vest pattern on Etsy. If you use this, you can skip the hat and just make adjustments to the hood as needed.
If you want to use a hat instead of a hooded vest, I think this vest pattern from Etsy is a good fit to make adjustments.
Creating the Pattern
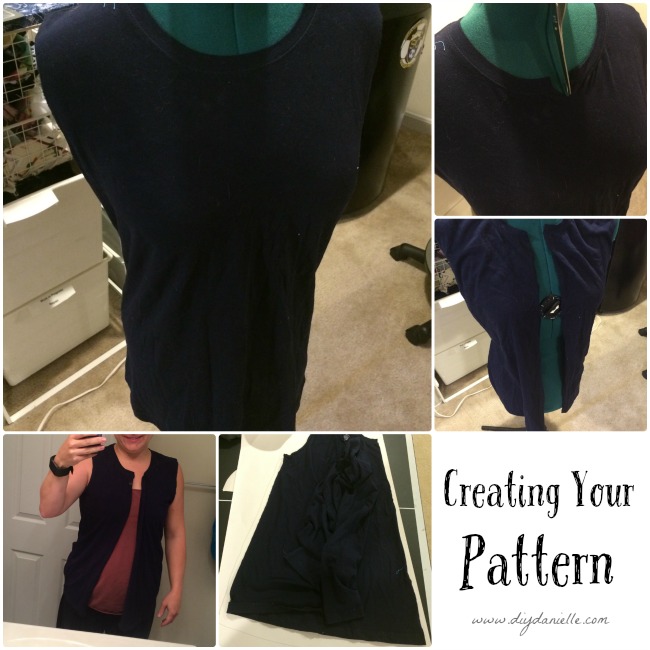
To create the pattern, I took a maternity shirt that I had thrown in my upcycling box. It still fit me (sigh) so I put it on my body form and cut right down the middle of my shirt. Now it’s a vest, haha. Very informal way to do this.
Once I did that, I traced my back for the pattern on paper… and I traced my front. Sooooo here’s where I had an issue. I traced one of my front pieces and not the other- figuring I’d just cut two pieces of the one front. Yeaaaahhhh that was assuming I had cut perfectly down the center. Bahahahahaha. Trace both. Maybe yours won’t be wonky. Make sure to add your seam allowance to your patterns. I saved the shirt to use as my lining. Clever huh? It would’ve been more clever if I’d gotten the pattern right for the front of the vest!
Adjusting Your Pattern to Make the Paw Patrol Vest
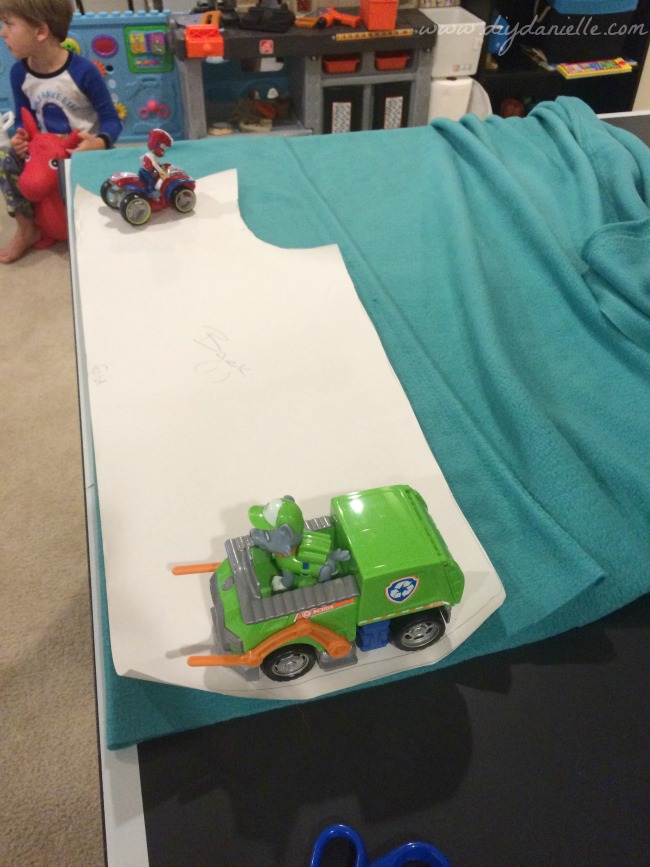
Now you can cut out your fabric for the front and back of the vest. Teehee.. “Paw Patrol to the rescue!” — they’re holding down my pattern for me. If you want to make some easy pattern weights, check out this DIY Pattern Weights Tutorial.
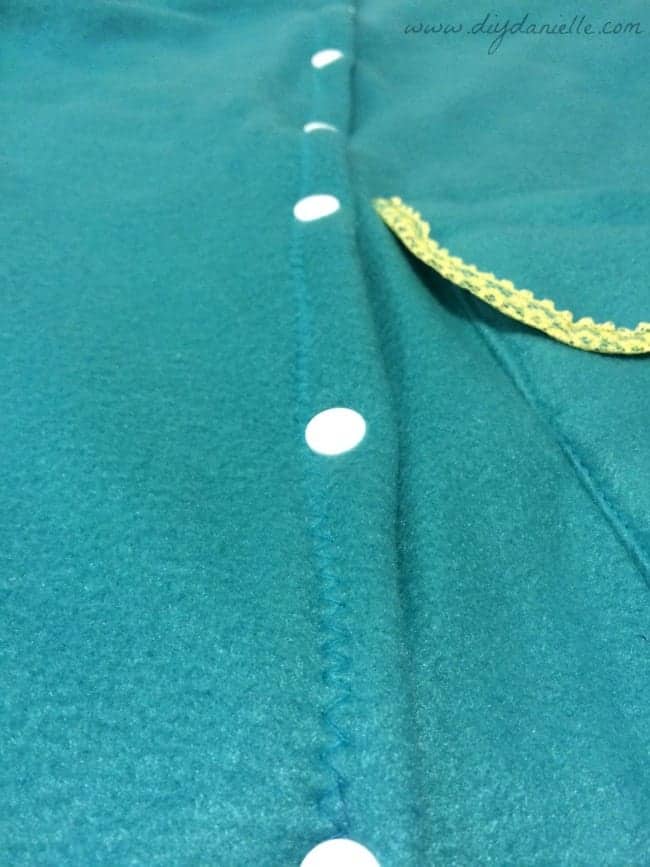
So once I cut out my back piece and my two front pieces, I laid my back piece right side up. I laid my front pieces right sides down on top. I matched the shoulder area- serged (or sew/zig zag) that area. Then I serged the torso sides. I also serged each piece of front fabric where the two pieces meet… this is just to finish the edge a bit. You can add a zipper here, buttons, or snaps here. I turned the edge over again and top stitched, then added my snaps at the end.

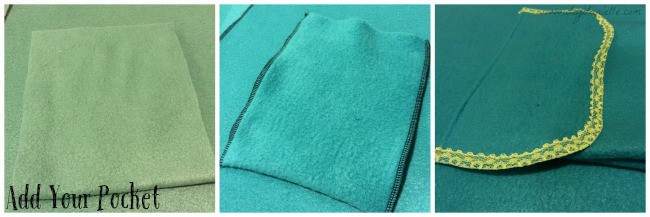
Make sure to add your pocket too. The top of the pocket has a yellow edge. I used yellow lace, but if you had yellow ribbon or such to do this, it might be even better.
Once I added my pocket, I took some yellow fleece, cut it into 2″ wide strips, and folded it in half. I used it as the edge to my arm openings. I just folded it right over the opening and used a zig zag stitch to sew it on. I also added a yellow edge to the bottom of my jacket to finish it.

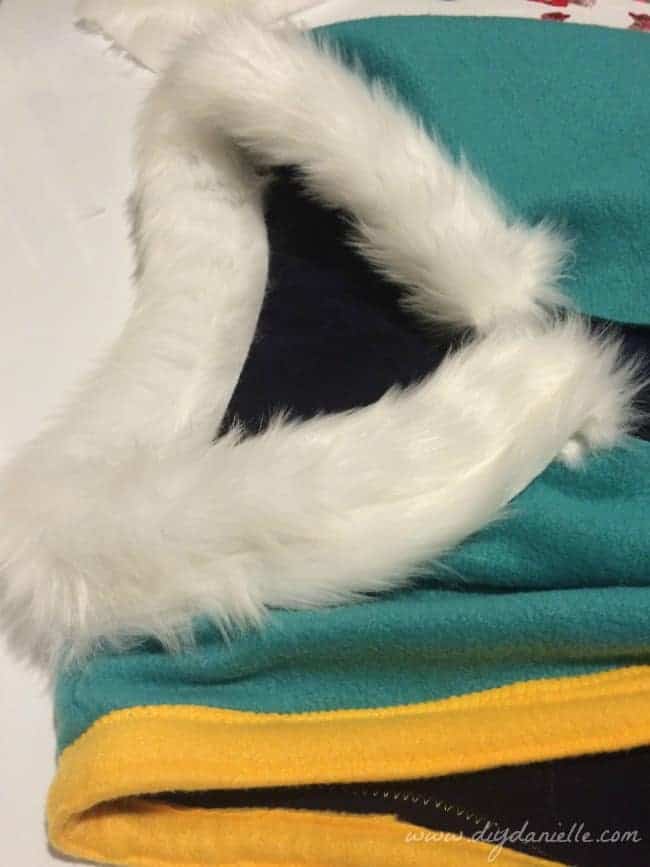
I sewed on my collar of fluffy goodness.
Then I added my snaps. I wish I’d had a zipper, but alas… idiot, I only had toddler jacket size zippers. Wish I’d planned that out better!
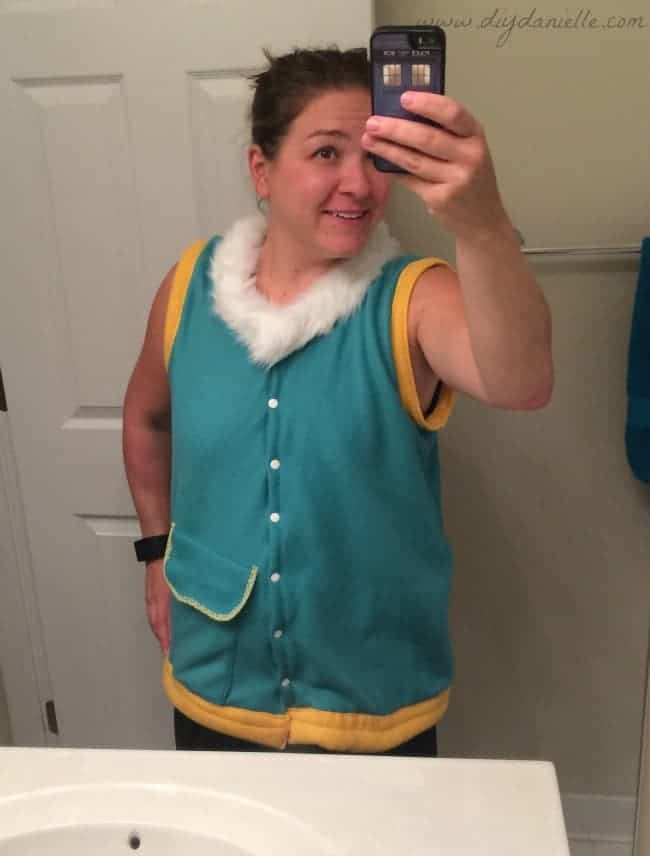
Completed vest!
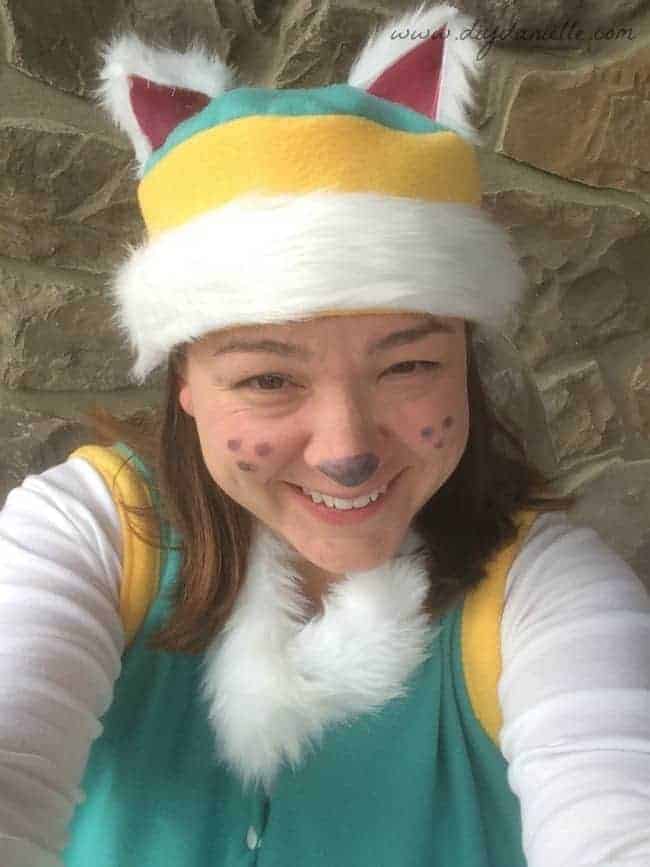
How to Make an Everest Hat
I debated whether I strictly needed a hat, but yes, of course I did. I took a hat that fit me and traced the top of it to get an idea of the size for my top circle. I added a seam allowance and cut out a turquoise cut of fabric. I cut out a strip of yellow fabric that could go all the way around the hat. Mine was about 5″ x 25″. I folded the yellow strip so it was right sides together, sewed the short end to create a circle. Then I was able to face the circle right sides together with the hat top. Sewed. Turns right sides out. I turned over the edge of my hat bottom, top stitched. I added the fur around the bottom of the hat.
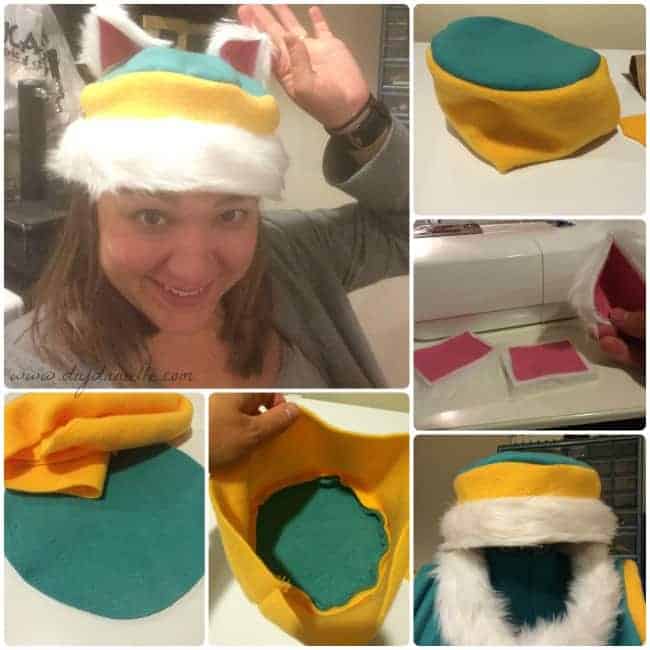
Ugh, explaining the ears is hopefully going to be understandable. I cut a little rectangle of fur. Then I glued on some pink fabric. Then I realized it wasn’t quite big enough so I ended up sewing together two sides of the two pieces of fur. That formed ONE ear. I made one more.
Once I made it, I stuffed fabric into my hat to make it easier to work with and put it on top of my dress form. Then I hot glued the ears just how I wanted them. Done.
How to Make Everest Pants
Making Your Pants Pattern
I chose to trace some yoga pants I had to make my pattern. I’m not going to explain this process too much and I didn’t take pictures (this is the portion I was working on the day after being ill). I created yoga pants before and I used the same process.
Buy a Pants Pattern
Honestly- save yourself some energy and buy a sewing pattern to use. I really like this Palazzo Pants Pattern from Patterns for Pirates. It’s easy to sew and you’ll be able to use it for other projects too.
Customizing Your Pants to Look like Everest
I used a periwinkle knit fabric that I found, and added a white knit for the bottom portion so my pants will match Everest’s legs. I don’t love how my pants came out but it’s my fault for using a pair of yoga pants that weren’t full length to create the pattern. Whoops. Also, my waist band is too big. I think this is because my fabric choice has a HUGE amount of stretch to it. It doesn’t fall off so I’m keeping it as is for now, but I will likely remove the white fabric after Halloween is over and use these as regular yoga pants… in which case I will fix the waist so I don’t embarrass myself!
The one thing I think would’ve helped was to sew the white fabric onto the periwinkle leg cuts BEFORE sewing the pants together. I sewed my white on after sewing the periwinkle portion of the pants closed. Mistake. I would’ve loved to top stitch the area the white and periwinkle combined. Alas.. hindsight is 20/20.
If you want to keep these pants for use at other times, I’d recommend getting a wide white fur and pinning or temporarily attaching it to the legs of your pants instead- that way you can remove it later.
The color of your waist band doesn’t matter because it will be under your vest. So whatever. I recommend making pants you’ll want to wear another day because it’s nice to have a portion of your costume be reusable for normal day wear.
Everest Makeup

I used eye liner to make my nose and freckles.
Paw Patrol Family Costumes
Please share and pin this post!
DIY Everest Paw Patrol Costume
Learn how to make this adult Paw Patrol costume. It can also be adjusted to make a children’s costume too!
Materials
- Teal/turquoise fleece fabric
- Yellow fleece fabric
- White fur fabric
- Periwinkle fabric
- Old shirt
- Snaps, a zipper, or buttons
- Pink fabric
Tools
- Glue gun
Instructions
- Create a pattern for the vest.
- Cut out your fabric for the front and back of the vest.
- Place the back piece right side up.
- Lay the front pieces right sides down on top.
- Match the shoulder area.
- Serge (or sew/zig zag) that area.
- Serge the torso sides.
- Serge each piece of front fabric where the two pieces meet.
- Add a zipper, buttons, or snaps.
- Turn the edge over again and top stitch.
Can I buy that from you?! 🤣I drive to WI every Halloween to be part of my younger brothers Halloween trick or treating, and my nieces, nephew, brother and sister in law are all paw patrol characters this year, I’m suppose to be Everest. 😊