
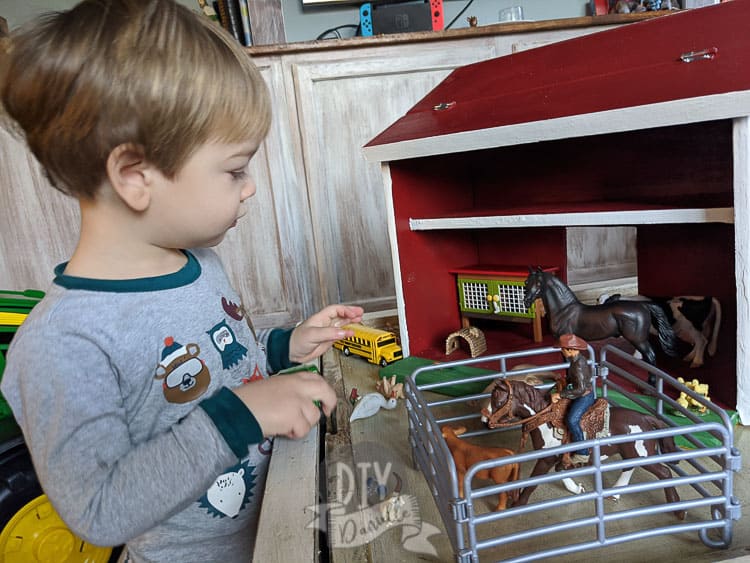
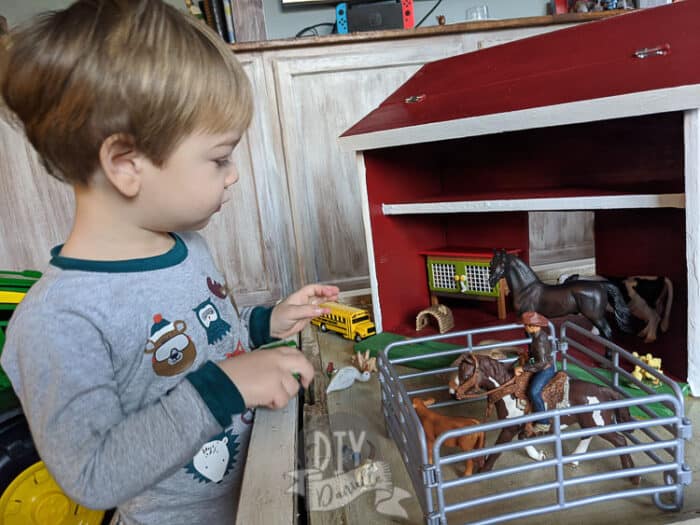
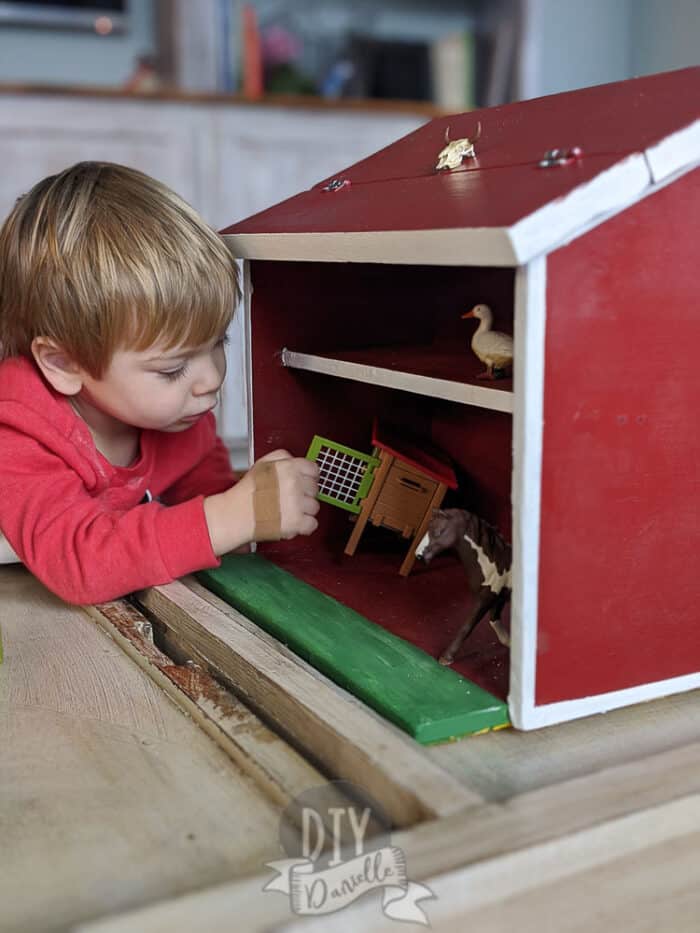
How to build a toy barn for a child. My two year old LOVES farm animals so I decided to whip up this BASIC DIY barn toy for my son for Christmas.
This post may contain affiliate links which may earn me commissions should you click through them and take certain actions. As an affiliate for Amazon, Cricut, xTool, Home Depot, and other sites, I earn from qualifying purchases. Please DIY carefully. View my full legal disclosures here.
The majority of my content is generated by me, as are 99% of the photos and videos, but I utilize technology for titles, descriptions, video editing out all of my ums, and occasionally for text overlay on images.
Please read the whole post so you don’t miss any important information!
My 2 year old is obsessed with the basic wood barn and farm animals at our local library so I decided to make him something similar for Christmas.
While there’s a lot of available options on the market, nothing quite fit the bill for what I wanted, and I was hoping for something to fit Schleich toy animals.
DIY Toy Barn
This is what I created and how you can replicate it. It’s a very simple project and I’m a newbie woodworker.
Sign up below for the FREE woodworking plan with the cuts of wood listed!
Supplies & Equipment
Safety
My son is 2 years old and doesn’t eat his stuff. If I had a kid who chewed his toys, I would ensure that I was using paint that was “safe” for chewing (not sure anything is truly safe, but there’s some safer options).
You’ll want to take this into consideration when you’re building your toy barn.
Also, “real wood” may be preferably to plywood, although we generally use Purebond plywood which is formaldehyde-free. Plywoods use glues to bond the layers together so they do have some chemicals in them to be wary of if you have a chewer.
Supplies
- Rustoleum 2x Painters Touch: Satin Colonial Red
- White and green Paint: I used a small container of acrylic
- Plywood: I used 1/2″ thick plywood for most of it, but the roof is 3/4″ wood. Real wood would look nice too.
- Everbilt 1 in narrow utility hinges
- 8 x 1 1/4″ GRK Trim Head Screws
- Felt for the bottom
Equipment Used
- Jig Saw
- Drill
- Circular Saw
- Wood glue
- Sander/Sandpaper
- Safety goggles
- Dust mask or respirator
- Wood Filler
- Level
- Painter’s Tape
- Glue gun (I’m obsessed with this one)
Tip from a friend: You’ll notice that my wood had a lot of splintered edges. My friend Scottie at Saved By Scottie recommends using painter’s tape along edges to prevent splintering.
Do you often do crafting projects? You’ll LOVE this woodworking plan for a craft cart that’s available in my store for an automatic download! Keep scrolling for the barn tutorial.
How to Build a Toy Barn
Start by cutting your wood according to the woodworking plan. Try to avoid splintered edges.
I drew everything out on my plywood scrap before cutting.
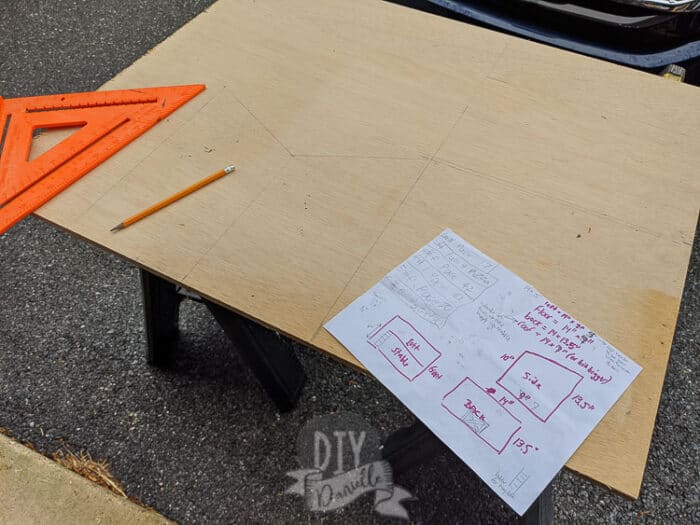
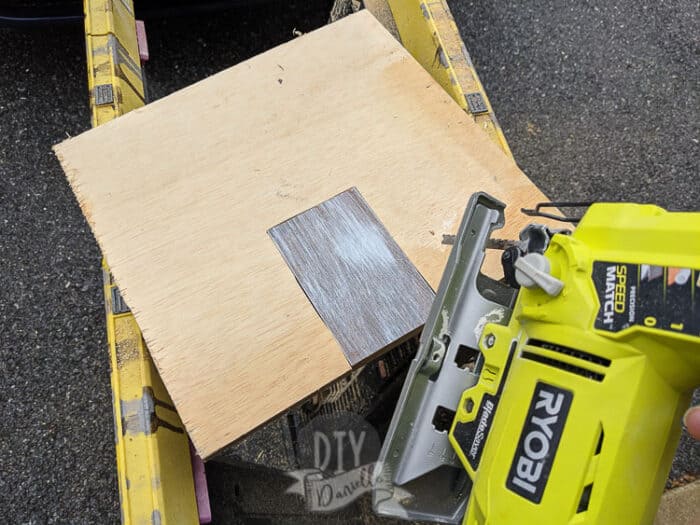
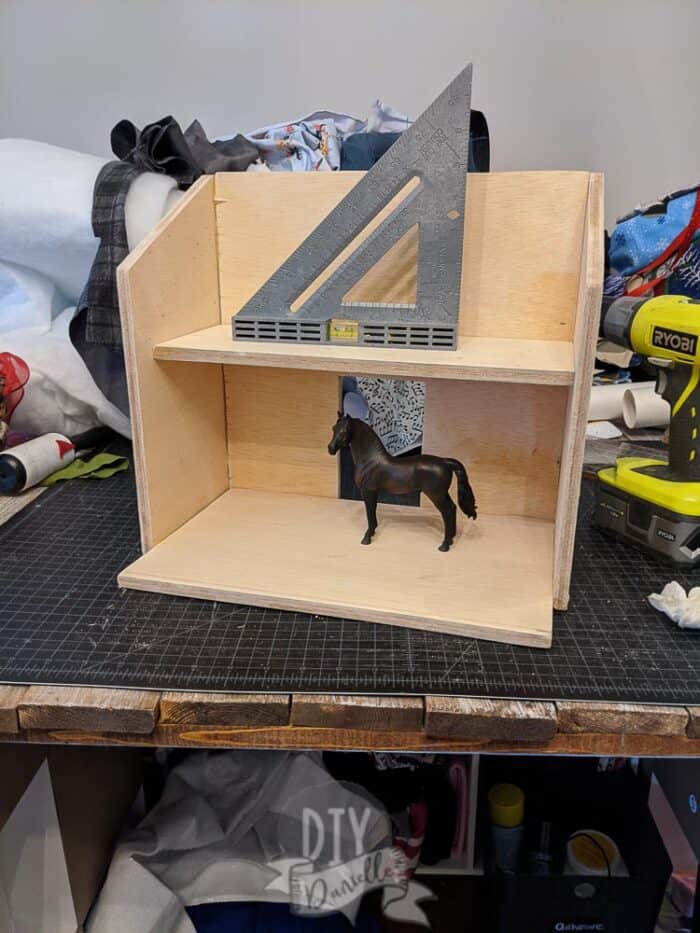
You’ll want to use a jig saw to cut away a rectangular area for the door on the back cut of wood. My door is 5.75″ tall and 3.5″ wide. This number was based on the height of my tallest toy animal, a horse.
Sand your wood and edges to make them smooth. Clean off the dust and debris from your wood and work surface.
Place your base and back of the toy barn. Predrill your holes to attack the back to the base. Attach using wood glue and trim head screws.

If you countersink the head of the screw, you’ll be able to cover up the screw heads with wood filler before painting. This is what I did.
Repeat the process with the side pieces of your barn. The sides go on the outside of the base, attaching to the base and back piece.
At this point you want to insert your loft. Use a level to make sure your loft isn’t lopsided. Once you have the placement correct, you can attach the loft as well using wood glue and trim head screws.
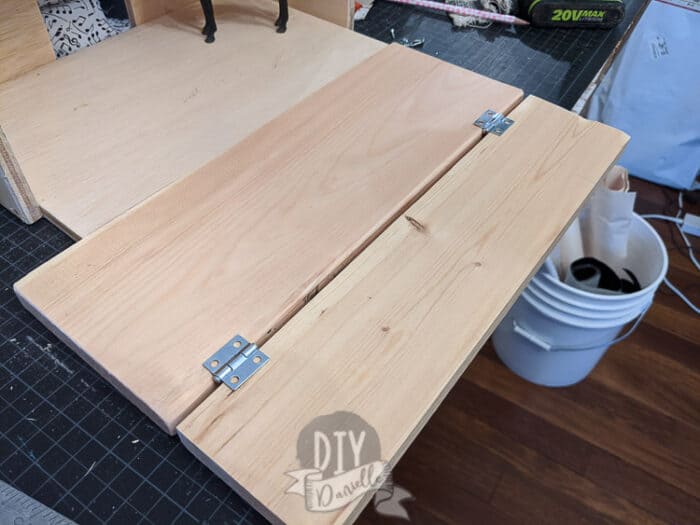
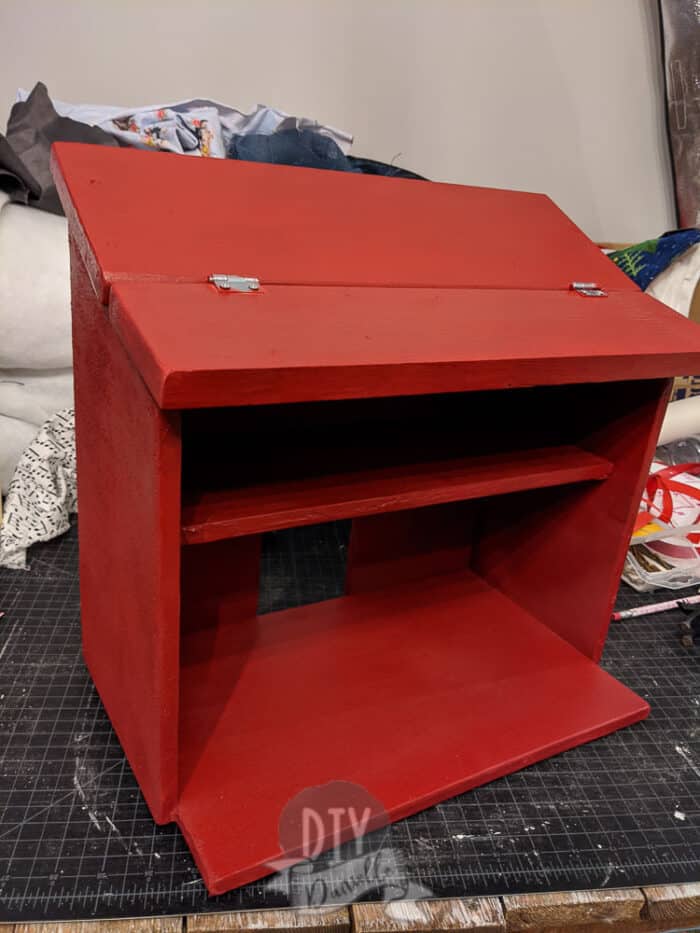
Now you can finish by adding the roof. I split the roof into two sections so my son could fold the roof back if he wanted to have better access to the loft. The thinner cut of wood is in the front.
I started by attaching the hinges to the two pieces of wood. Then I used wood glue and trim head screws to attach the back piece of wood to the top of the barn. DO NOT GLUE OR SCREW IN the front piece.
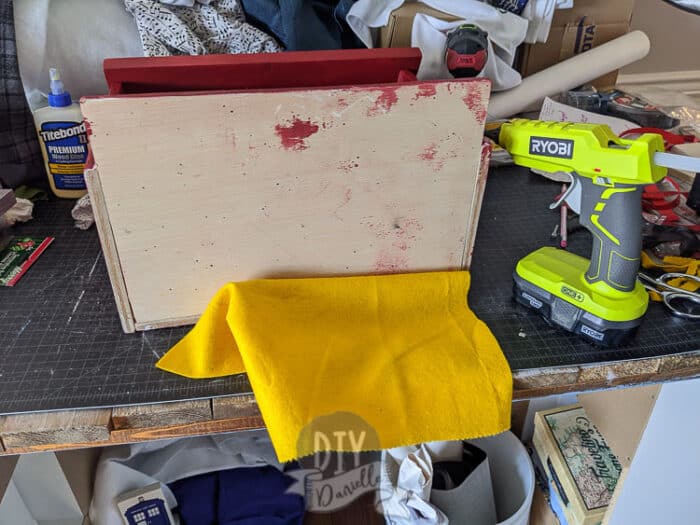
This is a good time to cut a piece of felt for the bottom of your barn. I used my glue gun to attach it. This should protect my floors and furniture hopefully.
Use wood filler to fill in the holes where your screws are. And any other areas you want to make pretty. I tried to make the plywood edges look pretty (sigh).
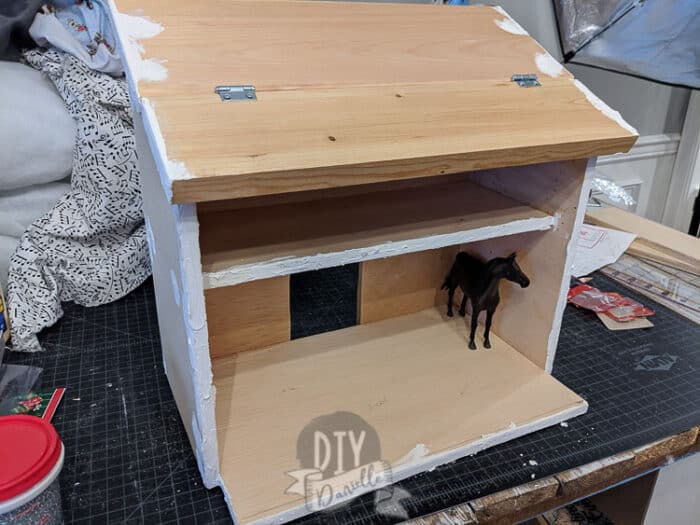
Prime the wood first. I made the mistake of spray painting the entire barn red. If I could do it again, I would tape off the areas I wanted white and green, then spray paint the rest.
You can customize this any way you want. Initially I’d planned to use vinyl for the white trim, but I changed my mind; I was worried it would peel too easily.
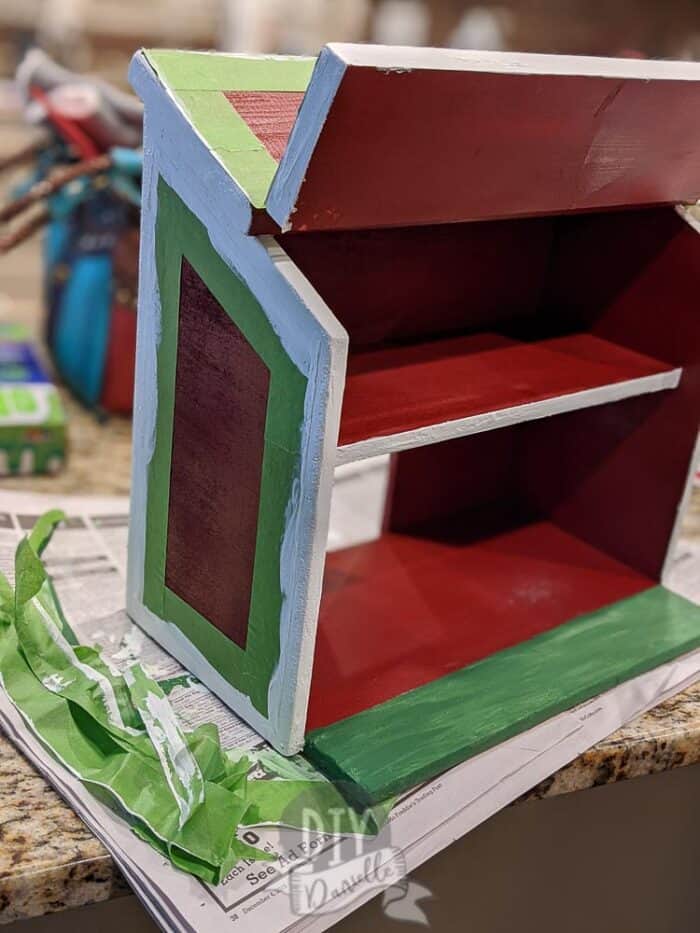
I think using that fake grass would be fun for the front portion. I’d also considered making the base bigger and adding fencing. My idea was to use dowels inserted into holes in the base, then attaching wood or fabric straps horizontally for the fence. I opted not to do this, however, because I didn’t want the barn to be too heavy.
Video of the Toy Barn Build
My Favorite Schleich Toys as Accessories
I liked this project because I could gift a few of the Schleich toys initially, then gift other toys later. The toys are nice for stocking stuffers and Easter baskets. Here’s a bunch of my more favorite toys that they have available.
- Schleich 7-Piece Farm Set
- Schleich 6-Piece Baby Farm Animal Set
- Schleich 5-Piece Cute Animal Set
- 5-Piece Horse Collector Set
New to building and want to try some easy projects? Check out these EASY 2×4 building projects and make an easy DIY bookshelf for kids with leftover wood scraps!
Please share and pin this post! You can also post your project and tag the DIYDanielle team on Instagram @doityourselfdanielle!

DIY Toy Barn from Wood Scrap: Get the FREE Plans
See how easy it is to build a basic toy barn for a child. This will be one to pass down and makes a great gift.
Materials
- Rustoleum 2x Painters Touch: Satin Colonial Red
- White and green Paint
- Plywood 1/2″ & 3/4" thick
- Everbilt 1 in narrow utility hinges
- 8 x 1 1/4″ GRK Trim Head Screws
- Felt
Tools
- Jig Saw
- Drill
- Circular Saw
- Wood glue
- Sander/Sandpaper
- Safety goggles
- Dust mask or respirator
- Wood Filler
- Level
- Painter’s Tape
- Glue gun
Instructions
- Cut your wood according to the woodworking plan.
- Draw everything out on the plywood scrap before cutting.
- Use a jig saw to cut away a rectangular area for the door on the back cut of wood.
- Sand your wood and edges to make them smooth.
- Clean off the dust and debris from your wood and work surface.
- Pre-drill your holes to attach the back to the base.
- Attach using wood glue and trim head screws.
- Fill the screw heads with wood filler before painting.
- Repeat the process with the side pieces of your barn.
- Insert your loft, using a level to make sure your loft isn’t lopsided.
- Attach the loft using wood glue and trim head screws.
- Split the roof into two sections so it can fold back.
- Attach the hinges to the two pieces of wood.
- Use wood glue and trim head screws to attach the back piece to the top of the barn.
- Cut a piece of felt for the bottom of your barn and attach with a glue gun.
- Use wood filler to fill in the holes where your screws are.
- Prime the wood first, then spray paint.
Recommended Products
As an Amazon Associate and member of other affiliate programs, I earn from qualifying purchases.

Web Story: How to Make a Toy Barn for Schleich Toys