How to add storage to your home’s entryway so you have a bench, coat hangers, and a place to store socks, winter gear, and sunscreen!
This post may contain affiliate links which may earn me commissions should you click through them and take certain actions. As an affiliate for Amazon, Cricut, xTool, Home Depot, and other sites, I earn from qualifying purchases. Please DIY carefully. View my full legal disclosures here.
The majority of my content is generated by me, as are 99% of the photos and videos, but I utilize technology for titles, descriptions, video editing out all of my ums, and occasionally for text overlay on images.
Please read the whole post so you don’t miss any important information!
A long, long time ago, we installed an entryway storage in the foyer of our previous home. I wanted to share some photos of the process.
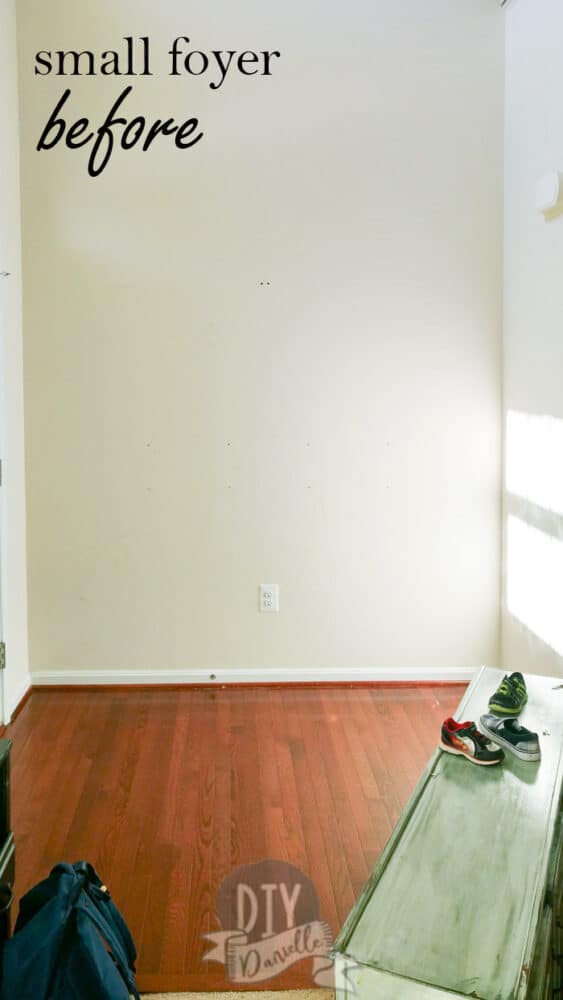
The foyer was this thin area. It was sort of a waste of space: The area was too small to put a piece of furniture. We kinda threw our shoes in a pile there for a long time.
Eventually I added a long shelf to the entrance to put keys and other small items on. We added a DIY shelf made of upcycled drawers to hold socks and mittens. There was a basket to hold shoes. But it was sort of ugly.
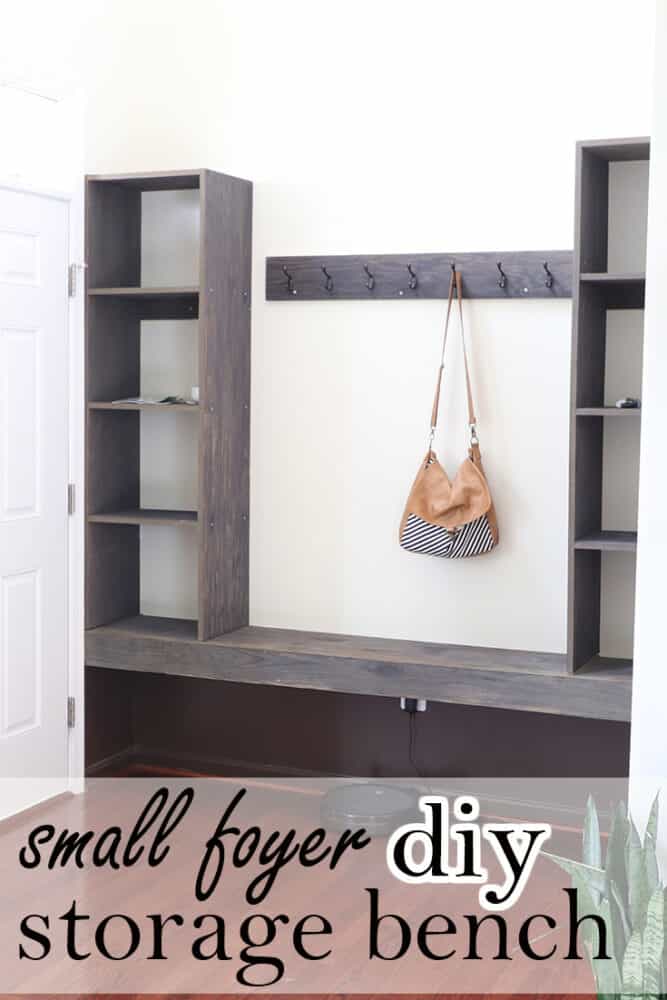
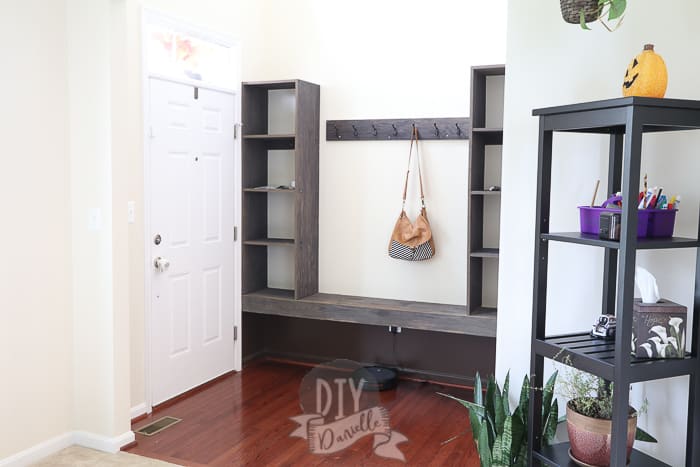
So we put together some simple shelves with a bench. We added a DIY coat rack in between the shelves.
Using open shelving helps keep the room from feeling like a locker room in my opinion, letting the room be lighter and more open. We added baskets and other decor items for the shelves.
Those baskets held items like sunscreen, winter gloves and hats, goggles for swim lessons, socks for the kids, our keys, and other items.
We’ve since moved and this is our DIY Mudroom now. I can’t remember exactly what we did so I’ll give you the basic instructions!
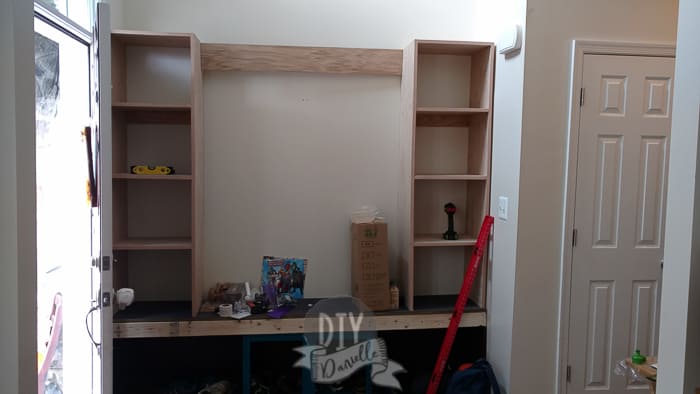
This is the “before” once we cleared everything out so we had space to work. The door is to the left and needed room to open so we had to keep the built-ins relatively thin.
Important Supplies
- 3/4″ plywood: I prefer this thickness for plywood we use so it’s sturdy and is less prone to bowing with weight over time.
- 2x4s: Interior 2x4s were used for the base, but I’d actually recommend building a plywood base instead.
- Long cabinet screws: These screw into the studs of your wall and their length helps keep the shelves and seating from pulling out of the wall.
- Stud Finder: All items are screwed into studs so it’s important you have a stud finder and know how to use it.
- Level: You want your seat and shelves to be level.
Our DIY Foyer Storage Cabinet
Initially we tried to use old kitchen cabinets as seating, but we quickly scrapped that idea. The cabinets were so long that there was only room for two small shelves.
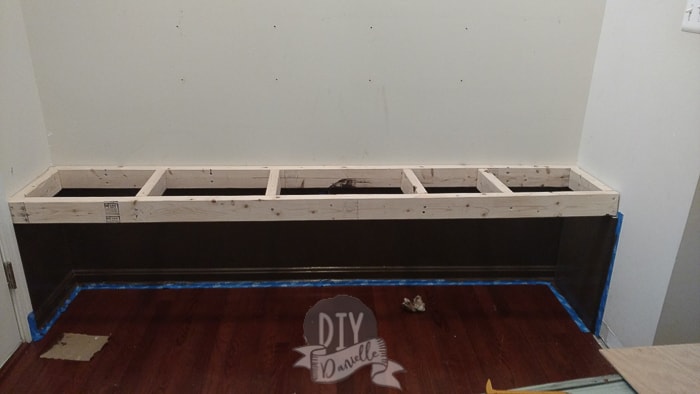
We ended up building a frame for the “seat” of the entry bench. The frame was screwed into the wall using cabinet screws, then an additional support was screwed into the wall under the frame. Lotttts of work done to make sure it would support weight.
Here are the 2x4s laid out for the frame.
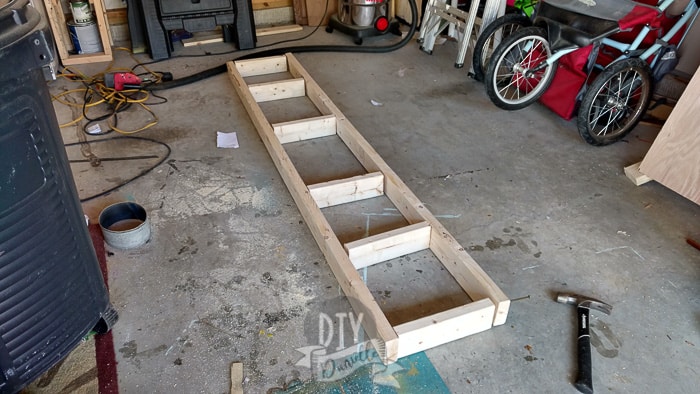
I painted the back dark to hide the supports as best as I could. It’s important to hit studs when you attach something like this. The drywall can’t hold the weight by itself.
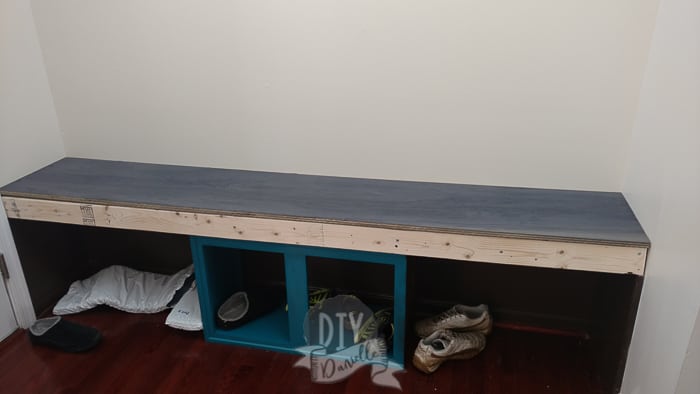
In this picture, you can see the plywood laid for the top of the bench.
But DON’T build it like we did.
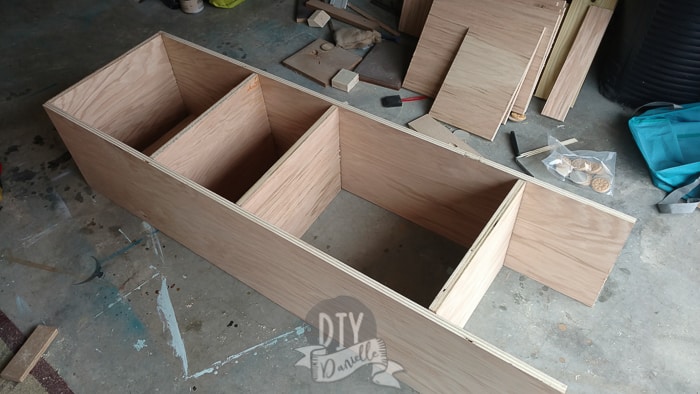
THE BETTER OPTION Looking back, I think it would be better (and easier) to build an entire shelf to go along the floor similar to how we built the shelves on either side (except horizontal). I would suggest building the box with the vertical dividers, then adding the horizontal shelves. You could put a pair of shoes in each box which would be awesome. If you want that area hidden, you could build cabinet doors for the shoe area.
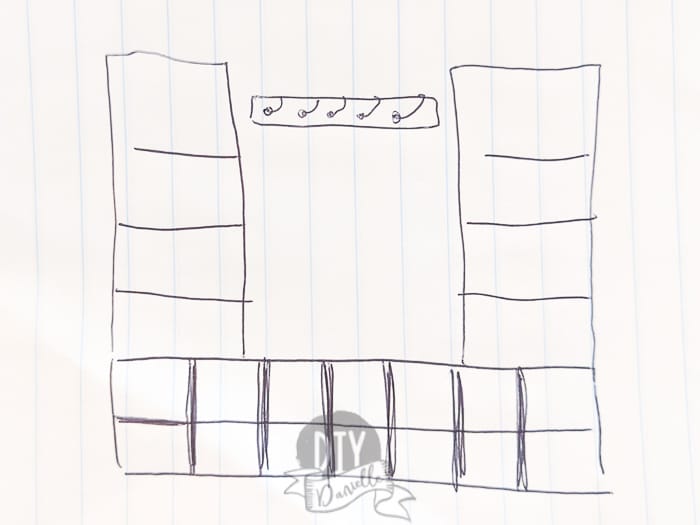
Your other option would be to build two shelves, one for either side, then to add a shoe bench in the middle in a similar style as above.
Regardless, once the base is on, we built our two shelves. The shelving units were mounted to the wall, but touch the seat as well.
Both shelves units have a small piece of plywood under the first shelf; that piece is screwed into the wall with cabinet screws. You NEED to hit a stud.
All I did after this was add the coat rack, iron on the veneer to cover the fronts of the plywood, and we added a piece of trim in from of the 2×4 to cover it.
I stained the unit with Amy Howard’s “Vintage Wood: Salvaged Timber” stain. It smells phenomenal and I love the finish. The one downfall is that if you use two different types of wood (such as the veneer we used on the front to cover the plywood edges), you’ll get two different looks.
You might also consider adding an outlet to this for charging electronics AT THE DOOR- here’s a tutorial on How to Install an Outlet in a Nightstand Drawer. This doesn’t involve any tricky electrical work.
We’ve done a number of other built-ins so make sure to check them out… I ADORE them.
- DIY Living Room Built In Bookshelves
- Small Laundry Room Built-Ins
- DIY Farmhouse Entertainment Center Built Ins
- DIY Closet System
- DIY Office Built Ins
Please share and pin this post! You can also post your project and tag the DIYDanielle team on Instagram @doityourselfdanielle!