Make your own DIY coaster box using a laser engraver for a personalized touch to your home decor or as a custom gift.
This DIY coaster box uses a laser engraver to add a personal touch to your home decor or craft an awesome custom gift! It’s ridiculously easy to cut, engrave, and assemble, and you can make the whole DIY coaster box set in an afternoon. Follow along with the tutorial video, or check out some of my other laser engraving projects here!
This post may contain affiliate links which may earn me commissions should you click through them and take certain actions. As an affiliate for Amazon, Cricut, xTool, Home Depot, and other sites, I earn from qualifying purchases. Please DIY carefully. View my full legal disclosures here.
The majority of my content is generated by me, as are 99% of the photos and videos, but I utilize technology for titles, descriptions, video editing out all of my ums, and occasionally for text overlay on images.
Please read the whole post so you don’t miss any important information!
Supplies
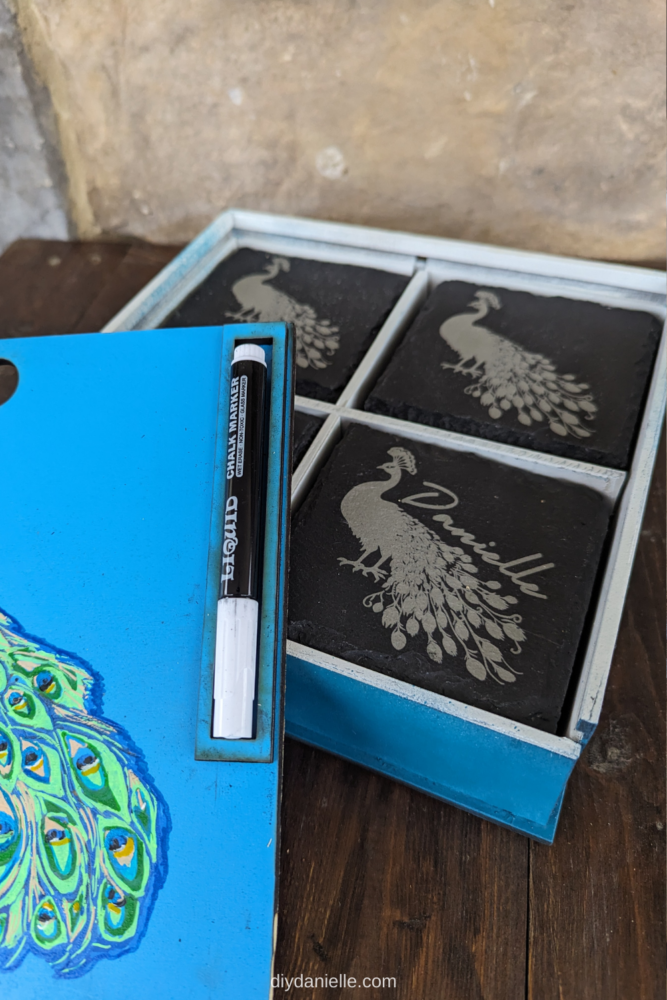
- 12 Stone Coasters: https://amzn.to/3RMaB1B
- ¼” Plywood – Purebond or other type compatible with laser cutting (the goal is to not have any toxic glues used in the material): https://homedepot.sjv.io/7m20NQ
- Clamps to hold the box together while the glue dries.
- Wood Glue: https://homedepot.sjv.io/5b4JQo
- Chalk Marker: https://amzn.to/48k0vvD
- Acrylic Paint Markers: https://amzn.to/3RKnCbU
- xTool M1 Laser Cutter http://shrsl.com/3v9vq
- Honeycomb Riser http://shrsl.com/3yxwg
- Air Assist http://shrsl.com/3yxv6
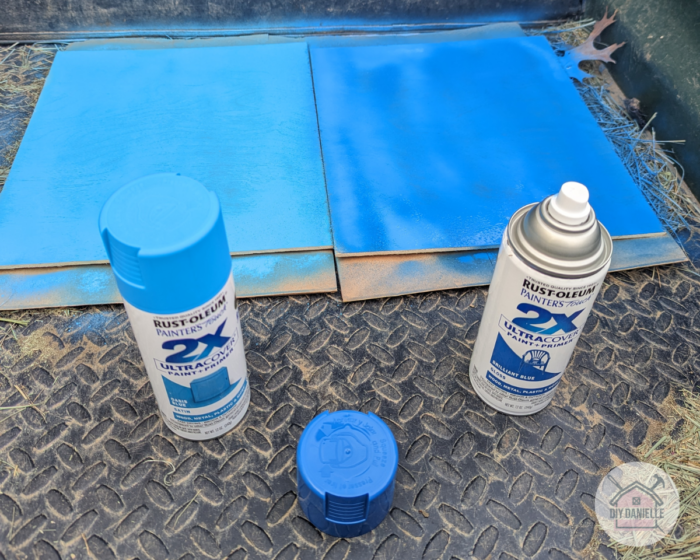
- Rustoleum 2x Spray Paint (I used blue and white!) https://homedepot.sjv.io/Ean04Q
DIY Coaster Box: Photo Tutorial
Step 1: Start by spray painting the wood pieces for the coaster box. It’s easier to do this before cutting the pieces for the box. You can paint them in different colors or use the same color.
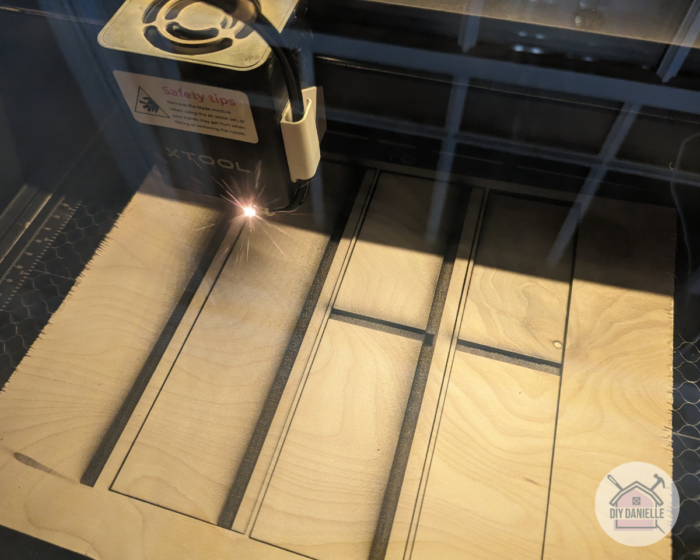
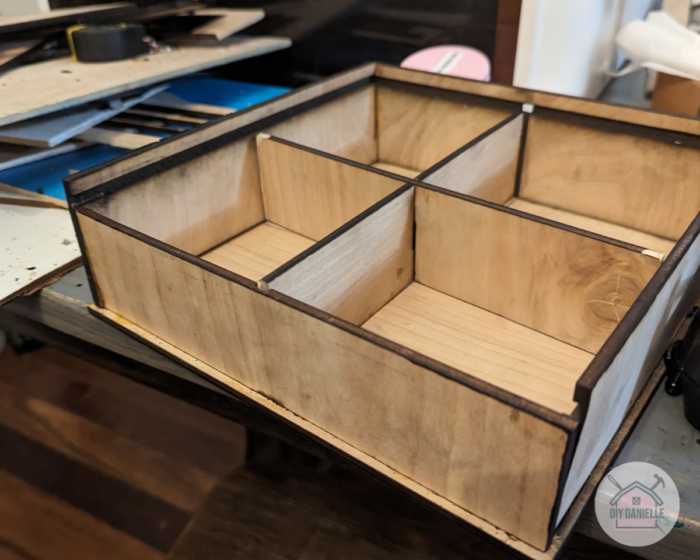
Step 2: Next, cut the pieces for the sides and dividers of the box with the laser cutter.
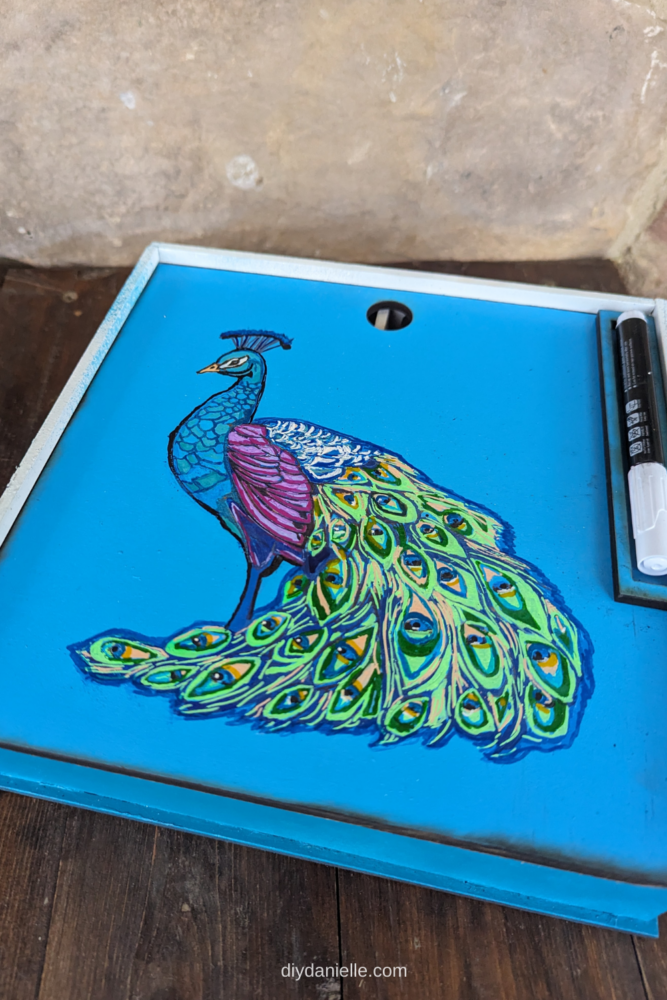
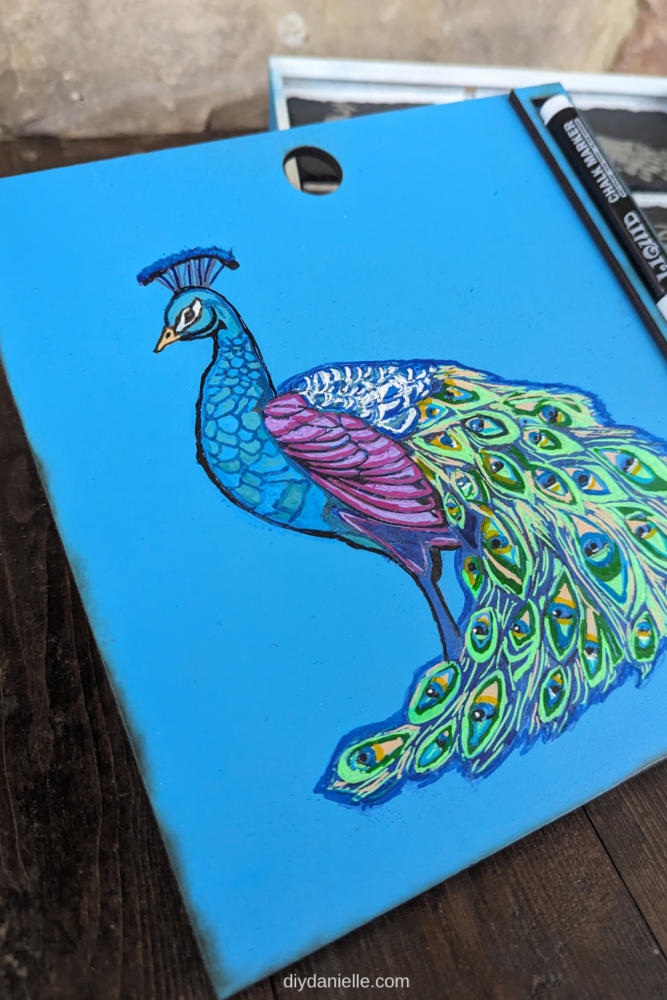
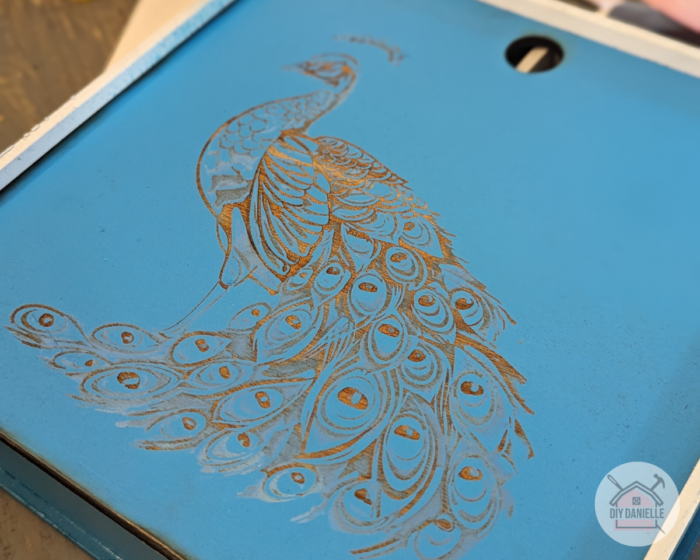
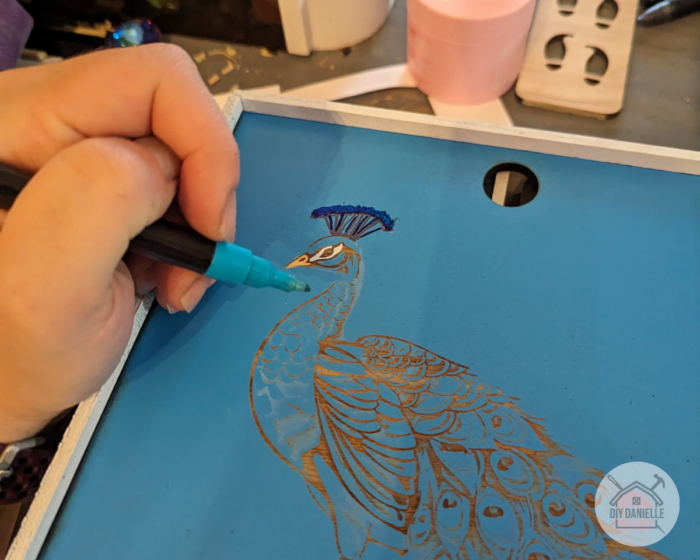
Step 3: Cut the bottom and top pieces of the box. At this stage, you can engrave the top (and/or bottom) of the box. I picked a peacock design that I could color in with acrylic markers, but you can choose from any number of things like names, dates, and images. The more personal, the better!
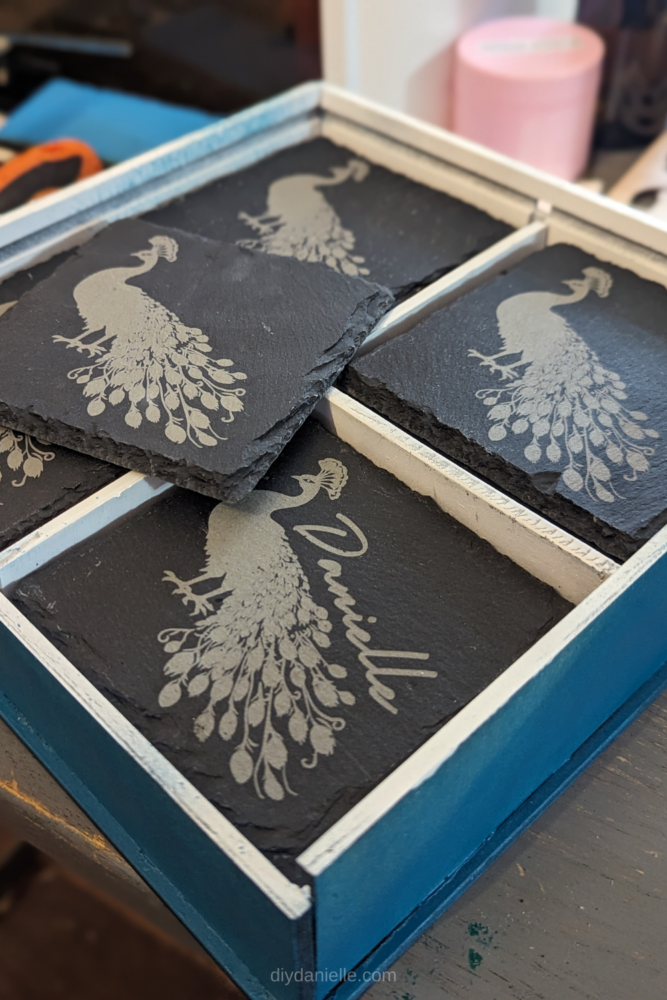
Step 4: This step is optional, but you can also engrave your coasters! You can use the same design that you used for the outside of the box or choose a new one.
Step 5: Assemble the box and use the wood glue to attach the pieces. I recommend using some clamps to hold it together as it dries. Let it dry. It should take about an hour for the wood glue to fully harden.
Step 6: Cut the pieces for the chalk marker holder. Attach it to the lid using wood glue and let it dry completely.

Step 7: While the holder is drying, you can carefully color in the design on the outside of the box using the acrylic paint markers.
Step 8: Once the paint and glue have dried, seal your work by coating the box in polyurethane spray. This will keep the paint from scratching or rubbing off easily! Let it dry completely before moving on, at least an hour or two.
Step 9: Add your chalk marker to the holder on the lid! At this point, you can also add four stick-on or glue-on felt pads to the bottom corners of the coaster box to keep it from scratching your tabletops.
Step 10: Use chalk markers to temporarily customize your stone coasters! I engraved names on a few of the coasters and left the rest blank to add the names of guests when they come over for dinner. Chalk markers usually come off the coasters under running water or a damp cloth.
As an additional note: While I was able to make this entire box using my laser cutter, it would have been a LOT faster to do the groove cuts with a table saw. A LOT FASTER.
I want to make a million more of these boxes because I had SO much fun with them, but I will do groove cuts with my table saw in the future and save the engraving machine for the intricate details (the circle cut and the engraved design).
If you’re scared of the table saw or don’t have one, obviously this is an option. But you may want to consider a router for the groove cuts.
Again- the laser engraver is VERY slow to engrave the gaps down. I spent a LOT of time waiting for it before I was like doh, I have a table saw I need to use that. Given that laser cutters can be a fire risk and need supervision, I hate sitting for hours to wait on cuts that can be done more easily in my woodworking shed.
Video Tutorial: Custom Coaster Box
Please share and pin this post! You can also post your project and tag the DIYDanielle team on Instagram @doityourselfdanielle!