

This large DIY corner desk is perfect for two people. We used 2x4s for the Farmhouse style legs, (2) IKEA Alex drawers, and butcherblock.
This post may contain affiliate links which may earn me commissions should you click through them and take certain actions. As an affiliate for Amazon, Cricut, xTool, Home Depot, and other sites, I earn from qualifying purchases. Please DIY carefully. View my full legal disclosures here.
The majority of my content is generated by me, as are 99% of the photos and videos, but I utilize technology for titles, descriptions, video editing out all of my ums, and occasionally for text overlay on images.
Please read the whole post so you don’t miss any important information!
We’re geeks: we love computers and computer games. Our two older kids have hand me down computers that they use for school and games. When we moved, a priority project was fixing up our office with DIY desks and storage space.
In the meantime, it’s been a hot mess.
Initially we prioritized other projects like our DIY laundry room and DIY master closet renovation. We added a fan and light to the room last year too. But our school system opted for 100% online learning in the Fall so we HAD to finish the office area. The ADHD genes are fairly strong in our family and an ORGANIZED space is really important for my kids (and myself).
With all three kids home, however, it’s been difficult to tackle the projects. I’ve been working on each section of the project in small increments.
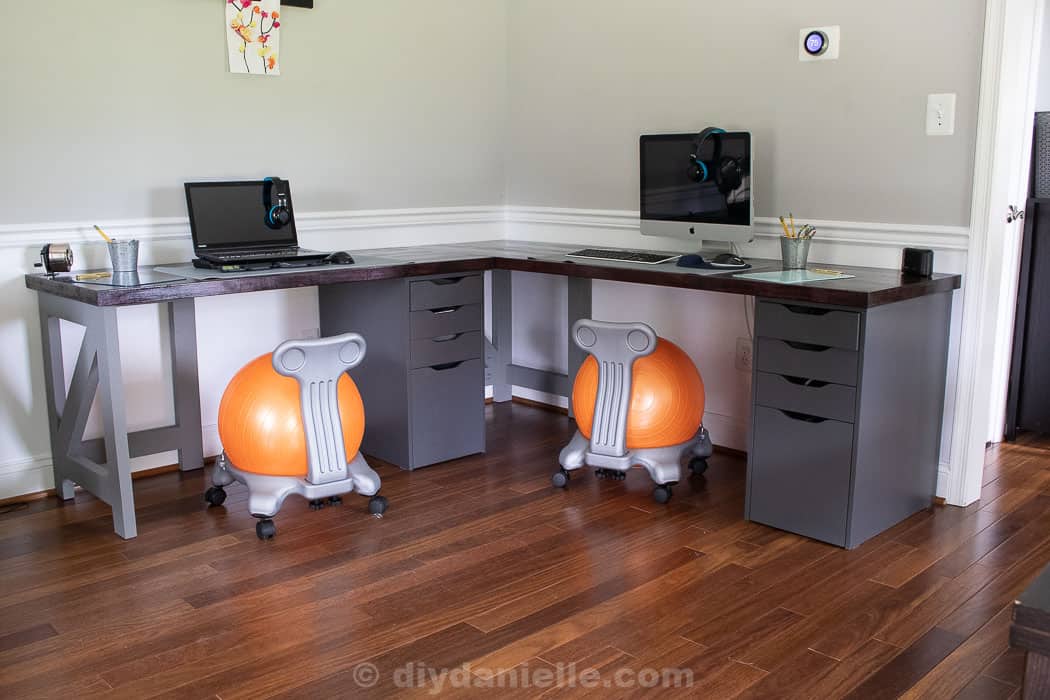
First finished? The 2 person corner desk for the kids.
Keep an eye out for the rest of our homeschooling and office renovation including:
- (2) 4′ desks
- (1) 5′ desk for my work area
- (1) Tall shelf for the printer and other supplies
- Wall shelves
- Homeschooling station setup with labels, school schedules, etc.
- Full office renovation reveal!
Did you know I have a store with all sorts of fun digital products? Here’s a few you might be interested in, or keep scrolling for the tutorial!
How to Make a 2 Person Corner Desk
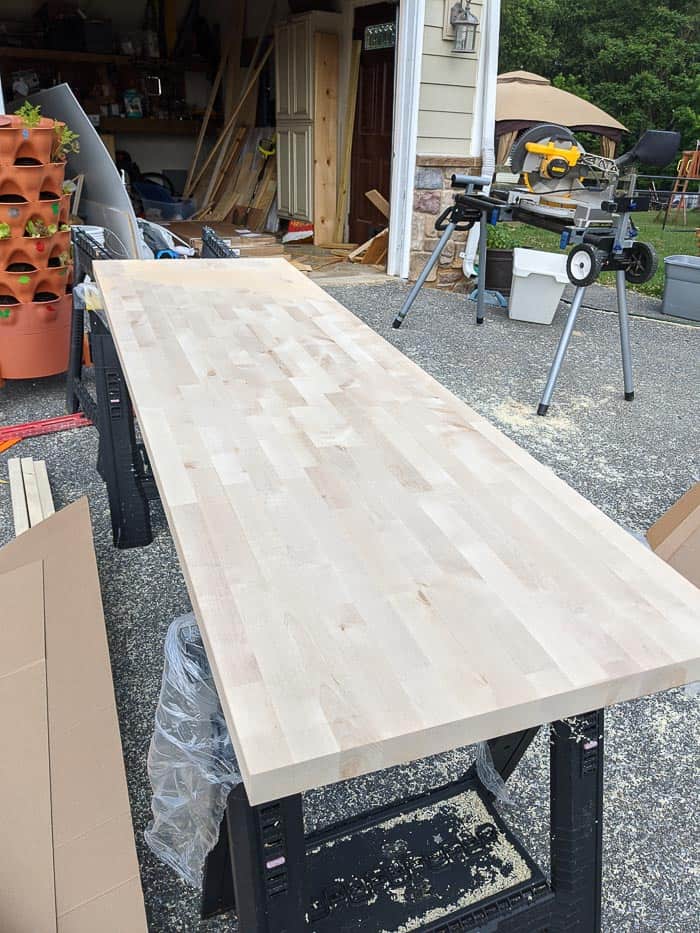
When choosing your supplies, remember that butcherblock comes in different types of wood and finishes. Our butcherblock is 25″ deep and 1 5/8″ thick (ish). It was unfinished birch.
Our butcherblock tops are heavy so you may want to opt for a thinner piece if you want a lighter piece of furniture. We had to be careful about how we assembled these because we didn’t want the kids to wiggle the desks apart and end up with heavy butcherblock crashing down.
Supplies
- Butcherblock:
- 6′ butcherblock cut to 58″ ($168)
- 8′ butcherblock cut to 83″ ($240)
- (3) 2x4s: $4 per 96″ 2×4 (113″ per leg)
- IKEA Alex Drawers (Gray)
- Varathane Premium Wood Stain: Black Cherry
- Varathane Ultimate Polyurethane Oil Based, Clear Semi Gloss
- Kilz3 Premium Interior/Exterior Primer Water Based
- Behr Ultra Scuff Defense Paint and Primer in One: Barnwood Gray
- (1 pk) 1.5″ Corner Braces: 2 per leg
- (2) Flat brackets: TP 1-13/16 in. x 5 in. 20-Gauge Galvanized Tie Plate
- Large Command Strips (4 pairs)
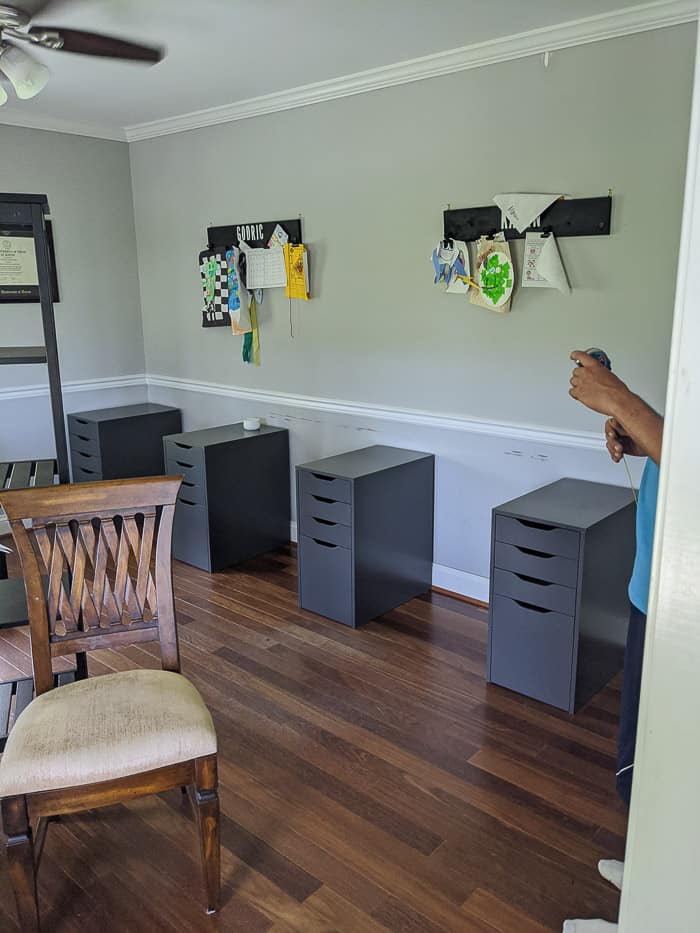
Alex Drawers for a Desk
The Alex drawers cost $79/each and we paid for shipping because the stores were closed when we ordered them. We could have built cabinets from scratch, but my husband poo-poo’ed that idea. We’ve never built drawers and we needed six of these so buying the drawers made more sense. If we could have purchased these already assembled, it would have been nice. I love buying used IKEA stuff for this reason.
Click here to learn How to Assemble IKEA Alex Drawers
Preparing the Butcherblock
We carefully cut the butcherblock down to the sizes we needed: 58″ and 83″.
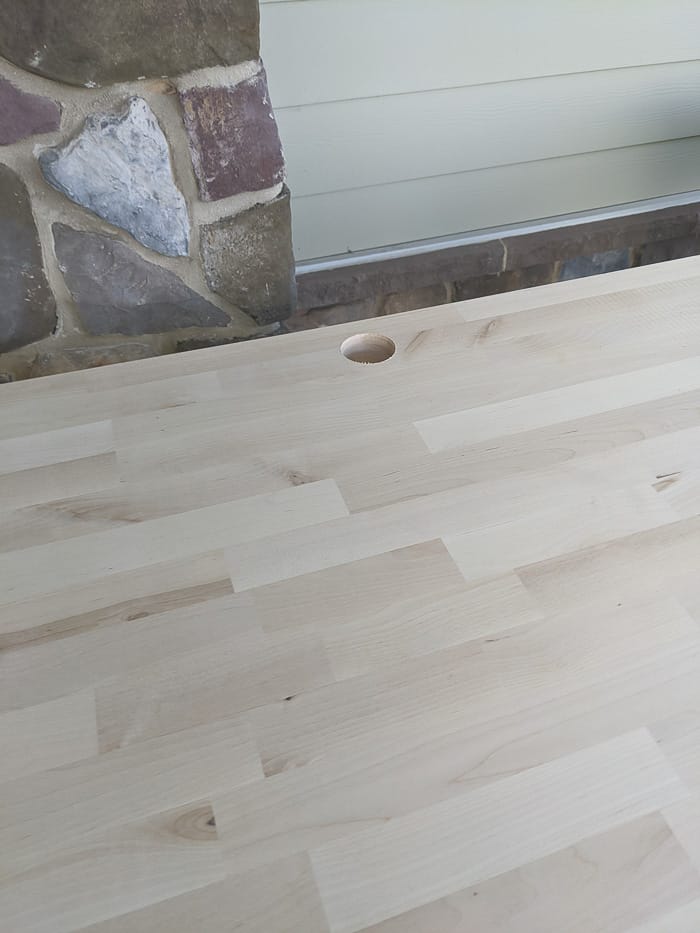
My husband used a hole saw to cut a 2″ hole in the back of the desk to run wiring through. Afterwards, he sanded down the raw edges to smooth them out.
A few tips for a clean cut with the hole saw:
- Practice on a scrap first.
- Use painter’s tape on the back and front of the area you’re cutting.
- You can place a block of scrap wood under the butcherblock if you want to prevent blowout.
- Slow and steady wins the race.
- Your hole saw may not go through butcherblock this thick, but the hole saw has a drill bit in the middle that will go through. You can flip the butcherblock and insert your drill bit in that hole again to cut from the opposite side.
There’s an obvious good and bad side to the butcherblock. You want the flawed side on the bottom. I recommend applying your stain and poly to the bottom, then flipping to do the top.
I used Black Cherry stain and applied one layer of stain with a clean rag or brush, and disposable gloves. Once dry, you can apply another layer or two of the stain if you want the finish to be darker.
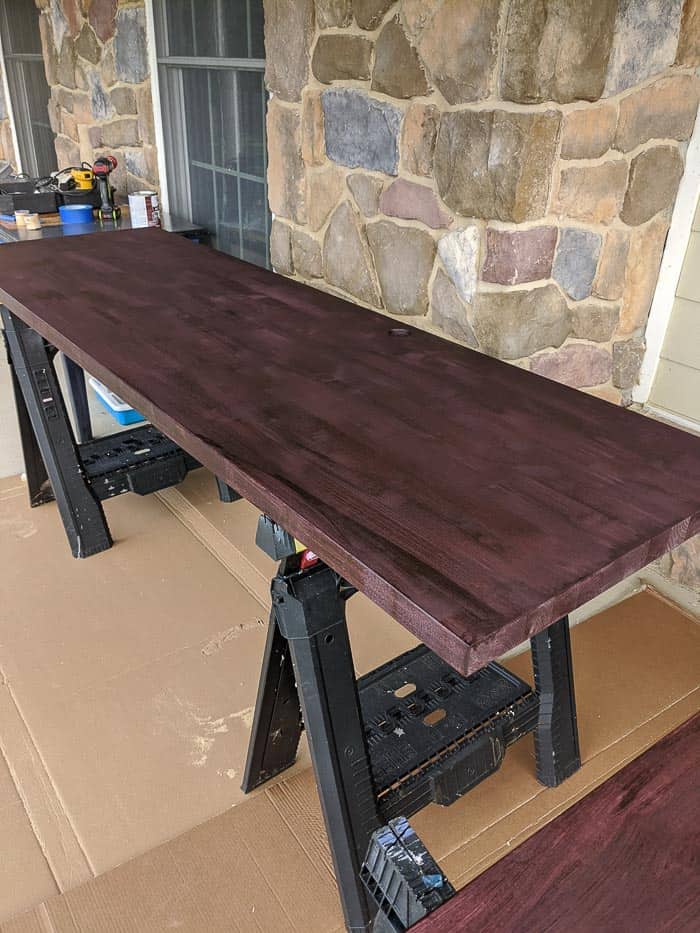
Once the stain dried, I applied three layers of Polyurethane. Wearing gloves, I use an old clean sock on my hand to wipe on the poly. For each layer of polyurethane, you want to let it dry, sand lightly with 400 grit sandpaper, then apply another layer of poly. Do not sand your very last layer.
You need at least three layers of polyurethane per side.
When staining, sanding, and applying your polyurethane, you want to use long strokes in the direction of the grain.
Building the Legs
The legs were fairly simple to build. I’m going to be putting together a woodworking plan for the legs so please scroll to the bottom of the post to get on the waiting list for that plan.
For each leg, you need (3) 27.5″ tall 2x4s for the vertical supports, (4) 15 3/4″ supports horizontally, and one diagonal support. These were assembled with pocket holes on the inside of the L shape.
You can use plugs for the pocket holes if you desire, but we left them as is as they aren’t easily visible.
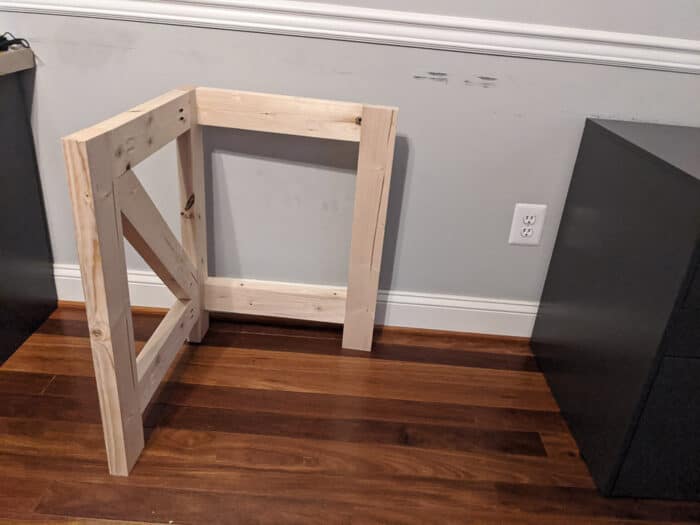
Once you’ve built your two legs, you should use Primer on the wood; regular paint + primer doesn’t work well for raw wood. Once dry, apply a couple of coats of gray paint. I used Scuff Defense from Behr because I had it on hand; it has more of a flat look to the paint. The Barnwood Gray isn’t quite the right color, but it will work. I may decide to repaint with a darker gray at some point.
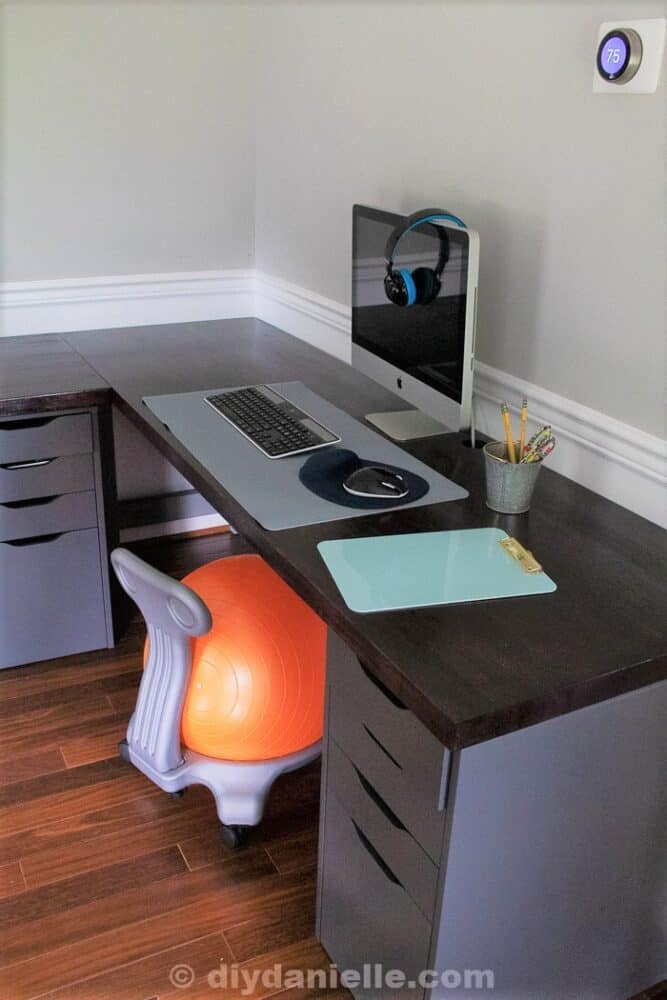
This is how the two legs are positioned under my corner desk. There’s one in the corner to support the end of the right piece of butcherblock. Then there’s one to support the left piece. We could have used double drawers for each desk, but there would have been less leg space which wasn’t ideal.

Attaching the Butcherblock to the Alex Drawers
We didn’t want to drill into the drawers because they’re not true wood and they might have split. The benefit to using screws, however, is that the desk can be taken apart again.
My husband suggested gluing the desk top to the drawers, but I wanted a removable option. I decided to use two sets of Large Command Strips per drawer. They should keep the desk tops from shifting around, but they stick together like Velcro so they can also be pulled off.
I placed the strips on top of the desk to show you the approximate placement, but obviously these goes under the butcherblock so they stick to the bottom of the counter and the top of the drawers.
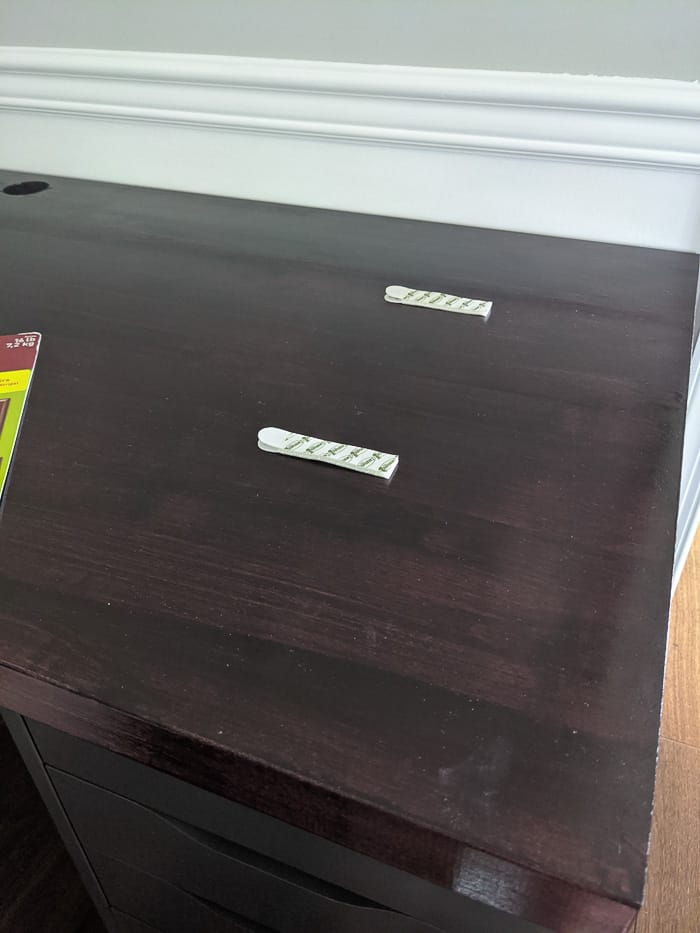
If I want to remove the Command Strips altogether, I can use a hair dryer to heat up the glue and peel them off, hopefully without ruining the finish on the countertop or the drawers.
There’s nothing complicated about this part of the project, but you need to line up your desk top and drawers properly so you can adhere everything properly the first time.
Attaching the Two Pieces of Butcherblock
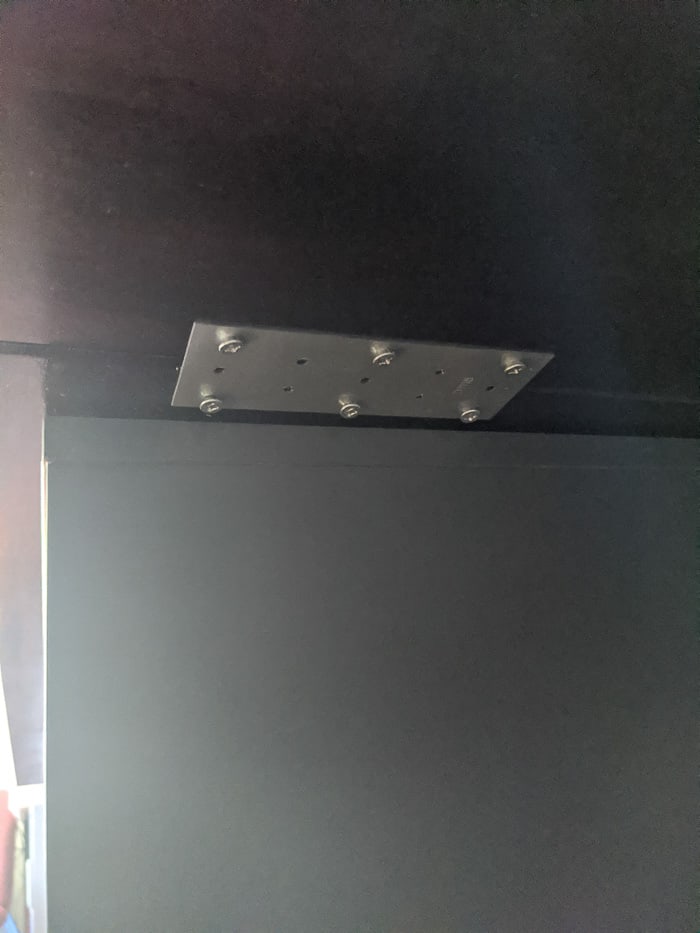
To attach the two sections of desk top, we used flat braces, specifically TP 1-13/16 in. x 5 in. 20-Gauge Galvanized Tie Plates. You need enough space between the IKEA drawers and the connection so you have room to screw them together.
Here’s a photo of the plates on top of the desk in their approximate placement… they’ll be attached UNDER the desk where they won’t be visible.
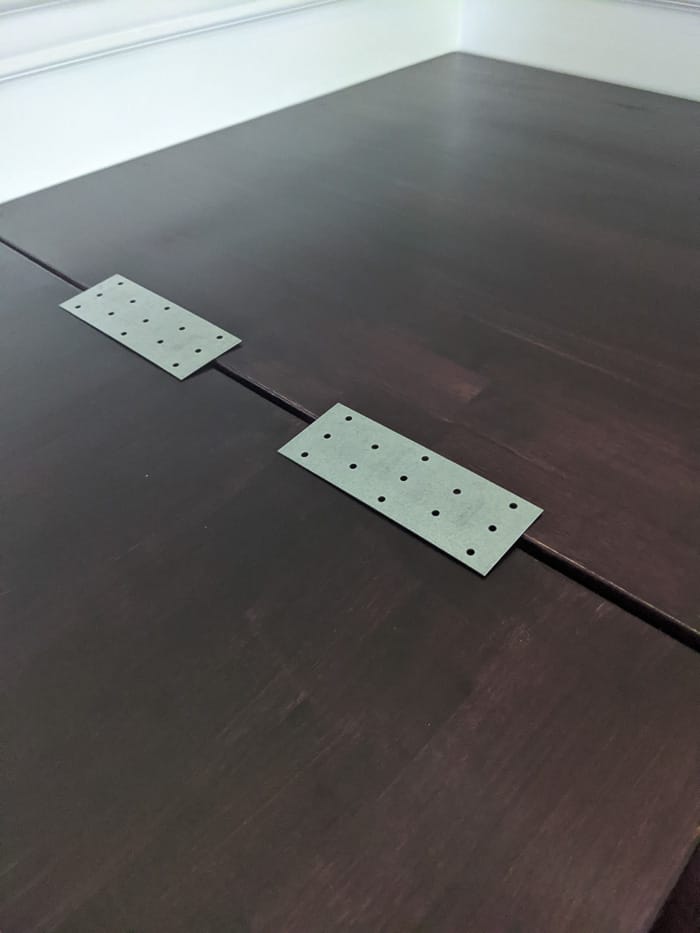
Here’s a photo of them installed under the desk.
Attaching the Legs to the Butcherblock
If you opt for a longer desk on either side, you could use purely the Alex Drawers for each side… so a total of 4 Alex Drawers. But the problem is that you lose leg space when you use two drawers so I don’t recommend that.
We built (2) legs; one for the corner and one for the left desk. The two Alex drawers we used supported the other sides. We were going for a farmhouse style leg.
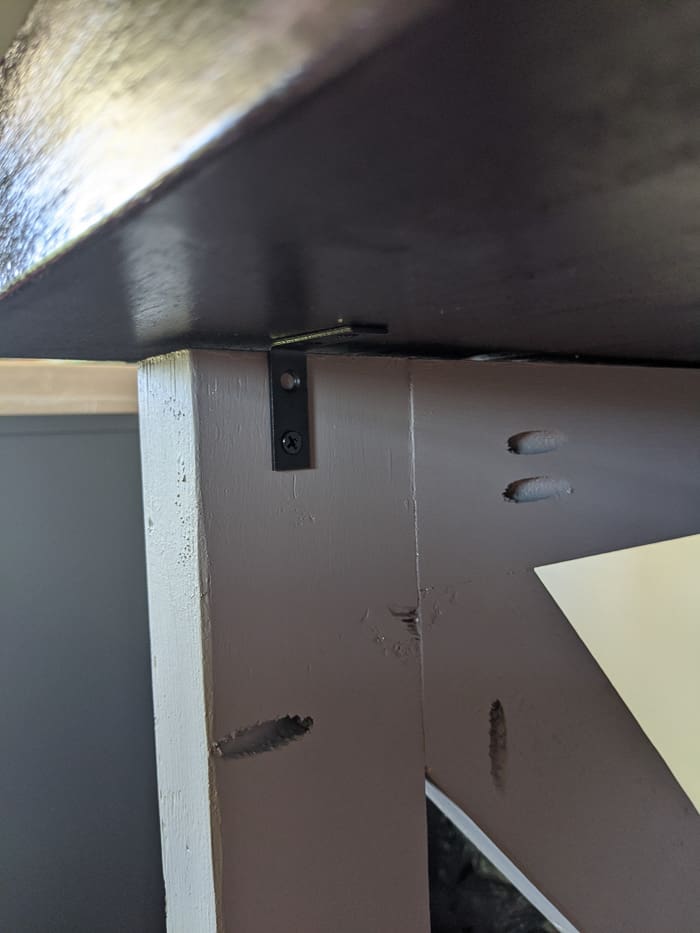
Each leg is attached to the bottom of the butcherblock with (2) 1.5″ Corner Braces.
Want the woodworking plan for the legs of the desk? Sign up for the waiting list for the plan below!
Desk Accessories
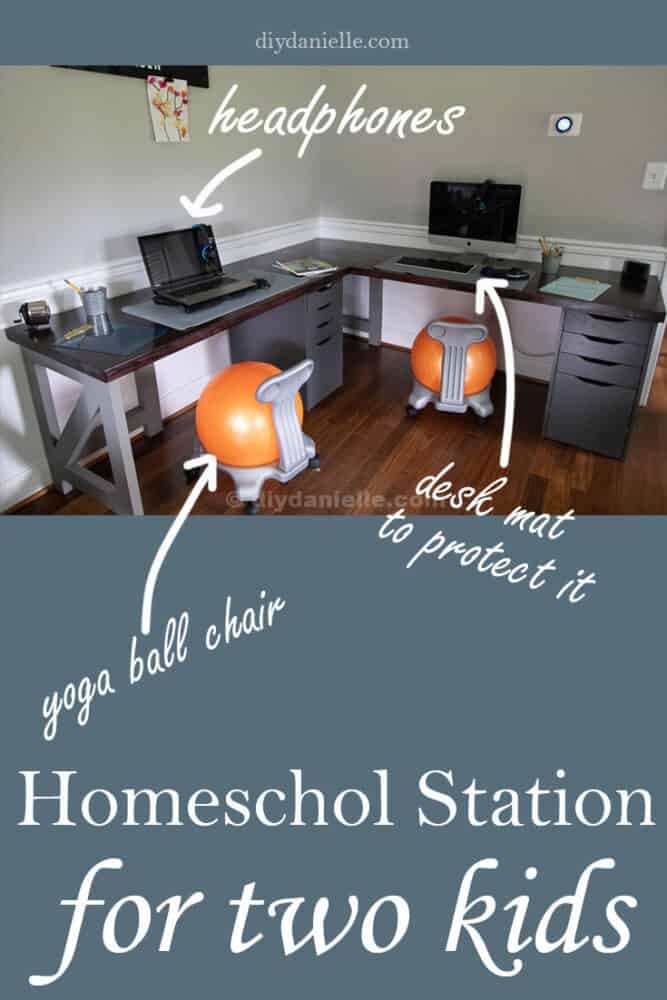
I decided to go with a gray and orange yoga ball chair for the kids. According to the manufacturer: “this exercise ball chair helps to reduce restlessness, fidgeting and prevent boredom.” I figured it was worth a shot and probably better for their backs, seeing they’ll be at a computer from 9-3:30 four days a week. My 6 year old sits so nicely in his, but my wiggly 8 year old falls off at least once a day. I usually hear a thu-thu-THUMP as he slow falls. Super glad we secured the desktops. (2 at $59/each)
I also added a blue/gray leather desk protector for each child because I’m petrified they’ll ruin my beautiful butcherblock desktops! (2 at $20/each)
Total Project Cost for the large corner desk for two people: $637
- Butcherblock: $408
- 2x4s: $12
- All Braces/Brackets: $5
- Paint/Stain: $48
- 2 IKEA Alex Drawers: $158
- Command Strips: $6
- 2 Chairs: $118
- 2 Desk protectors: $40
Cost with the chairs and desk protectors: $795
This is fairly expensive for a desk, but it’s a nice quality custom desk so I think it’s comparable to what we would have paid otherwise. Many of these items I had on hand (the 2x4s, the paint and primer, some of the brackets) so they cost me nothing. I also have plenty of the paint and stain left to finish the other three desks for this room.
If you want to save money, use quality 3/4″ plywood instead and use trim. You should be able to make the desk top for this entire corner desk with (1) $55 4×8 plywood sheet. The top of the desk won’t be as thick, of course, but you should get a nice finished look (please send me pictures if you do this!). If you use plywood instead, your desk will run $284 or $442 with the chairs/desk protectors included. This is a HUGE savings and likely cheaper than you’ll find a two person corner desk, even used.
Total Finished Size of the corner desk: 83 1/8″ left side to corner, 83″ from corner to the right side.
You might also consider adding an outlet to the desk- here’s a tutorial on How to Install an Outlet in a Nightstand Drawer. This doesn’t involve any tricky electrical work.
Please share and pin this post! You can also post your project and tag the DIYDanielle team on Instagram @doityourselfdanielle!
Google Web Story: DIY Corner Desk