
How to setup an easy chicken moat around your garden. Adding a chicken run around your garden is a great way to combat pests and weeds.
Have you ever seen those cute chicken tunnels? I have wanted one SINCE FOREVER, but they didn’t look predator proof and I have a PERSISTENT fox who loves to snatch chickens whenever he can. Free ranging is also not an option thanks to fox, hawks, and loose dogs.
I toyed with the idea of building a large raised bed garden with a predator-proof chicken run around the entire garden, but when I calculate my wood costs, it was QUITE expensive to put together. It also wasn’t something I had the energy to tackle immediately.
This post may contain affiliate links which may earn me commissions should you click through them and take certain actions. As an affiliate for Amazon, Cricut, xTool, Home Depot, and other sites, I earn from qualifying purchases. Please DIY carefully. View my full legal disclosures here.
The majority of my content is generated by me, as are 99% of the photos and videos, but I utilize technology for titles, descriptions, video editing out all of my ums, and occasionally for text overlay on images.
Please read the whole post so you don’t miss any important information!
Chickens + Gardens: The Dream Team at Work
But I really wanted to work smarter, not harder on this whole gardening and chicken keeping thing. It’s important to me that I not waste time on tasks that could be simple and easy. Chickens and gardens work well together so it makes sense to keep the chicken coop near the garden.
Keeping chickens comes with a lot of benefits:
- Eggs
- Meat
- They will lay hatching eggs and hatch chicks
- Manure for composting
- They eat bugs
- They eat weeds
Unlike other types of animals on the homestead, they can be fairly easy to keep too.
My main struggles with my garden were:
- Dealing with weeds and grass around the perimeter
- Pests
- Mowing around the fencing
The chickens could help manage part of this, but I needed other ways to manage the rest. That’s how I developed this movable chicken moat.
Video Tour of the Chicken Moat
DIY Garden Moat (Aka the Chicken Moat): A Chicken Run Around Garden
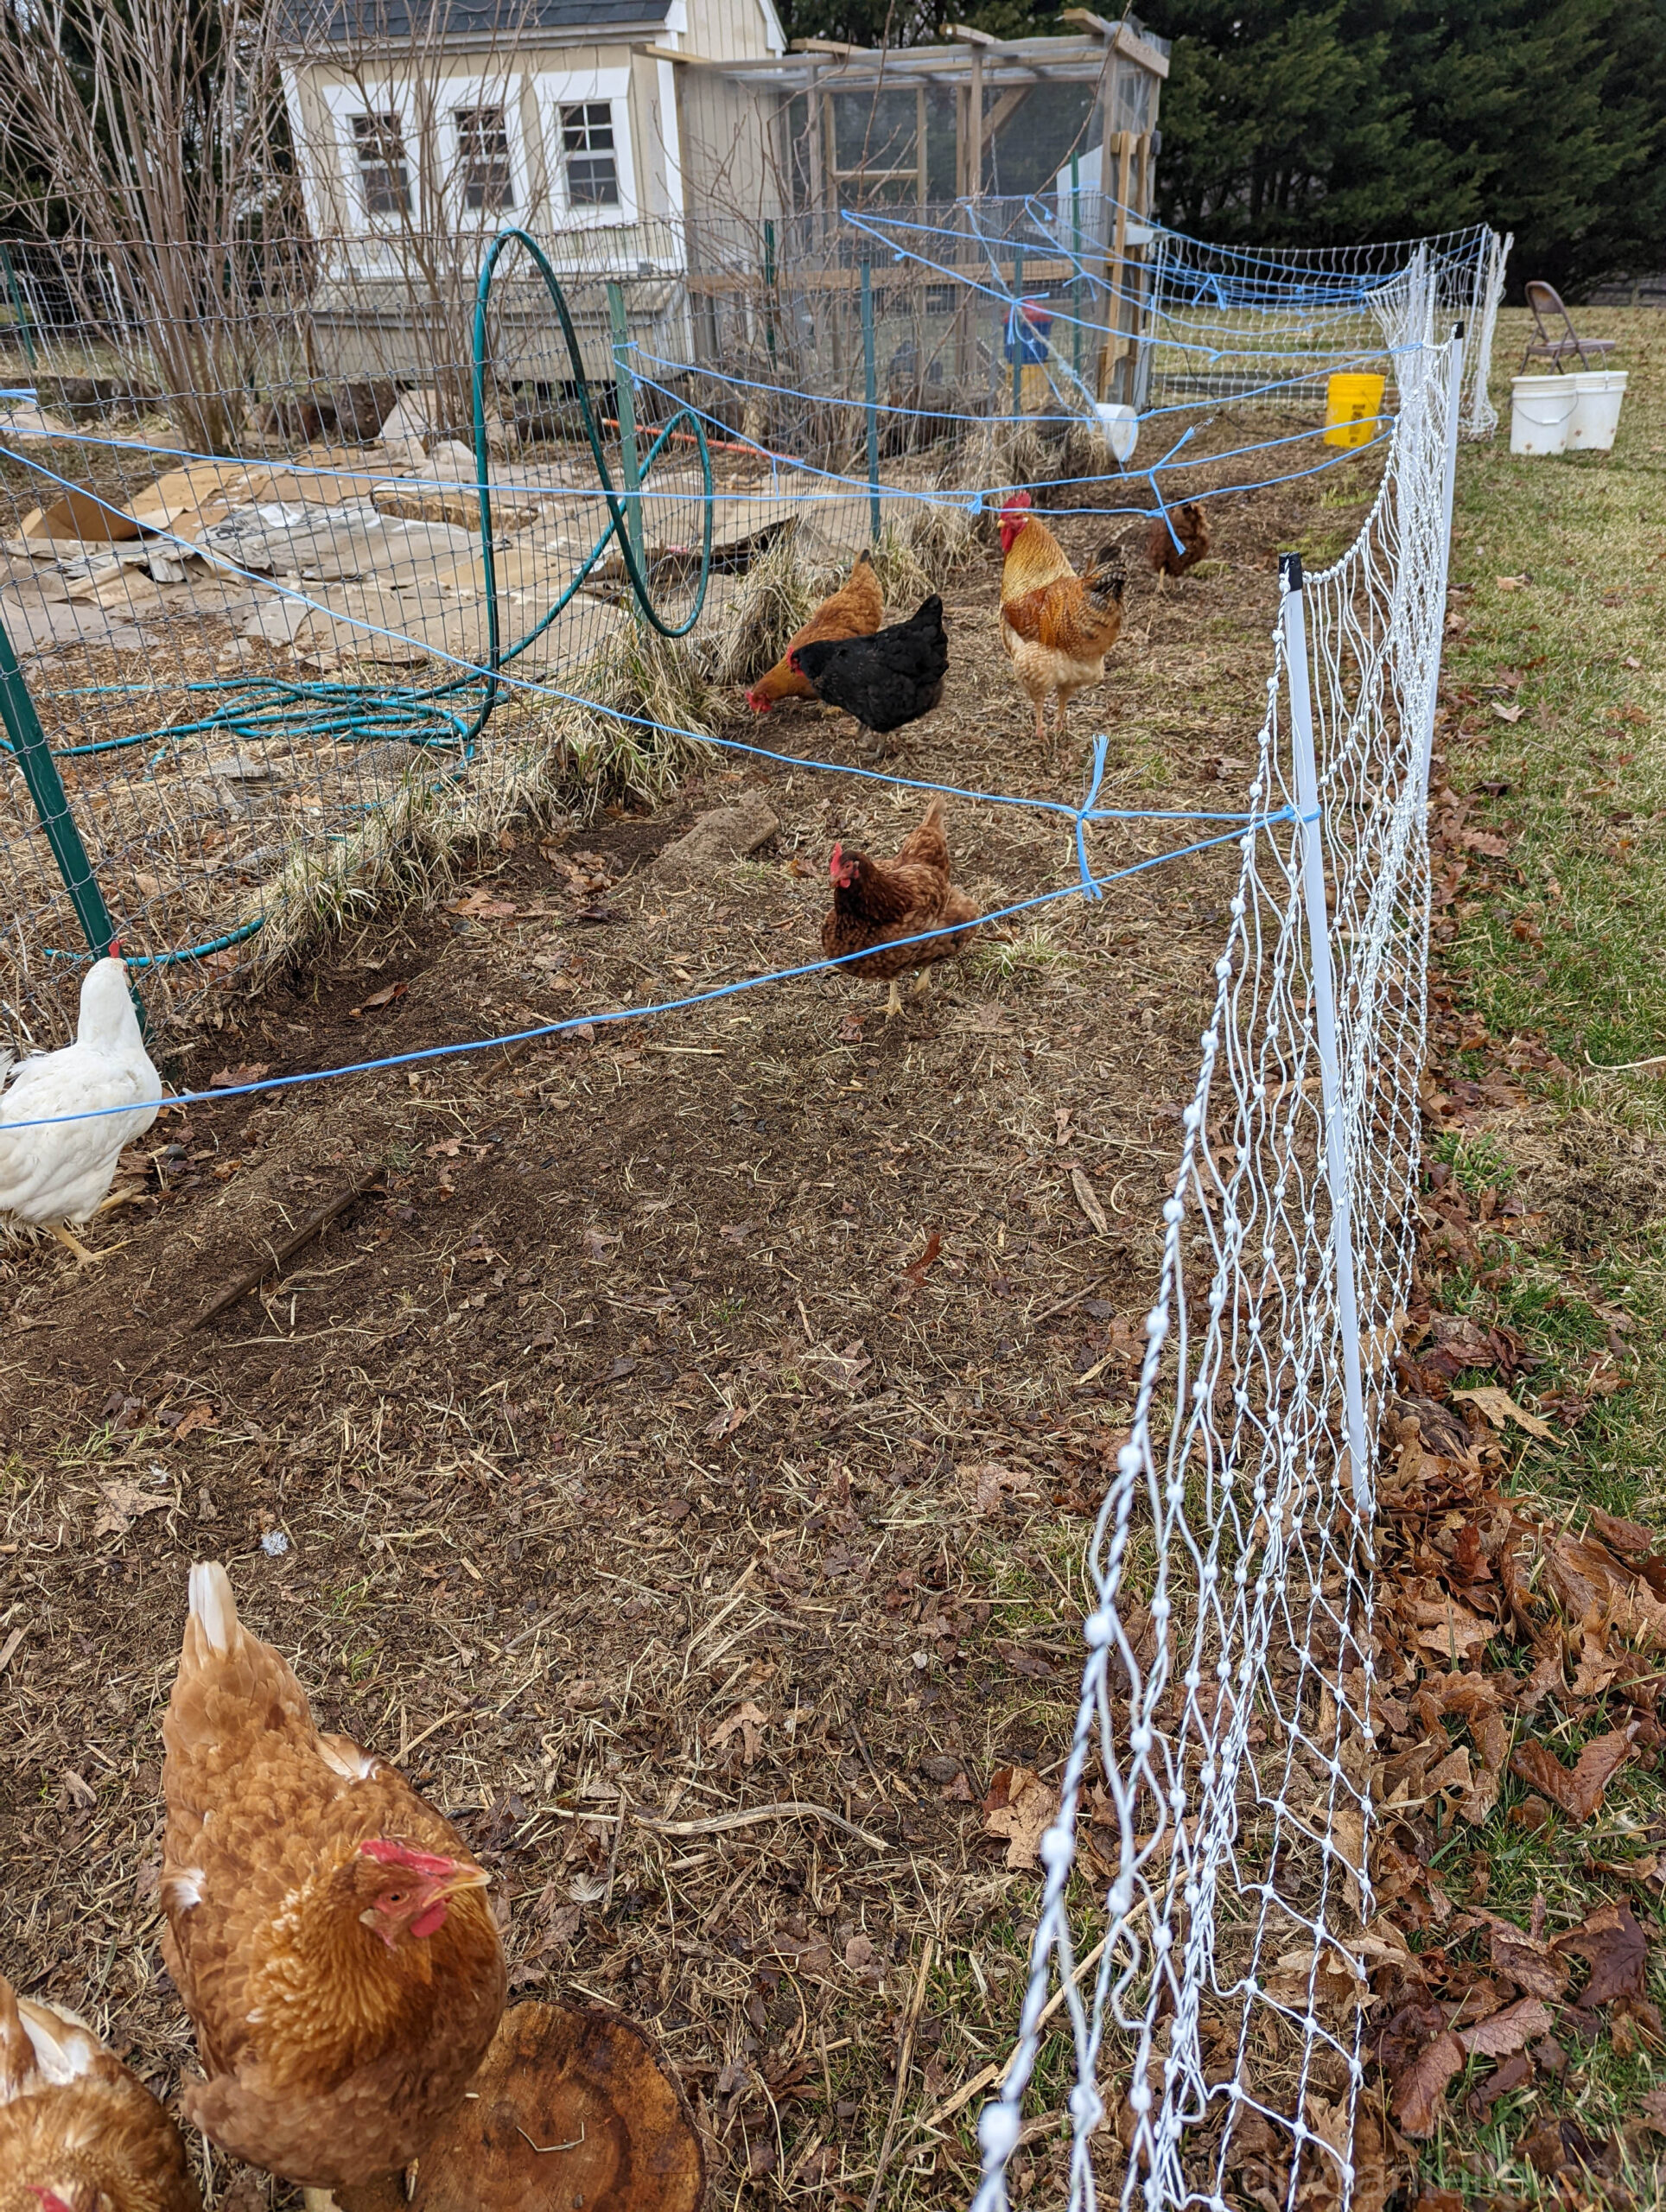
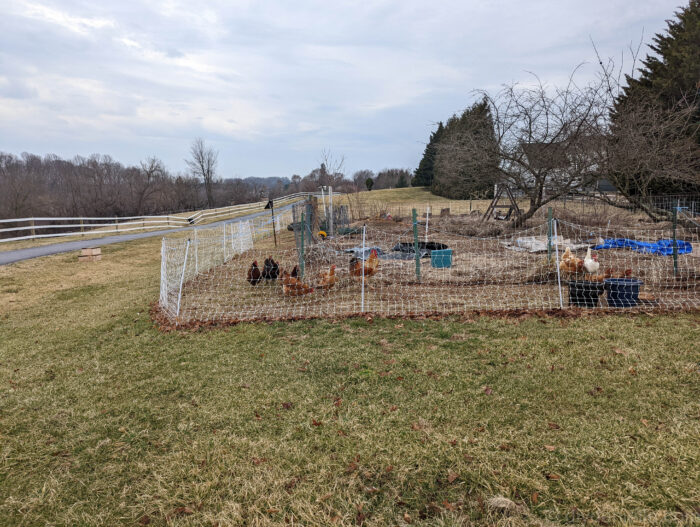
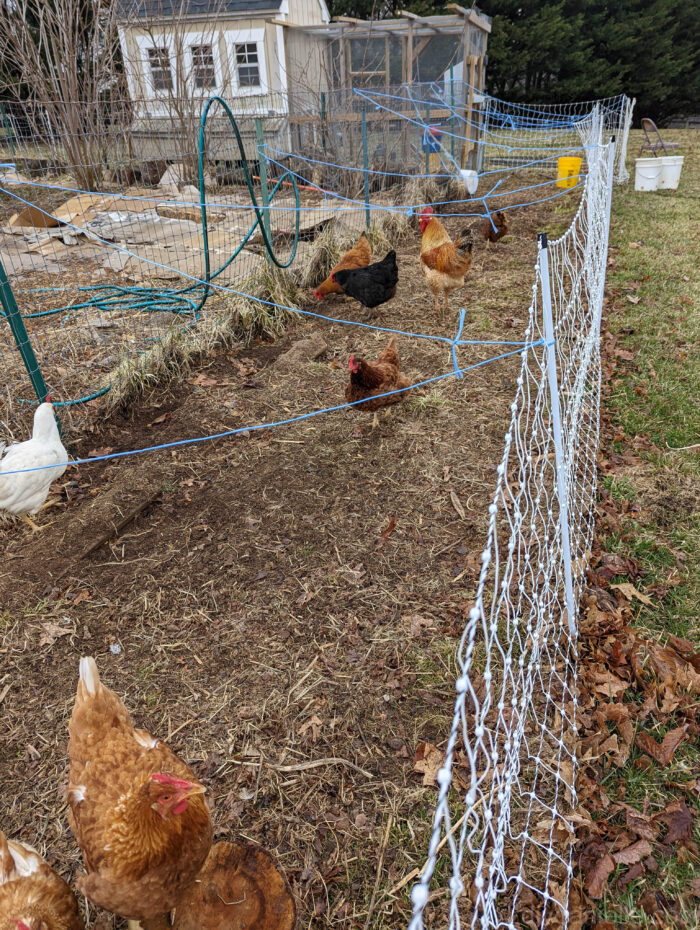
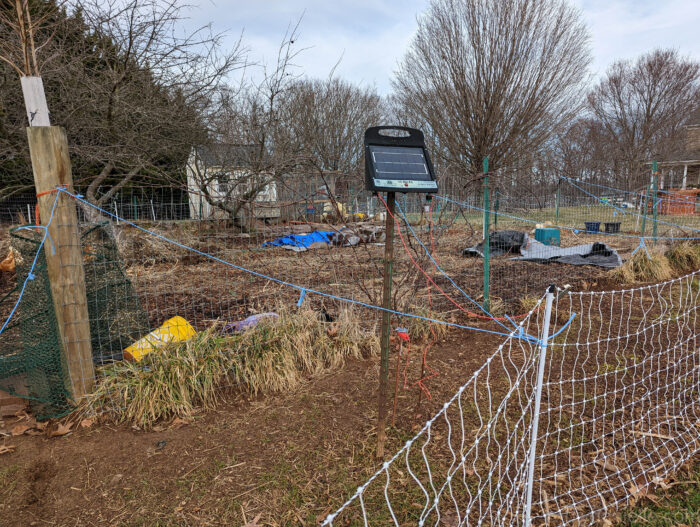
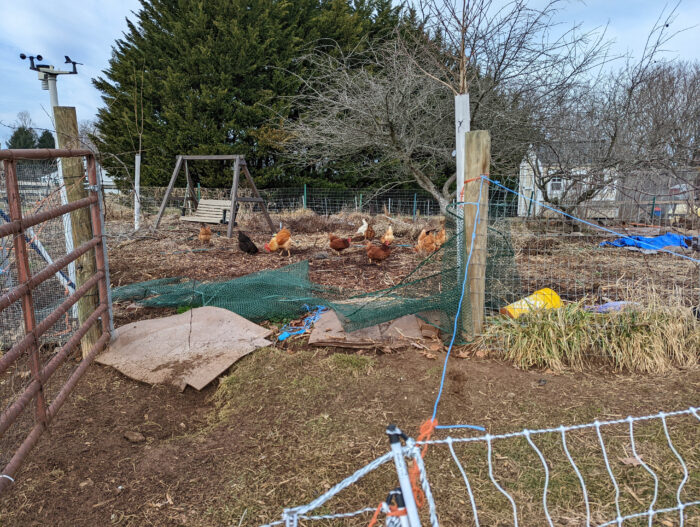
My solution to my problem was to create a movable chicken moat or “garden moat.” Step in electric fencing gives me the freedom to move my fencing in or out. Every time I mow the lawn, I can move my fencing in a bit, mow the area, then move the fencing back out to the max moat width. This prevents long grass from shorting out the electric fence. As you might guess, the chickens don’t want to eat the grass right under the fencing as they don’t like to get shocked.
The chickens will keep the rest of the moat area mowed, including reaching through to the interior garden to eat weeds along the perimeter. So far it’s working well and my 11 chickens do a good job of patrolling the moat area to perform cleanup.
As an added bonus, I believe this double fence SHOULD keep the deer out of my garden who, last year, would simply jump the fence when they wanted a snack. They seem to dislike my other electric fencing so I hope this is effective.
Keep in mind that while you should still offer your chickens feed, being able to free range will decrease how much feed they go through. They’ll be able to eat weeds and bugs to supplement their diet.
Products Used for the Chicken Moat
- (2) PoultryNet® Plus 12/42/3 (100′ x 42″ white/black roll), double spike: I used (2) rolls of net fencing. The first roll is poultry netting and then I used their goat netting for the other half just to save money. I’ll eventually replace this with the poultry netting because it’s a lot better for chickens (chickens can squeeze through the holes in the goat fencing but aren’t eager to do it once they realize it’s electrified).
- Extra step in posts are useful
- Solar charger or electric-powered charger: Electric will be stronger, but solar will do the trick if you don’t have access to a power outlet.
- Gate
- T Posts or wood posts
- No Climb Horse Fence
- Baling twine (leftover from hay): Any colorful rope will work here.
- Ground rods (2-3)
- Large screw hooks (Everbilt #6 Zinc): I think this multipack would be really useful to have around.
- Omlet Automatic Coop Door
Positioning the Chicken Coop
The chicken coop was positioned in the back right, near to some trees that border our property so that hopefully the trees buffer any rooster noises in the morning.
This also was a great position so that I could run (1) 100′ set of poultry netting from the front of the small predator proof chicken run, and (1) from the back of the coop so that they met at the entrance to the garden.
Setting up the Interior Garden
After many mistakes buying wire fencing, I used no climb horse fencing and t posts as the fencing for my 60×70′ garden. This was setup when I first put in the garden.
If you’re new to using t posts, make sure to buy the t post pounder. It makes a HUGE difference in how fast these t posts go into the ground.
My gate is in the front middle of my garden.
I have fruit trees, herbs, and also plant fruits and vegetables in my garden each year. I am hoping to add a pond soon as well, although I’m still working out the details of that. I have a swing inside my garden near the pond so I can sit and watch the birds and other wildlife in between gardening. It’s lovely, particularly in the Fall when I grow sunflowers.
Setting up the Chicken Run around the Garden
To setup the chicken run around the garden, I placed my Solar charger in between the moat fence and the garden fence. I added a ground rod nearby and plan to add two more.
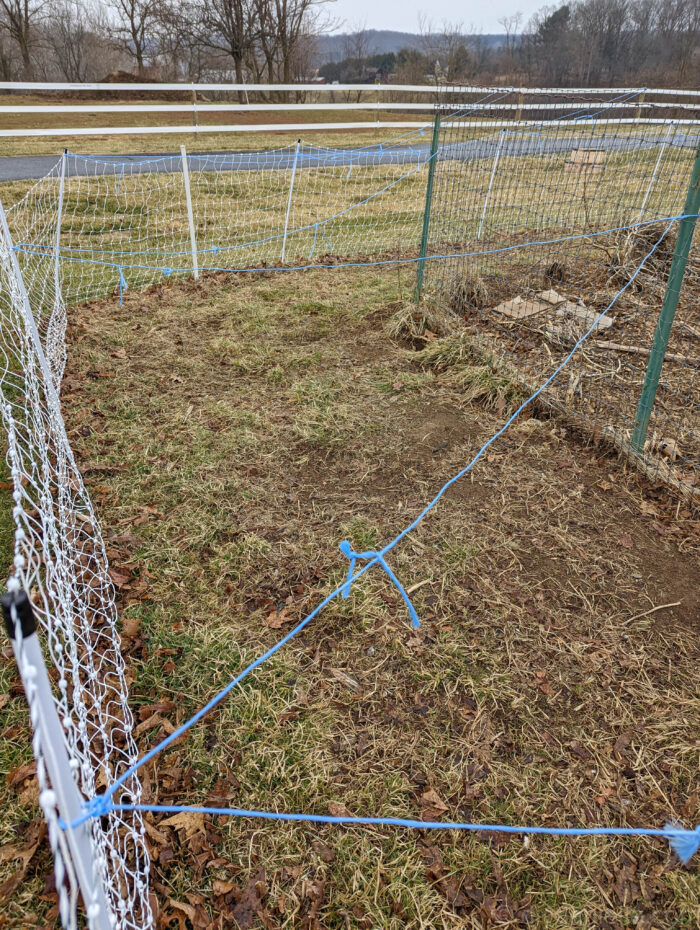
I started my PoultryNet at the solar charger and laid it out on the ground up to the chicken coop area. This allowed me to choose how wide to make the run, depending on how much fencing I had. The run is about 2-5′ wide. Near the gate I moved the fencing out a bit further so that the gate could open.
Here’s a good look at the width of the chicken run. To keep chickens from flying out, or hawks from getting in, I used bright blue baling twine across the top of the run. While there’s gaps that they can get through, this should HELP (and so far it’s working well).
I may attach Bird Scare Tape to the blue twine as well… the tape flies around in the wind, making birds nervous about getting near it.
Just remember that electric fencing should be marked so visitors don’t get electrocuted. I made my own DIY signs and you can get the SVG files from my shop, or you can purchase stickers to use if you don’t have a Cricut.
Not sure how electric fencing works? Check out my Guide to Electric Fencing.
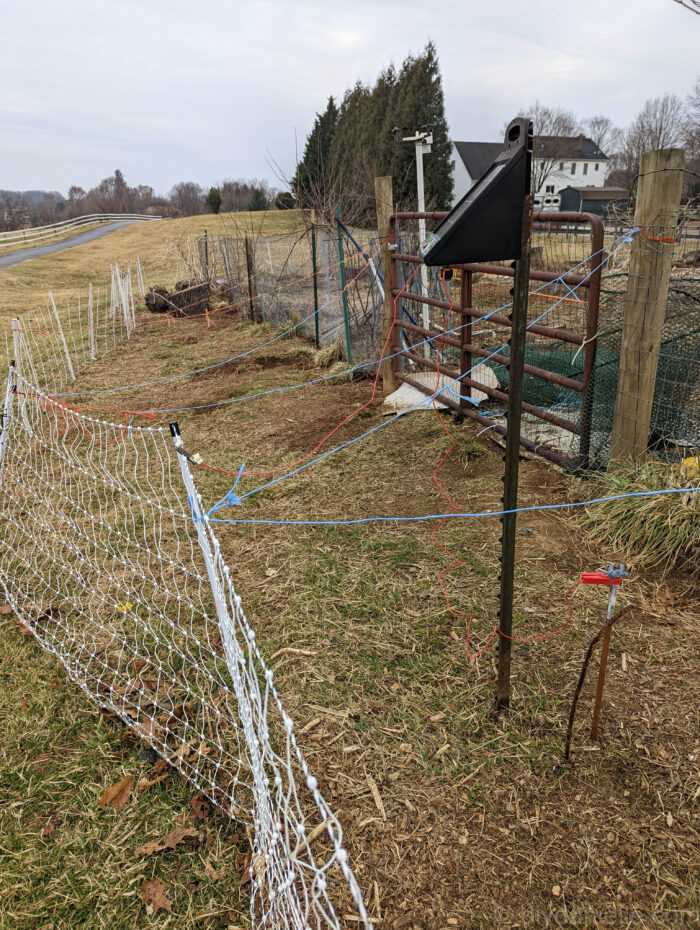
Gates
For gates, I have an interior gate that has wire around it to prevent the chickens from going into the garden when I don’t want them to.
The exterior part of the fencing does NOT have a traditional gate, but I made sure that my two sets of poultry fencing attach right where the garden gate is. That allows me to open the electric fencing up when I need to enter the garden.
I recommend a large gate of 8-12′ to give yourself the freedom to have wood chips or compost dumped directly in your garden.
Make sure that your interior gate can open without hitting the moat fencing.
More recently, I added a smaller gate to the side of the interior garden near the coop. I found that the chickens were getting stuck in that corner in the evening as they aren’t quite smart enough to walk back out the front gate and walk around (sigh).
Connecting the Poultry Netting to Wood Posts
This part was tricky because I wanted it to be easy to move the fencing. I COULD have used baling twine to hold it to the wood on the corner of the coop run, but then I’d need to untie it whenever I needed to move it or get through. Instead, I used a large screw hook (Everbilt #6 Zinc) in the wood. The poultry netting post fits snugly inside it, but I can easily pull the netting off the hook so I can get inside the chicken moat to access the eggs in our Best Eggs Nest Box.
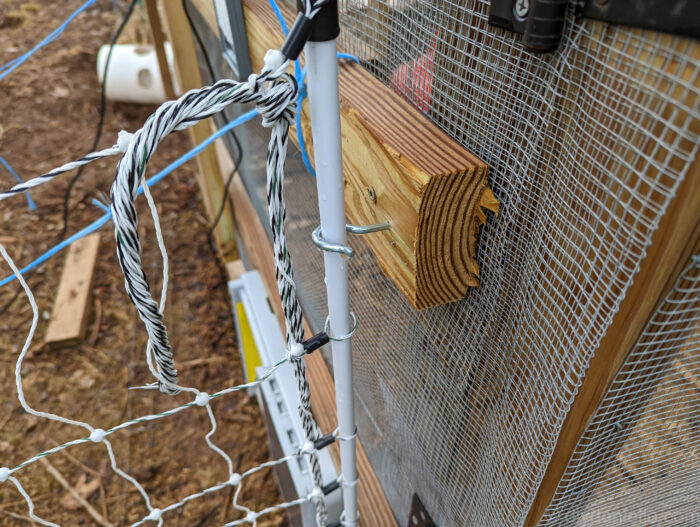
I may put another wood post near the entrance to the garden so I can add two more of these screw hooks, one on either side. This will make it easier to unhook them when I need to open the gate.
How to Use the Garden Moat
Spring
As you start to plant seeds and seedlings in your garden, you’ll want to keep your chickens out of the main garden area. Let them maintain the chicken moat area and give your plants time to grow. Chickens love weeds, but they can’t distinguish between weeds or your seedlings so don’t expect them to.
As I do cleanup and weed throughout the Spring, I throw weeds into the chicken moat so they can eat those. This gives them the vegetation to eat, reduces the work I do hauling weeds away, and generally makes the job a bit easier.
Summer
If you plant enough produce and are okay with the chickens eating some of it, you can allow the chickens into the central garden to eat pests, weeds, and yes- some of your plants, fruits or vegetables.
Fall & Winter
Once it’s time to clean up the garden in the Fall, you can open the inner gate and let the chickens come and go. They’ll till the soil for you, eat bugs, and take care of weeds. They’re VERY efficient and hard workers. Chickens will also fertilize the garden as they walk around, and you’ll have less mess to pick up inside the coop.
Other Products that Help Make Chicken Care Easier
We have a few other items that make this chicken setup easier to take care of.
Flat Edge Shovel
A shovel with a metal flat edge is perfect for scraping dirty bedding out of the shed. I generally use a big plastic shovel because I clean my coop frequently, but I used a flat edged metal shovel when I initially cleaned this old coop out to use. It just got up the old dirty bedding better.
This door is SO helpful. The main part of the chicken coop and the attached predator proof run are open 24/7. This allows the chickens a small protected area to eat and drink, even in the early morning or the evening. The automatic coop door is attached to the run and it is set to open at 8am and close when it gets dark. I setup the light to turn on shortly before the door closes so the chickens have advanced notice that they need to get inside.
So far it’s worked GREAT and you don’t need electricity in your coop to use it!
I purchased the Best Nest Box because I was tired of the chickens pooping on their eggs. This nest box is set at an angle so the eggs roll back into a protected area. I bought the extra pad so I could wash and swap them out routinely.
Note that you can setup your box so the eggs roll to the front or the back. DO NOT set it up so the eggs roll to the front. The perch is right over the lid and if you do this, the chickens will poop on the lid… which means your eggs are clean, but you need to get your hands dirty to get the lid open to get the eggs.
When I initially set it up, I had it inside the coop so the eggs rolled to the front. But I immediately switched the direction when I set it up in my run so I could collect the eggs from the back. It’s worked SO much better this way.
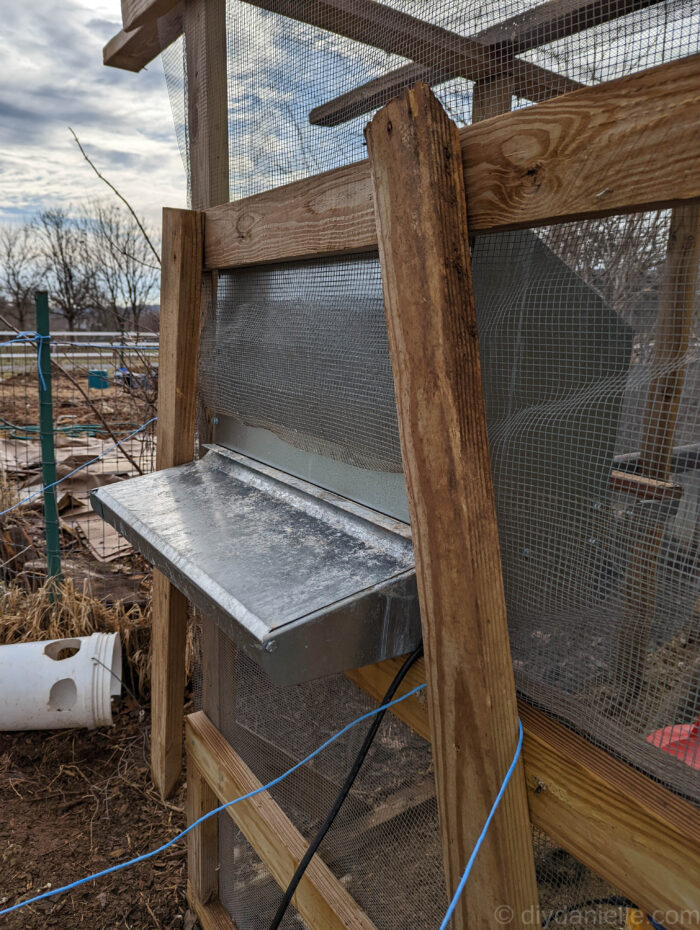
The 24″ medium Best Nest Box is perfect for our 10 hens IF I collect daily, but the large 48″ Best Nest Box is better if you have more hens or don’t collect regularly.
I may eventually replace my large coop with one or two of these portable coops.
If you don’t have a coop yet and plan to get started with chickens, it would be easy to place a few of these around inside the electric fencing… and cost far less than purchasing a wood coop which can cost $5k or thereabouts, at least in my area. I like how easy the plastic would be to clean out… I imagine it would be simple to spray it down with a hose when the chickens weren’t in it.
Please share and pin this post! You can also post your project and tag the DIYDanielle team on Instagram @doityourselfdanielle!