Get your campers in the spirit with these fun camping party favors for kids of all ages. These party favors are practical and useful!
This year my oldest son requested a campout for his birthday party. It was a lot of fun. My middle son wanted a s’mores party (non sleepover). So I ended up making camping themed party favors for both parties.
These projects came out so nice and I think the kids will keep these favors and get a lot of use out of them. I love being able to provide items that they can actually use!
This post may contain affiliate links which may earn me commissions should you click through them and take certain actions. As an affiliate for Amazon, Cricut, xTool, Home Depot, and other sites, I earn from qualifying purchases. Please DIY carefully. View my full legal disclosures here.
The majority of my content is generated by me, as are 99% of the photos and videos, but I utilize technology for titles, descriptions, video editing out all of my ums, and occasionally for text overlay on images.
Please read the whole post so you don’t miss any important information!
Party Favors for a Camping Party
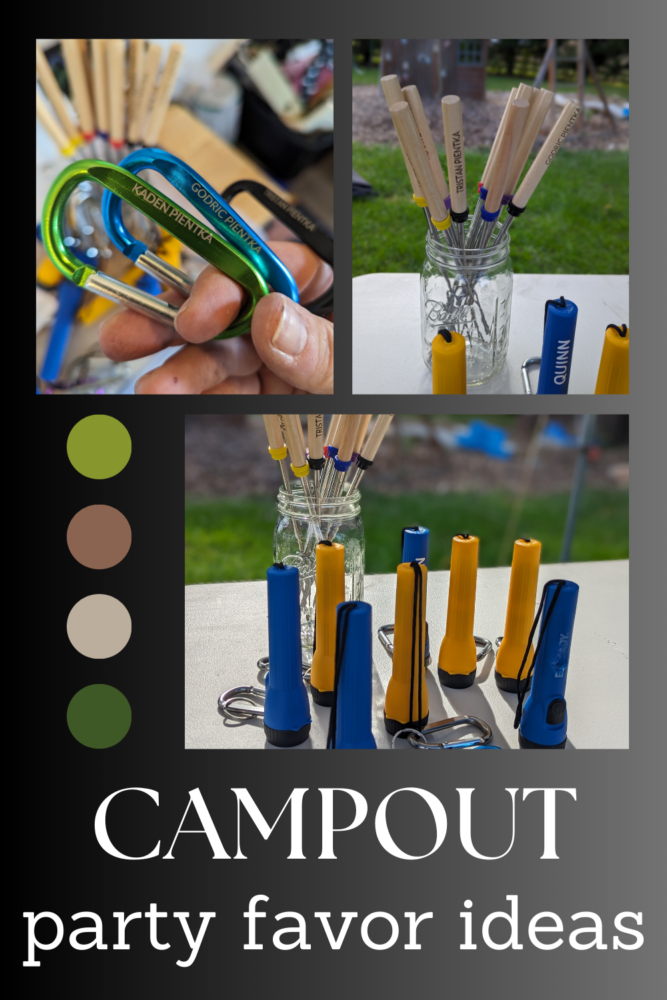
These 3 party favors are perfect for a camping party and will be useful long term for the kids who receive them. My husband suggested getting flint and steel kits for everyone and we poo poo’ed that pretty quickly.
Customized Roasting Sticks with a Laser Engraving Machine
Cost: $1.60/each
Supplies: xTool M1 Laser Cutting Machine Air Assist | Roasting Sticks xTool M1 Laser Cutter Honeycomb Riser
These roasting sticks are PERFECT for a camping party. Each child has their name on their roasting stick— no germ sharing! And they can take it home after. You can roast marshmallows, hot dogs, and other items using these.
Instructions: Start by placing your roasting sticks on your honeycomb riser. I made sure to alternate which direction they were facing so I could keep them close together. I used the magnetic clips to hold them in place so they wouldn’t shift.
I used the software for my xTool to setup all of the children’s names for each stick. I used first and last names on anything engraved because it doesn’t mean more work for me (adding more text with vinyl is extra work so the flashlights are just first names).
You’ll need to adjust the placement of the names on the sticks and resize to be small enough to fit.
I have the 10W M1 machine and I have this set for 50 Power, 130 Speed, 2 passes.
These took less than one minute to engrave per stick so it was a relatively quick project.
Custom Flashlights with Kids Names
Cost: $2.25/each (not including vinyl because I had it already and it was such a tiny amount)
Supplies: Cricut Maker 3 | | Cricut Roll Holder | Cricut Smart Permanent Vinyl | Painters Tape | Flashlights | Magic Eraser
Instructions: Start by wetting your Magic Eraser and using it to rub off the company logo on the flat side of the flashlight. This takes a few minutes, but it will work!
Cut your names out on your Cricut machine using Cricut Permanent Vinyl. If you use capital letters, you won’t have any i dots to move over.
Weed the excess vinyl away from the designs.
Use painter’s tape to transfer the design onto your flashlights.
Custom Engraved Carabiner Clips
Cost: $1.33/each
Supplies: Carabiner Clips | Black Sharpie | xTool M1 Laser Cutting Machine Air Assist | xTool M1 Laser Cutter Honeycomb Riser
Instructions: These were a bit tricky to do, but also quick and easy. So bear with me here on the instructions.
First of all, certain materials and colors do not engrave with certain lasers. Do I understand any of the reasons? Not even a little and I don’t care to learn tbh. This is one of those ‘it is what it is’ situations where I just learn the rules and try to work around them if necessary. But this color of stainless steel wouldn’t engrave as is… which I discovered THE DAY OF THE PARTY so of course, I cheated and made it work. To avoid the color issue, I colored in the engravable area with black Sharpie. Try to make sure it’s a solid layer.
The lettering needs to be fairly small and I ended up raising these up on risers. I was at a 9-10 pt. font. I struggled because the framing didn’t work accurately and the machine was NOT able to auto measure it. I just took the risk.
As you can see the placement was NOT great. They were all a bit wonky but I got the text on the carabiner and that’s what is important.
Engrave at 100 power, 20 speed, 1 pass with the M1 10W machine.
Once it was engraved, I used a paper towel with a little rubbing alcohol on it to wipe off the marker (the alcohol may not have been necessary, a wet towel might have worked).
These all came out so well! Overall, I spent $5.18 per child for favors which is perhaps more than many spend, but we have small parties at our house so our other expenses are pretty low. I would rather spend $5 per kid on decent favors that they’ll use long term than $3 per child on throwaway stuff.
Other favor ideas for a campout party:
Some of these are a bit
- Homemade boxes with s’mores in them
- Homemade boxes for popcorn
- Glowsticks
- Flint n steel (if you KNOW THE KIDS and KNOW they’ll be safe with it)
- Cooling neck wraps/bandanas (hot weather)
- Neck fans
- LED Headlamp
- Emergency survival straws
- Customized baseball cap
- Custom water bottles
- Safety/survival whistle (bring your ear plugs, lol)
Please share and pin this post! You can also post your project and tag the DIYDanielle team on Instagram @doityourselfdanielle!