

Learn about the Ironwood shed frame kit from Shelter Logic, including the setup process and potential uses for this wood shed kit.
This post may contain affiliate links which may earn me commissions should you click through them and take certain actions. As an affiliate for Amazon, Cricut, xTool, Home Depot, and other sites, I earn from qualifying purchases. Please DIY carefully. View my full legal disclosures here.
The majority of my content is generated by me, as are 99% of the photos and videos, but I utilize technology for titles, descriptions, video editing out all of my ums, and occasionally for text overlay on images.
Please read the whole post so you don’t miss any important information!
Thank you to ShelterLogic Group and Arrow Storage Products for sponsoring this post!
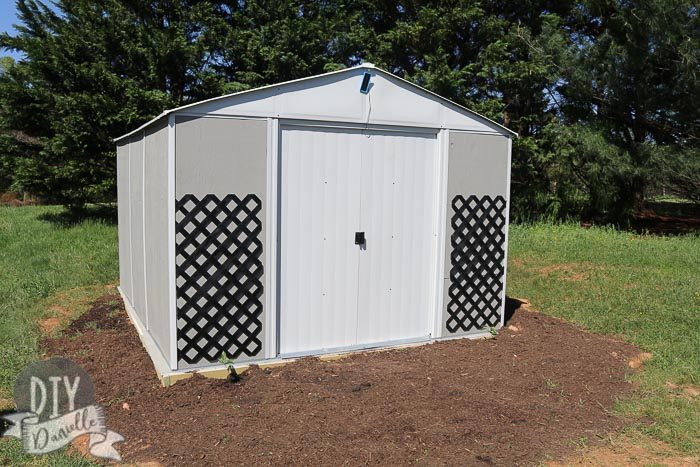
Today I’m working with ShelterLogic who sent me their Ironwood Shed Frame Kit to review and to build into a kids garage. You’ll see that post soon, but I wanted to talk about this shed kit and how to install it.
Previously in this series: Building a 10×12 Shed Base
Why a Kit?
I know you’re probably wondering why I would use a kit. There’s a few benefits to the kit in comparison to a complete full build or purchasing a pre-made shed.
Benefit #1: Easier for Beginner DIY’ers
We recently built our own goat shed and two of the hardest parts to building the shed were the ROOF and the DOOR. Designing it and making sure we ordered all of the correct supplies wasn’t fun either.
You’d think this would be a simple process, but we are not professional builders. We’re DIY’ers. We like to save money and we like learning new things along the way.
If you’re a new DIY’er, using a kit like this may be the best option.
Benefit #2: Save Money
You get more bang for your buck with a kit like this over buying a complete kit shed.
Our 6×8 goat shed cost over $550 in supplies with no base and it’s smaller. I believe that a 10×12 shed would have cost us around $700-900+ to build from scratch, but I’m not sure.
A 10×12 prebuilt shed in my area costs $3200, not including a base. Those expensive sheds have windows and are very nice (structurally they hold up very, very well), but it wasn’t in my budget.
In terms of a full kit where you don’t need to buy the wood, you can get the Vinyl Dallas Vinyl-Coated Steel Storage Shed 10×12 for $979.99 or the Red Barn Steel Storage Shed 10×14 for $929.99.
So just for a cost comparison:
The Ironwood Frame was $499.99 + $175 for the wood panels which brings the total cost (excluding accessories, paint, and the base) to $674.99
- $305 savings over the Vinyl Dallas Shed
- $2,525 savings over a local shed.
- And an estimated $200+ cheaper than building a shed from scratch.
Benefit #3: Potentially Easier to Transport
If you order the kit online for delivery and only need to buy the wood for the sides, I believe you’ll find it’s easier to haul. Some hardware stores will cut your 4×8′ wood into the sizes you need so you can fit them in your car.
We have a local lumber store that offers delivery so we usually opt for that route now, but before we moved we were stuck renting trucks to build larger structures like our duck shed. It gets expensive and time consuming.
Benefit #4: Steel Frame, Wood Sides
If you prefer the look of wood over a complete metal shed, this is a great option. Also, the steel and roof doesn’t need to be painted.
Benefit #5: More Color Choices
You can paint or stain this whatever color you choose. Want to match your house color? Go for it. Paint it bright pink? Have at it.
DIY Shed for Storage or Poultry
When I saw this kit, I was really excited about the possibilities for it. Naturally, it works well for a storage shed.
I imagined this working for goats, but after putting this shed together I would suggest that it only be used for smaller animals. I think goats would probably stress the walls and door too much. Mine are pretty rough on our goat shed. That said, I can imagine it making a good option as a coop for chickens, ducks, or other poultry.
The problem with most pre-built sheds or full shed kits is that they don’t offer enough ventilation for animals. You want some decent size openings or windows.
If you use this for small animals, you will need to predator proof it. You would want to use heavy duty staples to put hardware cloth over the window to prevent predators from getting into the structure. If you see a gap, that’s an area a predator could get in. That’s where you’d need your hardware cloth.
For my project, I am creating a kids’ garage for outdoor toy storage. This will hold bikes, ride on cars, Nerf guns, basketballs, baseball equipment, and more. GUYS! I cannot begin to express how thrilled I am to remove these things from my garage. So. Excited.
Don’t tell my kids, they think I’m just a super awesome mommy who is building them a garage. This is our little secret, k?
Supplies Needed for the Shed Kit
The kit doesn’t come with EVERYTHING you need. You need to buy the wood for the sides. This is your supply list for the 10×12 kit. The smaller kits should naturally require fewer supplies so you will at least get an idea of your max cost by eyeballing this:
- (10) Flat 3/8” X 48” X 96” Exterior grade wood siding for sides: $175
- The Ironwood Shed sold by ShelterLogic: $499.99 (Cream 10×12)
Supplies for the Shed Base
I have more information about the base and building it in in my post, Building a Shed Base for a 10×12 shed. Don’t forget that regardless of which shed kit you buy, you’ll need a base of some sort. So when comparing kit to kit, make sure you’re comparing the price with the base.
- (11) 12′ Pressured Treated 2x4s: $85.80
- (4) 10′ Pressured Treated 4x4s: $52.68
- (5) 4×8 3/4″ CDX Yellow Pine Plywood: $143.50
- Nails 10×4 galvanized (2lbs should be good): $8.28
Overall Cost of the Shed: $965.25
I forgot to tally the cost of primer and paint. While I already had the primer, I bought two gallon containers of exterior paint in SW Rushing River (I actually had this mixed at a different store though). I saw it recommended as a great gray by Thistlewood Farms.
Ironwood Shed Setup Process
Let me give you a quick rundown of the setup process. This is a video documenting the process if you prefer video to photos.
Step 1: Level Your Area and Build Your Base
Read my full tutorial on how to build a wood base for a 10×12 shed or put down a concrete base. If it will rain before you finish the roof of the shed, make sure to cover the base with a tarp to keep it dry.
Step 2: Cut Your Wood
I recommend starting this first so you can give your paint time to dry while you’re putting together the frame (plus you’ll be painting the base too). Once you choose whether to do a horizontal or vertical installation, you can review the sizes for your cuts and cut your boards to size.
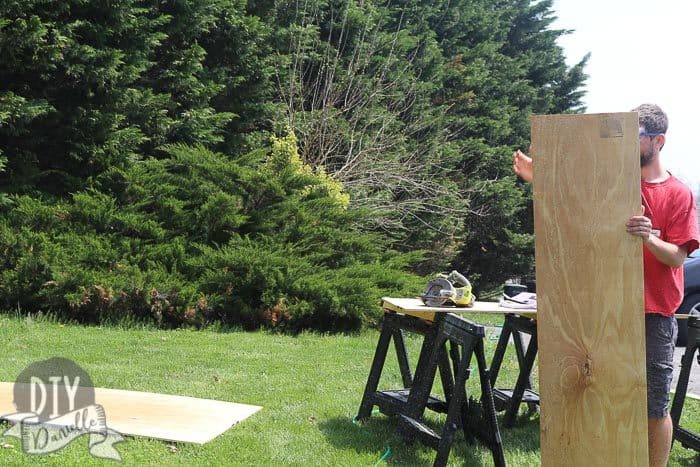
panels in advance, you can make sure you get it right.
Step 3: Prime and Paint Your Wood
You’ll want to prime and paint your wood, including the wood base for your shed. It’s easier to do it all at the same time. You need to do both sides of the exterior grade panels.
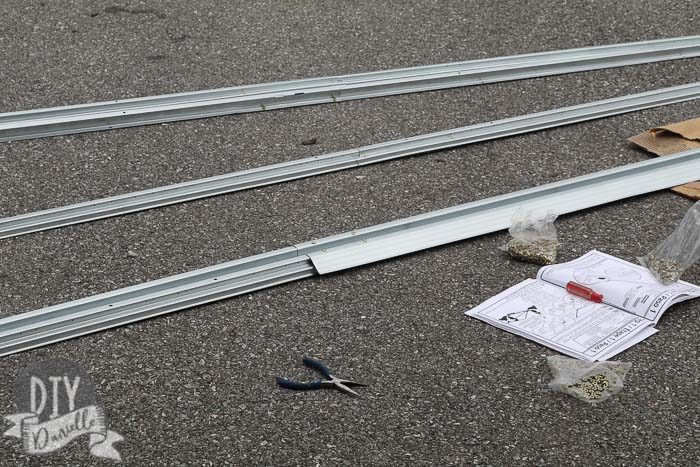
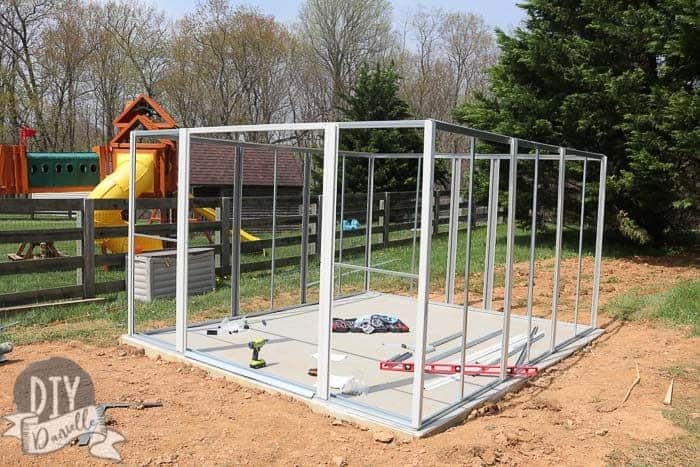
Step 4: Build Your Frame
Follow the directions on your kit to build the frame. The first part of this is just combining the bottom bars to make them longer for the metal base of the frame.
You’ll put the base together next, the you’ll install the corner supports.
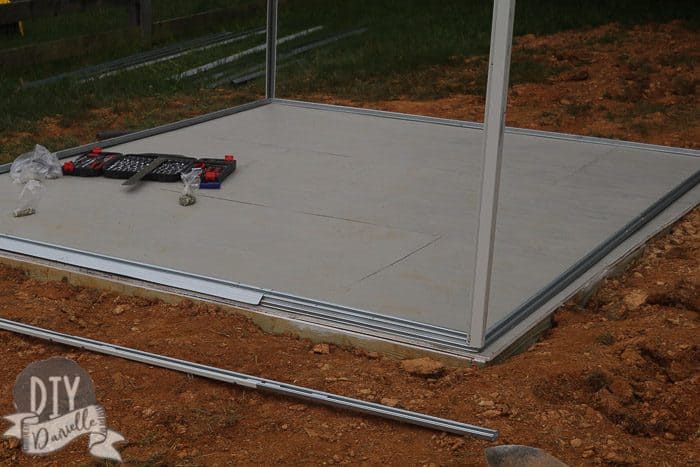
Next comes the four sides for the top of the shed, then more vertical supports along the sides.
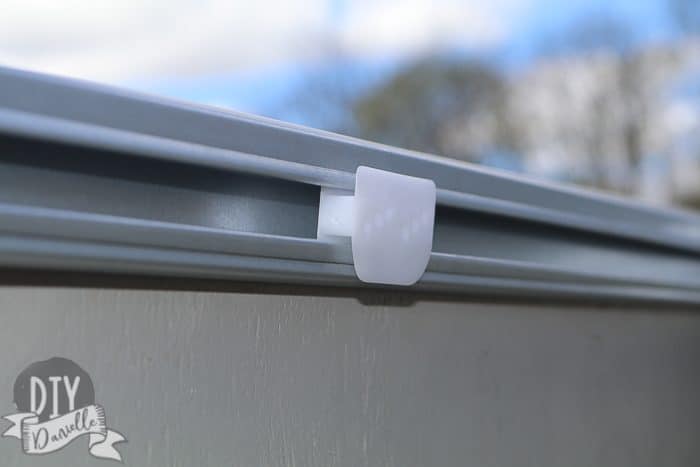
The two pieces in the front are for your doorway. The door for this shed is on tracks and slides open and closed in the interior of the shed. We really like that there isn’t a door swinging in the wind with this setup!
A quick note on the door slide mechanism for the inside… this is how the sliders go on. This step comes when you’re assembling the top front bar. Get it right HERE… it can be fixed later, but it’s much harder. Ask me how I know.
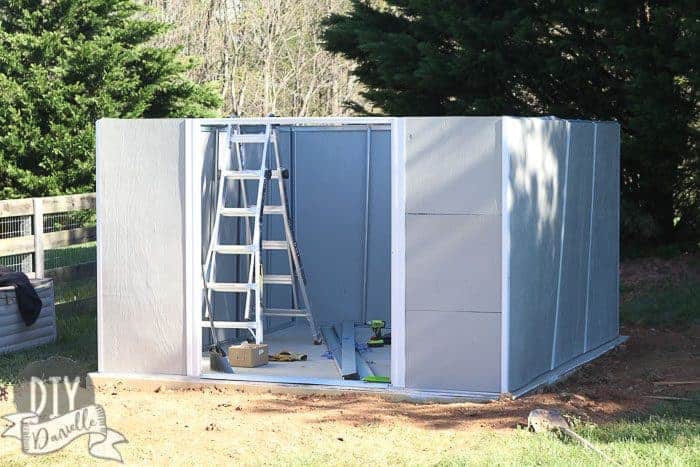
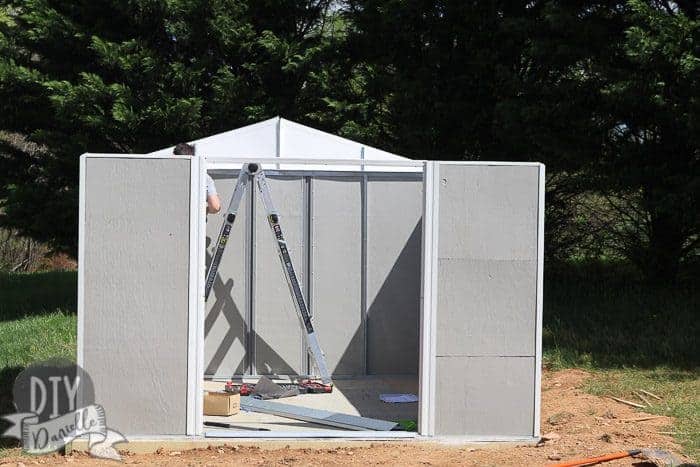
Yay! You can put in your panels now! Slide them in. They should be snug so it’ll be a two person job to get them in there. The video makes it look easy. If it’s too easy, you probably cut the wood too small.
This is a job you need to do on a PEACEFUL day… you’ll need a good ladder to get up to place the panels in and the wind will carry you and that panel right off the ladder if you do this in wind.
I recommend making sure that you can finish this shed the same day you put the panels in. The shed gets sturdier the more you put it together… at this point, the panels are helping the wind blow the shed around. You really want to get the panels in and the roof on, all in the same day to make sure the shed is completely stable.
At this point you’re going to start working on the roof and door. If you have an extra helper, have them put the door together. It’s an independent task that could be done pretty early in this process.
You’ll start by attaching the metal brackets to your gable pieces per the manual. Each triangle is installed on the front and back of the roof separately, then the two matching triangles are attached together.
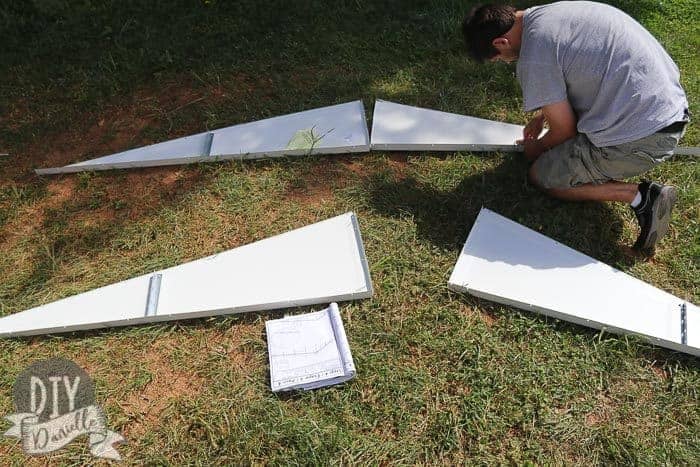
Once both gables are fully installed, the supports for the roof go on.
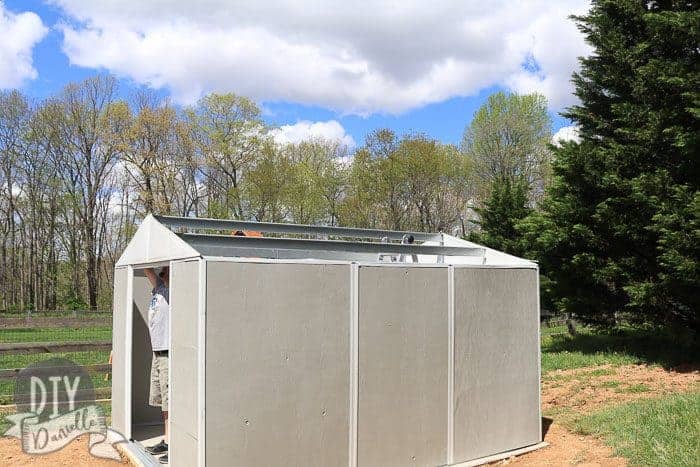
There’s braces that get installed for the middle support beam.

At this point, I think you’d be good to take a break for the day if necessary. Just make sure to throw a tarp over the top and the doorway if you’re worried about rain. You could probably install the door at this point pretty quickly.
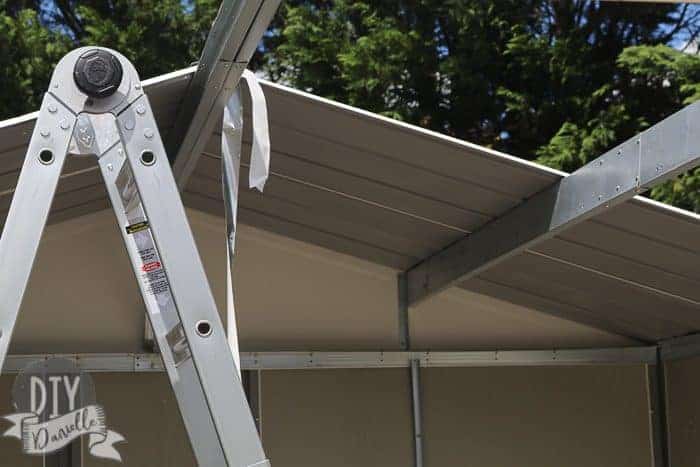
Now you can install your roofing pieces. You start at the back of the shed, install one on each side, then move forward to the next section closer to the front. And so on… as you go, you’re also installing weatherproofing tape and a metal piece over the top where they combine. My husband did this part fairly independently, but I occasionally provided an additional hand to help get a screw into a nut when panels were overlapping.
Having two people working on this for 100% of the project is REALLY useful. We have 3 kids and no babysitter so we were struggling a bit.
And that’s it, besides the door install which I didn’t really photograph. It was very quick and easy so you shouldn’t have too many issues with it.
Oh! And don’t forget to attach your shed to the base now.
Additional information from ShelterLogic Group:
- Shed Preparation & Assembly Checklist
- Maintenance and Care for Your Arrow Shed
- Controlling Condensation
- Strengthening Your Roof
Thoughts on the Kit & Assembly
Time to Put Together
Overall, this is what I expect for any kit. It takes time to put together- you are saving a lot of money by putting in the work to install it. I found this much easier to install than our playset/playground (which was a nightmare).
Strength of the Shed
I love the look and feel like it is stable enough for our purposes. It IS NOT, in my opinion, sturdy enough for a strong animal leaning against it or for areas with bad winds.
The frame itself is a lot of fairly thin pieces of hollow metal. It gets sturdier when it’s put together, but you’re not working with heavy duty materials.
The Door
The door to this is excellent. I love that it tucks inside the shed and rolls easily on sliders, rather than opening in or out.
Leaking
The wood base that we built was slightly bigger than the shed frame. I think that has contributed to leaking. The problem is that this shed kit doesn’t have a floor so water can run under the metal pieces. I’d be interested in hearing if others have had the same problem… we’ve been trying to troubleshoot this. I believe that due to the shed base being bigger, water falls on top of the edges and sits on the wood base. This isn’t good for the base and the water can run into the shed itself. Even though the base WAS level, water sitting on the top of it has warped the wood so water will pool in some areas. I have stood in the shed during heavy rain, however, and the roof isn’t the problem. I’m considering putting drains in so the water will drain to the ground below the shed. We’ve added silicone caulking around the bottom but have still had some issues.
Improvements
Things I’d do better next time? I’d try to find a higher quality wood for the panels. My husband and I did a LOT of complaining about the panels that we got. So. Much. Complaining.
I would also suggest drawing out the panels on your wood and making sure the cut will be perfectly rectangular before cutting. The bottom and top cuts need to be straight to fit right. Otherwise you will end up with gaps. Do not assume, like we did, that the wood you bought is straight along the edges.
I think kits are a great option for people who want to learn how to build… it gives you a taste for what building looks like and gets you used to following directions.
We have built lots of things from kits, such as play sets, furniture, and box springs. It has gotten us into a better comfort zone to start tackling full DIY projects like our goat shed, duck house, and the lean to that we’re planning for hay storage.
I hope this was helpful in helping you decide if this is the right kit for you. Let me know what you think and keep an eye out for the post about the kids garage setup. I’m almost finished with it and it’s PRETTY AWESOME. I’ve got Nerf gun storage, an easy bike rack, and more!
Next in this series: Building & Organizing a Kids Garage
Please pin this post!
This is very informative blog. I appreciate your content. Helpful post for me. Thanks for sharing!