
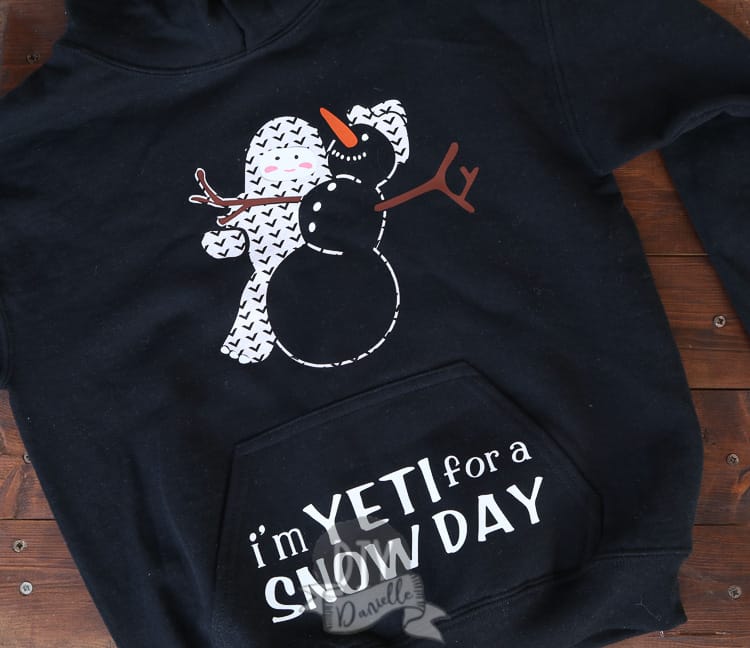
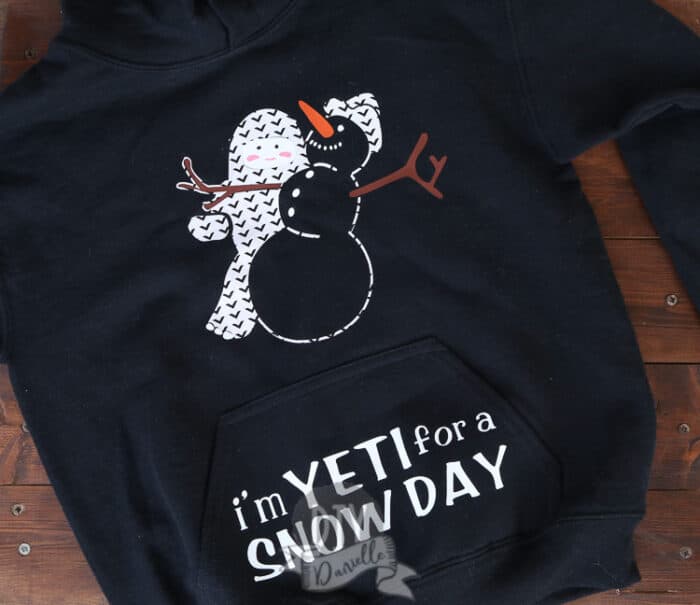
How to make a custom Yeti for a Snow Day shirt. This fun shirt is easy to make- get the free cut file!
Learn how to make a custom “Yeti for a Snow Day” shirt! This fun DIY Yeti shirt is easy to make—and you can grab the free cut file to create your own.
In Maryland, there’s usually just enough snow each year to enjoy the experience… but not so much that it makes anyone want to move. People who grew up in colder states might feel differently, but around here, a lot of folks prefer the warm weather.
This year has been a total DUD though! Normally there’s at least one or two good snowstorms, but it’s February and there hasn’t been one real snow day to play in. Lame. And it’s not like it hasn’t been cold either… it’s been freezing! It’s disappointing to say the least.
So these shirts were made anyway—because everyone is SO yeti for a snow day! And while the “yeti” snow day joke definitely isn’t just one person’s thing, it’s still such a fun theme for a winter shirt.
This post may contain affiliate links which may earn me commissions should you click through them and take certain actions. As an affiliate for Amazon, Cricut, xTool, Home Depot, and other sites, I earn from qualifying purchases. Please DIY carefully. View my full legal disclosures here.
The majority of my content is generated by me, as are 99% of the photos and videos, but I utilize technology for titles, descriptions, video editing out all of my ums, and occasionally for text overlay on images.
Please read the whole post so you don’t miss any important information!
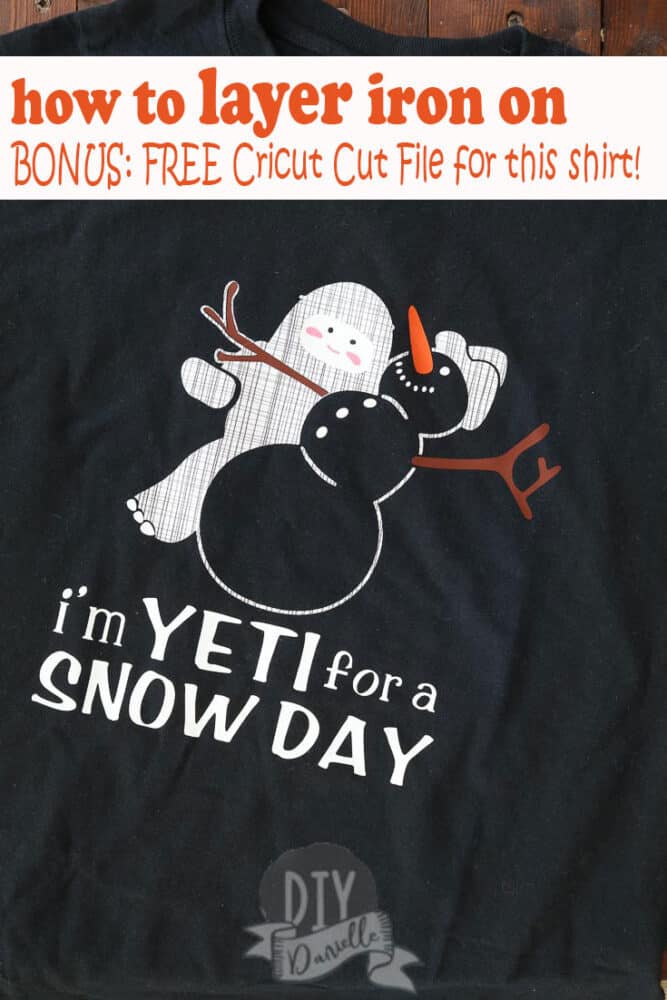
DIY Yeti for a Snow Day Shirt
Supplies
- Cricut Maker™
- Cutting mat
- Weeding tool
- Cricut EasyPress™ with the Pressing Pillow Underneath
- Teflon Sheet
- Black shirts or hoodies
- Iron On Vinyl: You’ll need pink, brown, black, and orange iron on.
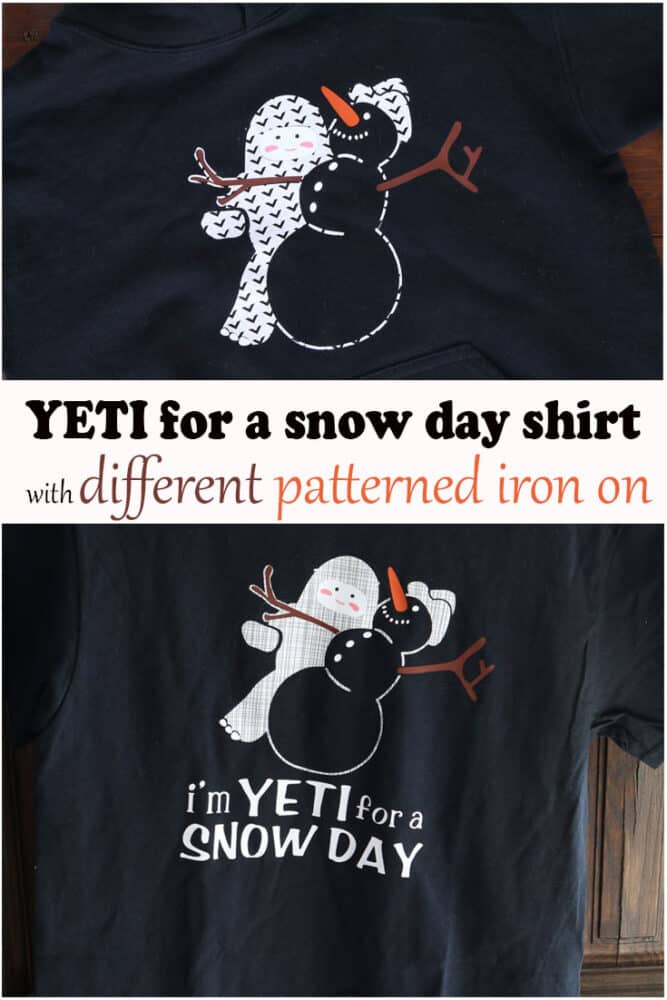
- This project used two different types of patterned iron on for the Yeti. Patterned Iron -On™ Sampler, Rustic Lodge Lumberjack and Patterns Iron-On Sampler, Nature Walk Basics. You can choose which you like the best (I’ll show the two side by side below)
- Design: Yeti for a Snow Day
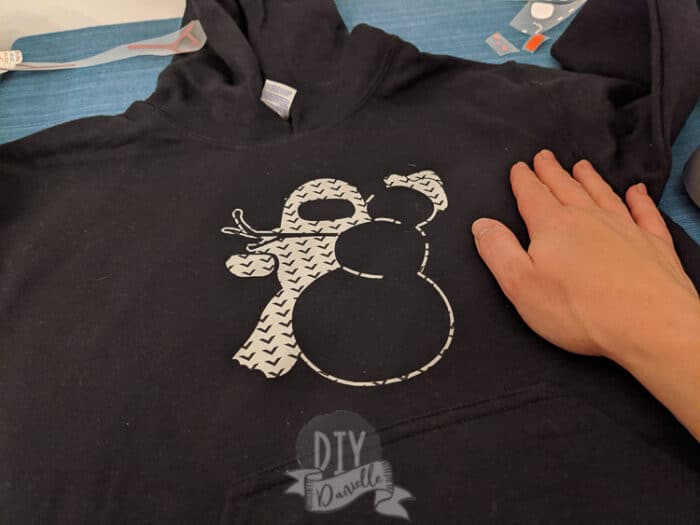
Here’s a picture with the yeti in two different types of patterned iron on! Leave a comment below and let us know which you think works the best!
How to Layer the Iron On Vinyl
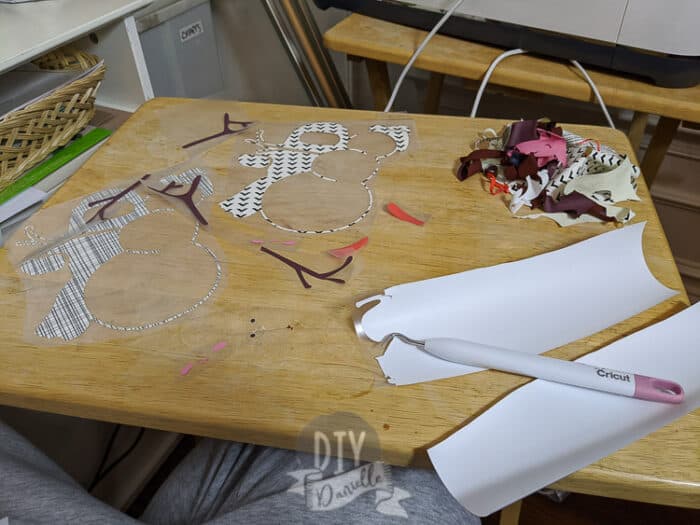
You’ll need to start by cutting out your file. Delete the second set if you’re only making one shirt.
Don’t forget to place the iron on pretty side down on the cutting mat and choose mirror for EACH SHEET. There’s a lot of colors here!
The main yeti and snowman outline were cut out of the patterned iron on. The rest of the colors should match their colored iron on.
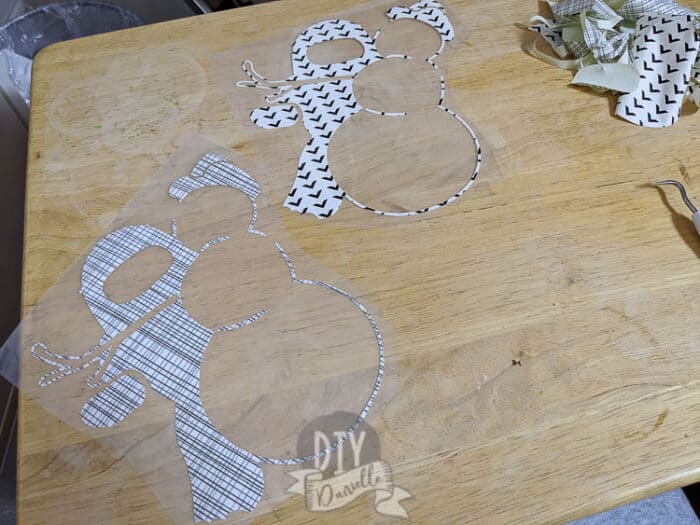
Lots of weeding and such to prepare your pieces. Don’t lose any of the small bits.
Once you weed everything and you’re ready to go, preheat your shirt with your heat press for 5 seconds. Use the Cricut Heat Guide to determine the temperature for your iron on / fabric combination.
You need to decide what order to layer everything in. You can’t shove them all on the shirt and press… the plastic carrier sheets from the lower layers will prevent the top layers from adhering. I hope that makes sense.
You’ll need to start with the big Yeti/snowman piece. Center where you want it on the shirt. Press. Once the iron on is adhered, peel the plastic sheet off carefully.
Now you can decide the next piece. Here’s how I did mine… I did the white face and the other white pieces next.
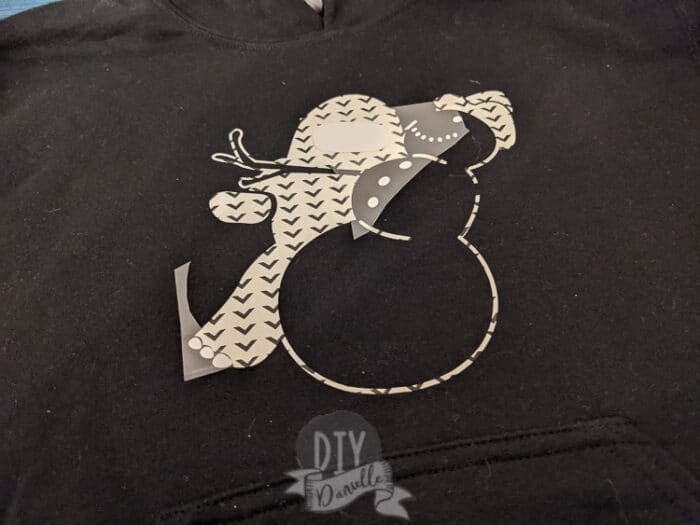
Next are the brown stick arms. Make sure they’re in the blank spots and not on top of the patterned iron on at all.
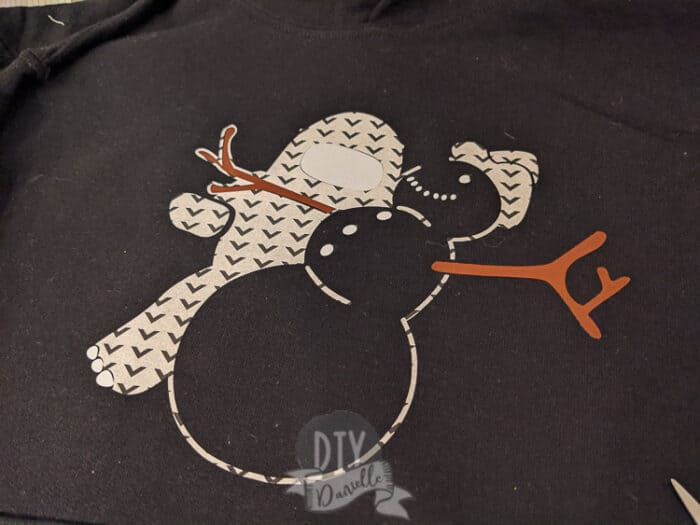
I didn’t take photos of the eyes, face, and nose, but I cut the carrier sheet close to the iron on for those and placed all three at the same time. Make sure they DO NOT overlap at all.
Once you put those on, you can apply your words on the shirt wherever you please. I put the words for the hoodie on the pocket.
Remember that when layering, you can’t always layer certain types of iron on on TOP of each other. The nice thing about this project is that, excepting the eyes on the white face, none of the iron on vinyl is on top of each other.
Don’t forget to let us know which is your favorite iron on for the main Yeti in the comments!
It’s almost Valentine’s Day! Check out this DIY boys Valentine’s Shirt and these DIY naughty boxers to gift to your spouse.
Please share and pin this post! You can also post your project and tag the DIYDanielle team on Instagram @doityourselfdanielle!
Google Web Story: I’m Yeti For a Snow Day Shirt