
How to turn a onesie into a shirt. This simple project gets rid of the pesky snaps which can cause issues with fit on some babies. Learn how to convert those onesies into tshirts here!
This post may contain affiliate links which may earn me commissions should you click through them and take certain actions. As an affiliate for Amazon, Cricut, xTool, Home Depot, and other sites, I earn from qualifying purchases. Please DIY carefully. View my full legal disclosures here.
The majority of my content is generated by me, as are 99% of the photos and videos, but I utilize technology for titles, descriptions, video editing out all of my ums, and occasionally for text overlay on images.
Please read the whole post so you don’t miss any important information!
We use cloth diapers and one of the issues is that the diapers give babies a little extra fluff back there. It means that sometimes you need to size up a bit to have the diapers fit your baby. Teeshirts fit much better, particularly when paired with some grow-with-me pants like Maxaloones that have extra area built into the butt for a cloth diaper.
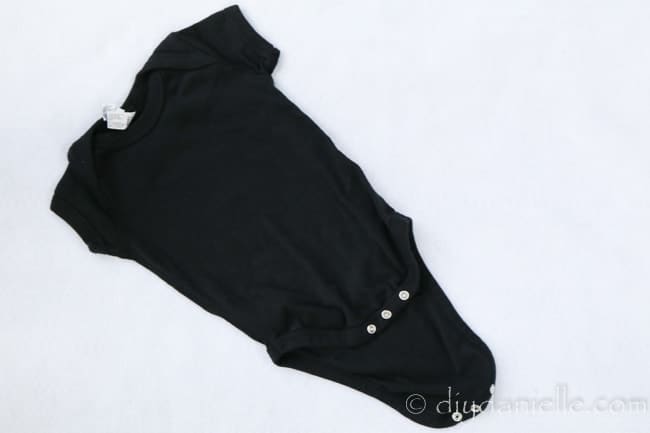
The reality though is that a lot of baby clothes come as onesies and sometimes it’s nice to take a onesie that you love and extend it’s life a bit by turning it into a tshirt. This is a 6 mo onesie but I was able to throw it on my 9 month old who wears 9-12 mo clothes for some photos once it was converted to a t-shirt. Don’t get me wrong- his rolls were hanging out a bit, but it helped.
Use the Discount Code DIYDANIELLE on cricut.com for 10% off any cutting machine or heatpress (no minimum). Excludes: materials/accessories/mystery boxes/etc. Applies to US/CA only, code expires 12/31/23.
Supplies
- Scissors: I love my Gingher scissors.
- Options:
- Method 1: Nothing
- Method 2: Hem Tape
- Method 3: Sewing Machine
- Method 4: Coverstitch Machine (I own a Brother coverstitch that I found on Craigslist but this is another option)
How to Turn a Onesie Into a Shirt
There are a few ways to turn a onesie into a tshirt.
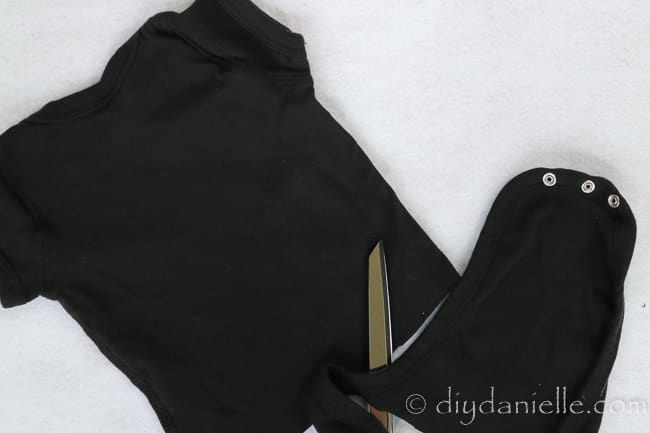
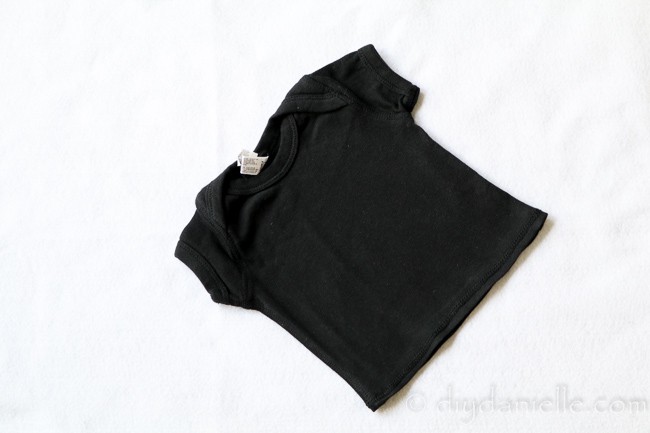
Method 1: Cut and leave as is.
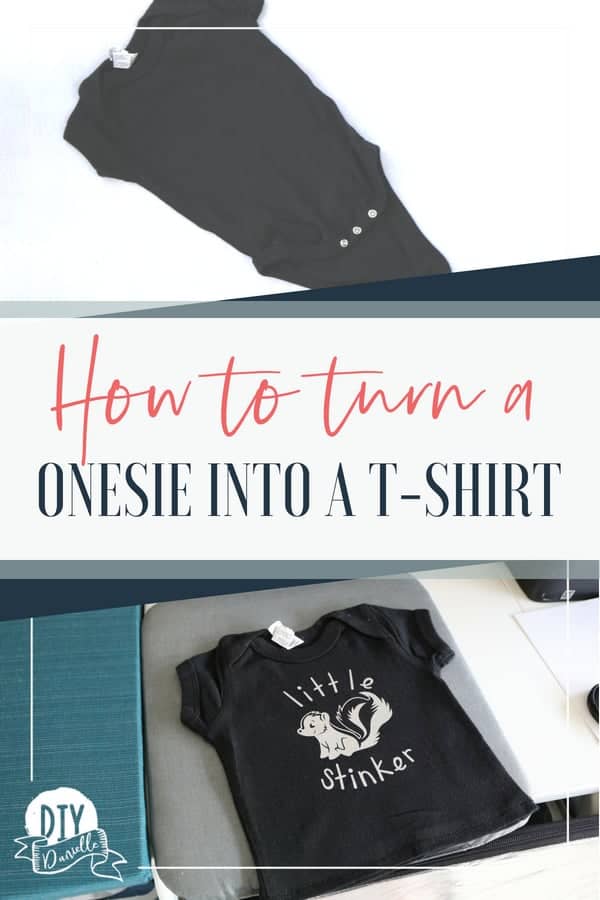
This is super easy. Take your onesie and find the LOWEST point above where the shirt starts to curve down into the snap area. You can cut across here. If you don’t want to sew or use hem tape, you can just stop here.
Some people like to keep the snaps from the bottom to make onesie extenders.
Method 2: Cut and finish the seams using hem tape.
I don’t have photos of this because I used my coverstitch, but you can fold over the edge of your t-shirt, press with an iron, then use the iron to apply hem tape.
If you’re not familiar with hem tape, it’s like a two sided iron on tape. You put it on the inside of the fold so it can’t be seen when worn. When ironed on, it sticks to fabric on both sides so it can hold the hem closed. I don’t feel it stays on as well as sewing, but it does work.
Note: When you do methods 2-4, you’re shortening the shirt even further. If you want to do methods 3-4, you could finish the edges by adding a band as an additional option. This would lengthen the teeshirt, allowing it to last even longer.
Method 3: Cut and finish the seams using a sewing machine.
If you don’t have a coverstitch, it’s very easy to sew the hem. You’ll start by pressing your edge under. This gives you a neat look. Then you can use a stretch stitch to sew the edge down.
You don’t want to use a straight stitch because the stitch isn’t meant for use with stretchy fabrics. If you use a straight stitch, you run the risk of popping stitches if/when the bottom gets stretched.
Method 4: Convert a Onesie into a shirt Using a Coverstitch Machine
My favorite method is playing with my new coverstitch machine. These machines create the finished hem that you see on most store bought clothing. It’s easy to use and it has a really pretty finish.
You still need to begin by pressing your edge under. Then you just use the coverstitch to sew around the shirt bottom. One side will have a double stitch, the other will have the fancy stitch… not sure what it’s called to be honest. I know with store bought items they’ll sometimes put that stitch on the outside and other times on the inside. I think the double stitch is probably the ‘correct’ way.
There’s nothing like a coverstitch to make this project look like store bought clothing.
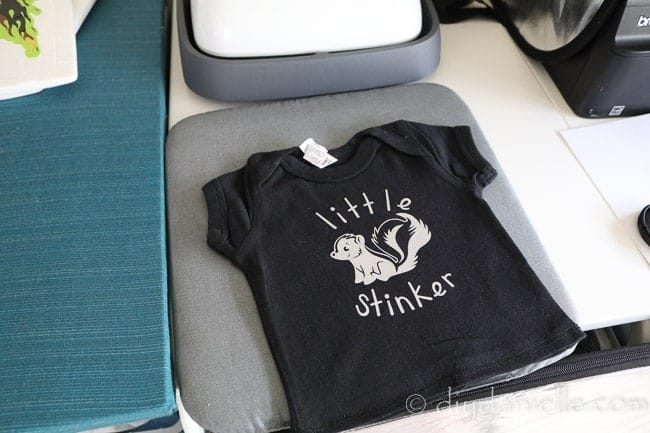
I added a little HTV with my Cricut and EasyPress to finish off my shirt. PERFECT!
Here’s a video of how to use the coverstitch to finish the edges:
Make sure to check out my post about sewing grow with me pants. These are great to pair with your onesie turned t-shirt and fit wonderfully over a cloth diapered bum!
Please pin this post!
Did you find that the curl up or roll at the bottom? I want to do this to my daughters onesies. Thanks!
For which method?