

Want to make your Halloween skeletons look more realistic? Here’s how to make your skeletons look like real corpses. This is satisfying!
Every year we put together a Halloween trail in our woods for the kids. Each year we try to think of creative new ways to upgrade our setup. This year we are corpsing skeletons. ‘Corpsing’ refers to the process of making plastic skeletons look more realistic. It’s VERY easy and a LOT of fun. To the point where my friend was like, “Huh, I’d totally do this as a job if anyone wanted to buy them.”
This post may contain affiliate links which may earn me commissions should you click through them and take certain actions. As an affiliate for Amazon, Cricut, xTool, Home Depot, and other sites, I earn from qualifying purchases. Please DIY carefully. View my full legal disclosures here.
The majority of my content is generated by me, as are 99% of the photos and videos, but I utilize technology for titles, descriptions, video editing out all of my ums, and occasionally for text overlay on images.
Please read the whole post so you don’t miss any important information!
How to Make Skeletons Look Realistic with the Corpsing Method
Supplies
- Heat Gun
- Skeleton
- Plastic Drop Cloths from the Dollar Tree
- Stain (I’ll talk about stain colors later)
- Paint brush
- Disposable gloves
- Mask
- Optional: Spray foam
Tutorial
Optional Step 0: Use spray foam inside the rib cage and around joints to bulk up your skeleton. Let dry. Carve the foam if desired.
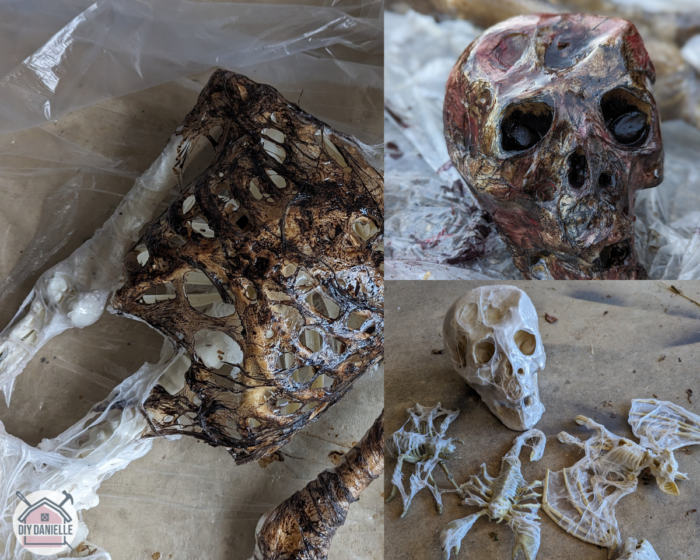
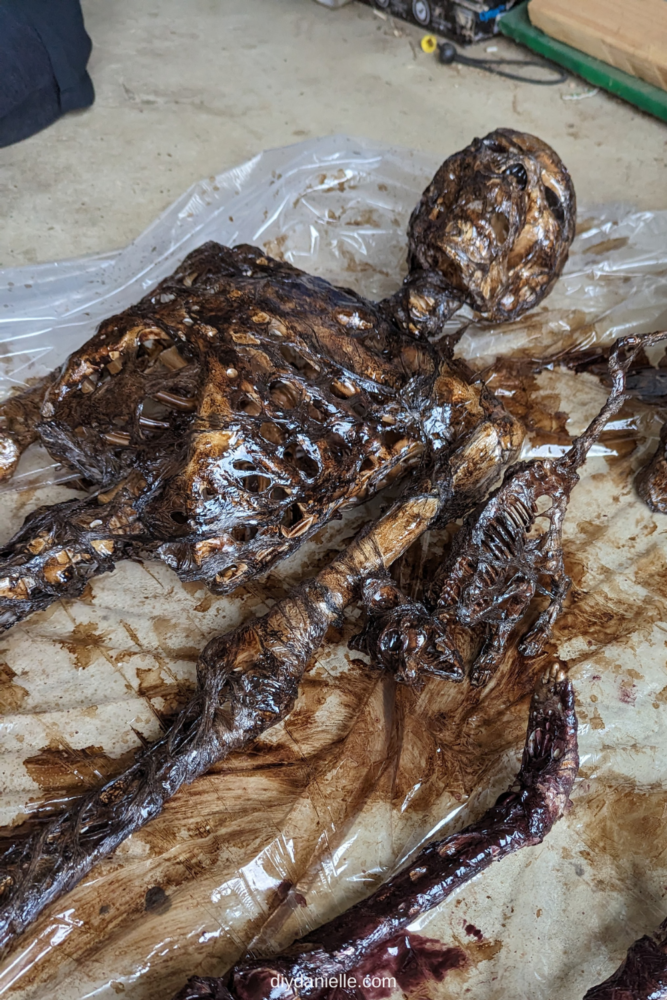
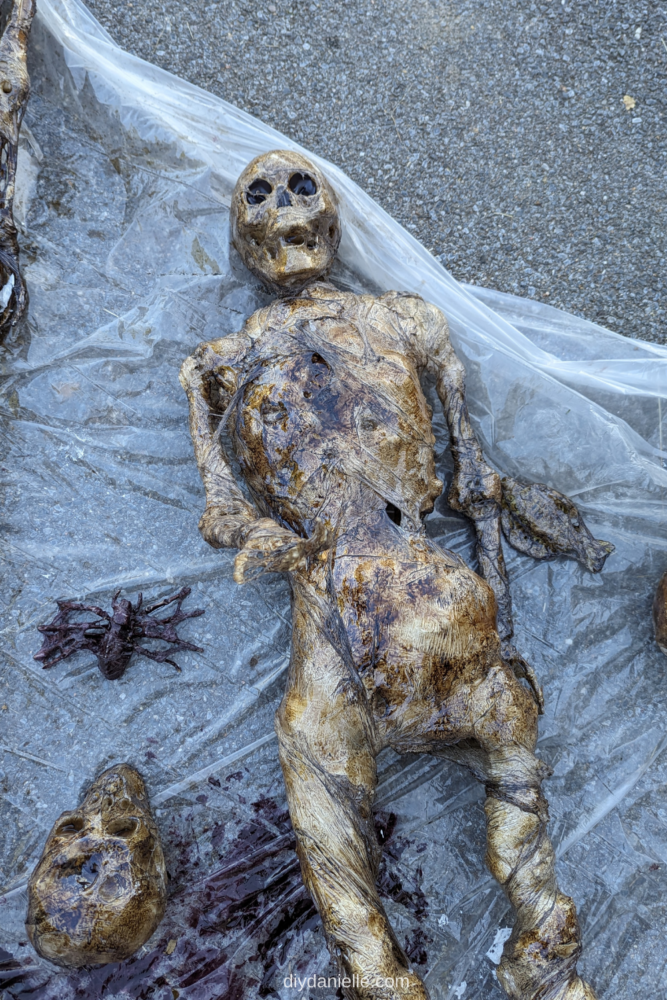
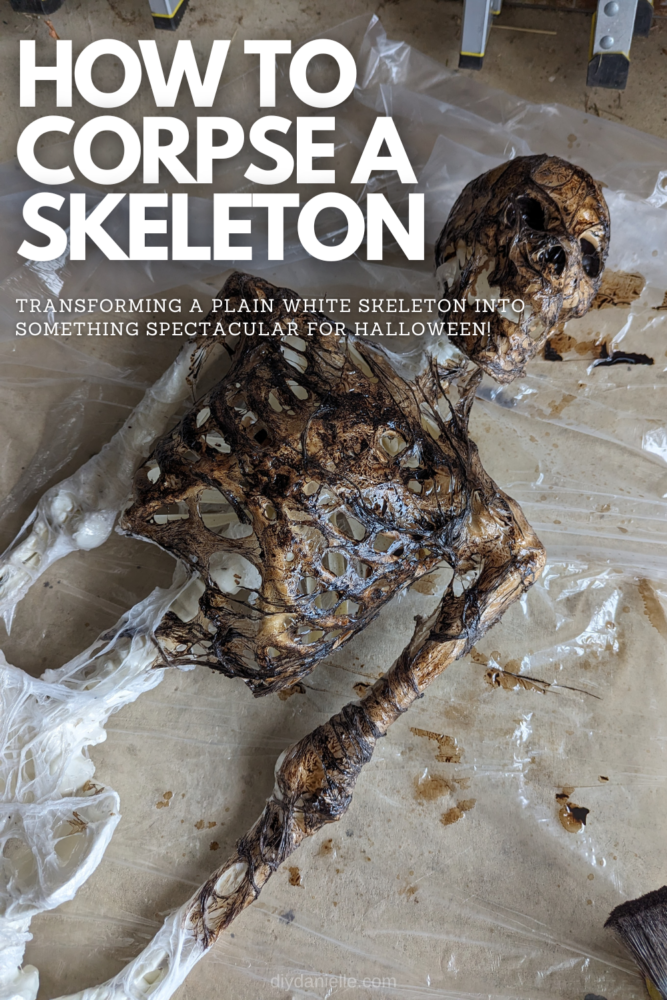
Step 1: Take your skeleton and wrap it with plastic. You want to do one layer of plastic at a time.
Step 2: Use your heat gun to melt the plastic around the skeleton. DO NOT leave the heat gun on any area too long or you’ll melt your skeleton underneath which isn’t ideal (although I did this accidentally with another project and the head caved in a bit. It looked pretty neat).
Heat Gun Safety: Be very careful not to burn anything down. I always use my heat gun on a concrete surface (like my garage floor) so that I have someplace to put it down that won’t burn. The gun gets VERY HOT and WILL start a fire if you leave it on one spot for too long. You can SEE flames come out of the end… so don’t point it at your face or anyone else’s flesh. Also… I’ve done this… don’t put the hot gun down on its own cord. You’ll burn the cord.
Step 3: Add additional layers of plastic, using the heat gun after each layer. Add more layers around areas like the knees and elbows.
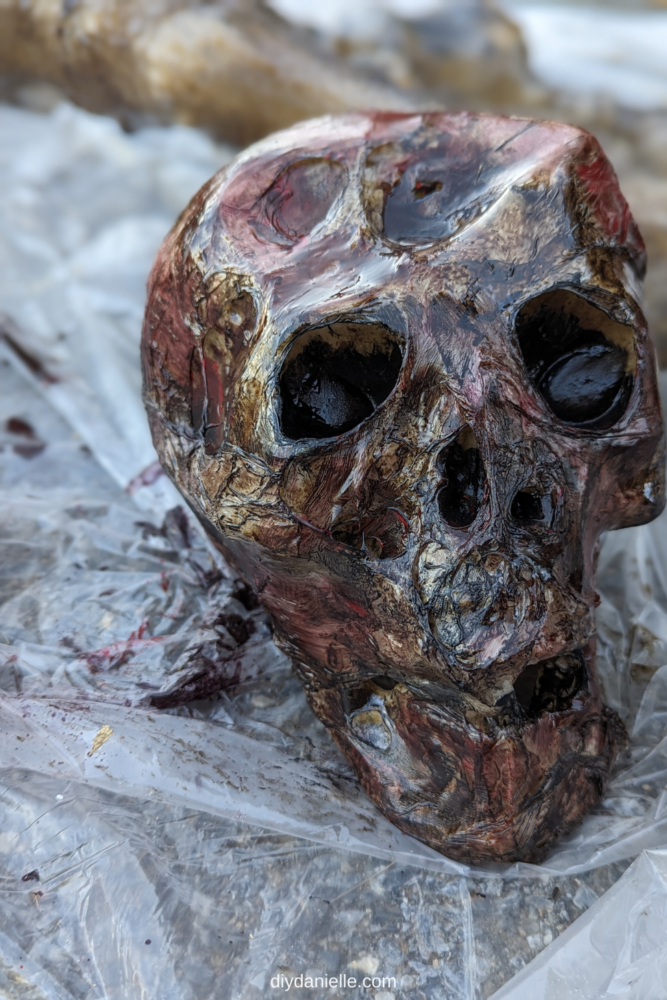
Step 4: You can spend longer on areas where there are gaps in the bones- ie. the open mouth area. This will burn a hole through the plastic or maybe leave strings of plastic across those gaps. It makes it look really cool and fleshy.
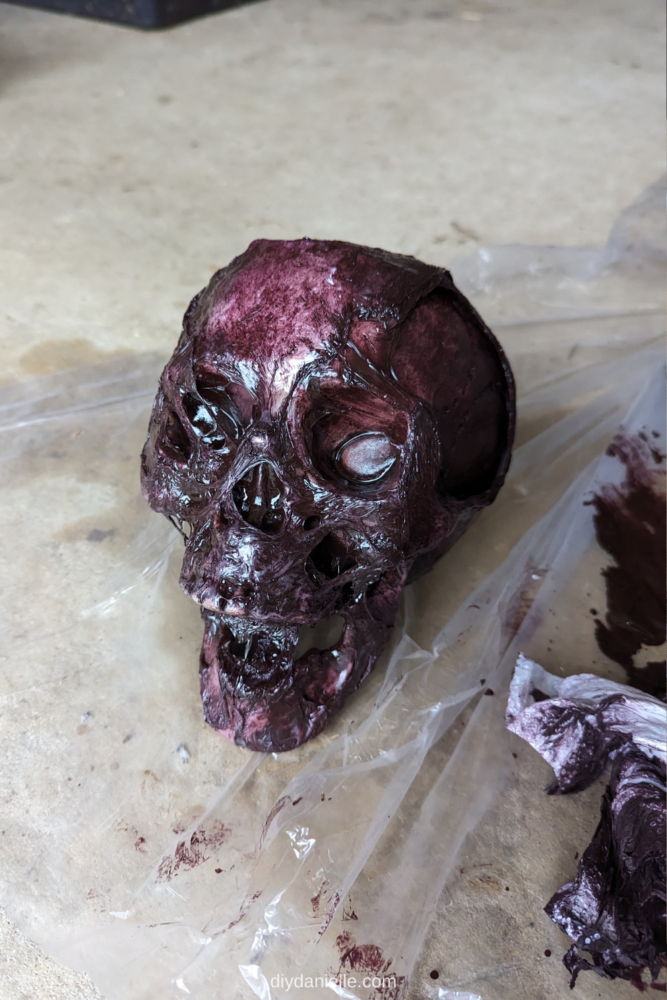
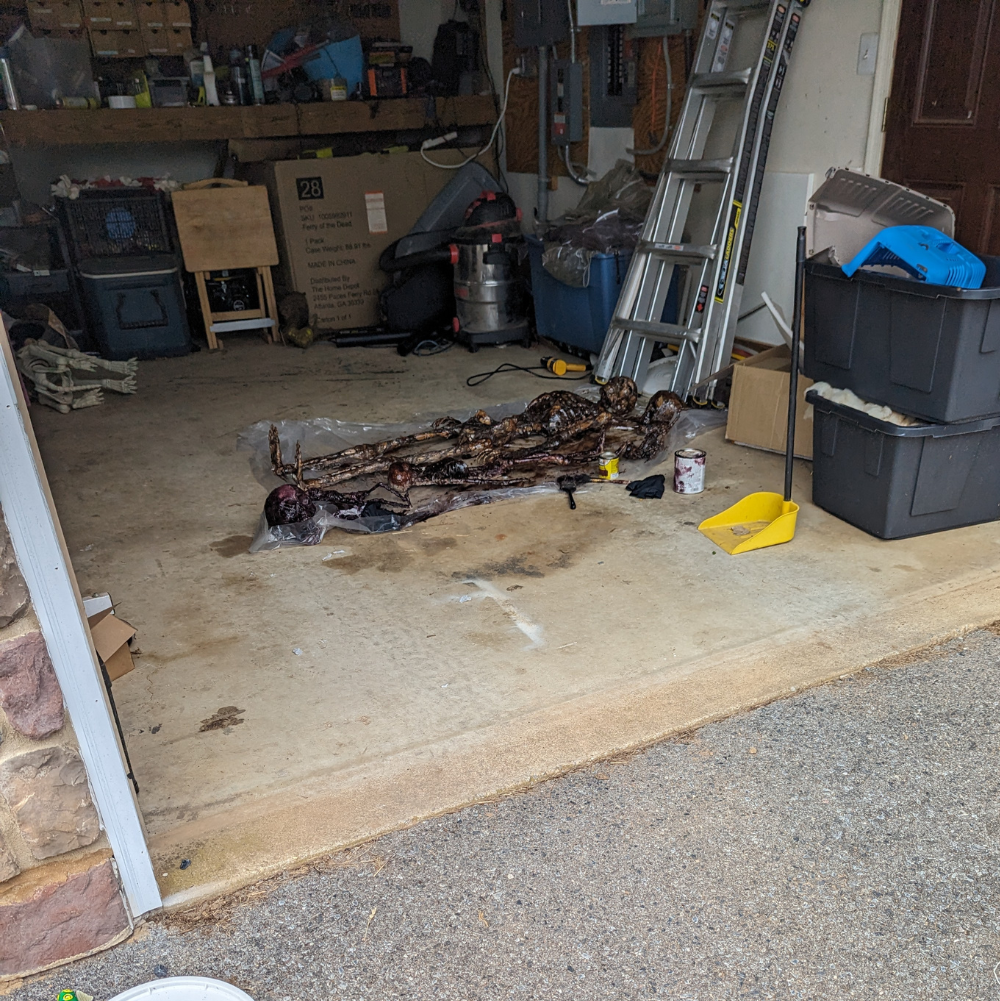
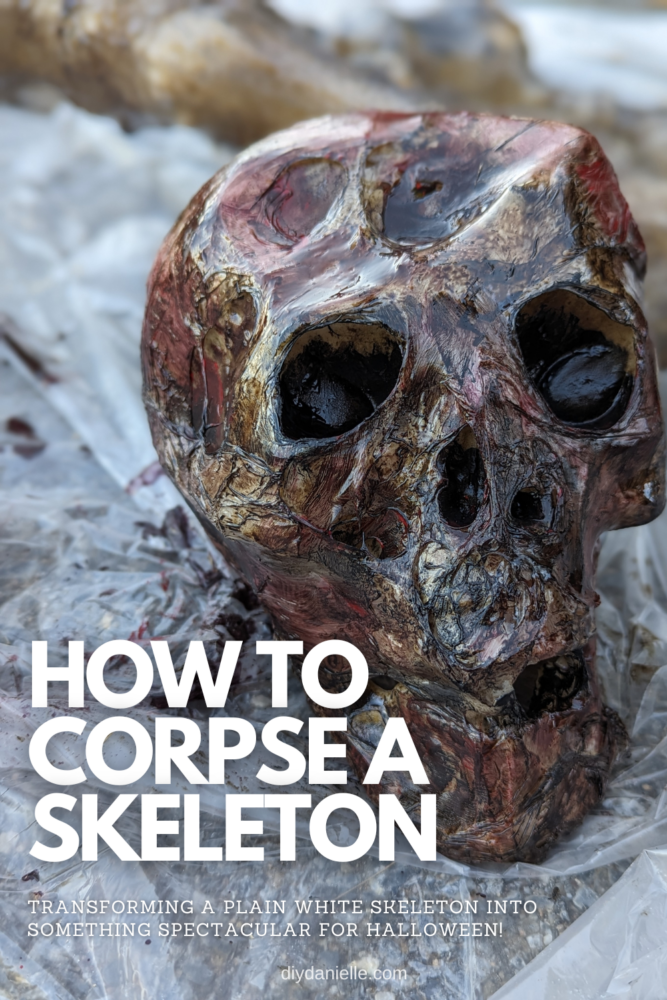
Step 5: Once cooled, put your skeletons on a drop cloth and use a paint brush to paint on your stain. Try to get in all of the areas.
Step 6: If needed, blot the excess stain with a paper towel or old towel. I found that one of my stains looked good without blotting but my other stain required extra blotting.
Step 7: Let dry.
Step 8: Once dry, flip and stain the opposite side.
Options for Corpsing
One thing I have seen is that some people start out by painting the skeleton first. This probably makes staining easier at the end. I was struggling to get the stain on the inside of the skeleton’s ribs.
Some people cut out the skellie’s original teeth and glue in fake teeth. Some people add additional layers of paint in red or black. Some people add fake blood or cotton balls or hair (I was tempted to grab some horse hair for this because it would look pretty realistic).
But I felt like the skeletons looked really good without all of this and while the extra stuff could really up our game, we don’t really need that level of detail. Nobody is getting THAT close and we aren’t filming a movie. I prefer to have our project be less painful…
Stain Choices
I like to use whatever excess stain I have sitting around. Here are some colors that I tried…. I think the classic penetrating worked better for me and required less blotting.
Varathane Classic Penetrating Wood Stain: Red Oak (my favorite)
Varathane Premium Wood Stain: Black Cherry
Varathane Classic Penetrating Wood Stain: Provincial
Can Corpsed Skeletons Be Left Outdoors?
I’ve been told that these hold up pretty well outdoors, although direct sunlight and snow will inevitably fade them some. I may see if I can apply a clear matte coat to increase the longevity, but it’s a fairly easy project to redo if I don’t.
I left my skellies drying inside the garage with the door open. Think anyone will call the police?
Video Tutorial: Corpsing Skeletons
Please share and pin this post! You can also post your project and tag the DIYDanielle team on Instagram @doityourselfdanielle!

Looks like this was your first time?
This method was developed by Allen Hopps of Stiltbeast fame, primarily for background props where detail is not too important.
It has been recycled and rehashed but hundreds of people who don’t understand its origin or purpose.
These don’t look realistic and they are not meant to be. They are filler in the background. The nice skeletons, corpsed out by more labor intensive methods, go out in front.
So, did you take this idea directly from the Stiltbeast YouTube channel, or one of the many, many copycats?
Likely not that youtube channel. I’m in a lot of facebook groups that shared different methods and I put together what worked for me, and tried to share the colors I used.
I don’t do a Halloween trail for grownups or money. I do this for fun for a bunch of young kids to run through our farm trail and they LOVE them. That’s what matters.
Does it even matter?!?! Its for a “home trail”….if they are satisfied with the results/method used, then its a win!!!!
This is a DIY method….you might want to check out another one more suited for YOUR needs/interests.
Thank you!
How did you go about the fingers on the hands? I’m not satisfied with how that part is turning out on mine. Thanks in advance! I found this DIY helpful, I too am doing this for kids in a trail.
Sooo it depends on which skeleton, but I did a lot of extra plastic wrap around the hands for a couple of them. It makes them look like they have fat hands… for the one without fat hands, I used a bit less plastic. But essentially wrap until you’re happy. 😉 It’s fun.
Thank you