
Are you wondering how to fix footie pajamas that have developed holes?. If you need ideas for repairing the holes worn in the toes of footie PJ’s, here are two easy ways to fix them. You can add a cuff or a band, or you can simple cut off the bottoms. Here’s how.
We have three boys so the third boy is receiving a lot of hand me downs that have seen better days. While the really rough looking stuff has been upcycled or tossed, some of the footie PJs were fine other than a couple of holes in the toes. I decided to fix them, rather than tossing the outfits. It’s a fairly simple fix, particularly if you sew, but I also have a no sew option.
Supplies for Fixing the Feet on Pajamas
Supplies listed below may include affiliate links to the products.
- Matching knit fabric- Upcycling t-shirts works great!
- Scissors
- Sewing equipment, if applicable
How to Fix Holes in Footie Pajamas Without Any Sewing
If you don’t have the sewing skills and just don’t want to worry about little toes getting stuck in the fabric, it’s a fairly simple fix.
Most pajamas are made of knit fabric- it’s stretchy. The nice thing about knits is that they don’t fray. If you cut a piece of cotton, you’d find bits and strands of fabric coming off in the wash. It falls apart, essentially. But with knits, they aren’t prone to fraying.
So the easy fix to fix the holes would be to cut the feet off. It won’t look as pretty as adding leg cuffs, but it certainly will work!
That said, the legs won’t be snug to your baby’s ankles and that might be a safety issue for overnight? I have no idea. I just know that most PJs for babies have tight cuffs or feet.

If you have a sewing machine and don’t want to add bands/cuffs, but still want the finished look, you could always turn the edges over and sew with a straight stitch. The legs may be a bit short on the baby though if you do this.
How to Fix Footie Pajamas By Adding Leg Cuffs
If you want to sew new cuffs on, this will be a more attractive option. You still begin by cutting off your feet. I tried to cut low enough that I won’t hit a snap when I’m sewing the bands on.
Once you cut off your feet, you want to measure the opening on the foot. These are 4″ wide (but of course it’s 8″ all the way around). This will help you decide on the size of your band. You want leg cuffs for PJ’s to be smaller than the size of the opening- this is to keep it snug to your baby’s legs. I think there are safety reasons for this as I’ve never seen pajamas made with wide legs for babies and young children.
For mine, I ended up using a 6″ wide band (so 1.5x the width) and using a really small seam allowance when I sewed. When I do other pairs, I might make them 2x, seeing it’ll still be snug once the seam allowance is taken into account.
The bands are 2″ tall or 4″ total before they’re folded over (like below). You can make the bands taller if you want… I might for the next ones I fix.
So long story short- I cut two pieces of knit fabric with the stretch along the long portion, 4″x 6″.
Now knit curls so it can be a pain to work with. I was using some scraps of new knit, but I’ve found that upcycling old tshirts for bands and cuffs works really well because the old knits from those shirts doesn’t seem to curl as much. Plus it’s a good way to reuse old clothing that might otherwise get tossed.

Your first step will be to fold the fabric so the two short ends meet, right sides together (like on the right in the picture below). You’ll use a stretch stitch or a serger to sew the ends together. If you’re using a regular sewing machine, you NEED to use a stretch stitch. This is really important, otherwise your threads will break when you try to stretch the fabric post sewing.
I’ve serged the one below.

Now you can see that I’ve finished both bands as stated above. Now I need to fold the bands as they’ll go on the outfit- wrong sides together. See photo on the right.

Once you’ve folded them, turn your outfit wrong sides out and pin your bands to the right side of your outfit legs. Normally, you’d find each quarter point on both the band and the leg opening but these are SUCH a small opening that it’s difficult to do that. I find the half points, match them up, and used my clips to hold them in place.
As you can see, the band is smaller than the leg opening. You’ll stretch the band to fit the leg opening as you sew- make sure not to stretch the leg opening too. JUST stretch the band.
And yes, use a stretch stitch like before or serge.

Here’s the inside of the leg with the band serged on.

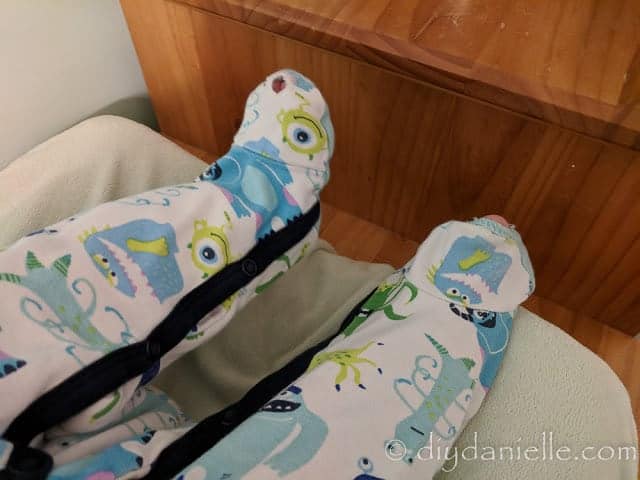
Here are the cuffs after being sewn on. They aren’t perfect because the footie portion had a bit of a curve on the top which meant my line wasn’t perfectly straight across. I could have cut the foot off higher to make it more even. You can do that, just make sure you’re far enough away from the first snaps that your sewing machine won’t hit the snaps.
Now you know how to fix footie pajamas instead of tossing them out! It’s not very difficult, and there are two different ways you can choose.

Here they are on my baby. It’s hard to take pictures of such busy feet.

If you found this tutorial on how to fix footie pajamas helpful, could you share it? Here’s a Pin-worthy image!

Thanks for taking the time to read this post! I really appreciate the time you’ve taken. Please share, like, and pin my post if you enjoyed it. Follow me on social media and subscribe to my email list to keep up to date on all of my latest projects!

Disclosure of Material Connection: Some of the links in the post above are “affiliate links.” This means if you click on the link and purchase the item, I will receive an affiliate commission. Regardless, I only recommend products or services I use personally and believe will add value to my readers. I am disclosing this in accordance with the Federal Trade Commission’s 16 CFR, Part 255: “Guides Concerning the Use of Endorsements and Testimonials in Advertising.”
Super! I’ve got a few that’ll need this before we have our third 🙂