Learn how to make potato stamps without cookie cutters or any specialized equipment. This was a quick homeschool project with my kids!
We’ve been homeschooling my two older sons this year and have done a number of fun projects with them. I like to work with what I have on hand because I’m struggling to get to the store with the 3 littles at home. Today we’re making potato stamps which the kids LOVED.
Last week we made DIY old fashioned paper. We’ve been reading You wouldn’t want to live without writing and You wouldn’t want to live without books. This series is pretty fun- lots of gross details that kids love, but the books are packed with information that covers history, science, and health.
This post may contain affiliate links which may earn me commissions should you click through them and take certain actions. As an affiliate for Amazon, Cricut, xTool, Home Depot, and other sites, I earn from qualifying purchases. Please DIY carefully. View my full legal disclosures here.
The majority of my content is generated by me, as are 99% of the photos and videos, but I utilize technology for titles, descriptions, video editing out all of my ums, and occasionally for text overlay on images.
Please read the whole post so you don’t miss any important information!
How to Make Simple Potato Stamps
Supplies:
- Potatoes
- Scissors
- Pencil
- Ink Pad Or Paint
- Knife
- Paper
- Toothpicks
Tutorial:
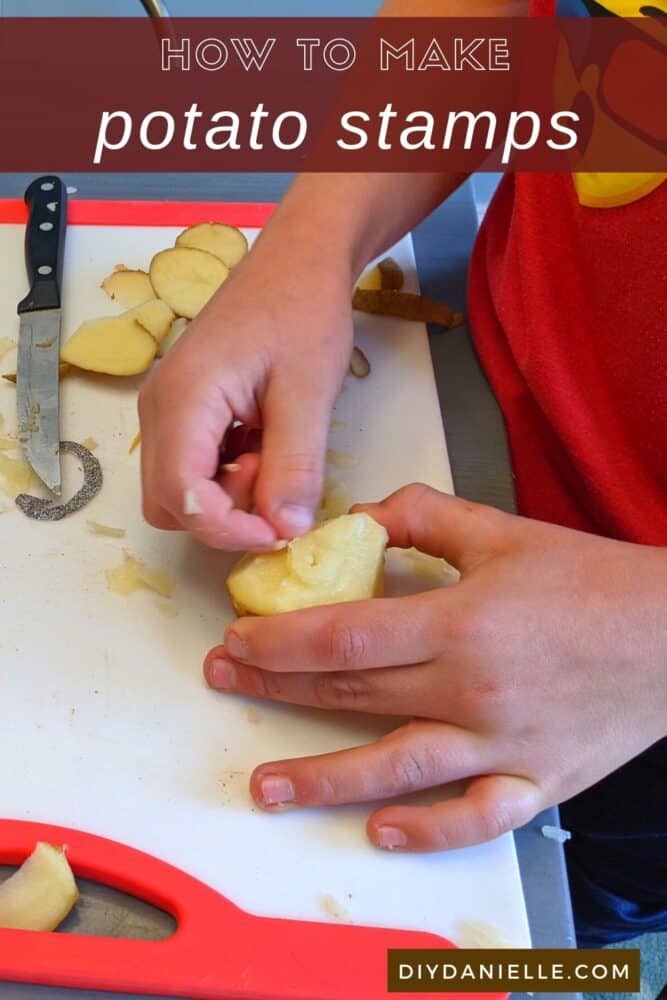
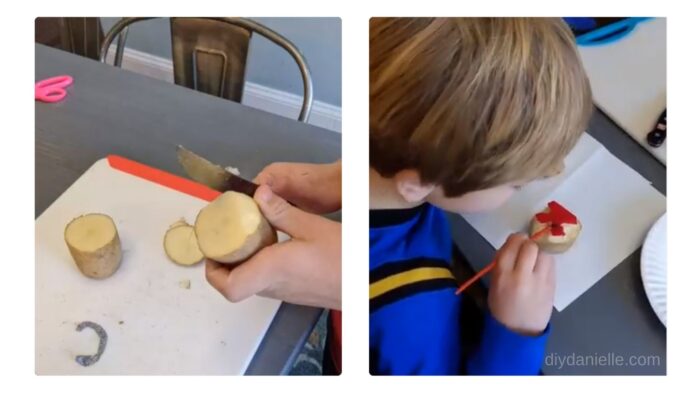
1. Cut potatoes in half.
2. Put your tomato raw sides down on a piece of paper and trace around it. This gives you a template so your design won’t be too big.
3. Draw bubble letter on paper. Thicker, larger letters work best. Don’t forget to make sure your letter on the stamp is reversed!
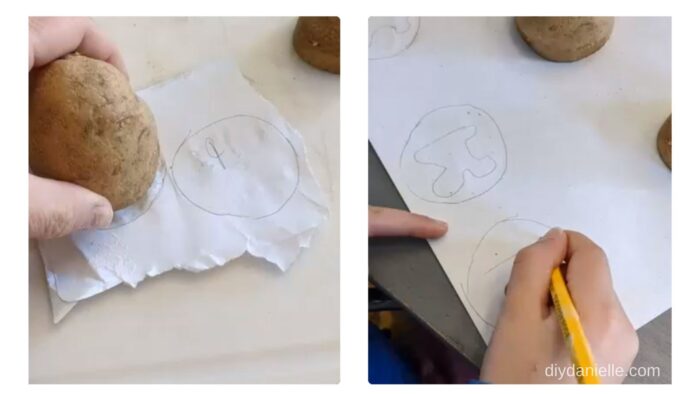
Right: Drawing the bubble letters inside the template.
4. Cut out bubble letter.
5. Place letter upside down on your potato. Trace.
6. Use a knife to carefully carve the letter out.
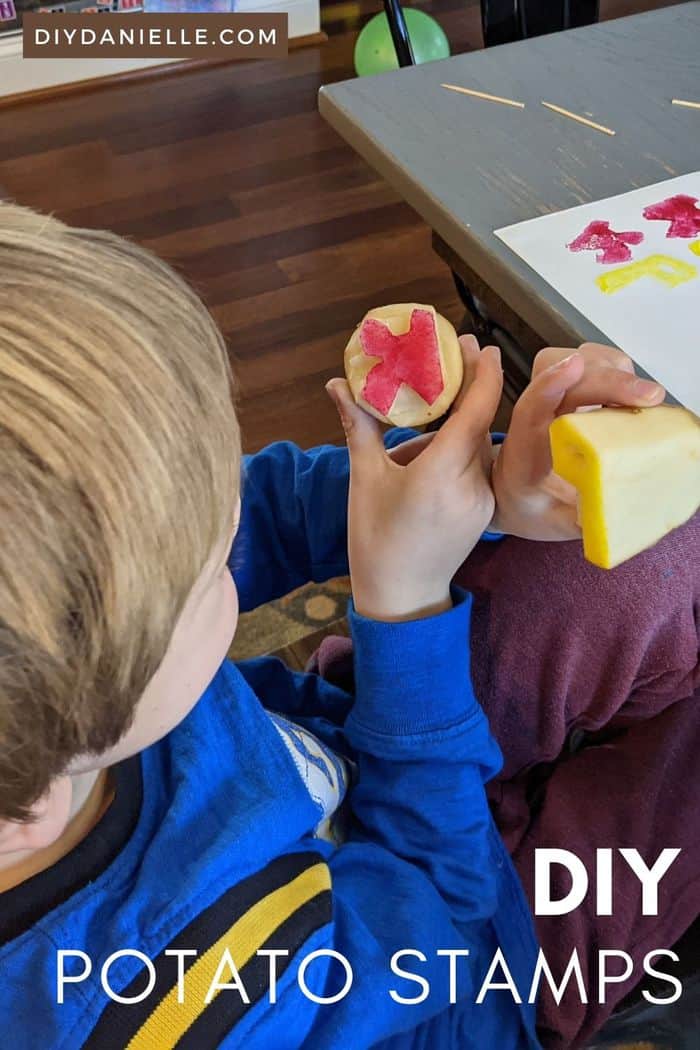
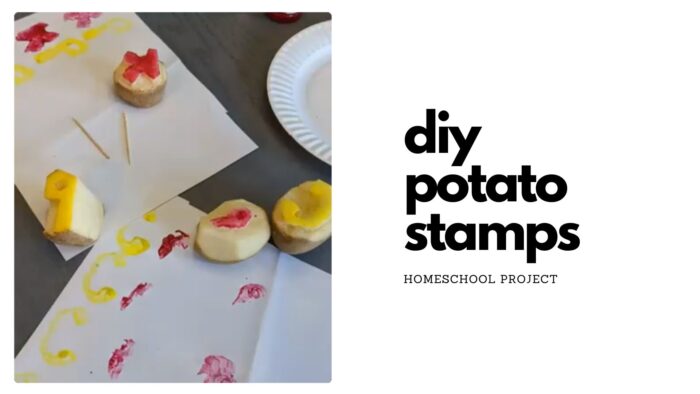
7. Place stamp on ink pad or apply paint. Use as a stamp.
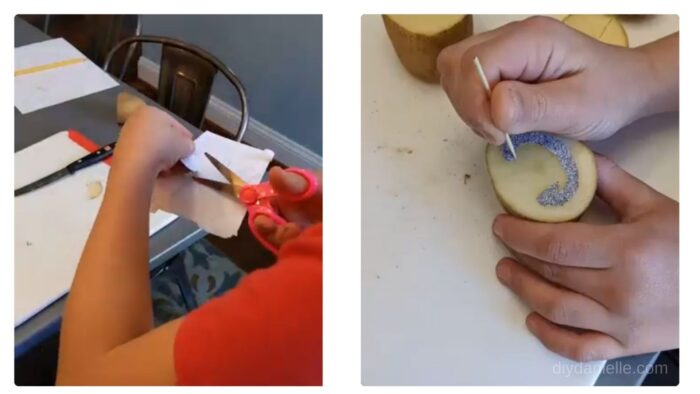
Right: Tracing the letter upside down on the top of the potato.
Right: Painting the letter on the potato with safe paints for kids.
Please share and pin this post! You can also post your project and tag the DIYDanielle team on Instagram @doityourselfdanielle!