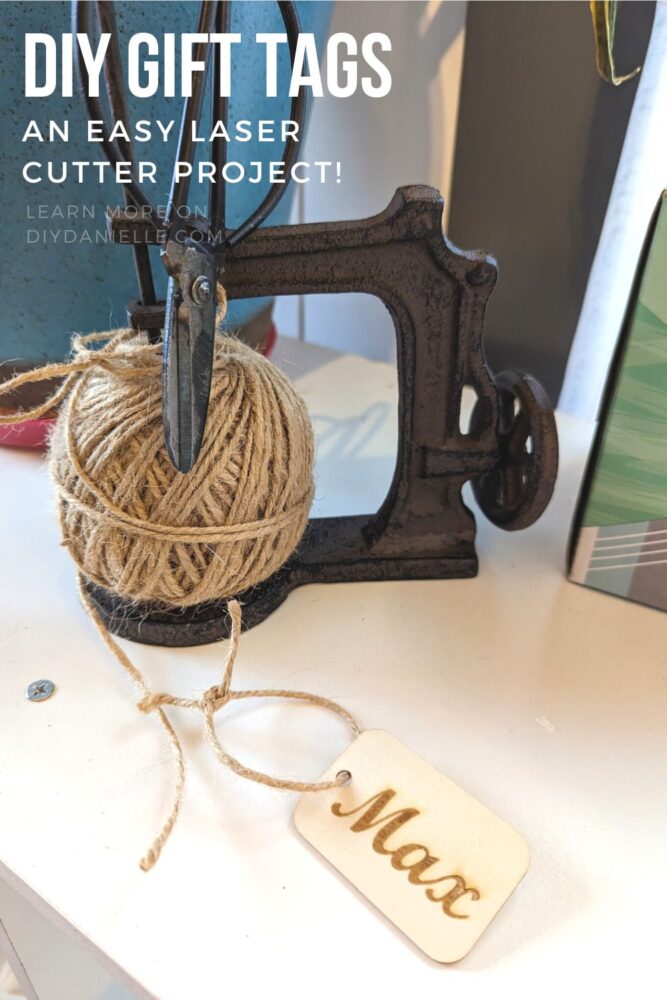
Learn how to make gift tags with a laser cutter and blank wood tags. These beautiful tags look professionally made!
When I received the xTools M1 laser cutter and a bundle of materials, I decided to make gift tags first. They’re such an easy project, they’re forgiving if you mess them up, and they’re great for combining with reusable gift bags. I LOVE how these came out. It’s a lot easier than wood burning by hand!
This post may contain affiliate links which may earn me commissions should you click through them and take certain actions. As an affiliate for Amazon, Cricut, xTool, Home Depot, and other sites, I earn from qualifying purchases. Please DIY carefully. View my full legal disclosures here.
The majority of my content is generated by me, as are 99% of the photos and videos, but I utilize technology for titles, descriptions, video editing out all of my ums, and occasionally for text overlay on images.
Please read the whole post so you don’t miss any important information!
How to Make Wood Gift Tags
Supplies:
- xTool M1: The Ultimate Gift-making Laser & Blade Cutting Machine
- Laser Materials Explore Kit (111 Pieces)
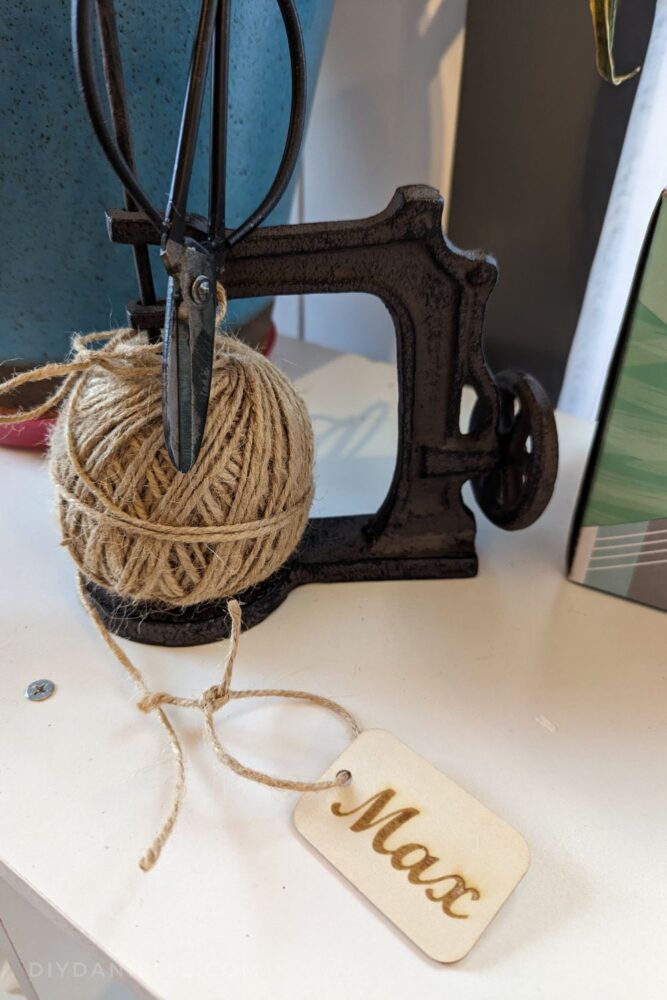
- Jute Twine & Scissors
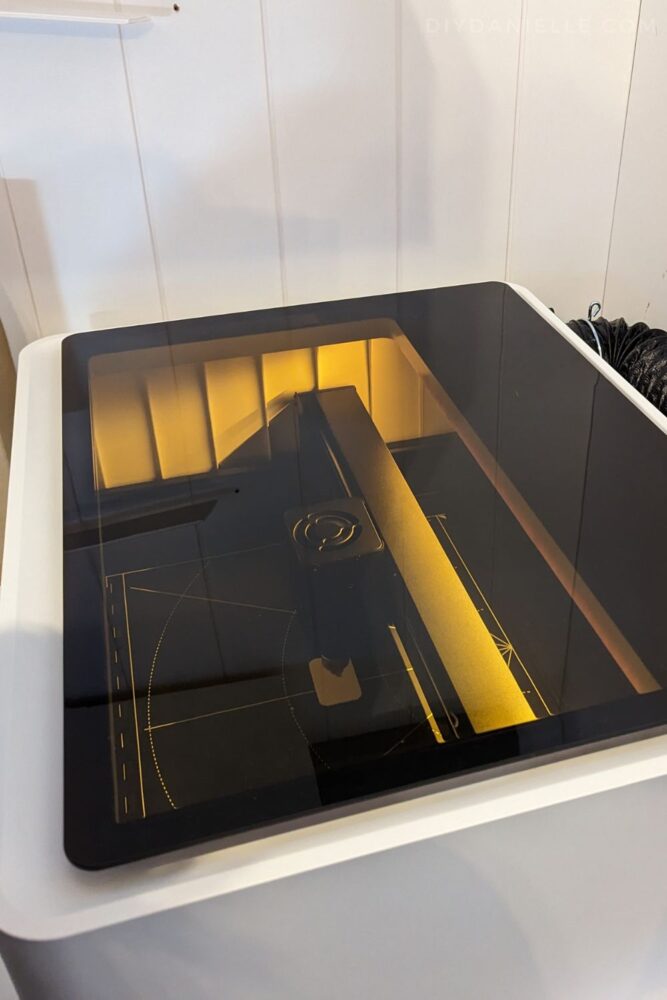
Step 1: Setup your M1 Laser cutter. Make sure it’s vented to outside. This is what it looks like when it’s turned on. You can see that there is a “mat” of sorts inside the box. They also have mats to use for certain types of projects.
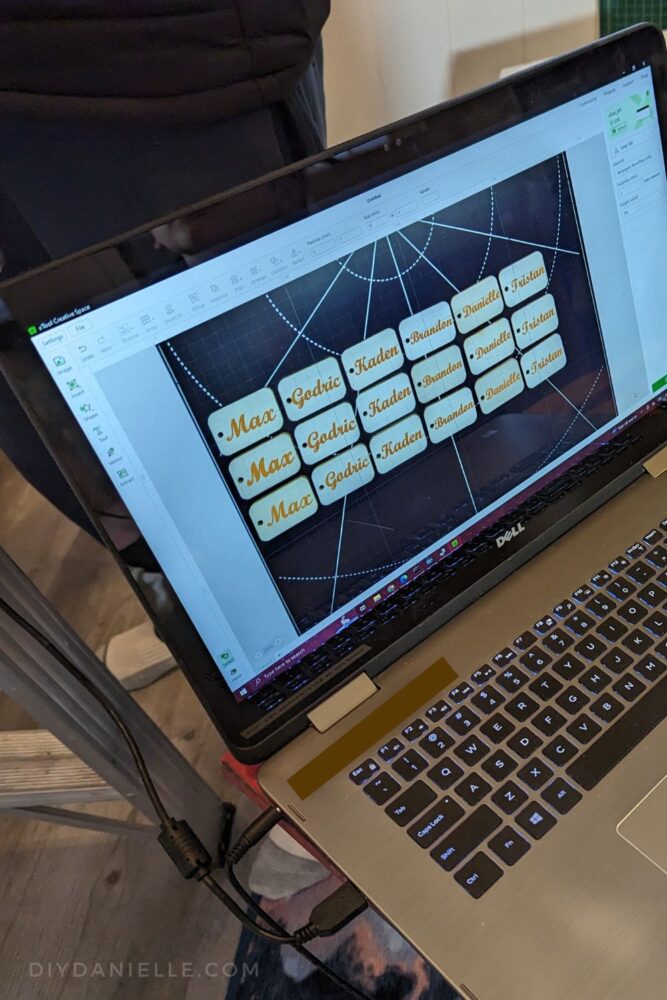
Step 2: Download the software, xTool Creative Space, and connect your machine to your computer.
Step 3: Place your tags inside the machine on the mat. Ideally, you want them to be lined up so you can easily center and level the words in the software. Close your lid.
Step 4: The software should “see” the tags on the machine’s mat. Add your text on top of each tag, adjusting the size so it fits.
Tip: There’s a button called “Smart Fill” that will fill all of the tags with the same name!
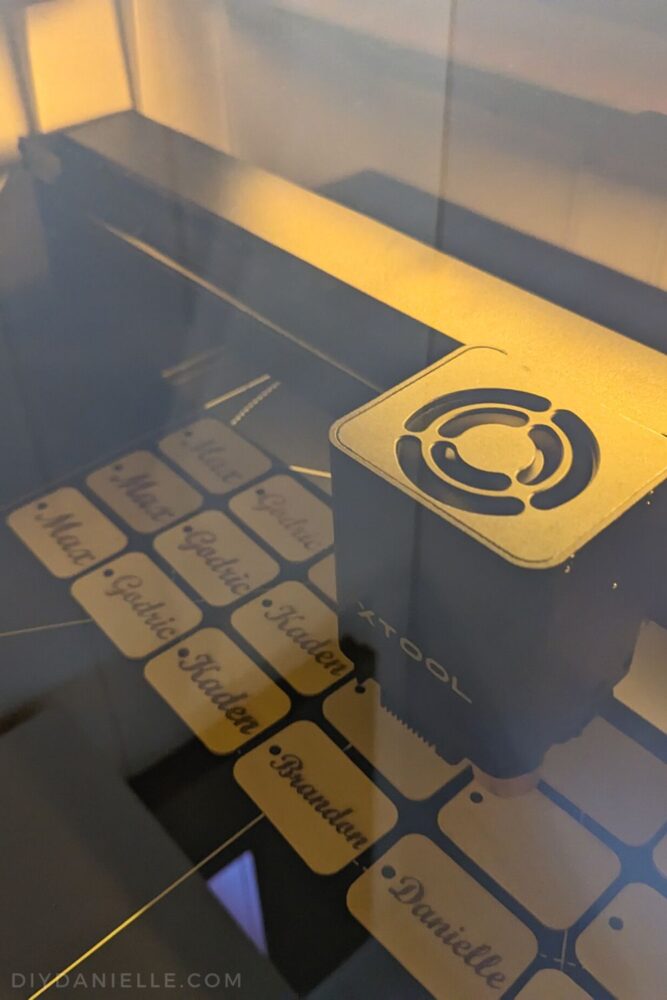
Step 5: Click PROCESS and LASER FLAT. It gives you the estimated time it will take to finish the project. Then click START. Press the blue button on the machine.
Step 6: The machine does most of the work at this point. Just keep an eye on the machine and the project while it works!
Step 7: Add your twine to the end of the tag!
Don’t forget to check out my Review of the xTool M1 Laser Cutter!
Please share and pin this post! You can also post your project and tag the DIYDanielle team on Instagram @doityourselfdanielle!