

Learn how to make your own dry erase pocket sleeve that’s a custom size. This is a great way to make something reusable, but non permanent.
Are you looking for a creative way to make chore cards reusable? In this DIY tutorial, we will show you how to create your own dry erase pouches for chore cards. The process is simple and fun, perfect for getting organized in style.
This post may contain affiliate links which may earn me commissions should you click through them and take certain actions. As an affiliate for Amazon, Cricut, xTool, Home Depot, and other sites, I earn from qualifying purchases. Please DIY carefully. View my full legal disclosures here.
The majority of my content is generated by me, as are 99% of the photos and videos, but I utilize technology for titles, descriptions, video editing out all of my ums, and occasionally for text overlay on images.
Please read the whole post so you don’t miss any important information!
DIY Dry Erase Pouches
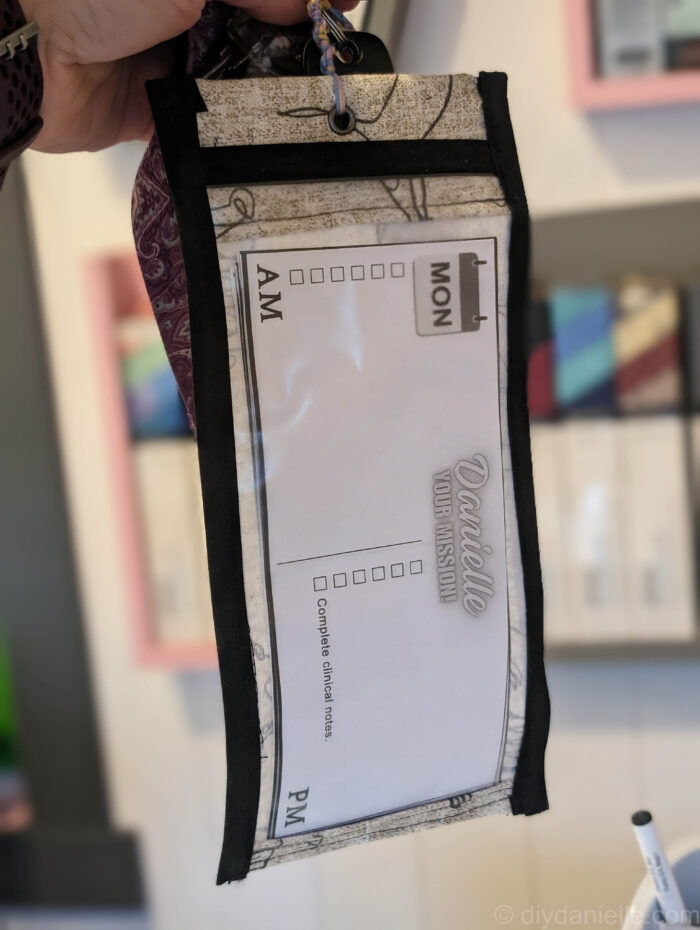
I wanted to make my kids some new chore charts, but to use pouches to carry the chore list around… otherwise they tend to forget what they were doing (ADHD problems). These pouches allow us to wear the chore chart until we’re finished, although the dry erase tends to disappear while we’re moving around… so usually we can’t mark the chore done until we actually take it off.
While I love the 8.5×11 ones that teachers buy, I wanted something that was a custom size and this was an easy thing to whip up.
Supplies
- Clear Vinyl
- Cotton Fabric
- Sewing Machine
- Bias Tape
- Grommet Press
Tutorial
To start, gather your materials including clear vinyl, bias tape, sewing machine, thread, a grommet, fabric, and stabilizer if desired. I also recommend using a scrap piece of fabric to add stability to the pouch.
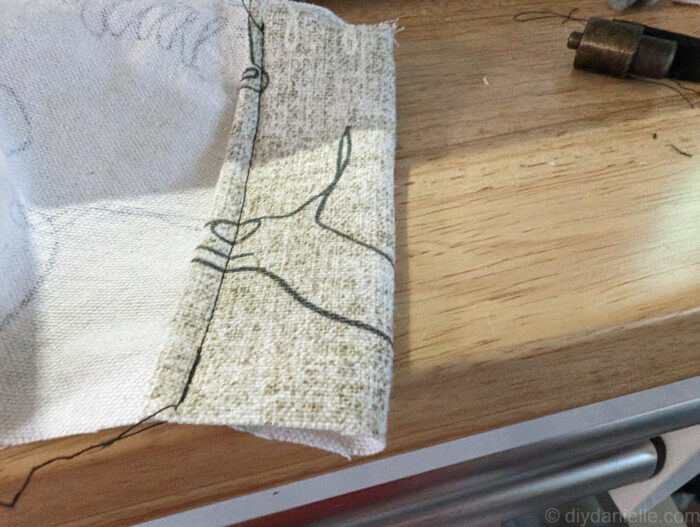
The first step involves sewing the bias tape onto one short side of the vinyl. This will give that open side a clean look!
Next, sew the cotton fabric right sides together with the vinyl along one short side. Fold it over so it’s right sides out, then sew the seam with a straight stitch.
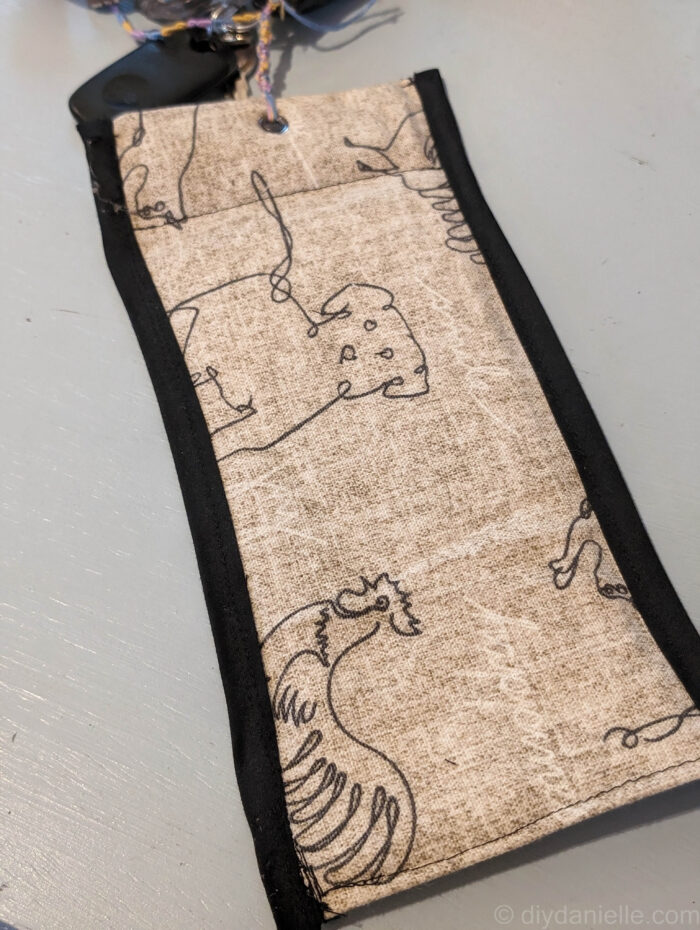
Fold the other side of your cotton fabric over, so the raw edges are hidden. I added a piece of scrap felt in between to reinforce the area. This is where our grommet will go later. I sewed a straight stitch across.
Now pull the vinyl up to the folded area so the pouch is ready to have the bias tape added to the sides.
Sew bias tape along the long sides to finish the pouch.
Once the bias tape is secured, trim any loose thread.
Add a grommet so you can attach this to your keychain or hang them up in your house.
And just like that, you have a reusable dry erase pouch for your chore cards!
What do you think!?
Video Tutorial
For a detailed visual guide on creating these DIY dry erase pouches, check out our video tutorial. Get ready to tackle your chores in a fun and stylish way!
Please share and pin this post! You can also post your project and tag the DIYDanielle team on Instagram @doityourselfdanielle!