
Ever stumbled upon those super crunchy, mega-light freeze dried snacks in the grocery aisle and wondered, “How in the world do they make these?” Well, buckle up, because today we’re diving into the frosty world of freeze drying – and, spoiler alert, it’s cooler than you think (pun totally intended)!
I’ve started my research into freeze drying as I have been considering picking up a home machine for preserving garden produce. I want to be able to safely store food for the winter, ideally without freezing it, and I want to avoid canning. Canning scares me because there are so many ways to mess it up… and it’s difficult, time consuming, and requires a lot of supervision.
Freeze drying seems like an easier process that will make life easier for me. Let’s get into the details about freeze drying, including how to prepare different foods for the process.
This post may contain affiliate links which may earn me commissions should you click through them and take certain actions. As an affiliate for Amazon, Cricut, xTool, Home Depot, and other sites, I earn from qualifying purchases. Please DIY carefully. View my full legal disclosures here.
The majority of my content is generated by me, as are 99% of the photos and videos, but I utilize technology for titles, descriptions, video editing out all of my ums, and occasionally for text overlay on images.
Please read the whole post so you don’t miss any important information!
What’s Freeze Drying, You Ask?
Imagine this: You’ve got a bounty of strawberries so juicy and sweet, they’re practically begging to be preserved in their prime. Or maybe you’ve whipped up a batch of your famous chili that’s just too good to go to waste. Enter freeze drying, a.k.a. the superhero of food preservation!
Freeze drying is a process that removes moisture from food by first freezing it solid, then reducing the surrounding pressure to allow the frozen water in the food to change directly from solid ice to vapor.
Why Go the Freeze-Dry Route?
Now, you might be thinking, “But I have a dehydrator, isn’t that enough?”
Yes, but also no. There are some benefits to freeze dried vs. dehydrated foods.
Here’s why:
- Longevity: Freeze-dried foods can last up to 25 years.
- Nutrition: This method keeps most of the nutrients intact, making it a healthier option.
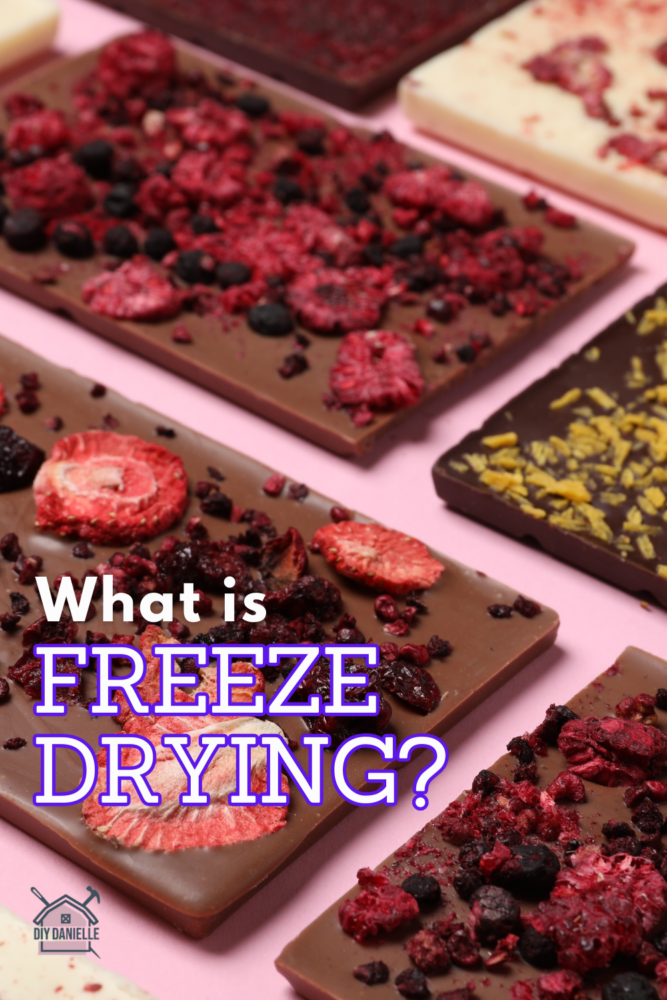
- Versatility: From fruits and veggies to complete meals and yes, even ice cream, if you can eat it, you can probably freeze-dry it.
Uses for Freeze-Dried Foods
The real fun begins once you’ve got your freeze-dried stash. Here are just a few ideas to get your culinary creativity flowing:
- Snack Attack: Fruits, veggies, even yogurt drops turn into light, crunchy, nutritious snacks.
- Sous Chef Staples: Prep ingredients like onions, garlic, and herbs in advance, then just toss them into your cooking as needed.
- Sweet Surprises: Ever tried freeze-dried candies or marshmallows? Game. Changer. I’m particularly fond of freeze dried Skittles.
The Fix for Food Preservation Woes
Freeze drying might sound like it’s straight out of a futuristic utopia, but it’s accessible, practical, and fun. Whether you’re a prepping pro, a sustainability superstar, or just someone who hates to see good food go to waste, freeze drying offers an exciting way to save and savor the flavors of your kitchen creations.
I love that it’s a reasonable way to store produce from my garden without waste. While I COULD compost excess produce or give it to my chickens, it’s a waste and I hate to eat flavorless grocery store produce throughout the winter. Being able to save produce for use over the winter is fantastic. I’m particularly interested in freeze drying elderberry as we grow quite a bit of it.
Freeze drying different items requires different types of preparation, however. Some foods are easy to prep, some require more work.
Here’s more about WHAT foods can be freeze dried and a basic guide to how they’re prepared for the process. It’s similar to dehydration.
What Foods Can Be Freeze Dried?
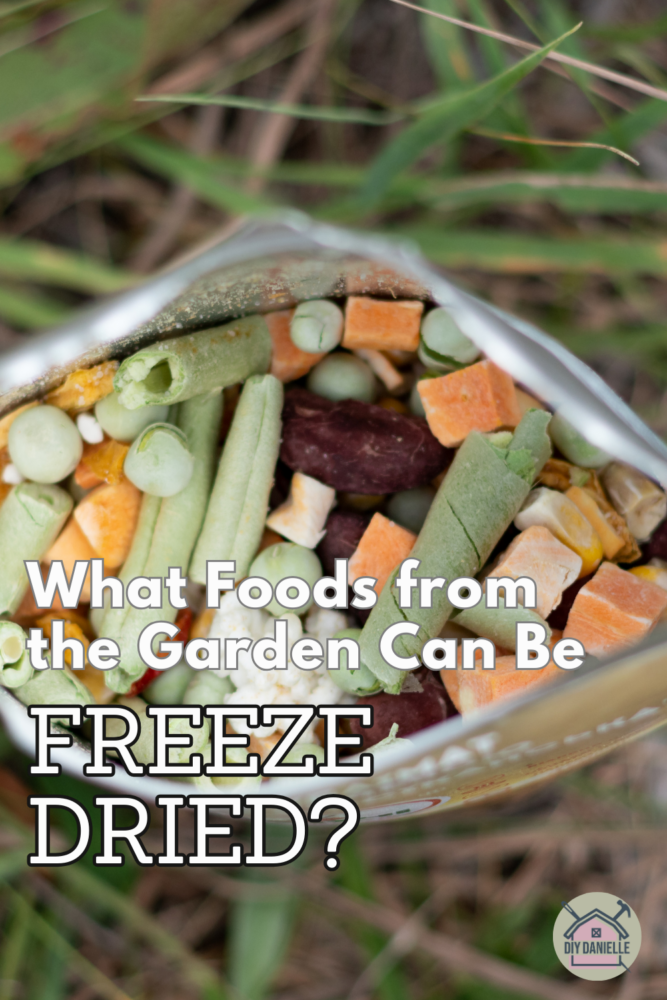
Vegetables that Can Be Freeze Dried
Prepping vegetables is an important step before freeze drying them. This process not only ensures that your veggies maintain their nutritional value and taste but also helps them freeze dry more efficiently. Here’s a basic guide to prepping your vegetables for freeze drying:
- Clean Thoroughly: Rinse your vegetables under cold water to remove any dirt or pesticides. For root vegetables, you might need to use a brush to get all the dirt off.
- Blanching: Most vegetables benefit from blanching before freeze drying. This short, hot water bath stops enzyme actions which can cause loss of flavor, color, and texture. After blanching, quickly cool the vegetables in ice water to stop the cooking process.
- Cutting: Slice or chop your vegetables into uniform pieces. Smaller pieces freeze dry faster and more uniformly. For things like peas and corn, you can leave them whole.
- Spreading Out: Lay your prepped vegetables out in a single layer on the freeze dryer trays. Ensure they’re not overcrowded or touching too much, as this can impact the freeze drying process.
- Pre-Freezing: Although not always necessary, pre-freezing your vegetables can speed up the freeze drying process. You can spread them out on a tray and place them in your freezer until they’re completely frozen.
- Packaging After Freeze Drying: Once freeze dried, ensure your vegetables are properly sealed in airtight containers or mylar bags with oxygen absorbers to preserve their shelf life.
Each type of vegetable might have specific prep requirements, but following these general steps can help you achieve the best results in freeze drying.
Here’s a list of vegetables that are well-suited for freeze drying:
- Broccoli
- Carrots
- Corn
- Peas
- Green beans
- Bell peppers
- Zucchini
- Spinach
- Mushrooms
- Tomatoes
- Cauliflower
- Onions
- Kale
- Brussels sprouts
- Sweet potatoes
These vegetables retain their nutrients, color, and flavor very well after freeze drying, making them perfect for long-term storage or convenient, healthy snacks.
Fruits that Can Be Freeze Dried
Preparing fruits before freeze drying is crucial for achieving the best quality in both taste and texture. Here’s a quick rundown of how to prep your fruits for freeze drying:
- Wash Thoroughly: Clean your fruits under cold water to remove any dirt or residues. It’s important to ensure they are clean before you start the freeze drying process.
- Peel and Pit: For fruits with thick skins (like bananas, kiwis, and peaches) or large pits (like cherries and plums), you’ll want to peel and pit them first. This makes them easier to eat once freeze-dried and ensures a more uniform drying process.
- Slice or Chop: Cutting your fruits into smaller pieces or slices helps them freeze dry more evenly and quickly. For berries and grapes, you can leave them whole, but keep in mind that whole fruits may take longer to freeze dry.
- Pre-Freeze (Optional): While not always necessary, pre-freezing your prepared fruit can help speed up the freeze drying process. Spread your fruit out on a tray in a single layer and place it in the freezer until fully frozen.
- Tray Placement: Arrange your prepped (and optionally pre-frozen) fruits in a single layer on the freeze dryer trays. Avoid overcrowding to ensure even freeze drying.
- After Freeze Drying: Once your fruits are freeze-dried, store them in airtight containers or mylar bags with oxygen absorbers to keep them fresh and crunchy for years.
Prepping your fruits not only ensures a successful freeze-drying process but also maximizes the shelf life and quality of the final product.
Here’s a list of fruits that are great for freeze drying:
- Apples
- Bananas
- Strawberries
- Blueberries
- Raspberries
- Peaches
- Cherries
- Pineapple
- Mango
- Kiwi
- Grapes
- Pears
- Elderberry
- Plums (pitted)
- Oranges (peeled and sectioned)
- Watermelon (though it’s very light and fluffy once freeze-dried)
Freeze drying these fruits retains their flavor, color, and most importantly, their nutritional value, making them perfect for healthy snacking or adding to recipes.
Herbs that Can Be Freeze Dried
Prepping herbs for freeze drying is straightforward but essential for preserving their flavors and nutritional benefits. Here’s how you can prepare them:
- Wash Gently: Start by washing the herbs gently under cold water to remove any dirt or residue. It’s important to ensure they’re clean before freeze drying.
- Dry Thoroughly: After washing, pat the herbs dry with a clean towel or use a salad spinner to remove as much moisture as possible. You can also let them air dry on a towel. They need to be completely dry to prevent ice crystals from forming during the freeze drying process.
- Remove Stems: For herbs with larger stems (like rosemary or thyme), strip the leaves from the stems since the stems can take much longer to dry and can affect the overall quality. For herbs with finer stems (like dill or cilantro), you can leave them attached if preferred.
- Chop or Leave Whole: Depending on your preference, you can chop the herbs into smaller pieces or leave them whole. Chopping can help them freeze dry more uniformly but is not strictly necessary for all herbs.
- Spread Out on Trays: Arrange the herbs in a single layer on the freeze dryer trays. Ensure they’re not overlapping too much, which can lead to uneven freeze drying.
- Pre-Freeze (Optional): While not always necessary, pre-freezing your herbs can help speed up the freeze drying process. Place the tray of herbs in your freezer until they are completely frozen.
- After Freeze Drying: Once the herbs are freeze-dried, they should be stored in airtight containers or mylar bags with oxygen absorbers to preserve their quality. This will help maintain their aroma and flavor for a long time.
By following these steps, you can successfully preserve your herbs through freeze drying, ensuring that you have a year-round supply for cooking, teas, or medicinal purposes.
Freeze drying is an excellent way to preserve herbs while maintaining their color, flavor, and aroma. Here’s a list of herbs that freeze dry well:
- Basil
- Parsley
- Cilantro
- Dill
- Chives
- Mint
- Oregano
- Rosemary
- Thyme
- Sage
- Tarragon
- Lavender
- Lemon balm
These herbs can be freeze dried and stored for long periods without losing their essential oils and flavors, making them a fantastic addition to your pantry for cooking and baking.
Freeze Drying Elderberry
Elderberries can be freeze-dried, and doing so is a fantastic way to preserve their nutritional benefits and flavor. Freeze-drying elderberries locks in their vitamins and antioxidants, making them a convenient and healthy addition to your pantry.
Here’s how you can prepare elderberries for freeze drying:
- Harvest and Clean: Start by carefully harvesting ripe elderberries, ensuring to pick out any unripe or spoiled berries. Once harvested, gently rinse the berries under cold water to remove any dirt or debris.
- De-Stem: Elderberries need to be removed from their stems because the stems and leaves of the elderberry plant contain compounds that are toxic if ingested in large quantities. You can do this by gently rolling the clusters of berries between your hands over a bowl or using a fork to comb the berries off the stems. Make sure only the berries get freeze-dried.
- Dry Thoroughly: After de-stemming and cleaning, allow the elderberries to air dry or pat them dry gently with a towel to remove excess moisture. This step is crucial to prevent ice formation during the freeze-drying process.
- Pre-Freeze: Pre-freezing the elderberries on a tray in a single layer can help speed up the freeze-drying process. Ensure they are completely frozen before placing them in the freeze dryer.
- Spread Out on Freeze Dryer Trays: Once pre-frozen, spread the elderberries out in a single layer on the freeze dryer trays, making sure they’re not clumped together to ensure even drying.
- Freeze Dry: Follow your freeze dryer’s instructions for freeze-drying berries. The process typically involves the machine freezing the berries further, then creating a vacuum to remove the moisture as vapor.
- Store Properly: After freeze drying, store the elderberries in airtight containers or mylar bags with oxygen absorbers to keep them dry and protect their nutritional quality.
Freeze-dried elderberries can be rehydrated and used in recipes like syrups, teas, or baked goods, or even enjoyed as a crunchy snack. This method of preservation ensures you can enjoy the health benefits of elderberries year-round.
Freeze Drying Elderberry Flowers
Elderberry flowers can also be freeze-dried, and the process preserves their delicate aroma and flavor beautifully. Freeze-drying elderflower is an excellent way to retain its culinary and potential medicinal qualities for use in teas, baked goods, and homemade syrups.
Here’s how to prepare elderberry flowers for freeze drying:
- Harvest Carefully: Choose elderberry flowers that are fully opened, fragrant, and free from brown spots. The best time to harvest is on a dry morning after the dew has evaporated but before the sun is too high. This helps ensure they retain their aroma and are not wilted.
- Clean Gently: Although it’s best not to wash elderflower to preserve its pollen and delicate flavor, check carefully and gently shake the flower heads to dislodge any insects or debris. If you must rinse them, do so lightly under a gentle stream of cold water and allow them to air dry completely on a clean towel.
- Prep the Flowers: Remove the elderflower heads from the large stems, which can be bitter. You can leave the tiny flowers attached to their small, central stems since these are much more tender and less bitter than the main stem. This also helps keep the flowers together during the freeze-drying process.
- Pre-Freeze (Optional): Spread the elderflower heads out on a tray in a single layer and pre-freeze them. This step can help speed up the freeze-drying process, though it’s not strictly necessary since elderflowers are quite delicate and have low moisture content.
- Arrange on Freeze Dryer Trays: Place the pre-frozen or fresh elderflower heads in a single layer on the freeze dryer trays, ensuring they’re not overly crowded to allow for even drying.
- Freeze Dry: Follow the instructions for your freeze dryer. Elderflower may dry faster than other items due to its delicate nature and low moisture content.
- Store Properly: After freeze-drying, store the elderflower in airtight containers or mylar bags with oxygen absorbers. This will help maintain their aroma and prevent them from reabsorbing moisture from the air.
Freeze-dried elderflowers retain much of their original color, fragrance, and flavor, making them perfect for adding a floral note to teas, infusions, baking recipes, or even homemade beauty products. The freeze-drying process enables you to enjoy the lovely essence of elderflowers long after their short blooming season has ended.
Candy that Can Be Freeze Dried
Preparing candy for freeze drying is straightforward and doesn’t require much prep work compared to foods like fruits, vegetables, or meats. However, there are a few tips and steps to ensure the best results:
- Select Suitable Candy: Not all candies freeze dry well. Choose candies that don’t have a high fat content, as fats can go rancid over time. Candies like gummies, hard candies, and sour candies are excellent choices.
- Size Matters: If you’re freeze drying larger items, such as chocolate bars or large marshmallows, consider cutting them into smaller pieces. This ensures they freeze dry evenly and thoroughly.
- Arrange on Trays: Spread the candies out in a single layer on the freeze dryer trays. Make sure they’re not touching or overlapping too much, which could cause them to stick together or freeze dry unevenly.
- Pre-Freeze (Optional): While not necessary, pre-freezing your candies can speed up the freeze drying process. Spread them out on a baking sheet and place them in the freezer until they’re completely frozen.
- Freeze Dry: Load your trays into the freeze dryer and start the cycle according to your machine’s instructions. Freeze drying times can vary depending on the type of candy and your specific freeze dryer model.
- Post-Processing: Once the freeze drying process is complete, check the candies to ensure they are thoroughly dry. They should feel light, and the texture will be significantly different from their original state.
- Store Properly: Store your freeze-dried candies in airtight containers or mylar bags with oxygen absorbers. This helps maintain their crunch and prevents them from absorbing moisture from the air.
- Enjoy: Freeze-dried candies can be enjoyed as a crunchy, novel treat. They are great for snacking, adding to dessert toppings, or even as a unique gift.
Freeze drying candy is a fun way to create a new snack experience from your favorite sweets. The process intensifies the flavors and adds an interesting crunch that’s different from the candy’s original texture.
Freeze drying transforms regular candies into delightful, crunchy treats with intensified flavors. Here’s a list of candies that are great candidates for freeze drying:
- Gummy candies (bears, worms, etc.)
- Marshmallows (including mini marshmallows and Peeps)
- Skittles
- Starburst
- Chocolate bars (cut into smaller pieces)
- Sour candies (Sour Patch Kids, etc.)
- Jelly beans
- Hard candies (lollipops, Jolly Ranchers, etc., crushed or whole)
- Taffy
- Candy corn
- Licorice
Freeze-dried candies not only offer a unique eating experience but also have a longer shelf life, making them perfect for snacks, gifts, or even as toppings for desserts and ice cream.
What Type of Freeze Dryer Should I Buy?
When I first started looking into this, I thought there was only one brand for freeze dryers— and they’re pricey. The benefit to the higher price is that everyone and their mother doesn’t have them so if you sell products made with them, you won’t be dealing with as much competition.
But I did find a couple of brands who sell freezer dryers and I will give you some viable options!
Blue Alpine: Medium Freeze Dryer
I believe this freeze dryer claims to be faster than other brands, but I haven’t had a chance to test any of them out. I’m currently trying to research my options and see if it will be in the budget any time soon. I was hoping to take advantage of them this season.
At the time I wrote this, it was priced at $3,095. The large was priced at $3,995.00. Where the large can do 25 lbs per cycle vs. 15, it might be worth the upgrade.
- Machine Size: 20″ x 21″ x 30″
- Weight: 110 lbs
- 5 trays and up to 15lbs of food per cycle
- Average freeze-drying cycles take 12-20 hours, 2-4 hours for most candies
- 120V, 15A Breaker (Normal Wall Outlet)
The price includes:
1x Medium Freeze Dryer
1x Impulse Sealer
1x Premium Vacuum Pump + Oil
5x Stainless Steel Trays
5x Silicone Mats
50x Mylar Bags
50x Oxygen Absorbers
Use my link to get 1% off your order: https://collabs.shop/ib1vkc
Harvest Right
The medium Home Pro Freeze Dryer usually sells for $3,195, but when I wrote this it was on sale for $2,695.
- Machine Size: 19″ W x 25″ D x 29″ H
- Weight: 119 lbs
- 10-15lbs of food per cycle
- 110 volt outlet
The price includes:
- Medium Freeze Dryer
- Premier Industrial Vacuum Pump
- Vacuum Pump Oil
- Oil Filter
- Stainless Steel Trays (set of 5)
- Guide to Freeze Drying
- Mylar Bags (50 ct)
- Oxygen Absorbers (50 ct)
- Impulse Sealer
USA LAB
Stay Fresh
Do You Want to Sell Freeze Dried Farm Products?
While plenty of people likely sell products made with home freeze dryers, I think it’s beneficial to consider a commercial machine if you plan to sell. Sometimes companies won’t allow you to take advantage of their customer service if they discover you’re doing commercial use with a home dryer.
The other thing to consider, if you have a small farm, is renting a commercial kitchen and using their freeze dryer. In many states, Cottage Food laws mean that the use of a commercial kitchen gives your food additional ‘shelf life’ (on paper). Having your own commercial kitchen setup probably isn’t realistic initially so renting a space would be a beneficial option.
So, there you have it – the frosty deets on freeze drying! Ready to give it a try? Your pantry (and future self) will thank you. Happy freeze drying, DIYers!
Please share and pin this post! You can also post your project and tag the DIYDanielle team on Instagram @doityourselfdanielle!