

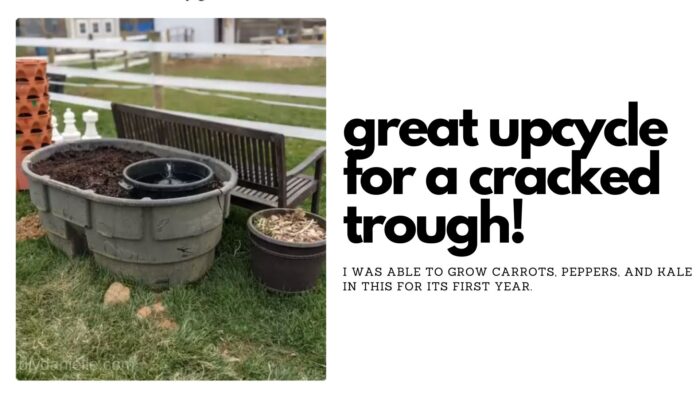
How to make a trough planter with a water feature. I used a horse trough and muck bucket to create this beautiful addition to our landscaping.
I have been planning to add a pond to our yard for a while. We had a gorgeous pond at our last house and I miss it SO much. But big ponds are expensive and I am waiting until the littlest is older to build one. We’re getting closer, but in the meantime, I decided to create an outdoor trough planter with a water feature. It was an affordable project and will “scratch the itch” until we’re ready to create a larger pond.
This post may contain affiliate links which may earn me commissions should you click through them and take certain actions. As an affiliate for Amazon, Cricut, xTool, Home Depot, and other sites, I earn from qualifying purchases. Please DIY carefully. View my full legal disclosures here.
The majority of my content is generated by me, as are 99% of the photos and videos, but I utilize technology for titles, descriptions, video editing out all of my ums, and occasionally for text overlay on images.
Please read the whole post so you don’t miss any important information!
I had this project in mind for a while, but I didn’t have a trough I wanted to sacrifice. They’re pretty expensive new and I’d rather upcycle an older trough that would otherwise end up in a landfill. A local barn was moving and had a big yard sale. I got this trough and muck bucket (plus a few other small items) for $50! The trough has a crack and the drain plug is missing. It will work great for a planter- just not well for water!
If you want a video or photos, keep scrolling, but I want to just outline the process. It’s very, very easy. I placed the trough where I wanted it and made sure the open drain was facing downhill. This will allow excess water from rain to run out of the planter. I also added a couple of drainage holes to the bottom of the trough with my drill. This is important for outdoor planters as it keeps rain water from flooding your plants, rotting their root systems, and causing their untimely demise. While I wanted the soil to be well drained, I also wanted the planter to retain SOME water. I only added 3-5 small holes.
Filling a trough this big with dirt is tricky. Potting soil is ALWAYS the correct type of soil for a planter. It retains water better so the soil won’t dry out as fast. It’s lose and won’t compact too much, which allows roots to grow happily through it.
That said, it’s a big “planter” and that much potting soil is pricey. If you add rocks to the bottom of your planter as a ‘filler,’ this will give space for water to drain.
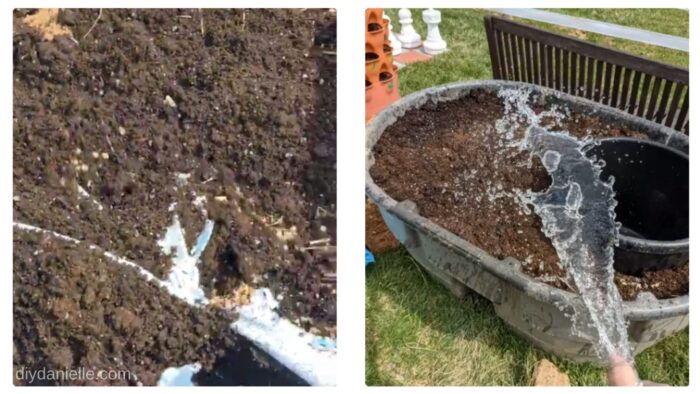
In our case, I opted to use some clay soil (left from our patio) for the bottom of the trough. I added compost and potting soil to the top 1/3 of the trough. In Fall, I’ll mix the soil up a bit and add more compost.
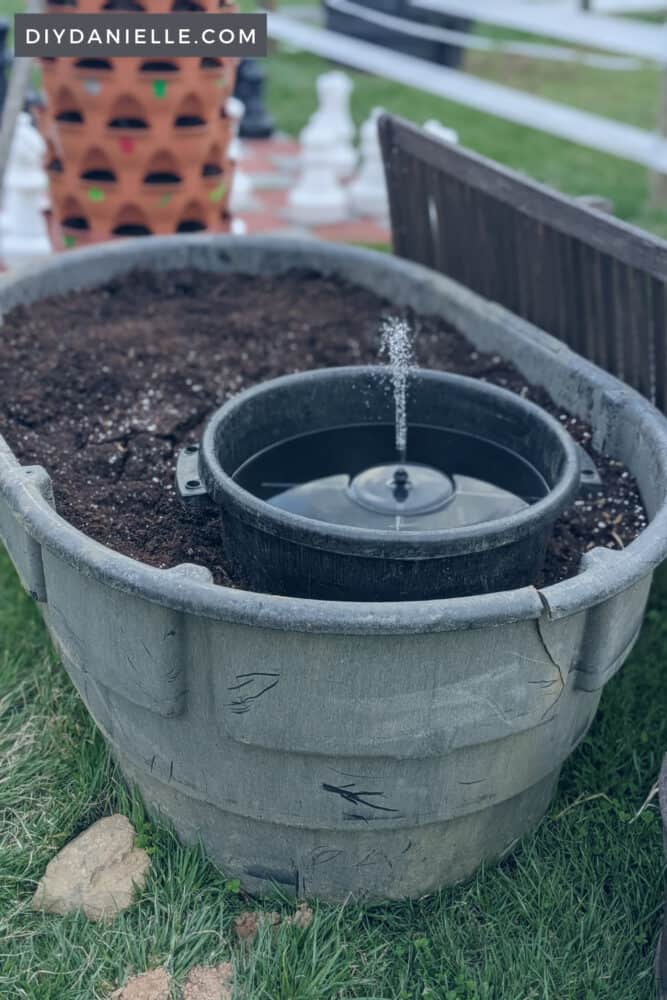
Before adding my compost and potting soil, however, I set my muck bucket in place on top of the clay. This will be the water feature and I wanted it to be slightly higher than the edge of the trough. I don’t want soil getting into the water.
I patted the soil down around the muck bucket. I’m hoping the soil compacts enough so I can pull the muck bucket out to wash if needed.
I planted carrot seeds in the trough. It’s pretty early in the season for Maryland and carrots are hardy enough for the colder weather. I’ve found that deep planters, such as the privacy planters at my old house, were the best for planting carrots. The deep planter means there’s lots of room for the roots to grow down. The soil was loose enough that I grew nice, straight LARGE carrots.
And honestly, what better place is there to grow carrots than besides the horse field?! Once I harvest these, I’ll probably opt for some flowers or another fruit/veggie that does well in the full sun. Our summers get hot and this spot is VERY sunny.
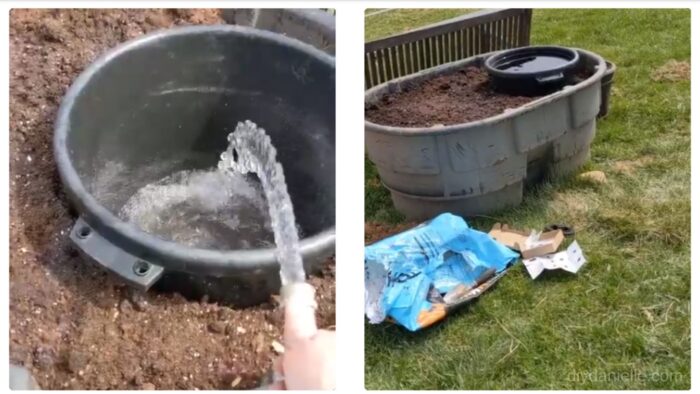
In the meantime, I was filling up my clean muck bucket with water. I added a solar pump to circulate the water; this prevents mosquitos from laying eggs in the water feature and adds that lovely burble that make water features so desirable.
Here’s a video of the process. For the photos and breakdown, keep scrolling.
DIY Farm Trough Planter & Water Feature
Supplies:
- Carrot seeds
- Solar Pump
- Potting soil
- Muck bucket *Not exact bucket shown
- Trough*Not exact product shown
My goals for this planter? Growing carrots! I also wanted a water feature. I designed this to be a nice place to sit and watch my farm friends. I love being able to sit on a bench and occasionally I can get up, pick a carrot, and feed the horses. It’s absolutely lovely.
1. Start with a water bucket and trough with an open drain.

2. Drill drainage holes in the bottom of the trough.
3. Add soil for fill. I used junk soil in the bottom.

4. Then I followed up by adding potting soil on top.
5. Wet and pack down your soil around the smaller bin.
6. Fill your water bucket.
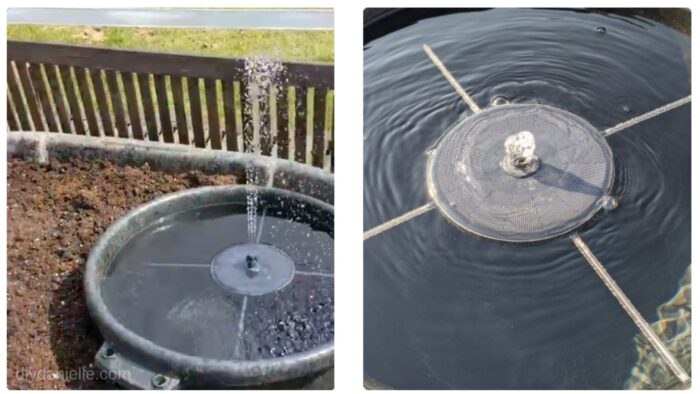
7. Add a solar fountain pump.
The special nozzles are really pretty, but the wind here tends to blow some of the water out of the bucket. I removed the tip to the fountain so it wouldn’t lose water.
8. I added some carrot seeds to the soil and we will see how they grow!
I think a small trough would work well indoors too, if you don’t add drainage holes and leave the drain closed. It would be neat to experiment with one of these for an indoor garden to grow lettuce or other greens. One of these troughs with some soil and plant life might also make a decent “cage” for some types of pets. You could make their own little habitat!
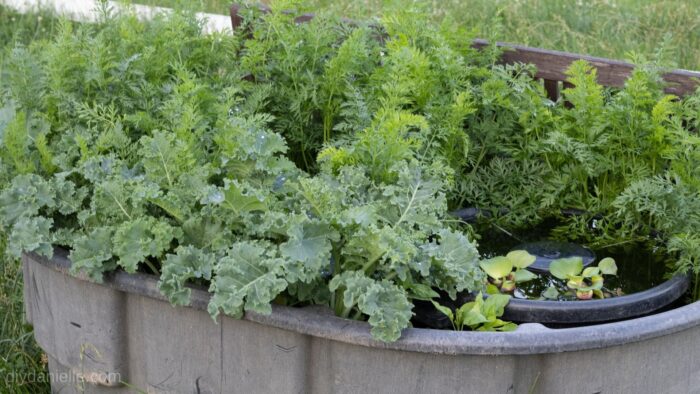
Here’s a photo of the trough planter after the plants had time to grow. I have carrots and kale in this picture, but flowers would really look lovely cascading over the front; I may add nasturtium to the front next year and do the carrots in the back.
Please share and pin this post! You can also post your project and tag the DIYDanielle team on Instagram @doityourselfdanielle!
Google Web Story: How to Make a Trough Planter with Water Feature