Build a DIY ball python enclosure (4’x2’x3′)! Sturdy, secure, and perfect for your pet snake with step-by-step guidance for beginners.
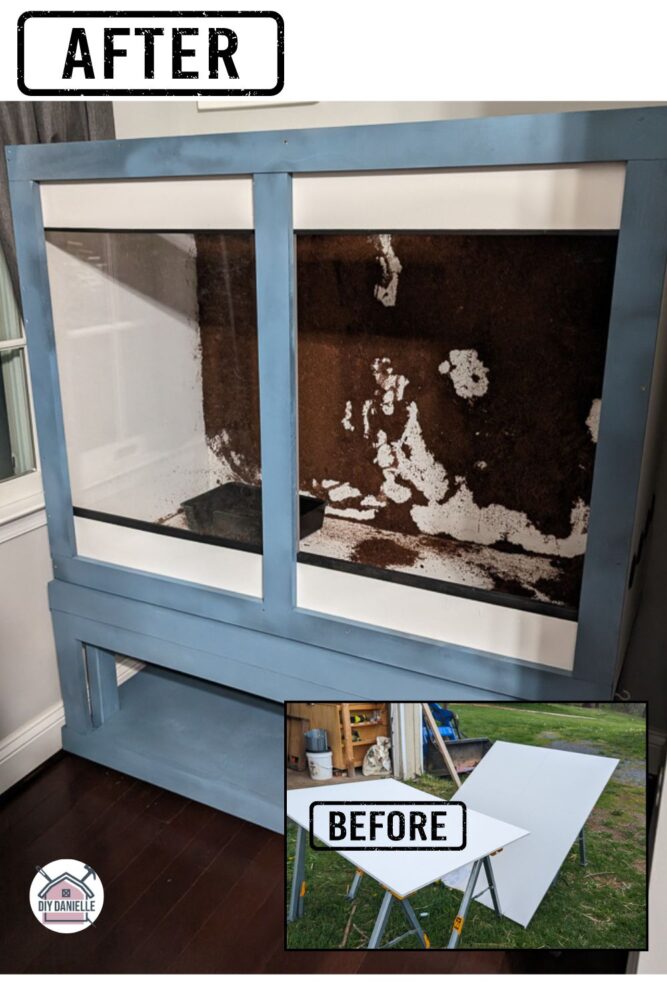
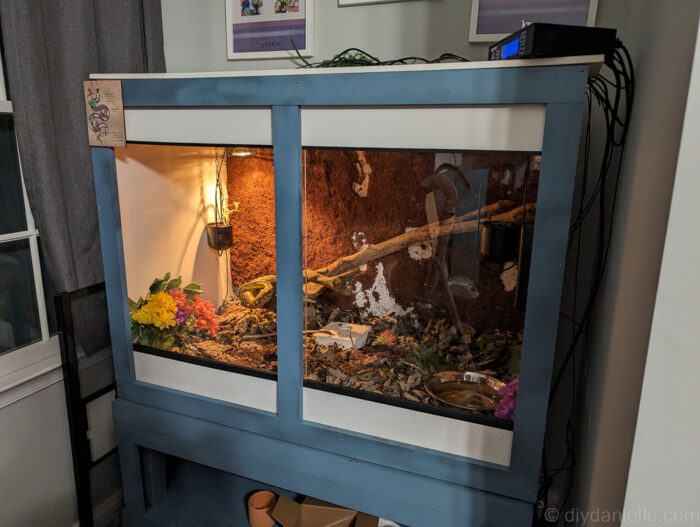
My ball python enclosure is one of my favorite woodworking projects. Technically it’s not made of wood- I framed the front in wood but the main enclosure is made of a 1/2″ 4×8 sheet of PVC.
It’s not cheap, but it’s a little bit better at holding in humidity and it looks really nice. You also don’t need to paint or prime it.
I think I’d recommend 3/4″ PVC, however, as it should be a bit more sturdy that way. It’s about a $36 difference from the 1/2″ right now so, while that adds up, I think it’s better to opt for the most stable enclosure. You could also use the 3/4″ for some pieces and 1/2″ for the others, but that does mess with the math a bit.
If you use the 3/4″, you may also be able to skip the front frame which saves some time. But the front DOES look nice.
This post may contain affiliate links which may earn me commissions should you click through them and take certain actions. As an affiliate for Amazon, Cricut, xTool, Home Depot, and other sites, I earn from qualifying purchases. Please DIY carefully. View my full legal disclosures here.
The majority of my content is generated by me, as are 99% of the photos and videos, but I utilize technology for titles, descriptions, video editing out all of my ums, and occasionally for text overlay on images.
Please read the whole post so you don’t miss any important information!
DIY Reptile Enclosure
Supplies
- (2) 24×36″ glass pieces or clear acrylic: https://amzn.to/3Im0iAJ
- (1) 48″ sliding door tracks
- (2) 4×8 PVC Sheets 1/2″ or 3/4″ thick
- (2) 24 x 36″: Sides
- (1) 4×3, 48×36″: Back
- (1) 4×2, 48×24″: Bottom
- (1) 48×24″: Top (note I pieced together several scraps for this to use less of the PVC because I was making 2 enclosures)
- (1) 6″ x 48″: Front Top*
- (1) 6″ x 48″: Front Bottom* *These two pieces need to have their height adjusted based on the size your your clear acrylic and the rails/sliding door tracks
- 1 Box of 2″ Trim Head Screws (shorter if you use 1/2″ PVC): homedepot.sjv.io/kOqEXV
- Drill attachment such as a hole saw or spade bit to make these.
- Air Vents: Mine are 2″:https://amzn.to/4mDJzGY
- Decorative Elements:
- Coconut Coir backdrop: https://amzn.to/4gQqwIe
- Alternatively, Glue + Coconut Coir: https://amzn.to/4mZeE8p
- Sticks (you should look up safe woods- things like apple trees are usually safe).
- 3D printed or Purchased Cups for Closet Rod: https://amzn.to/3VCCpYz
Note: I used 1/2″ according to my original notes, but I think 3/4″ would be safer.
Tutorial
My enclosure is 4 ft wide by 2 ft deep by 3 ft tall. This gives my snake a little bit of extra room compared to the 4x2x2 that is recommended at a minimum.
Bigger is always better, but space in my house is limited and I have noted that it’s a lot more difficult to keep the space heated and at the correct humidity when it’s a larger space.
Owning reptiles is likely to cause an increase in your electric bill.
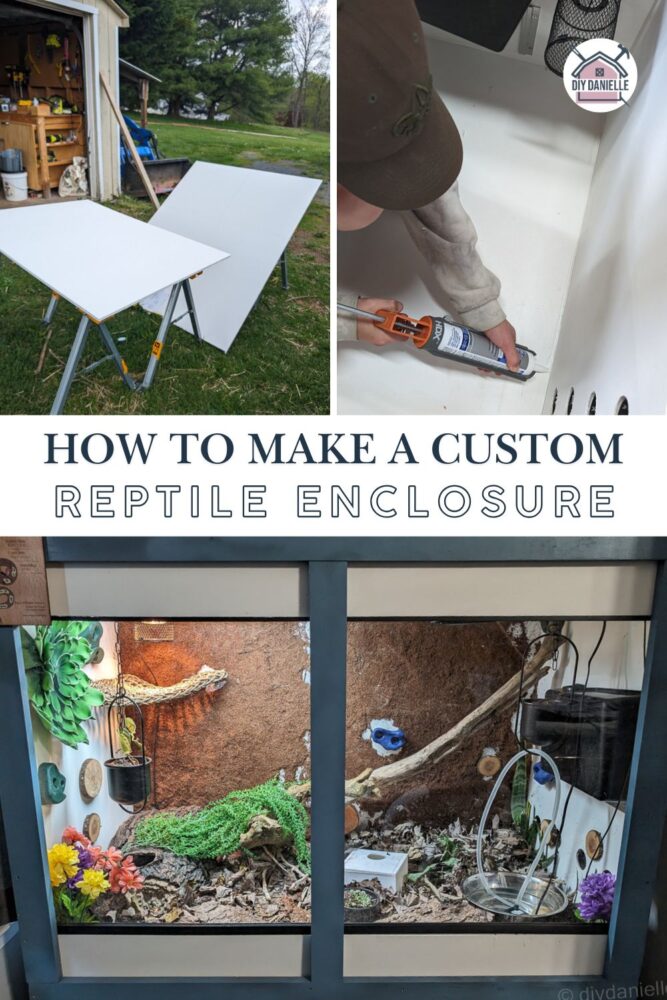
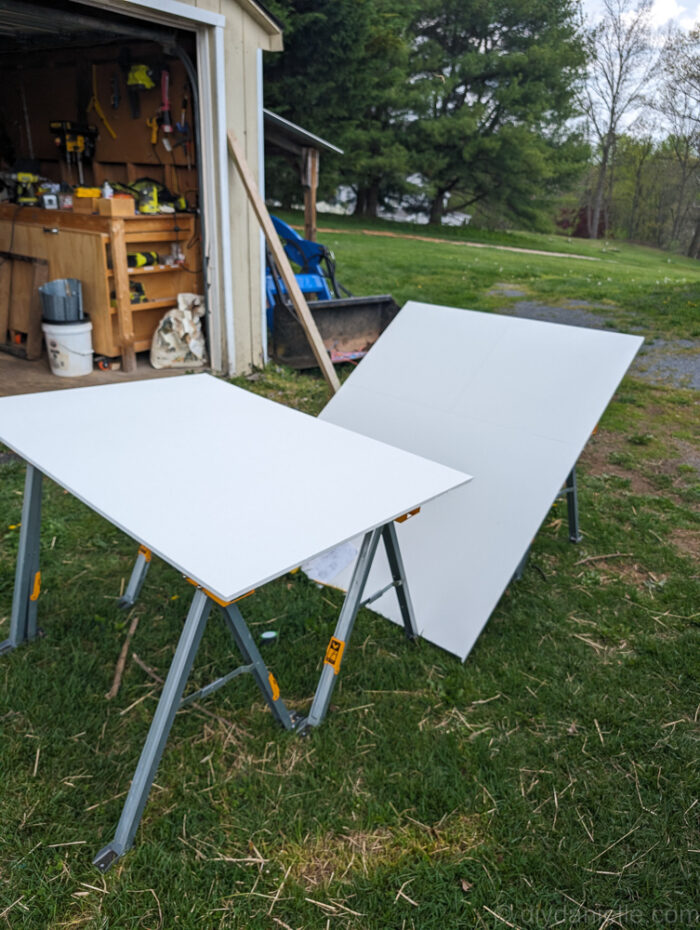
Step 1: Cut your PVC. It creates a LOT of dust.
You MUST wear a mask and ideally have some type of suction/vacuum to clean it up as you cut. I was COVERED, even though my saw has an attached bag to catch sawdust. It’s pretty disgusting to work with at this end.
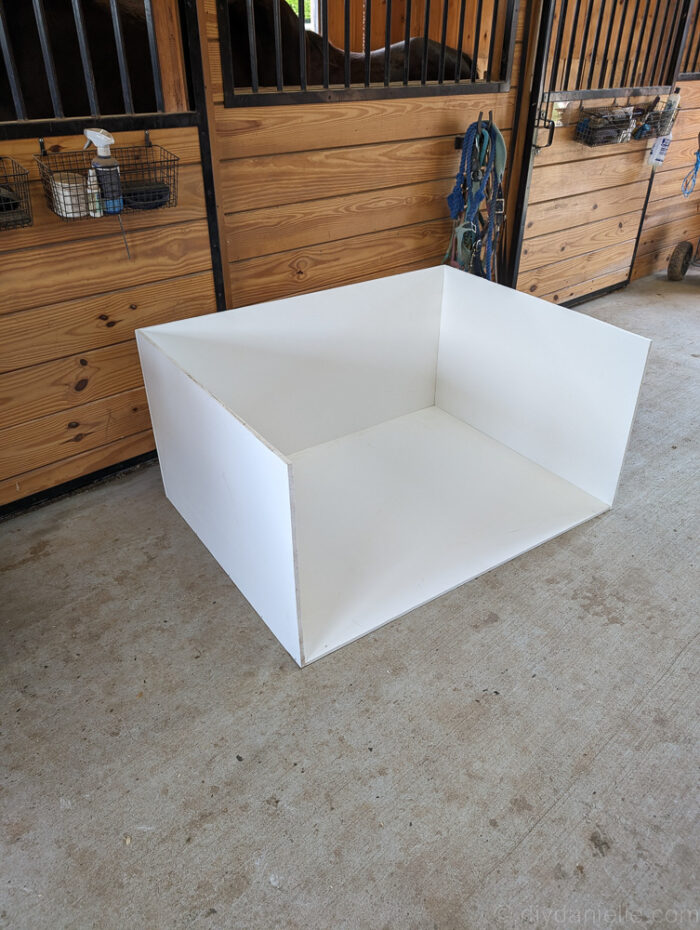
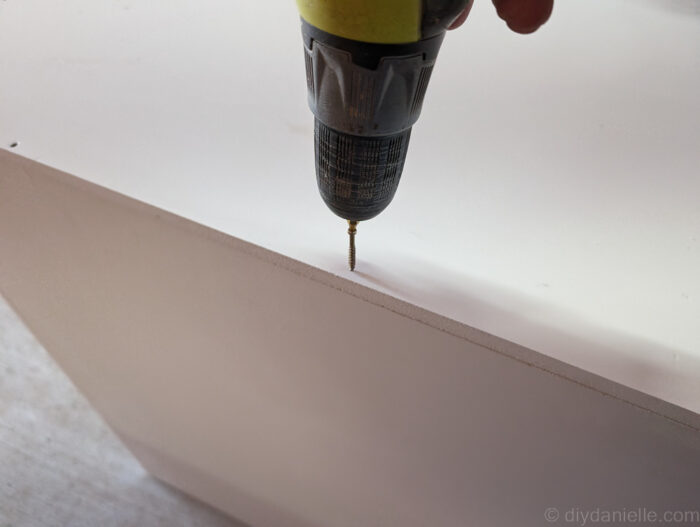
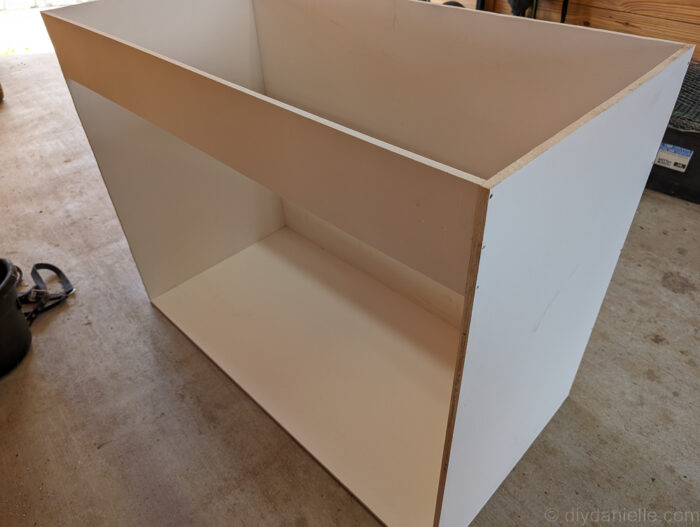
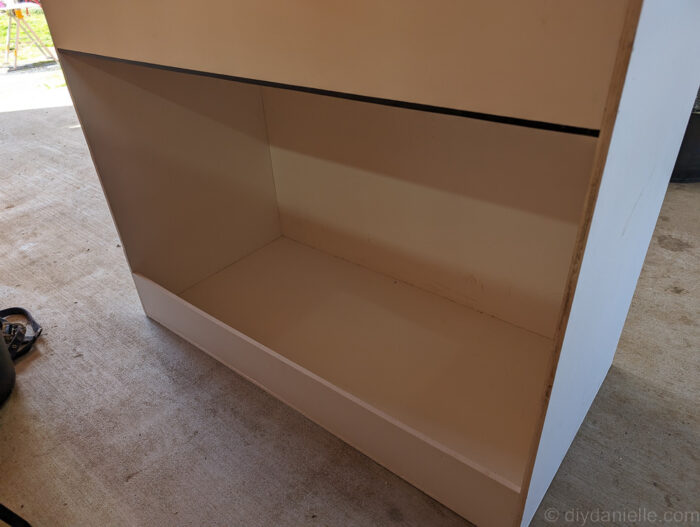
Step 2: Build the bottom, sides, and back of your enclosure using 4×8 sheets of 1/2″ or 3/4″ PVC.
I used trim head screws for this. I also recommend using an adhesive.
Base your screw length on the thickness of your PVC. If you’re using 1/2″ PVC, 1.25″-1.50″ long screws are best.
If you’re using 3/4″, you can use 1.75-2″ long screws.
It should look like this when finished:
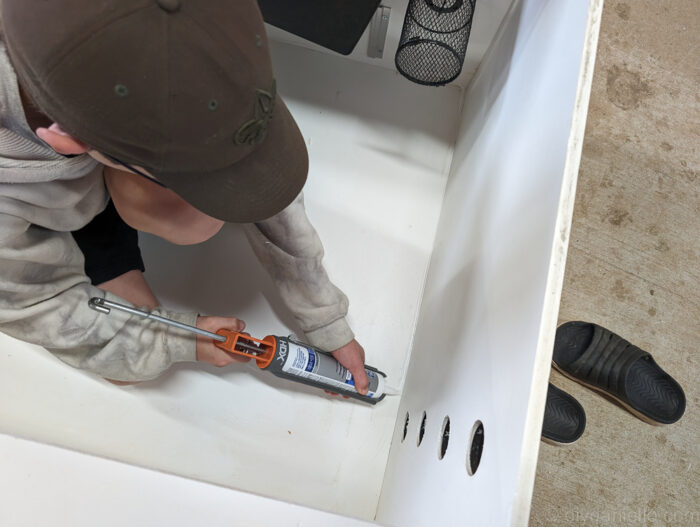
Step 3: Caulk around the seams of your enclosure from the inside.
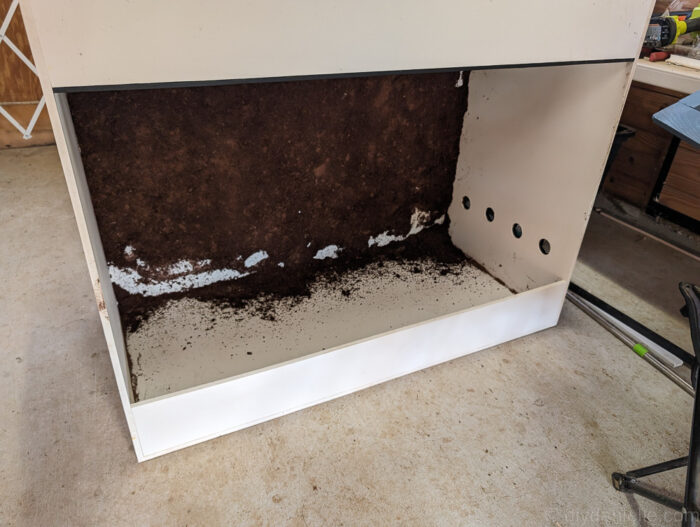
Step 4: Apply mod podge (or silicone) to the back and/or sides of your enclosure. While still wet, sprinkle coco fiber over the walls to create a more earthy effect.
Alternatively, you can use coconut coir mats and attach those.
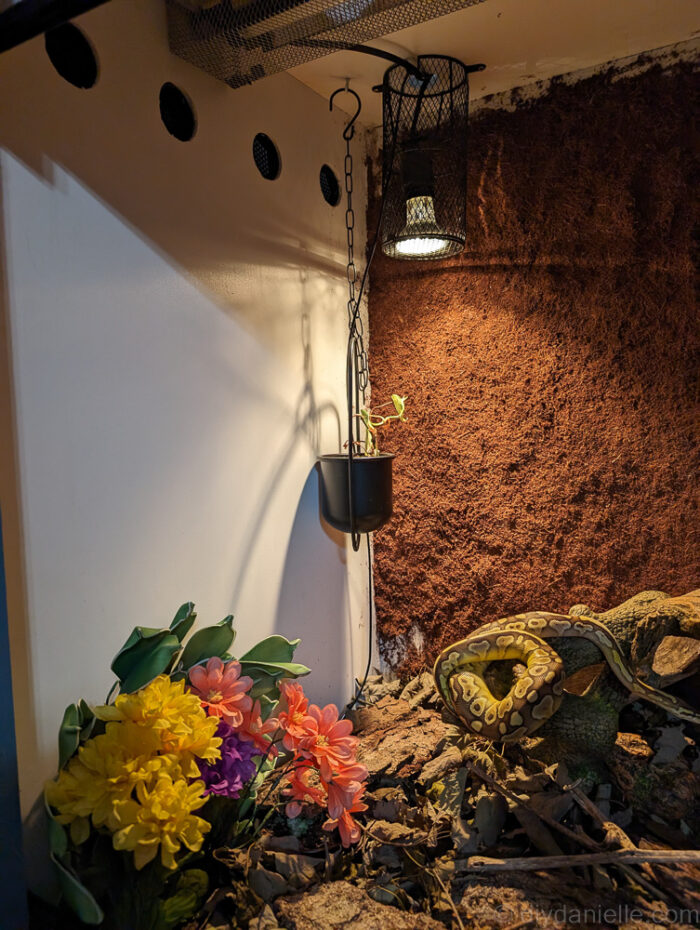
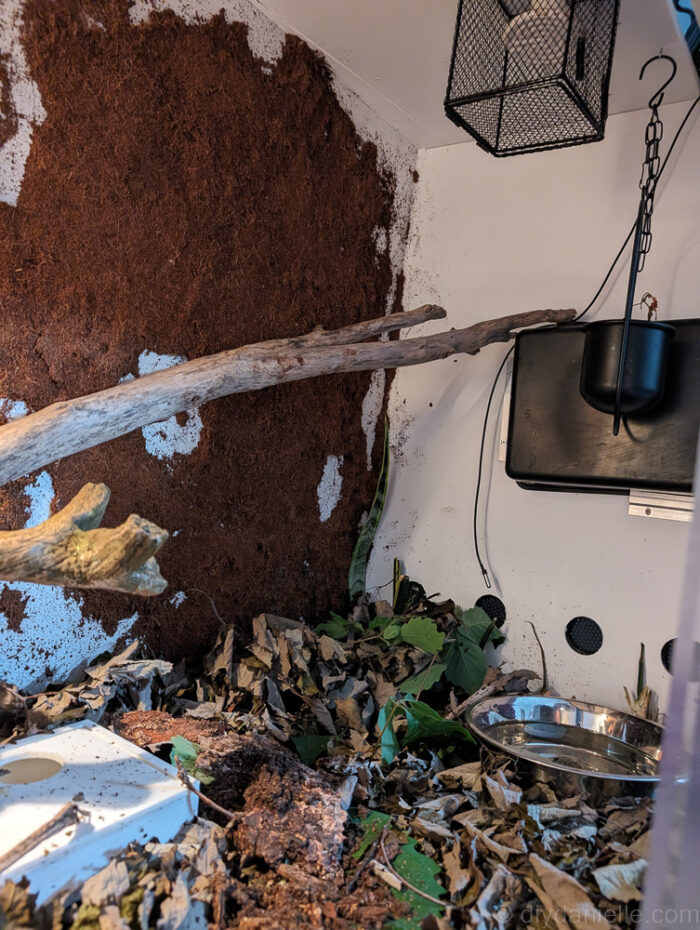
Step 5: Vents should be placed strategically. You can use a drill attachment such as a hole saw or spade bit to make these.
They need to be:
- Above the substrate.
- Low on the cool side
- High on the hot side.
This allows for a convection effect to help move air in and out of the enclosure without a fan.
I used 4 vents per side that were 2″ wide. These ended up being too much ventilation for my enclosure to keep the humidity in so I used clear tape to cover the ones that were not needed.
You could try smaller vents or fewer vents to avoid this, but keep in mind that you don’t want your humidity too high. Each enclosure and home is a little different so you may not get the same results that I did (I live in a fairly humid area, but keep my house at 67 in the winter with a humidifier running- in the summer, I have a whole house dehumidifier running).
Create the hole with your hole saw or spade bit attachment in the correct size.
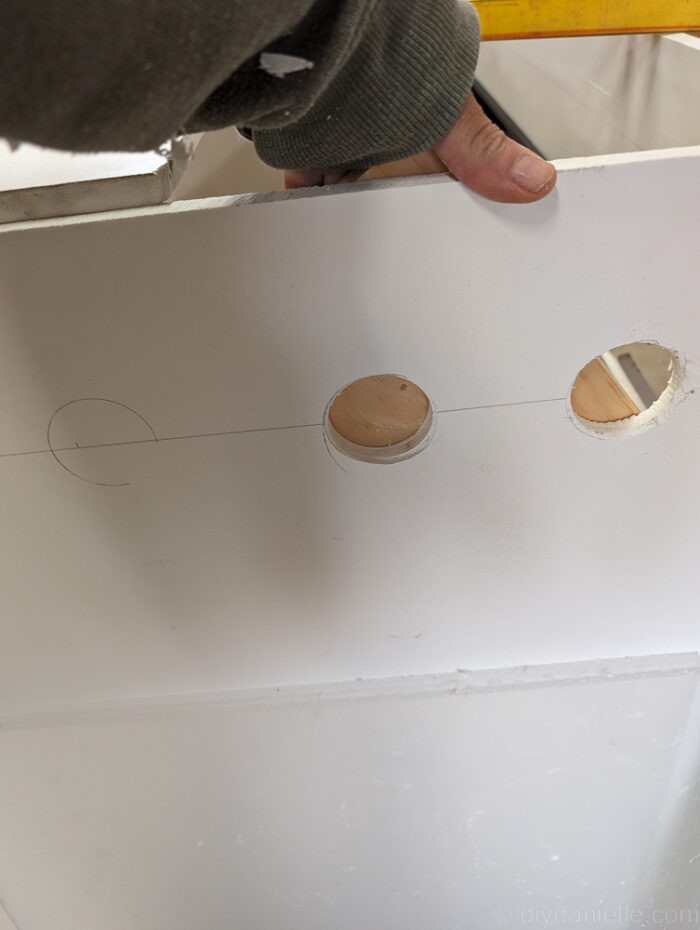
Then add your vent cover.
You MUST USE vent covers. Snakes can get out of some pretty small holes!
Note: I wish I’d been able to find some vent covers that opened and closed, but I haven’t seen them. I also wish the vent covers were two sided- these will only fit on one side. I placed mine on the inside
Step 6: Attach your top.
When you’re putting together your top, you probably want to do one big piece. I used two different pieces and part of this was to be economical and buy as few of the 4×8 pvc sheets as possible.
The problem is that you’re going to need to attach lighting to the top + having multiple pieces made it a little more tricky.
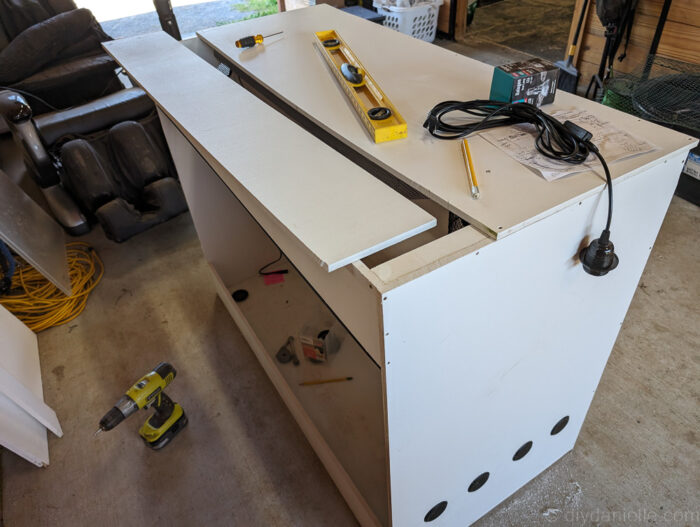
I really wish the top was easier to pull on and off so that I could make adjustments as needed. One piece would have been a lot better.
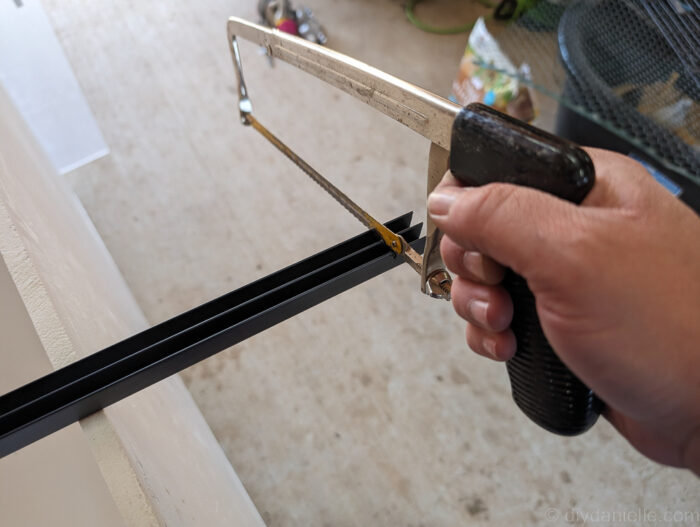
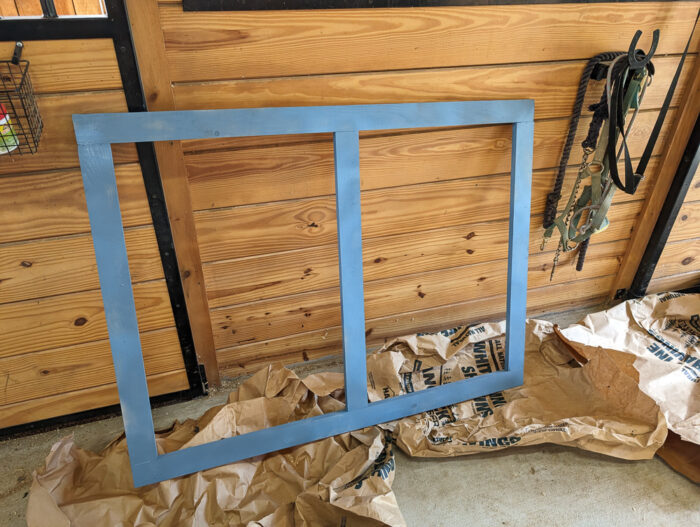
Step 7: Last we cut a small strip for the top front and the bottom front. These strips are there to support the structure and to hold the doors in places.
These size of these will depend on the size of your acrylic/glass fronts and your rails… you need to adjust these cuts accordingly, otherwise your doors will either fall out or not go in properly.
You can glue or screw these on, just make sure the screws don’t stick out and interfere with the door’s movement.
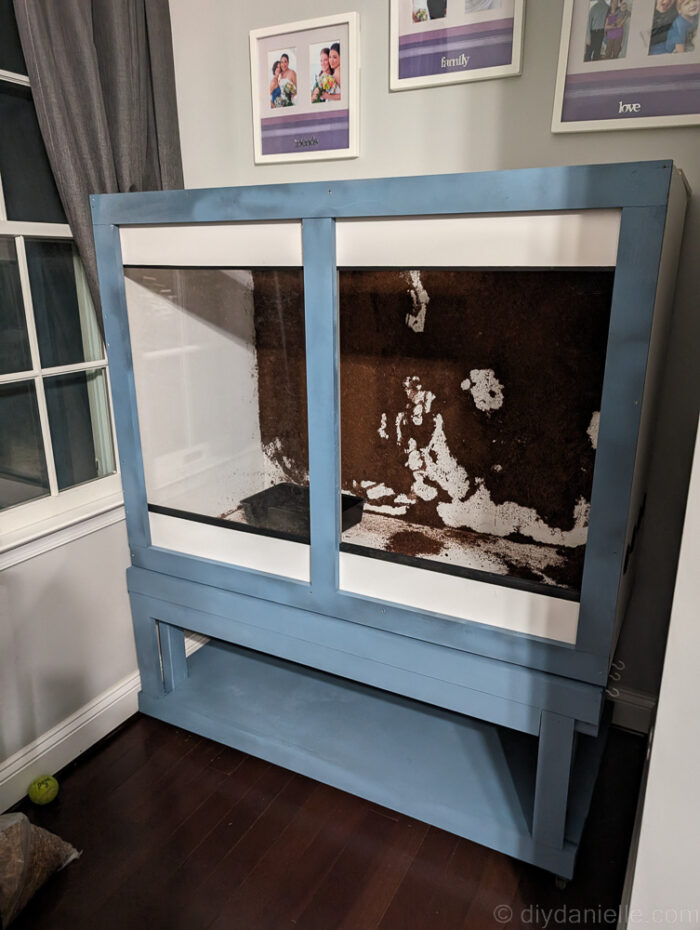
Step 8: Install your acrylic doors.

Step 9: I built a wood frame for the front and painted it to match with my base that is on Wheels. This looked a lot nicer and stabilized the cage a bit. I don’t think this would be necessary with a 3/4″ thickness PVC.
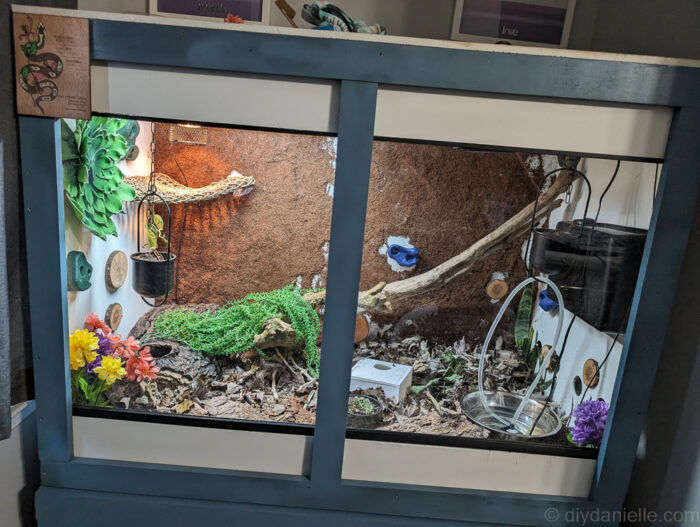
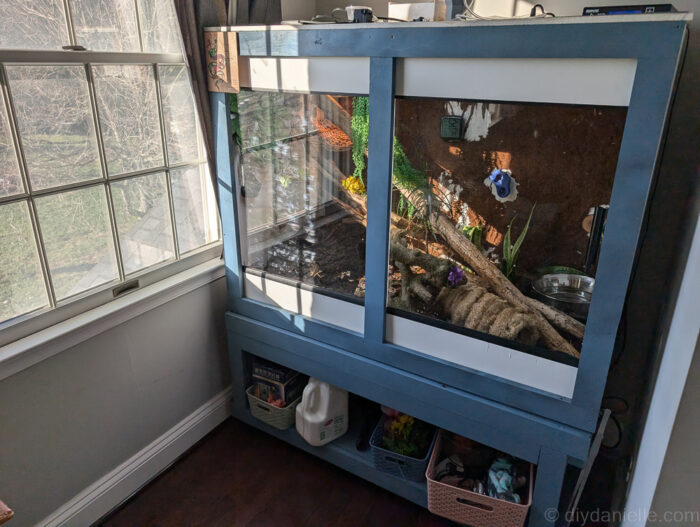
That’s pretty much it! Everything else is cosmetic and also related to the bioactive nature of the tank which I’ll write about separately.
- I added climbing hand holds to the back of the enclosure for my snake to curl around if she wanted to.
- I also added sticks and a hanging planter.
- I have a water bowl and also a sky hide.
Read about bioactive tanks here: https://diydanielle.com/diy-bioactive-reptile-enclosure

If you’re interested in a more detailed woodworking plan, leave me a comment below. I don’t have software to make them so I usually hire that job out and I prefer to wait until I have enough interest. Thanks!
Please share and pin this post! You can also post your project and tag the DIYDanielle team on Instagram @doityourselfdanielle!