Build a DIY bioactive ball python enclosure! Step-by-step guide to a secure, natural habitat perfect for your snake’s health and comfort.
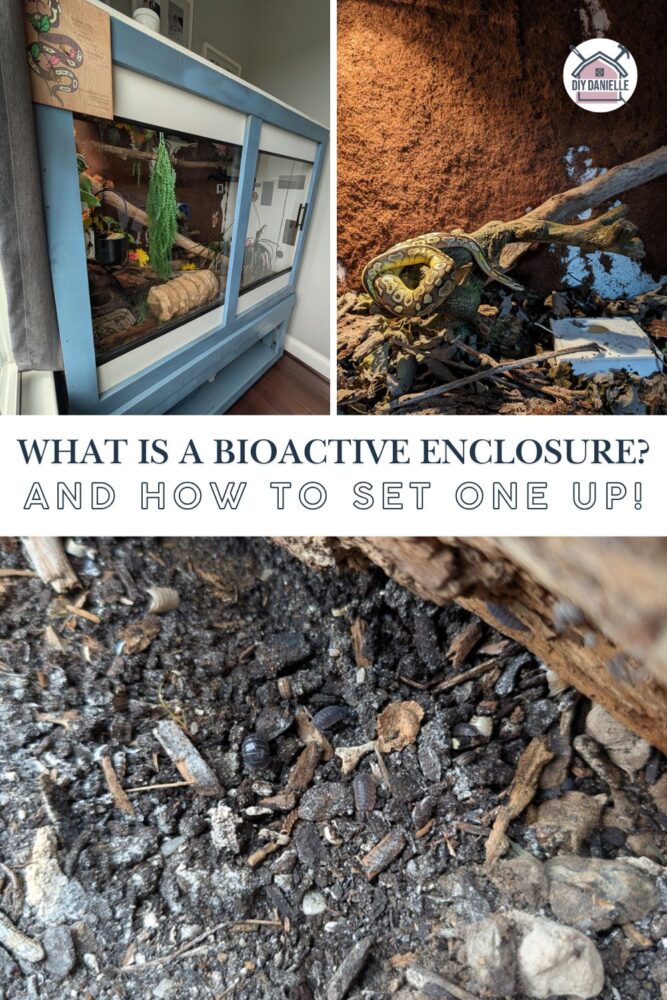
Bioactive enclosures are really cool. The idea behind them is that the base of the cage is a natural material that would exist in nature. You have bugs in there that will help break down poo, mold, and other debris that you don’t want.
With ball pythons, or other snakes, they don’t poop a lot. As a result, this is a great option because it makes for a much lower maintenance cage. You can sort of set and forget your cage and skip routine cleaning (i.e. I don’t ever empty the base of my cage).
Setup is really where you’re investing a lot of time and (usually) money.
Reptiles tend to be pretty expensive to set up properly, but once set up correctly, are fairly low-key (in my opinion) to take care of if nothing changes.
All of that said, most people do remove the poo because even though it’ll break down, it’s sort of unsightly. You also want to remove any uneaten food if they leave a dead mouse in there.
Will it break down eventually? Probably. Will it smell awful in the meantime? Yes.
Let me get into the details of setup and my experience with maintenance so far.
This post may contain affiliate links which may earn me commissions should you click through them and take certain actions. As an affiliate for Amazon, Cricut, xTool, Home Depot, and other sites, I earn from qualifying purchases. Please DIY carefully. View my full legal disclosures here.
The majority of my content is generated by me, as are 99% of the photos and videos, but I utilize technology for titles, descriptions, video editing out all of my ums, and occasionally for text overlay on images.
Please read the whole post so you don’t miss any important information!
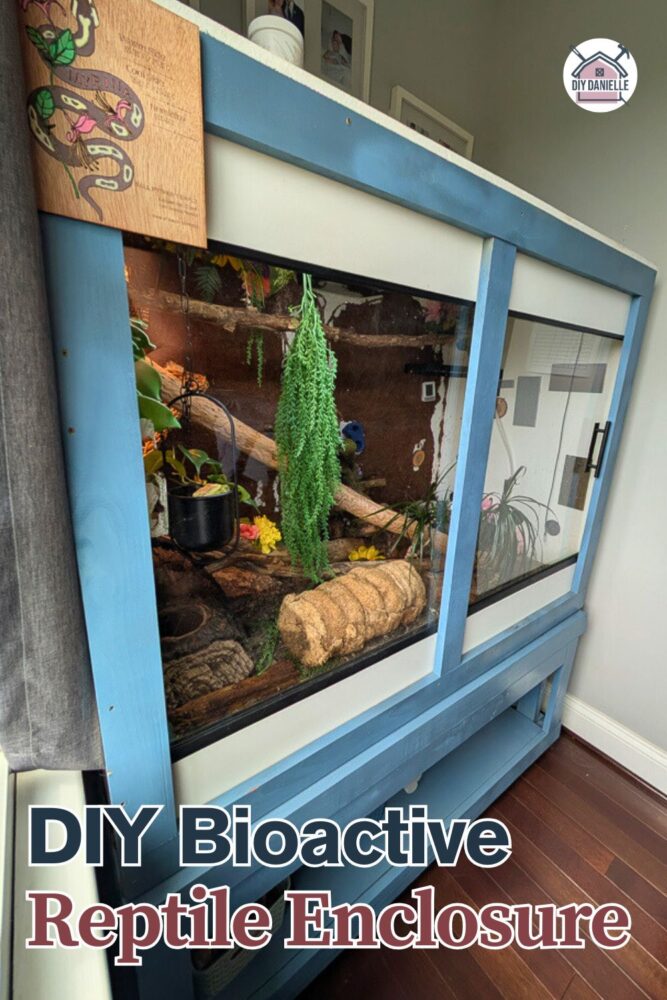
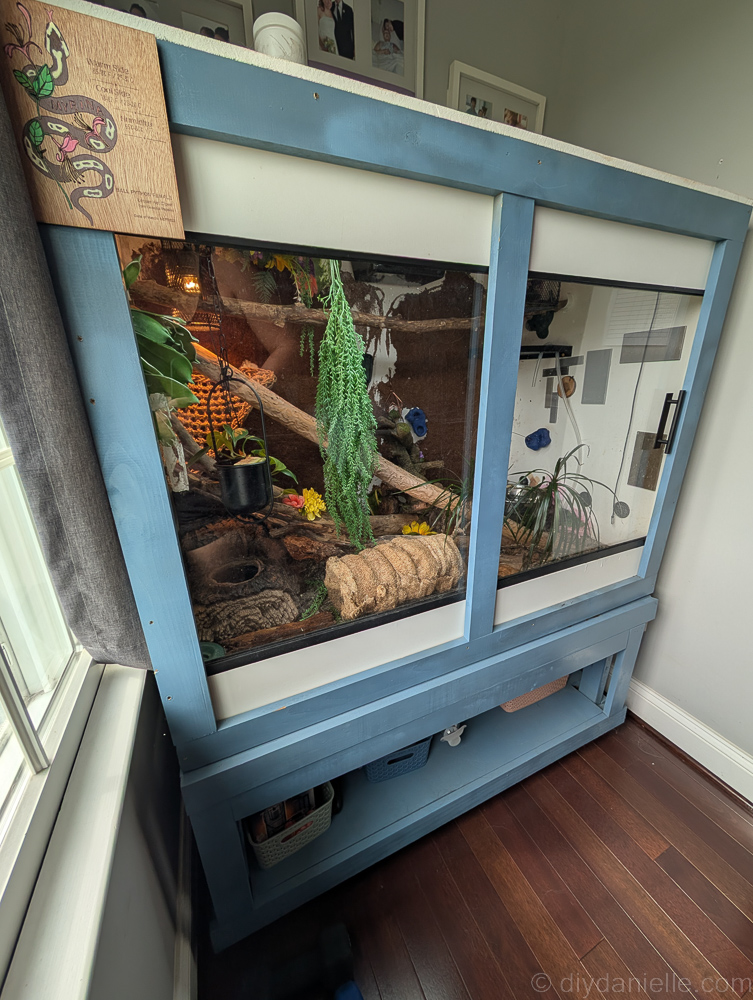
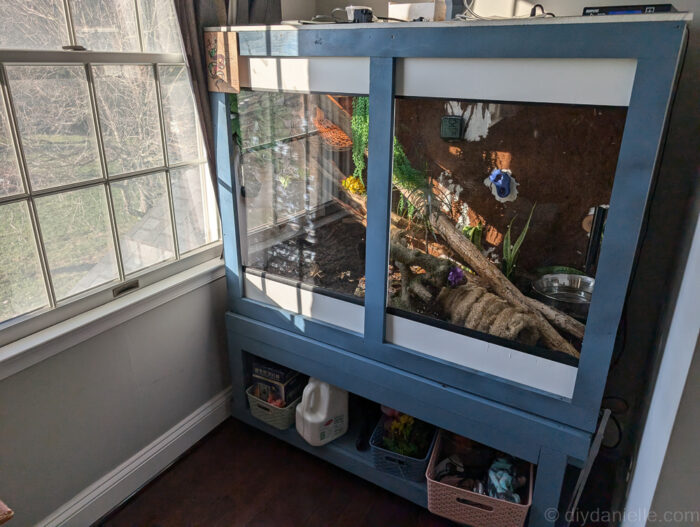
DIY Bioactive Reptile Enclosure
Project Supplies
- Enclosure with a deep-ish base (you want the lip to be high enough so that the base materials don’t fall out the front when you open the door.
- Lava Rock or Clay Hydroponic Beads for drainage layer: https://amzn.to/46HcS5t
- Gardening cloth (you want something porous): https://homedepot.sjv.io/yq1Kbb
- Organic Top Soil: https://homedepot.sjv.io/3JNKZk
- Play Sand (rinse): homedepot.sjv.io/eOrej
- Compost Mix (EcoEarth): homedepot.sjv.io/Vx5kAa
- Leaves or buy leaf litter: https://amzn.to/42g9L36
- Cleaning crew: These are the bugs!
- Springtails: https://amzn.to/46PPByr
- Isopods: https://amzn.to/4pNjHey
- Superworms
- Superworm beetles
- Mealworm or mealworm beetles
- Buffalo beetles
- Crickets
Notes on materials:
- Hydroponic Beads of Clay: These are very light weight which is ideal because your soil will be HEAVY
Bioactive Setup
Step 1: Caulk around all of your interior edges of your enclosure. MANY ENCLOSURES (except fish tanks) are NOT caulked properly for this purpose.
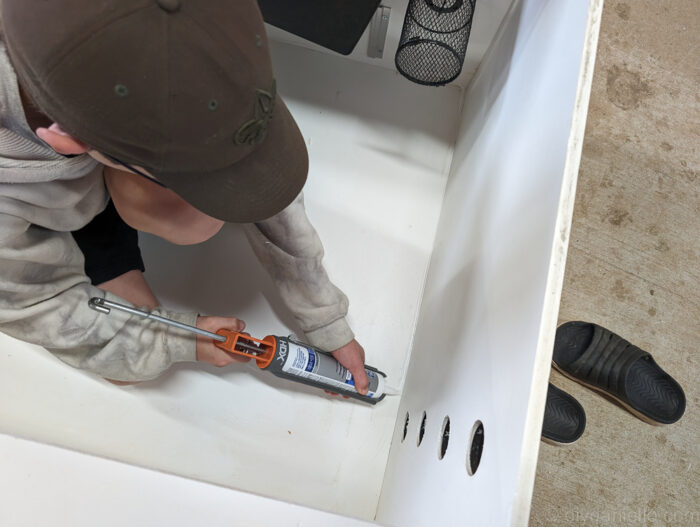
I pour a gallon of water into my base routinely and I don’t want it leaking.
Step 2: Add 1″ of lava rock or hydroponic clay beads to the bottom of the enclosure.
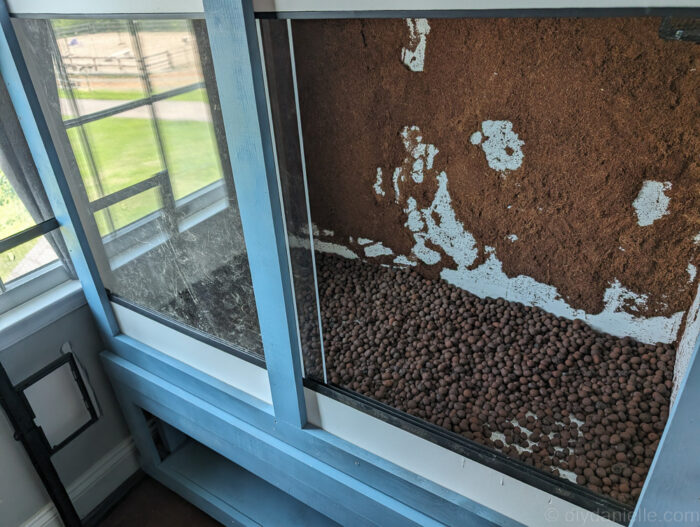
Step 3: Add a liner/garden cloth over the lava rock.
Step 4: Rinse your sand.
Step 5: Mix together 60% organic topsoil, 30% play sand, and 10% Ecoearth or any compost mix. I use a big bin to mix them up in. Then I add it to bottom, on top of gardening cloth.
Add until you have 3″ minimum depth.
Step 6: Select and place all live plants. Place any other decorations.
Step 7: Go outside and find leaves, ideally from hardwood trees or oak. Bake at 300 F for 45 minutes to get rid of hitch hikers. These can cover the substrate once cooled.
Alternatively, you can buy leaf litter.
Step 8: Add cleaning crew. These can include Springtails, Isopods, Superworms, Superworm beetles, Mealworm, mealworm beetles, buffalo beetles and crickets.
Bioactive Snake Enclosure: Maintenance
Your cage should not smell. If it smells, you did something wrong. At this point you start to troubleshoot. My son’s cage got pretty stinky at one point, but it turned out to be related to his skyhide which he cleaned out and then it was fine.
You can add new soil and new leaf litter as needed.
You may also want to use a small rake to just stir up the dirt occasionally. I find mine gets a little flat. It seems to be a cosmetic issue and I haven’t had issues otherwise.
I routinely add water to the base of the tank. This helps increase humidity in the tank without using the sprayers that hit the snake from above. I’ve avoided those because they may cause respiratory infections. I keep an empty 1 gallon jug next to my enclosure, fill it with water, and pour that in the enclosure once every week or two.
I keep an eye on humidity in the cage. I hang sensors on both the cold and hot side of my cage so I can determine if they’re correct. Overheating or freezing can injure or kill a cold blooded animal.
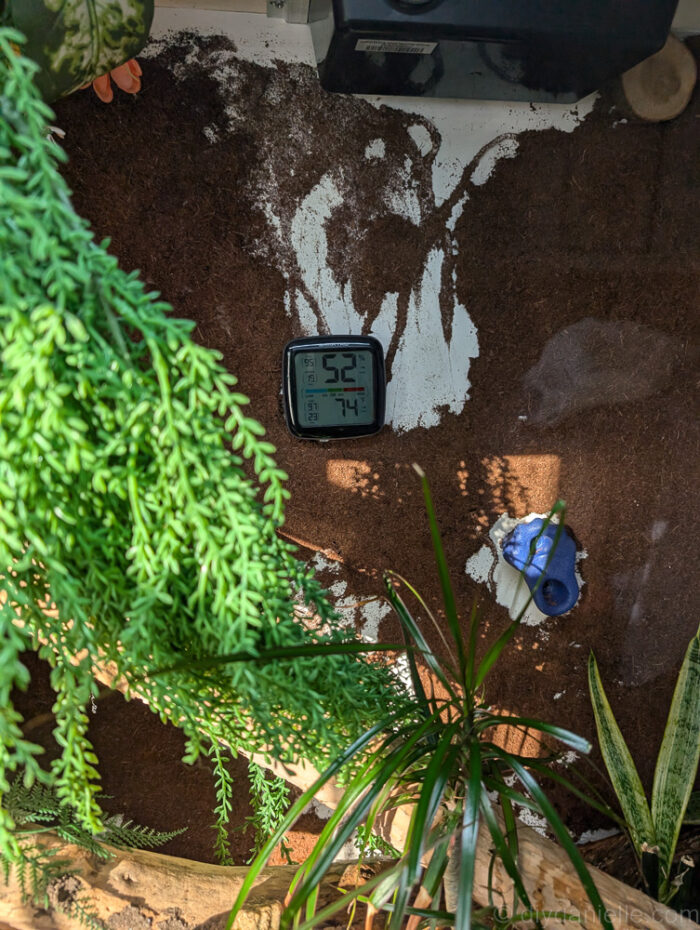
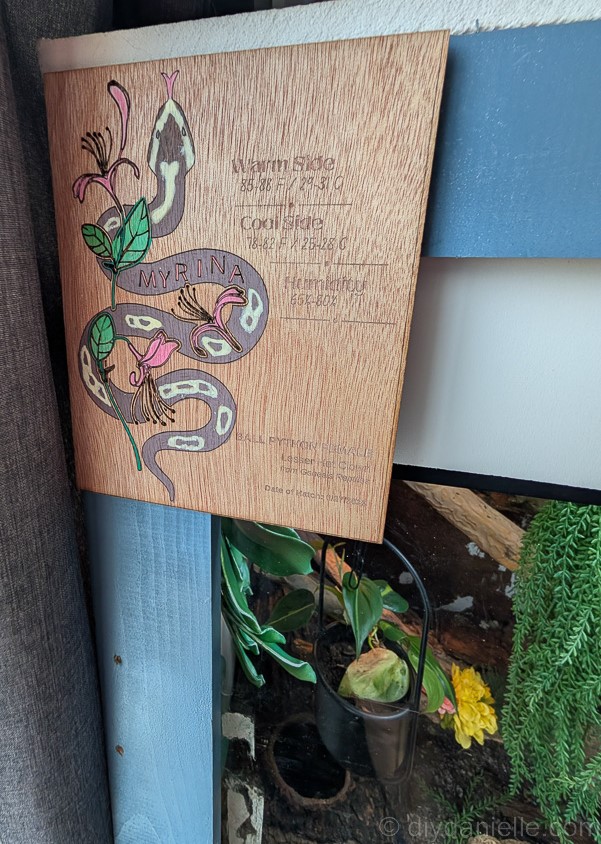
I also keep a label on my cage that says what the ideal temperature and humidity is… That way I don’t need to rely on my memory.
You can rake your cage soil occasionally, but be gentle to avoid hurting the bugs.
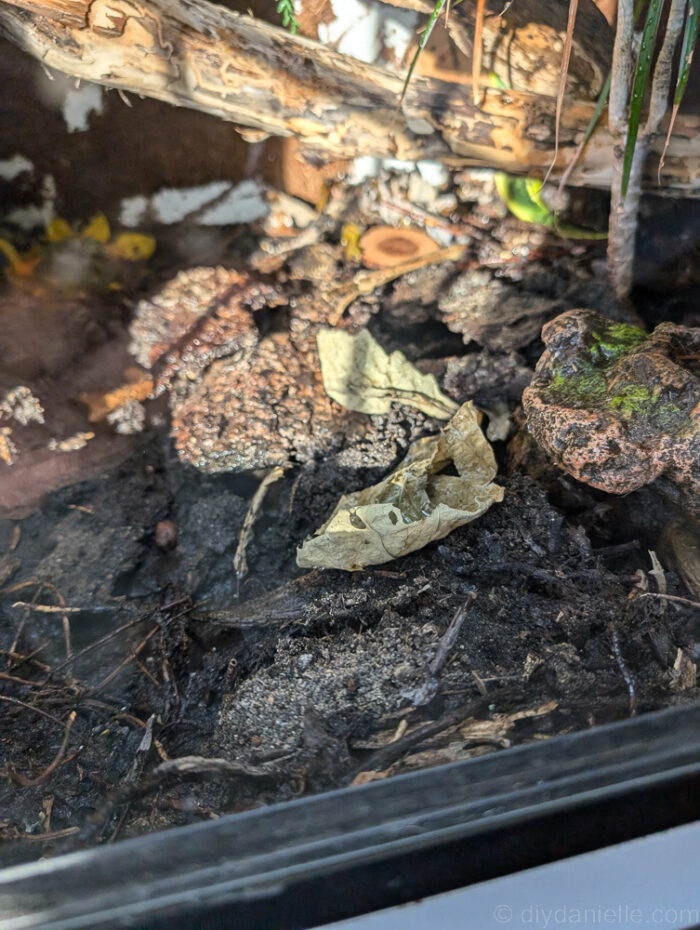
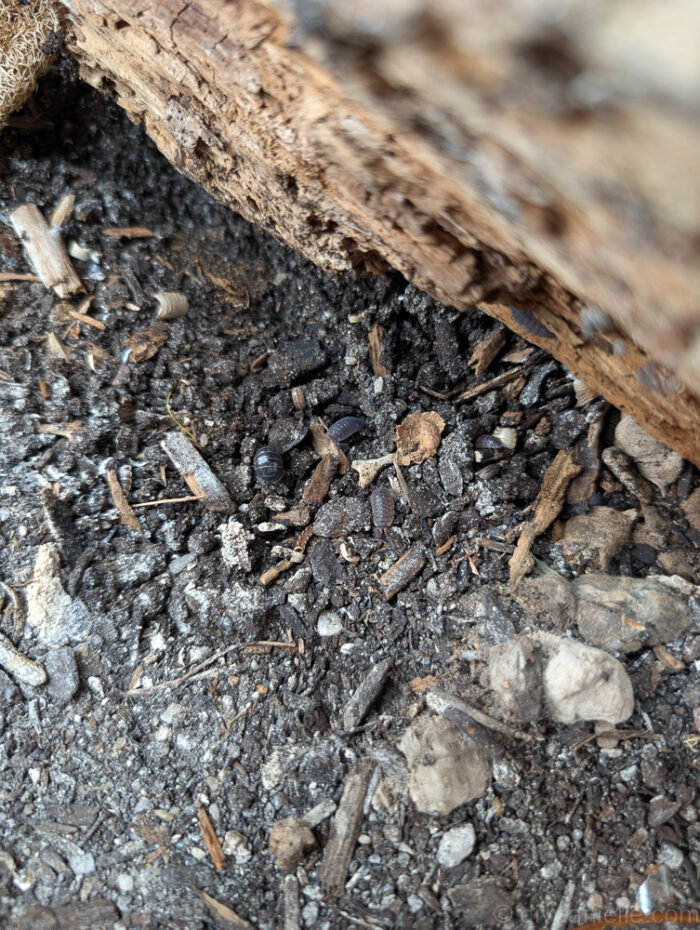
I like lots of leaf litter and small wood pieces on the ground for the bugs to hide under. I also like small rocks, but they add weight to the cage.
I can easily check on the health of my bugs by picking up logs or rocks and looking under them. As you can see below, there are some isopods that were under this log.
As needed, I pick out large pieces of poo. This is usually once every week or two weeks. I just flush them down the toilet.
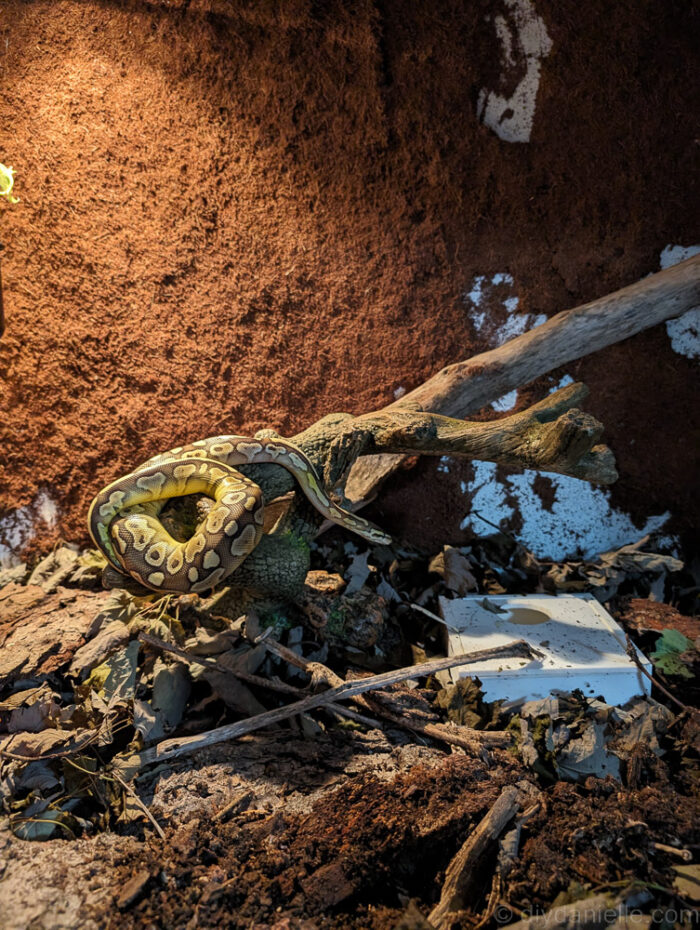
I like to tape a tracking sheet to my enclosure so I can record when I feed her. I find it really tricky to have an animal who eats so infrequently, and while ideally you feed based on their behavior, I need a log to keep track or I tend to forget (ADHD problems). Also, my snake isn’t very obvious when she’s hungry… she displays more hunting behavior the day after eating vs. three weeks after eating. I can’t quite puzzle it out.
Bioactive Recommendations
- Put wheels on your enclosure base. These are VERY heavy and it’s nice to be able to move them around. Make sure there are locks on the wheels to prevent a disaster though.
- Caulk, caulk, caulk… Where you generally need to keep humidity up in these enclosures, you’ll need to waterproof them. The PVC cages tend to hold in moisture better, but you’ll also be adding water to keep it up. Caulking helps keep you from having leaks all over your floor.
- The gardening cloth keeps the clay bead layer from getting mixed together with everything else if your animal digs. But if your animal digs, they’re probably going to go through the cloth (ie. My rat enclosure). So it’s questionably not necessary, but base it on your animal.
- It does keep you from messing it up though if you go in there and stir up your dirt.
- Rinse your sand before you put it in there and mix it all in. Even play sand ends up being pretty dusty. I don’t think it’ll bother a ball python as they don’t seem to dig through it, but it’s easier to clean it before it goes in and it keeps your lungs a little healthier during the mixing process.
- If you get confident about mixing dirt, you can actually mix a lot of your own supplies. For example, the topsoil is sphangum moss plus other organic matter. Aka it’s likely compost plus spangum moss which you can buy separately.
- I like to get organic compost though that’s clean because I don’t want to take in bugs (specifically gnats) to my house… Besides the ones I’m intentionally adding of course. But you can definitely treat your own compost by boiling it in order to make it bug-free. Just do it before you add the bugs that you want!
- So many materials that you might want to add can be found right in your backyard or at the local park, depending on your local laws. I dig up my own isopods, although I did purchase springtails online because I couldn’t seem to catch any. They’re much smaller.
Please share and pin this post! You can also post your project and tag the DIYDanielle team on Instagram @doityourselfdanielle!