Learn how to DIY your own plant labels with an xTool M1 Laser Cutter. Sealer recommended to protect in the elements.
Every year, I try something different for marking plants in my garden. Where we just got the xTool M1 Laser Cutter, I HAD to try laser engraving some plant markers! I used their bamboo plant markers, but you could also cut these from acrylic or other types of wood.
The main thing to consider is that wood WILL rot in the ground if not sealed. On the other hand, you may not want some types of sealer in the ground near your veggies and fruits- this is a personal choice.
This post may contain affiliate links which may earn me commissions should you click through them and take certain actions. As an affiliate for Amazon, Cricut, xTool, Home Depot, and other sites, I earn from qualifying purchases. Please DIY carefully. View my full legal disclosures here.
The majority of my content is generated by me, as are 99% of the photos and videos, but I utilize technology for titles, descriptions, video editing out all of my ums, and occasionally for text overlay on images.
Please read the whole post so you don’t miss any important information!
DIY Plant Labels
Supplies
- Bamboo Plant Markers: http://shrsl.com/40l3v
- xTool M1 Laser Cutter http://shrsl.com/3v9vq
- Honeycomb Riser http://shrsl.com/3yxwg
- Air Assist http://shrsl.com/3yxv6
- Optional Sealer: Clean Satin/Matte Spray Paint, Food Safe Lacquer, Crystal Lac Brite Tone
Use the Discount Code DIYDANIELLE on cricut.com for 10% off any cutting machine or heatpress (no minimum). Excludes: materials/accessories/mystery boxes/etc. Applies to US/CA only, code expires 12/31/23.
Tutorial
Step 1: Place your plant markers inside your laser cutting machine.
In my case, I’m using my honeycomb riser. Ideally, you’d hold these down somehow, perhaps by placing them on one of the colored mats. That said- I’m not sure it’s necessary. I had one marker that moved, but it was because I’d JUST setup my Air Assist and the tubing was too long. It ended up moving the marker slightly, throwing off my design. But I fixed the issue and it hasn’t been a problem since.
Step 2: In xTools Creative Space, arrange words and designs on your plant labels.
The nice thing about using a laser cutter is that it pulls up your wood onto the screen, and once you click AUTO MEASURE, it is pretty accurate about placement. It’s really convenient for someone who has used a Cricut machine which doesn’t do this. There’s less room for error, from what I’ve seen.
Step 3: Once you’ve happy, select your design and click ENGRAVE. This should turn your design orange.
Step 4: Select Bamboo Plant Labels. Click PROCESS.
Step 5: Frame your design.
The machine will suggest framing. Framing is when the laser shows you where the design will go. You’ll click the framing button, then press the button on your machine. Look in through the top of the machine to see where the laser goes— if it’s in your work area, you’re good to go!
Step 6: Click Start, then press the button on your machine. Your machine will begin engraving your design.
Step 7: Once the machine is finished, removed your plant labels.
Step 8: If desired, seal your labels. I’ve seen the following sealers suggested: Clean Satin/Matte Spray Paint, Food Safe Lacquer, Crystal Lac Brite Tone.
These WILL NOT LAST for more than one year if not sealer. When unsealed wood is exposed to water, it rots. However, many people don’t like using a sealer with their fruits and veggies— you can use a food safe option if you prefer. Or just make labels each year.
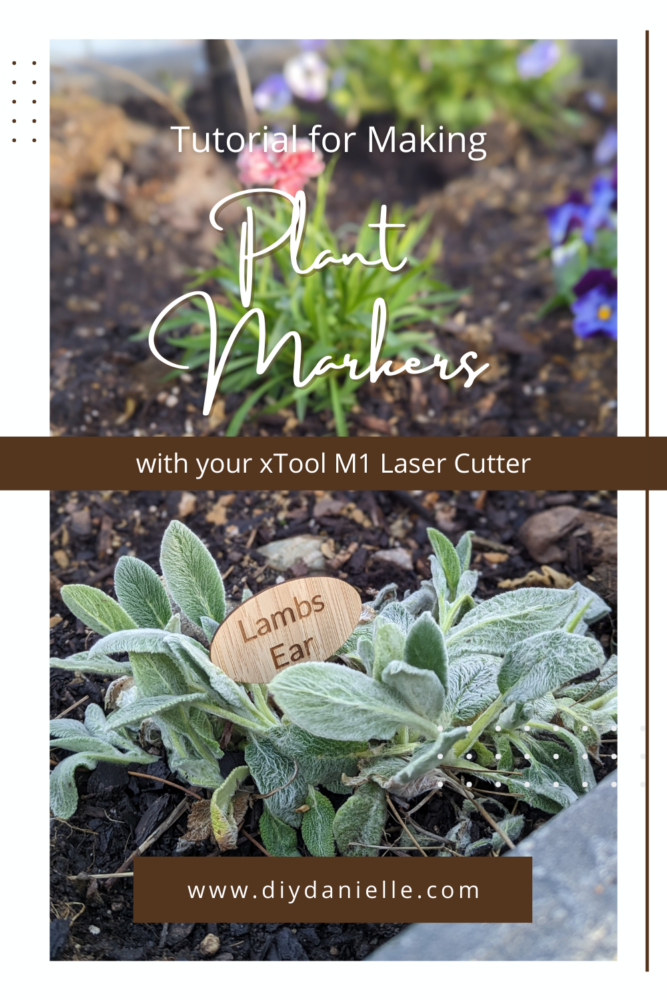
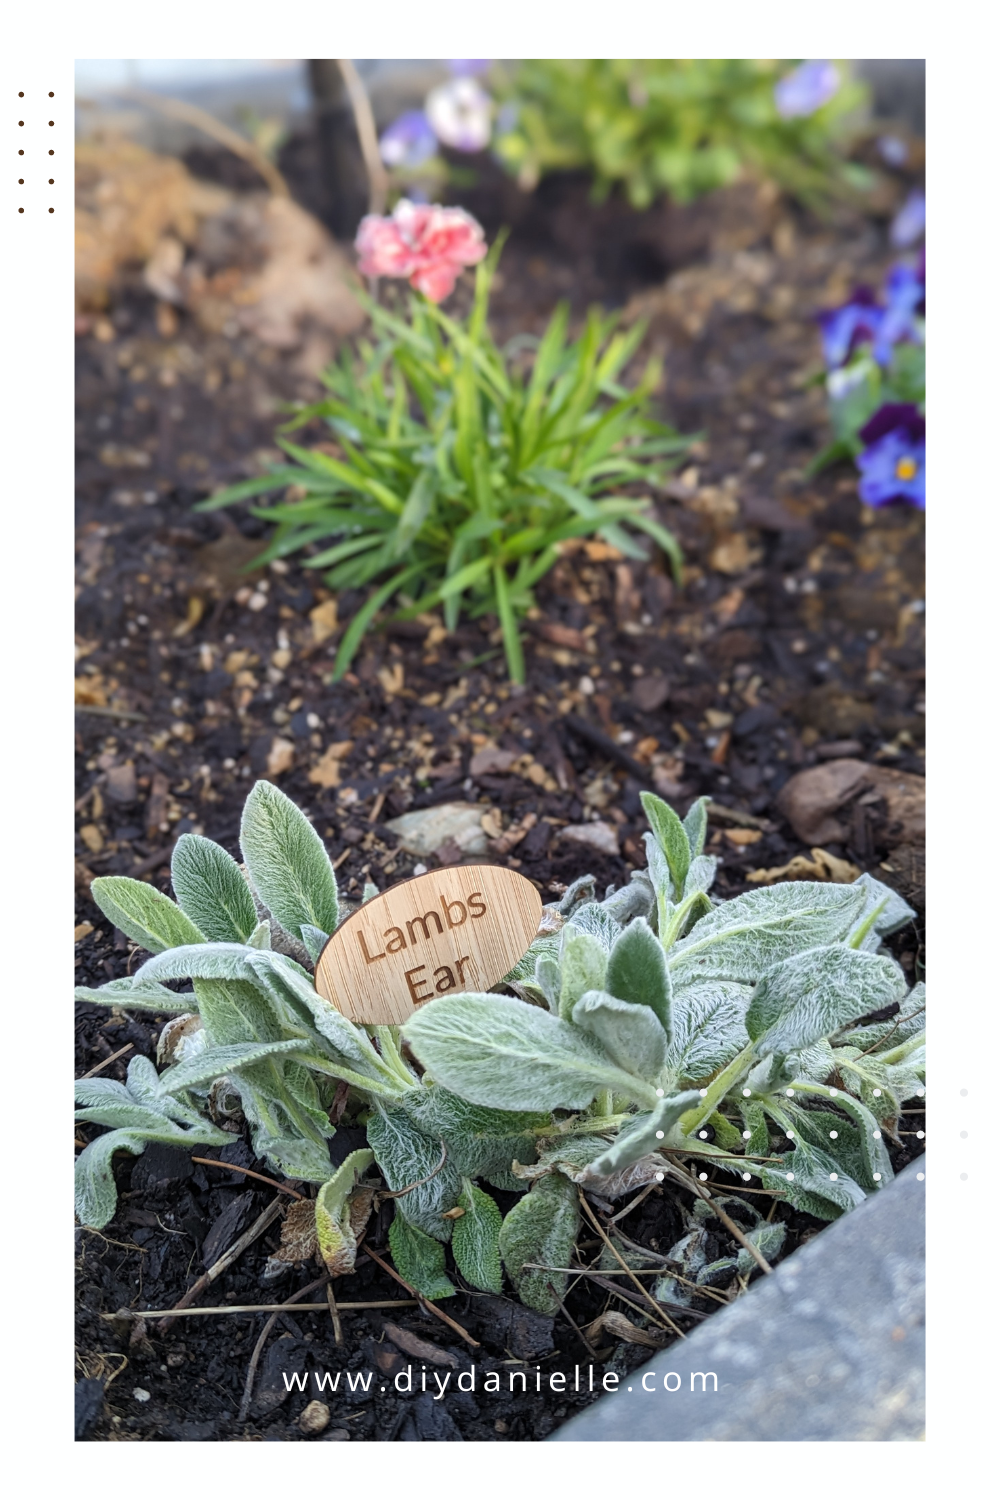
Step 9: Place your plant markers!
These came out so cute! I was trying to add images of the designs, but they didn’t engrave well so small so I switched to just using the words alone.
Please share and pin this post! You can also post your project and tag the DIYDanielle team on Instagram @doityourselfdanielle!