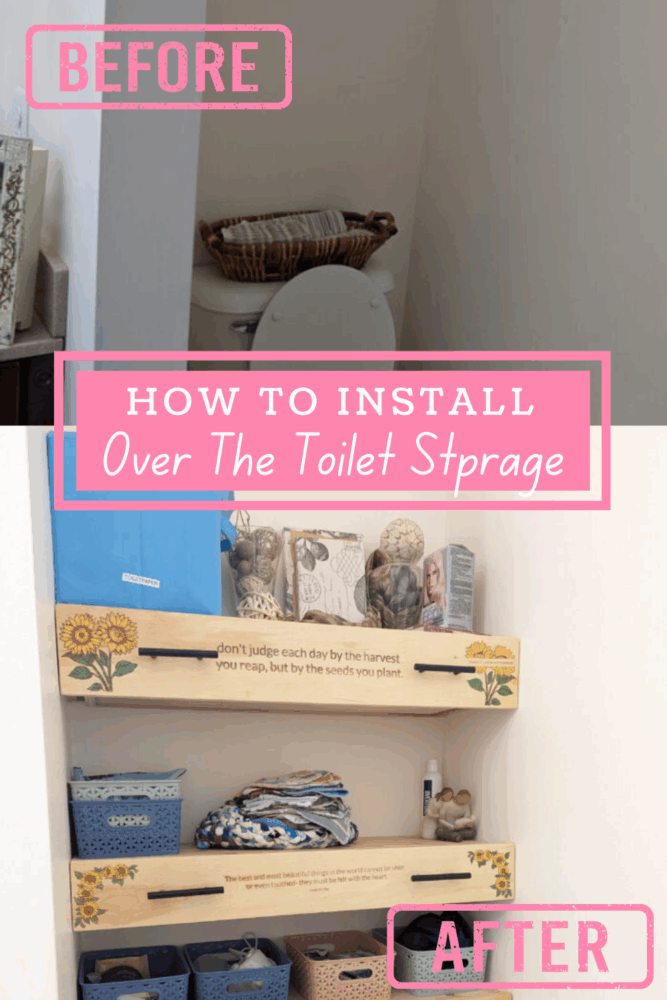
Maximize bathroom space! Discover the best over-the-toilet storage shelves for style, organization, and easy access to essentials.
This is one of my favorite ways to add over the toilet storage. It’s custom, built-in, and it gives you plenty of enclosed storage space.
We did something similar at our last house and we replicated it here. I’ll show you every step of the process, but we initially started with just the shelves.
Later on I custom built drawers that fit.
This post may contain affiliate links which may earn me commissions should you click through them and take certain actions. As an affiliate for Amazon, Cricut, xTool, Home Depot, and other sites, I earn from qualifying purchases. Please DIY carefully. View my full legal disclosures here.
The majority of my content is generated by me, as are 99% of the photos and videos, but I utilize technology for titles, descriptions, video editing out all of my ums, and occasionally for text overlay on images.
Please read the whole post so you don’t miss any important information!
DIY Over the Toilet Storage
Project Supplies
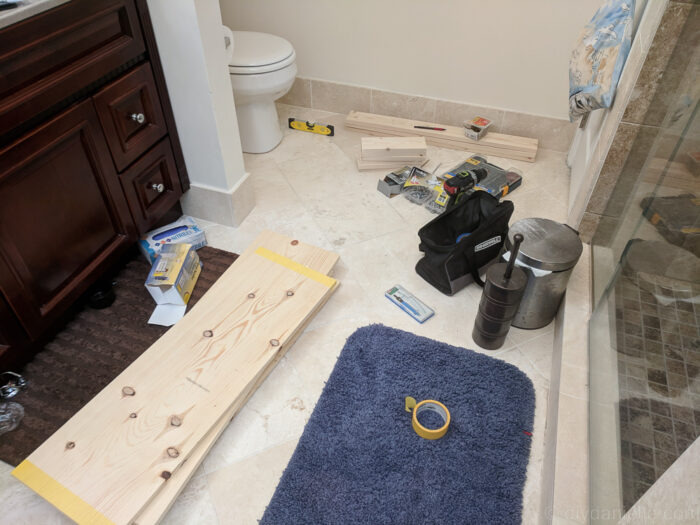
- Quality wood
- Level
- Drawers: Learn how I built mine here.
- Stud finder
- Drill
- Level
- Drawer Slides
Step by Step Instructions
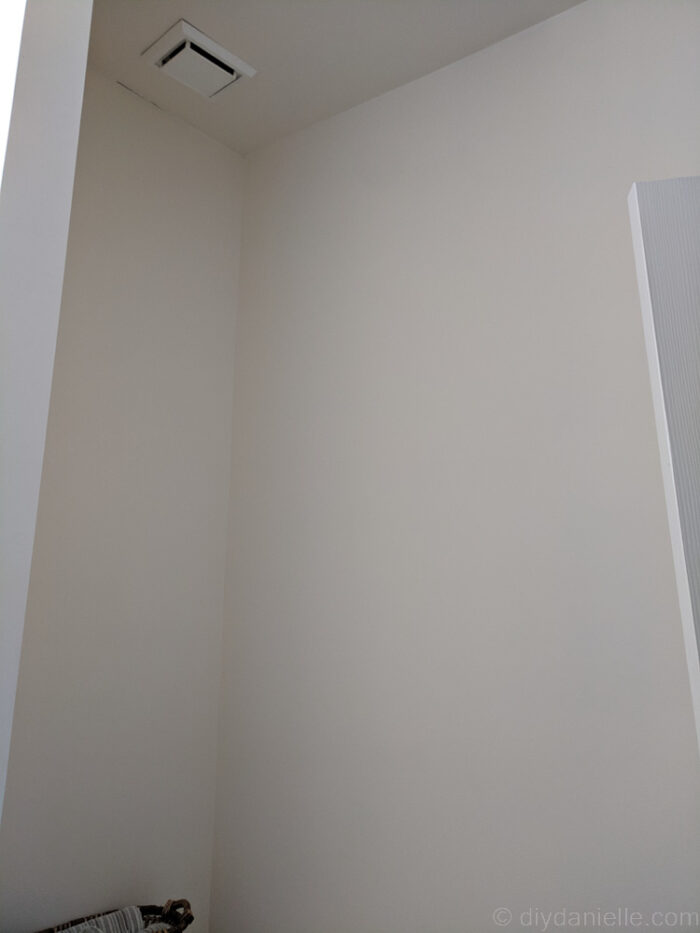
Step 1: Start by deciding on the height that you want your shelves. You want to make sure they’re not so low that you’re hitting your head, but you want them to be accessible.
Make sure to get some solid measurements to begin with. We are working between two walls and we need it to fit perfectly. The drawers need to be a little shallower than the width.
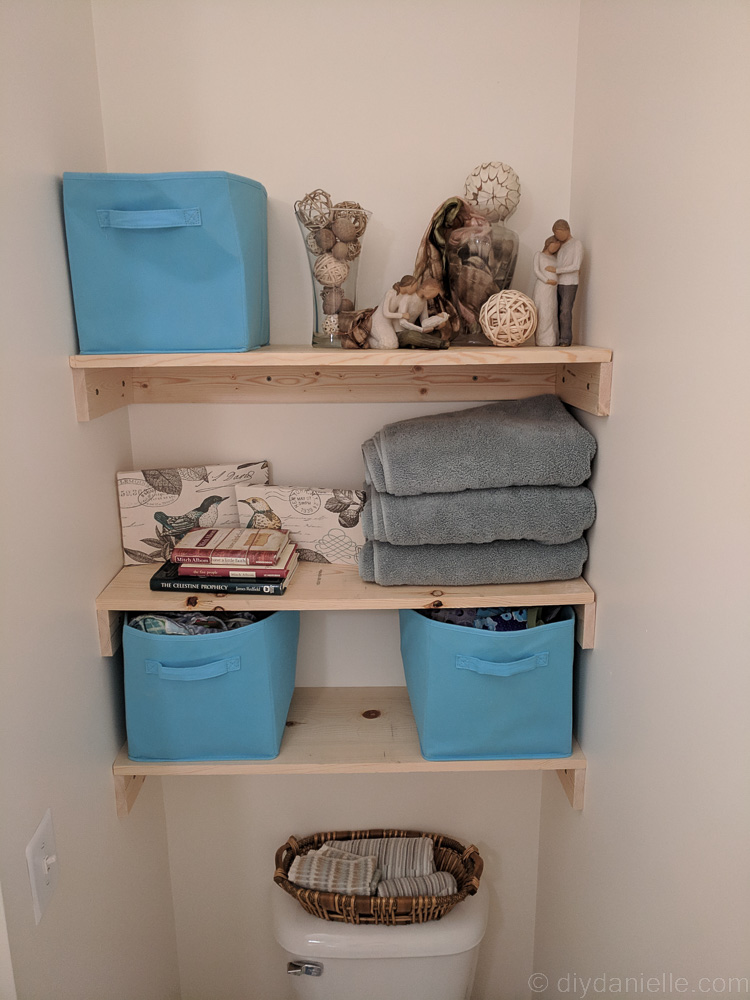
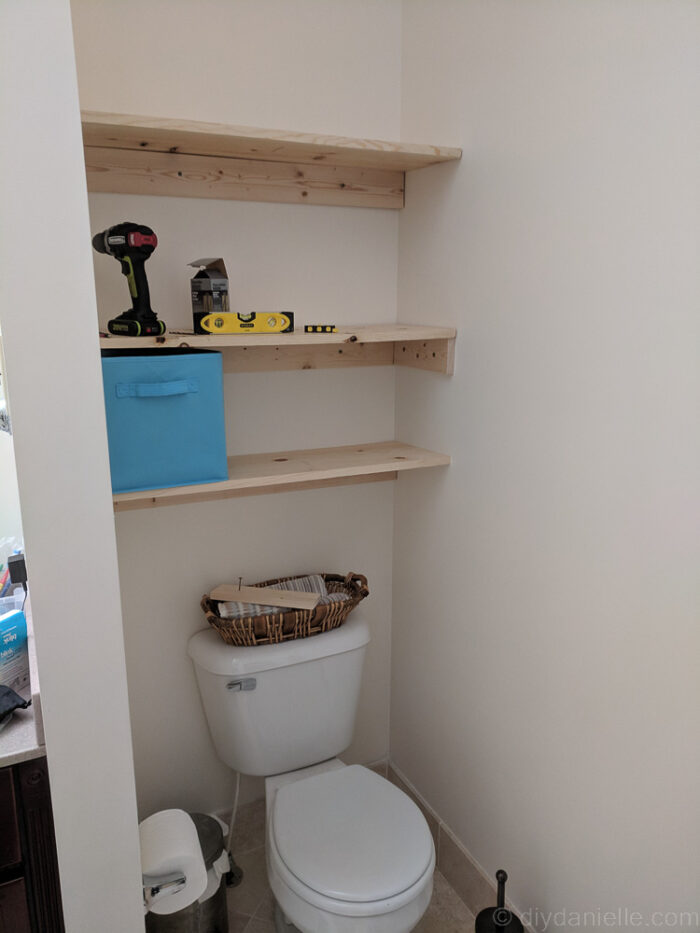
I have three shelves and the top one is really hard to reach. I use it for storing extra toilet paper and small knickknacks. I don’t mind climbing up to get stuff down. The top drawer is pretty difficult to reach though, so you may want to keep a stepping stool in the room.
Before Photos

Logistically, my bottom shelf is the only one that’s really easy to access. It may be smarter to build three shelves with drawers close together at the bottom and then have open shelving above.
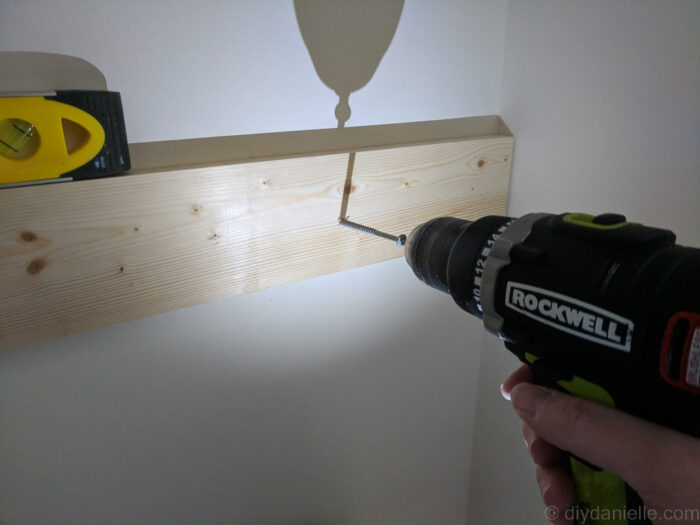
Step 2: Use your stud finder to identify where all the studs are in your wall.
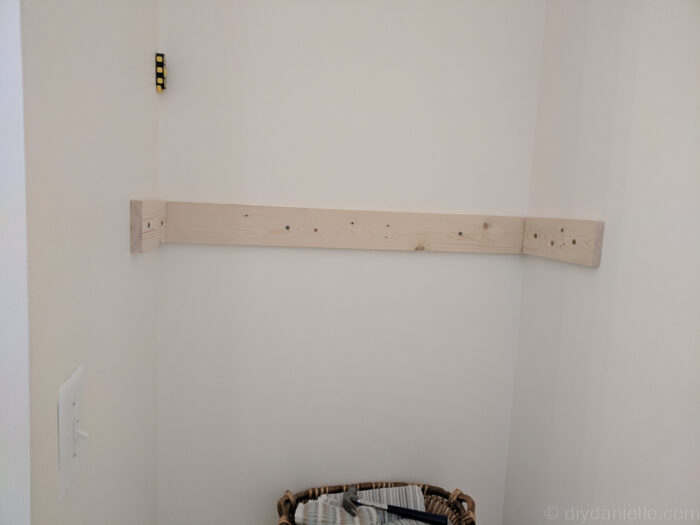
Cut a piece of pine wood to the width of your toilet area. This will support the first shelf.
If you do it exactly like mine, you’ll need three of these.
You can hang them in your desired placement, making sure that you place the screws where they will hit a stud. Also make sure that your board is level.
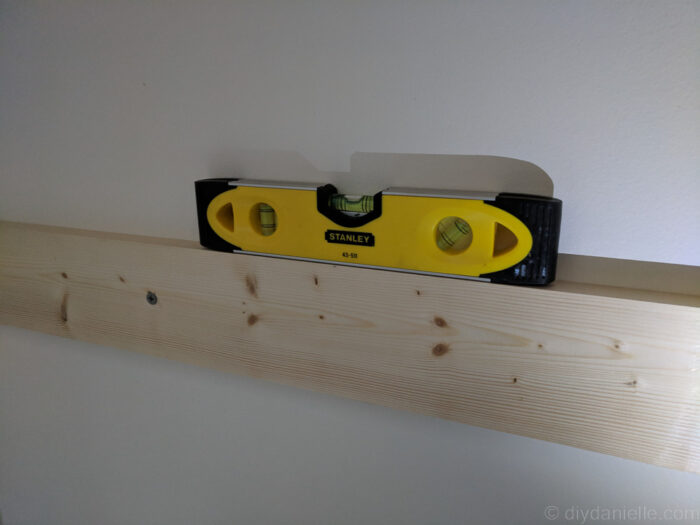
Mine are 34 in wide.
Step 3: Cut two smaller pieces that are about the depth you’d like for your shelf. Don’t make it too deep or you will bump your head.
Mine are 10.25″ each. You’ll need two per shelf. The depth doesn’t include the depth of the back support.
Again, make sure these are level and attached to a stud or use drywall anchors.
Step 4: Once you have the supports placed, you can cut a piece of wood for the top of the shelf. If you’re using plywood, add edge banding. I used good pine wood so the edges did not need to be finished.
I didn’t really do anything at all to finish these because they looked so nice to begin with.
We left it like this for a year or two before I added my drawers.

Step 5: Once I committed to building the drawers, I measured everything out and built the frame for the drawer. It’s just a box.
Make sure to leave room for the sliders and a little extra with just to make sure the drawer doesn’t hit either side of the wall… You also want to avoid any possible obstacles like light switches.
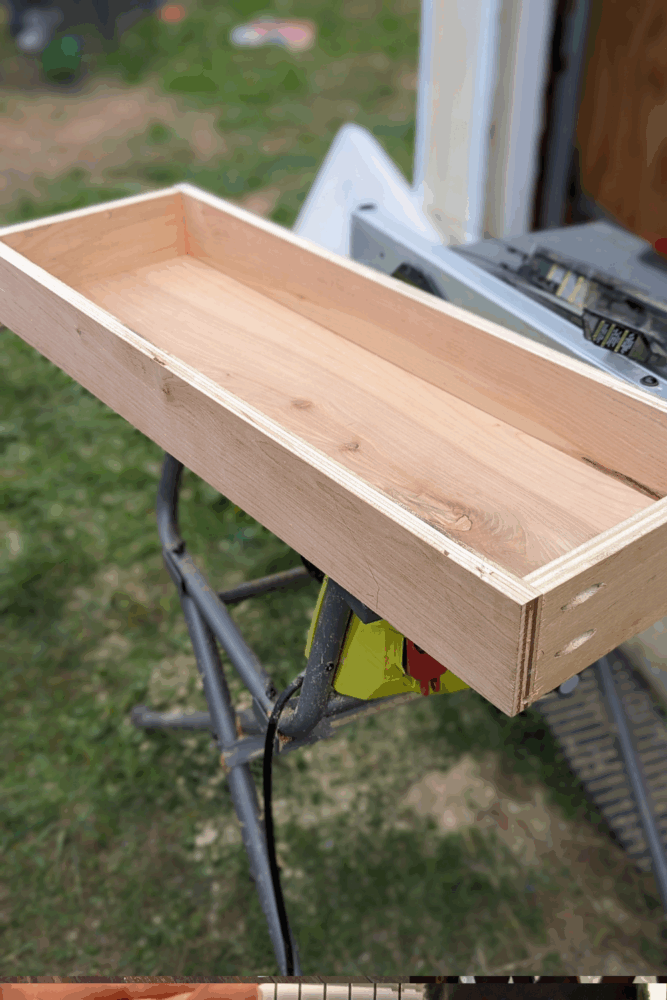
Step 6: Add your sliders. The side supports are perfect for this.
I also added drawer dividers for the middle drawer so I could organize medicine.
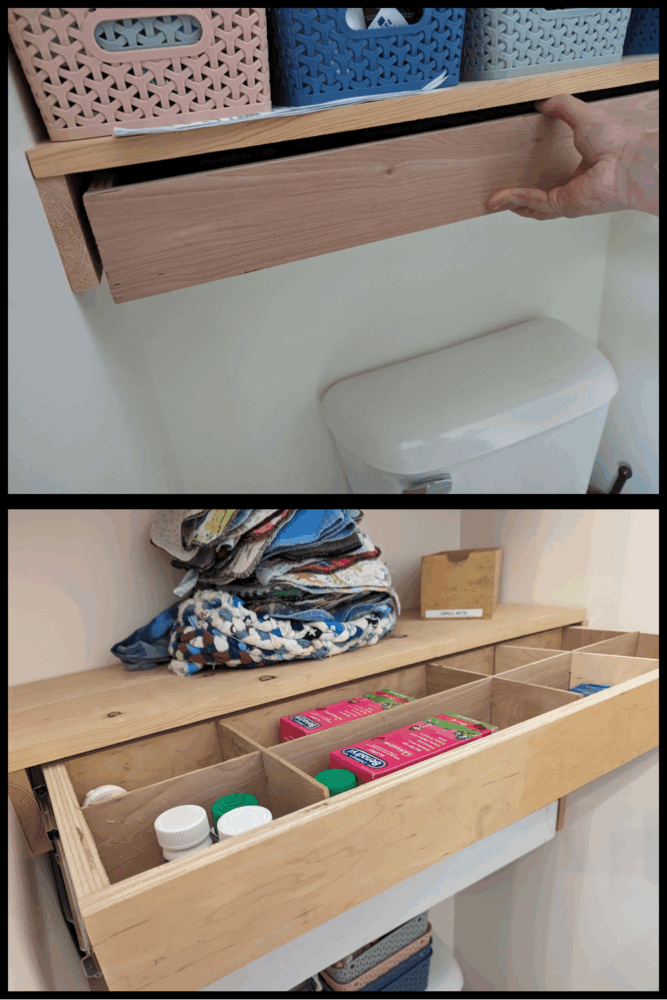
Step 7: Last I cut a piece of wood for the drawer fronts, laser engraved it, painted it, and then sealed it.
The drawer front was attached to the drawer and I added drawer pulls.
And that’s it! I love these so much.
I did something similar in our half bath but never really finished it properly.
So my plan is to redo those. When I do, I’ll make sure to post pictures of them! Make sure to follow along on the blog so you don’t miss it.
Please share and pin this post! You can also post your project and tag the DIYDanielle team on Instagram @doityourselfdanielle!