
Everything you need to know about Grommets: How to use grommet pliers, install grommets in curtains, and apply grommets without a tool.
When you sew, there’s a lot of different tools or sewing supplies that can help make your work look more professional. While you may have learned how to sew from a grandparent, they may not have had the modern tools that are available now. In the past, I talked about installing snaps with snap pliers. Snaps were one of the first closures that I learned about when I started sewing.
Grommets came much, much later, but I LOVE adding them to my projects now. They’re a great way to add a hole in fabric without sewing a buttonhole, and the metal tends to be pretty sturdy for projects that need it.
This post may contain affiliate links which may earn me commissions should you click through them and take certain actions. As an affiliate for Amazon, Cricut, xTool, Home Depot, and other sites, I earn from qualifying purchases. Please DIY carefully. View my full legal disclosures here.
The majority of my content is generated by me, as are 99% of the photos and videos, but I utilize technology for titles, descriptions, video editing out all of my ums, and occasionally for text overlay on images.
Please read the whole post so you don’t miss any important information!
What is a Grommet?
A grommet is a tool that can be both functional and decorative. It is a small ring that is used to create a structured hole in a variety of projects. Its main purpose is to keep the edges of a fabric or material from fraying or damaging.
When Do You Use a Grommet?
Grommets are commonly used on banners and curtains, among other things. This tool can be used to reinforce canvas, vinyl, fabric, and plastic. A grommet allows the material to be hung using a rope or metal rod without tearing. You may have seen grommets on shower curtains plastic banners.
This tool is also beneficial for more than just DIY projects. A grommet is found in electrical systems and even utilized in certain types of ear surgeries.
What is the Difference between Grommets and Eyelets
Eyelets and grommets are often confused because they look similar and serve the same purpose. The biggest difference between these tools is how they are installed.
An eyelet is only composed of one t-shaped piece. It is inserted by punching it through the material and then pressing it into place. Eyelets are typically used with smaller projects such as scrapbooking or clothing.
A grommet includes two pieces, a front and a back. Each piece is placed on either side of the material and then joined together. Grommets work best for sturdier materials or larger projects. They can adequately hold heavy curtains or large signs.
What are the Different Types of Grommets?
Grommets come in a variety of sizes and materials. These materials include metal, rubber, and plastic. The type of grommet needed will depend on the type of material and purpose of the project. Here are the different kinds of grommets and the advantages of each type:
Rubber- A rubber grommet is often used to avoid the sharp edges of a metal grommet. This allows a string or cord to pass through the hole without being frayed or damaged. This material is not susceptible to rust, therefore it is a better option for a humid environment. It is also a good choice for a material that is more prone to fraying.
Plastic- Similar to the rubber grommet, a plastic grommet is beneficial for its smooth edges. It can sustain a variety of situations without corrosion and is one of the strongest types of grommets.
Metal- This type of grommet is often used for its strength and durability.A metal grommet is malleable and can be hammered into a specific shape. Brass is the most common metal used for grommets due to its ability to withstand corrosion and a range of temperatures. Other popular metals used to make grommets include stainless steel, aluminum, and nickel.
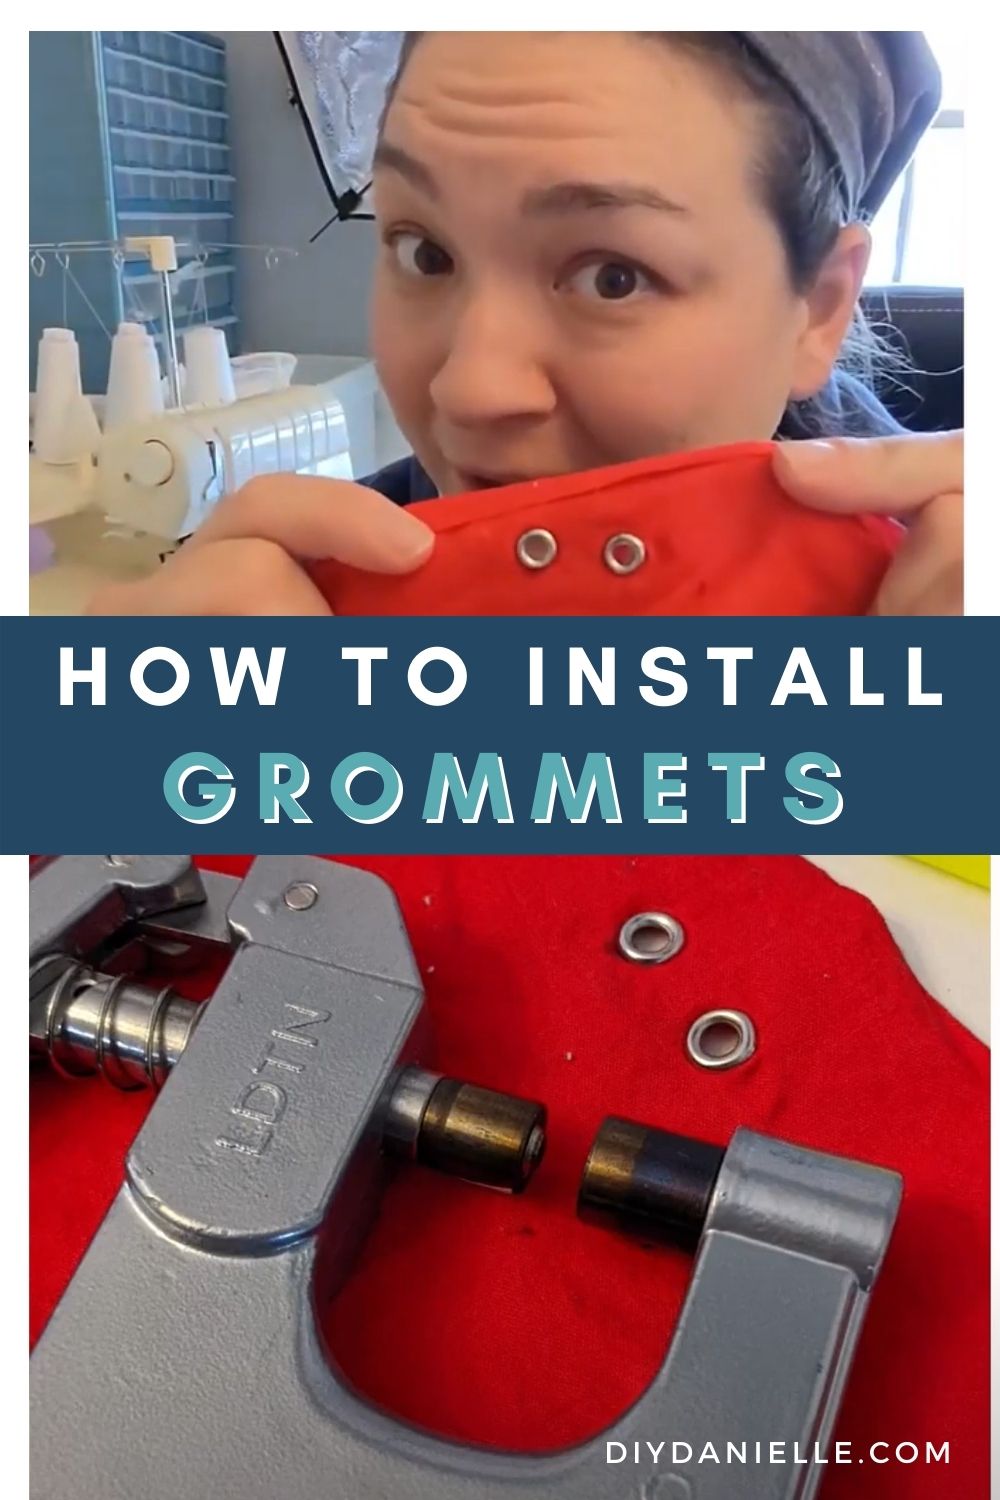
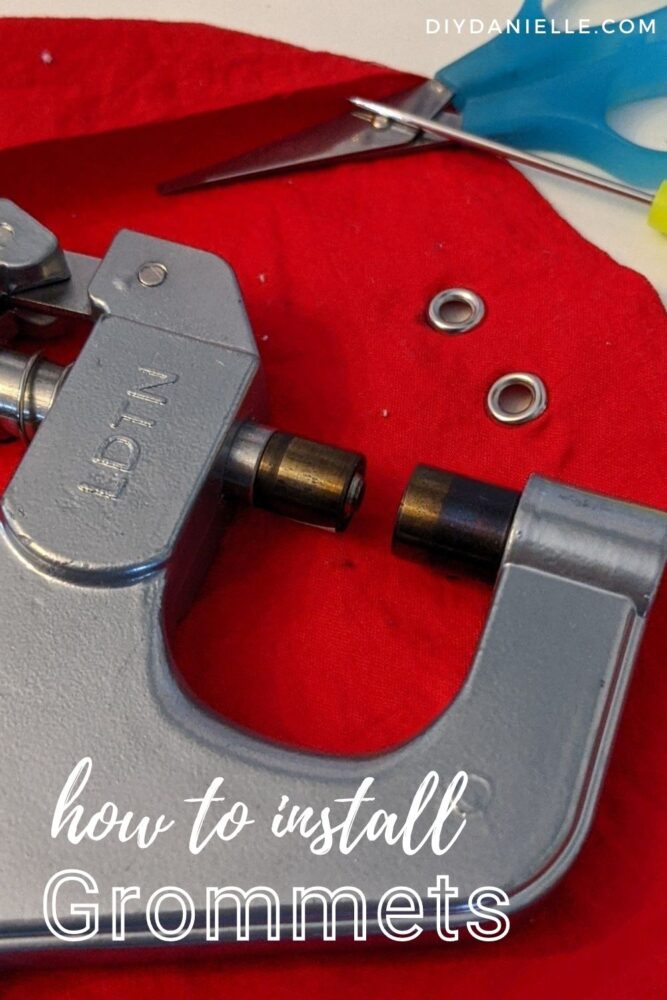
How to Use Grommet Pliers
I’m going to show you how to use grommet pliers from KamSnaps in the tutorial and video below. This is the method I find most comfortable because I am comfortable with applying snaps in much the same method.
Supplies:
- KamSnaps
- Grommet Press
- Kamsnaps Dies & Grommets
- Scrap FabricAwl/Small Scissors/Grommet Punch
Here’s a quick video tutorial on using grommets and grommet pliers:
Tutorial
In the tutorial above, I’m placing two grommets, side by side, for a drawstring to go through.
- Mark the placement for your grommet(s). Add a scrap fabric for reinforcement if needed. If you’re using a fabric like cotton, the extra reinforcement is NECESSARY. If you’re using a thick material, such as leather, you can skip it.
- Punch a hole for your grommet. The hole needs to be smaller than the grommet. You can use an awl, a special punch, or scissors.
- Place your male grommet on top of the fabric, then female piece on bottom with the reinforcement scraps. Squeeze pliers.
- Repeat with the other grommet hole.
How to Install Grommets without a Tool
Even though I love my grommet press, it’s not necessary! This YouTube channel shows an easy method with a hammer, a marble, and your grommets. I love how easily they snipped the holes with scissors- I seem to butcher that every time!
How to Reinforce Fabric for Grommets
One issue with grommets is that they can tear through fabric if it is not strong enough. To prevent this from occurring, you could add a second layer of the fabric throughout the entire project, or simply under each grommet hole. Another option is using a fusible interfacing to give the area more reinforcement.
I don’t always have interfacing available so I will sometimes use a piece of felt if it will be hidden or if I can find a piece that matches my fabric.
How to Cut Holes in Fabric for Grommets
It’s important to be careful when cutting the holes in your fabric for your grommets. If you make your hole too big, the grommet won’t fit properly and you’ll have issues with your finished product. This leads to fraying fabric and other unpleasantness. Unfortunately, I find that the only option once you’ve made your hole too big is to scrap the fabric and start over.
I always start with a smaller hole than the grommet size. It’s easier to make the hole bigger.
You can snip the hole with some scissors, or use something like a leather hole punch to make the hole.
Please share and pin this post! You can also post your project and tag the DIYDanielle team on Instagram @doityourselfdanielle!
How to Use Grommets
Instructions
1. Mark the placement for your grommet(s). Add a scrap fabric for reinforcement if needed.
2. Punch a hole for your grommet. The hole needs to be smaller than the grommet. You can use an awl, a special punch, or scissors.
3. Place your male grommet on top of the fabric, then female piece on bottom with the reinforcement scraps. Squeeze pliers.
4. Repeat with the other grommet hole.