Skip to Content

How to Make a Simple Hungry Caterpillar Costume

Sharing is caring!

DIY Hungry Caterpillar Hat for Baby

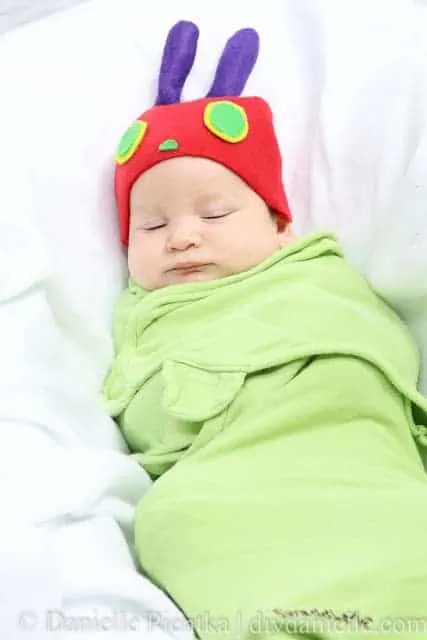
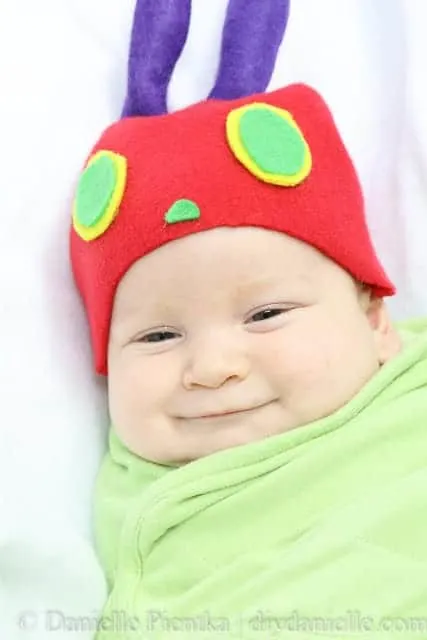
How to sew an easy Hungry Caterpillar costume for your baby.

This post may contain affiliate links. Using these links helps support my blog. Thank you! 

I was scrolling through Facebook a while back with my 6 year old, Godric, peering over my shoulder when I saw a really cute Hungry Caterpillar costume on an infant that was knit or crocheted. We’ve been discussing Halloween costumes recently and Godric immediately piped up, “HEY! Tristan should be the Hungry Caterpillar for Halloween and we can all be the food!”

It was brilliant!

My kids decided to be something else for Halloween, but I decided to stick with the Hungry Caterpillar theme for me and the baby. I didn’t know how to knit or crochet so I decided to sew the costume. It was pretty easy!

Also, our friend who works at our gym daycare mentioned that I hadn’t formerly introduced Baby Optimus Prime on the blog (although I’ve posted pictures and video to my Facebook and Instagram pages) so I figured this was a great time to show him off!

Supplies
Supplies listed below may include affiliate links to the products.

  • Green Baby Swaddler: I think the green one in the set is the one I own. I didn’t want to make or buy something
  • Red fleece
  • Yellow fleece or felt
  • Purple fleece or felt
  • Green fleece or felt
  • Hot glue gun
  • Tiny bit of fiberfill (probably optional)

Tutorial

To begin, I decided to use a green baby swaddler for the body of the costume, seeing it was something I already owned. There was no reason to make this project more complicated. You could certainly sew something easily too or just use a green blanket to wrap around baby. It’s October in Maryland so by October 31 the evening might be pretty chilly. I liked the idea of using the swaddler over his clothes to keep him warm. With my luck, it’ll be 80 degrees and he’ll be sweltering though. Maryland is so inconsistent. 
With the body of the costume already “made,” all I needed to do was make a hat. I used a baby hat that we owned to help me create a pattern for this hat, although I enlarged it a bit because my sons have bigger heads. Make sure to trace the hat but also add a seam allowance.

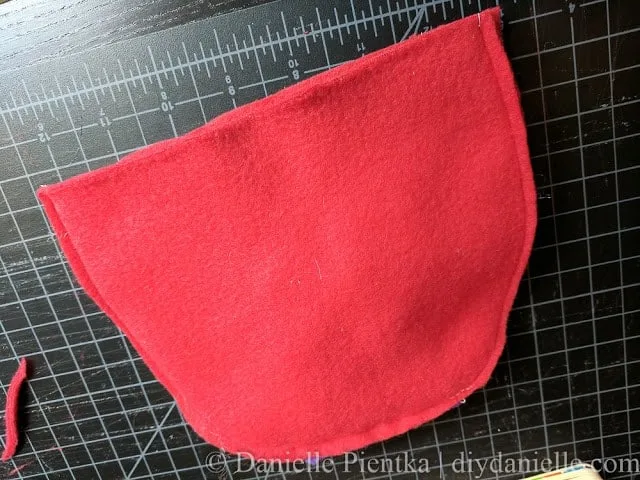
My hat was two pieces so I cut two pieces of red fleece.
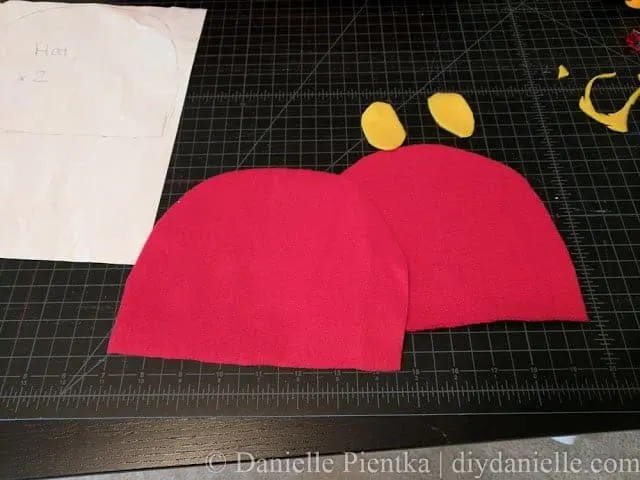
Hat pieces for making baby a Hungry Caterpillar hat

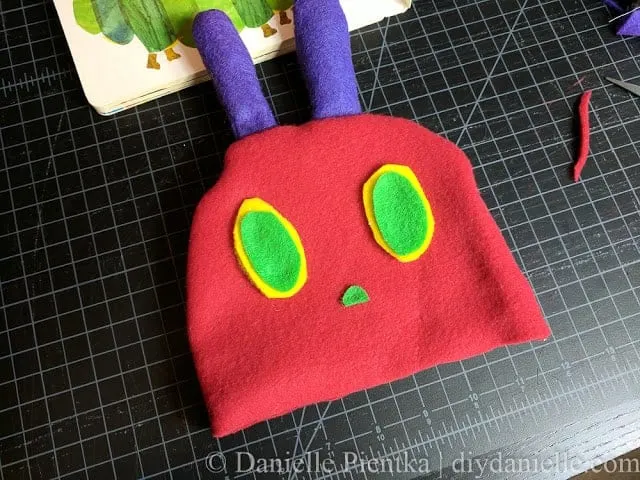
I cut out some ovals for the eyes with yellow and green felt and fleece (whatever I had on hand). I did a little piece of scrap green for the nose (which isn’t really clear in the book). I used a hot glue gun to place all of the pieces on one piece of the red hat.

If I did it again, I’d put the eyes closer together.
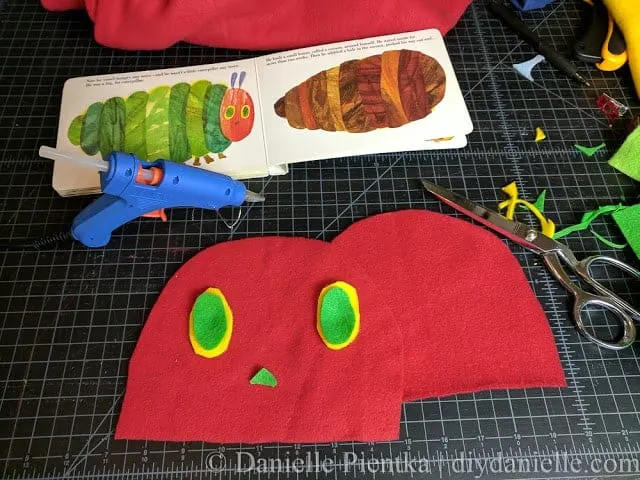
Using a hot glue gun to apply pieces to hat.

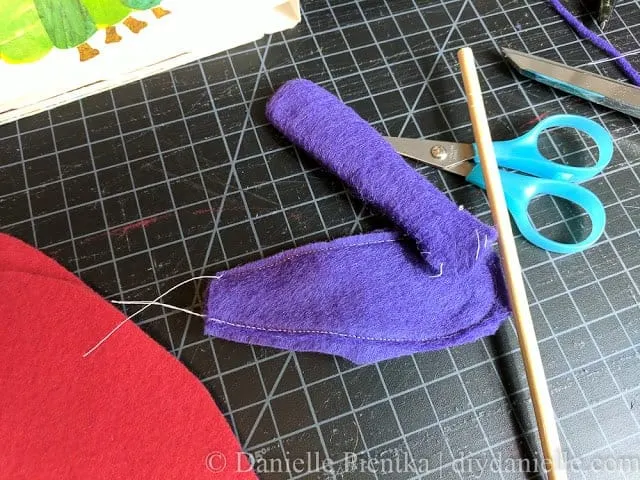
For the antennas, I used purple felt. Sewed the pieces right sides together, turned right sides out, stuffed with a bit of fiberfil. You could probably skip that if you wanted. The felt by itself was fairly stiff.
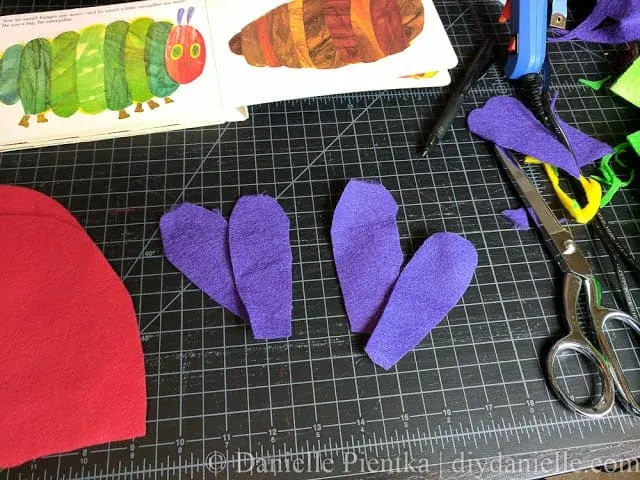
Cut outs for the antennas for the Hungry Caterpillar.
Sew antenna right sides together then turn right sides out.

Once filled, I put one piece of my hand right sides up, put the antennas on top, then placed the second hat piece right sides down. Pin.
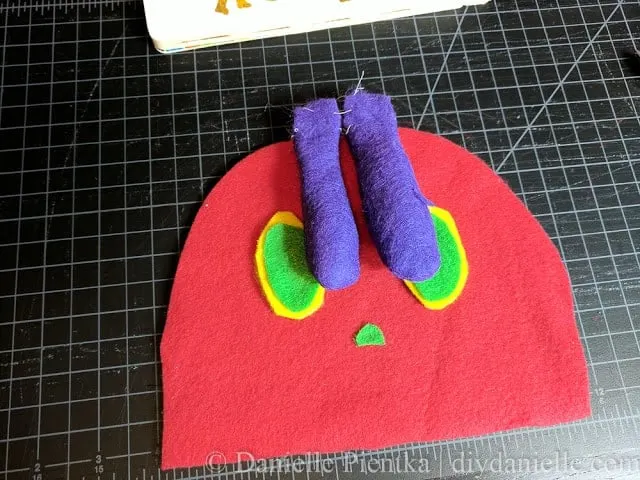
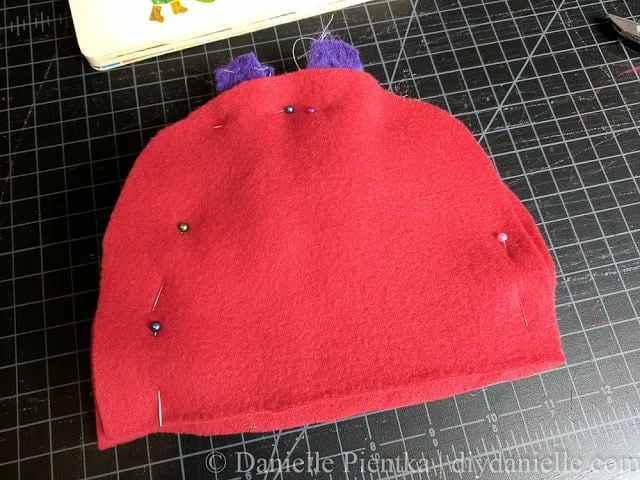
Sandwich the antenna between the  two piece for the hat. Pin.

Sandwich the antenna between the  two piece for the hat. Pin.

Sew the curve.

Sew baby hat closed, right sides together, then trim excess fabric. Turn right sides out.

Flip it right sides out. I attempted to hem the edges, but I didn’t like the look so I seam ripped then just cut the fabric the right size. It worked well and I like the clean edge to it. 

Make sure to check out the complete mommy and baby costume which will be posted in a few days!

Love it? Pin it!

Easy DIY Newborn Costume Idea: The Hungry Caterpillar

The Very Hungry Caterpillar: DIY Costume for a Newborn
Thanks for taking the time to read this post! I really appreciate the time you’ve taken. Please share, like, and pin my post if you enjoyed it. Follow me on social media and subscribe to my email list to keep up to date on all of my latest projects!
Thanks for Reading! -DIYDanielle
Disclosure of Material Connection: Some of the links in the post above are “affiliate links.” This means if you click on the link and purchase the item, I will receive an affiliate commission. Regardless, I only recommend products or services I use personally and believe will add value to my readers. I am disclosing this in accordance with the Federal Trade Commission’s 16 CFR, Part 255: “Guides Concerning the Use of Endorsements and Testimonials in Advertising.”

Sharing is caring!