Learn how to print custom stickers at home with our easy-to-follow guide. Whether you’re a small business owner or a craft enthusiast, this tutorial will help you personalize your projects with unique, eye-catching labels!
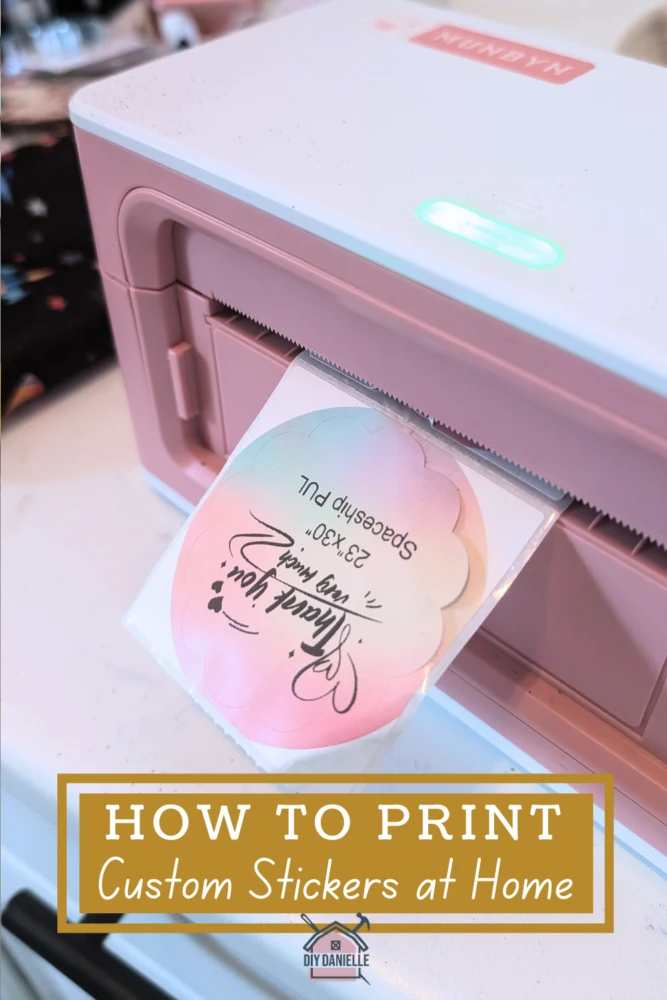
Label makers are among my FAVORITE items in my home to help keep me organized, as well as to help make sure that I can package items for sale quickly and easily. There are a LOT of different types of label makers for different uses and purposes. Today I’m going to show you how to print custom stickers at home using a thermal printer by Munbyn. These are a great option for product labels and anything you want to print QUICKLY and AFFORDABLY.
Thank you to Munbyn for sponsoring this post and for providing the supplies needed for this project. This post was written by me and I do my best to provide honest, unbiased reviews.
This label maker is perfect for marking products that I’m selling online or at my farmstand, for labeling items that may need frequent label changes, to make labels for party favors, for labeling gifts, and for labeling cups with everyone’s name at a party! I LOVE how quickly they print because this saves me time.
The nice thing about using labels is that it can add a personal touch to your products or gifts, help improve your brand’s visibility, and they’re pretty- we can’t forget the value of the dopamine you get from seeing the item wrapped up with a really cute sticker!
This post may contain affiliate links which may earn me commissions should you click through them and take certain actions. As an affiliate for Amazon, Cricut, xTool, Home Depot, and other sites, I earn from qualifying purchases. Please DIY carefully. View my full legal disclosures here.
Please read the whole post so you don’t miss any important information!
What is a Thermal Label Maker?
A thermal label maker is a type of printer that uses heat to transfer ink onto labels, rather than traditional ink cartridges or toners. Heat-sensitive paper darkens as it passes under the thermal transfer technology.
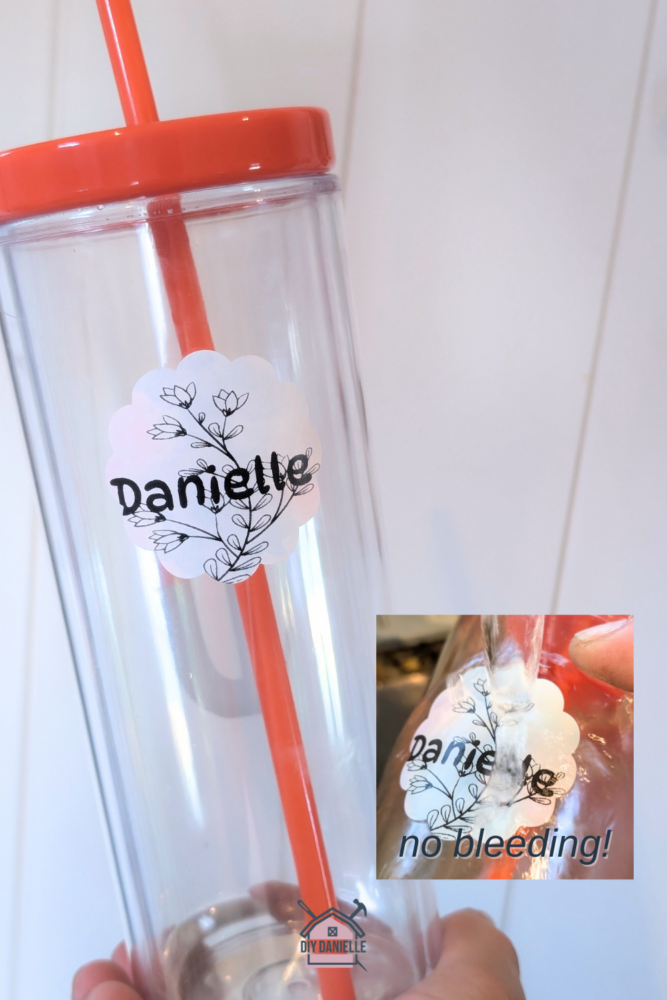
Thermal label makers are beneficial because they print quickly, are cost-effective, and produce high quality and smudge proof labels. Text and graphics only print in the color black, but you can buy different color and shape labels for the labels to give them some additional flair.
The nice thing about these waterproof labels is that they will work for shipping packages. You can print your own shipping labels from USPS, Fedex, or UPS and use your label maker to print the labels. The fast speed of printing (1 label per second) allows you to speed up your process, particularly if you’re trying to sell and ship lots of items each week.
How to Print Custom Stickers at Home
Supplies
Note: The discount code “BLOG12OFF” offers a 12% discount on orders from Munbyn, with no minimum purchase required.
- Munbyn RealWriter 941B: Munbyn Bluetooth Thermal Printer
- 4×6 Labels: These work well for 4×6 shipping labels
- Thermal Sticker Labels
- Custom Sticker Labels
Printing Custom Stickers Using the Munbyn Label Printer
Step 1: Open the Munbyn app and connect to your printer. If it’s plugged in and you’re on Wifi, this should be an easy process where you can follow the manufacturer directions. I had zero issues (yay!). I’d recommend setting up your account so you can save any designs, logos, etc. that you want to use more than once.
Step 2: At the bottom center of the app, you’ll see the option + with the word “Create”… click this!
Tip: As an alternative, you can also click TEMPLATE instead and it will show you a bunch of template stickers. Then you can select what size you want so you get templates only for a particular sticker size.
Step 3: This will bring up the following screen. It will cue you to create the label. If you click CUSTOM create, it allows you to enter the size of your label. If you select MORE, you’ll see a list of possible labels.
Select the label size that you’d like to use for your label(s).
Step 4: Once your sticker pulls up, you’ll have a variety of options to add to your sticker:
- Text
- Icon: There are a LOT of icons and you can even add your own. There are even wash instruction icons, allergy icons, etc.
- Illustration
- Border
- Graphics
- Image
- Barcode
- QR Code
- Swipe left to see also:
- Table
- Serial Numbers (1, 2, 3)
- Time (time stamps your sticker which is nice for eggs)
- Image Recognition
- Scan
- Voice Recognition
Step 5: You can drag the items on your design and arrange them however you would like. It’s a LOT of fun to play with. I also enjoy designing some things in Canva, then uploading as an image… the downside to this is that for some stickers, you’ll want to use transparency behind your Canva design or not. It may be a lot less complicated to upload your logo in black and white with a transparent background to use in the app, then add your additional text and information.
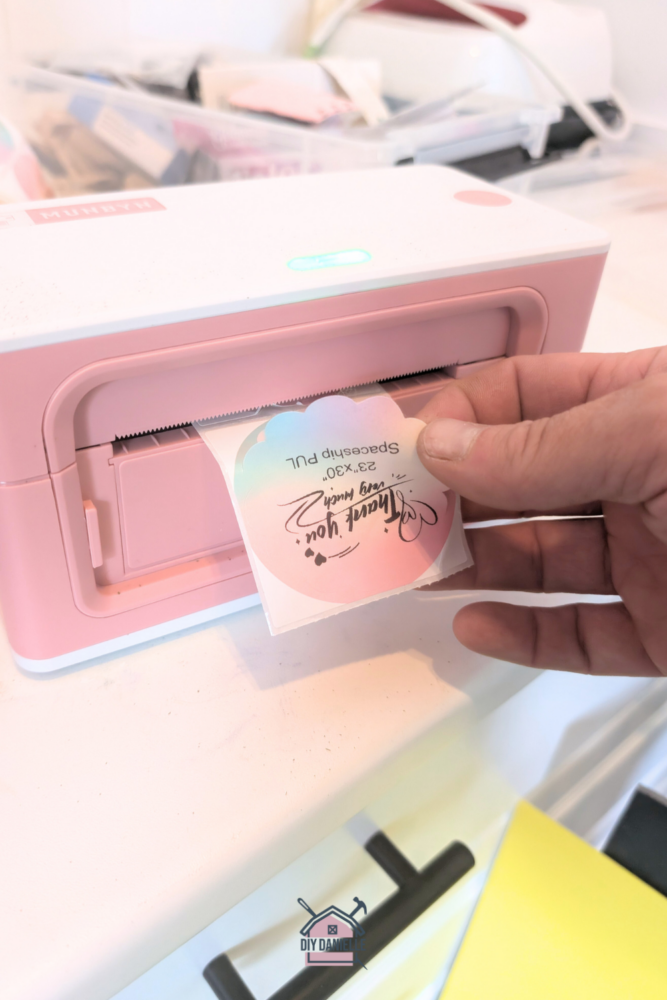
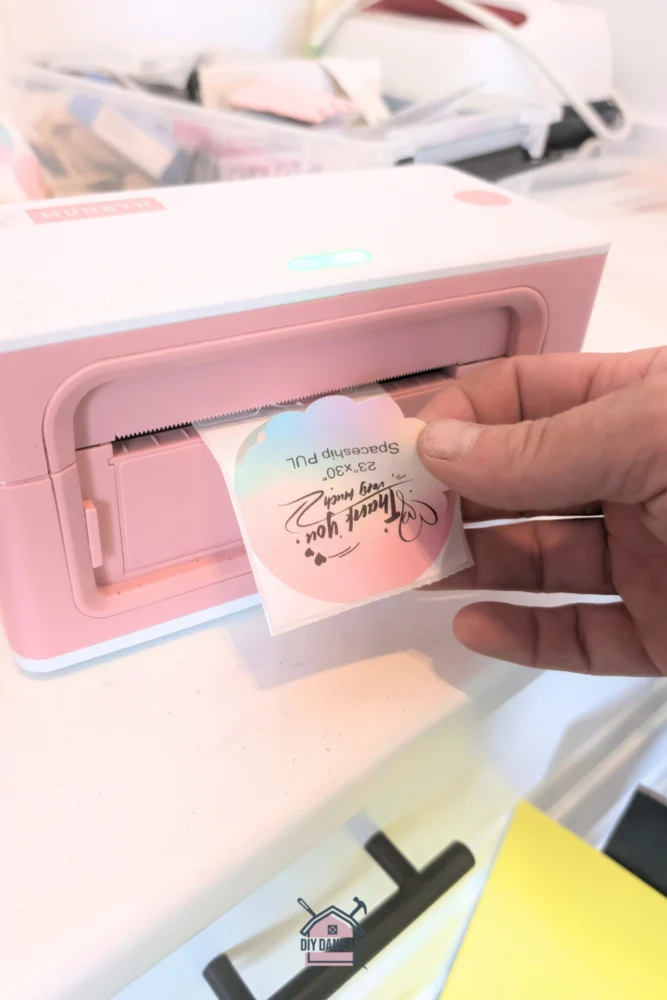
Step 6: Once you’re done creating your design, you can hit PRINT.
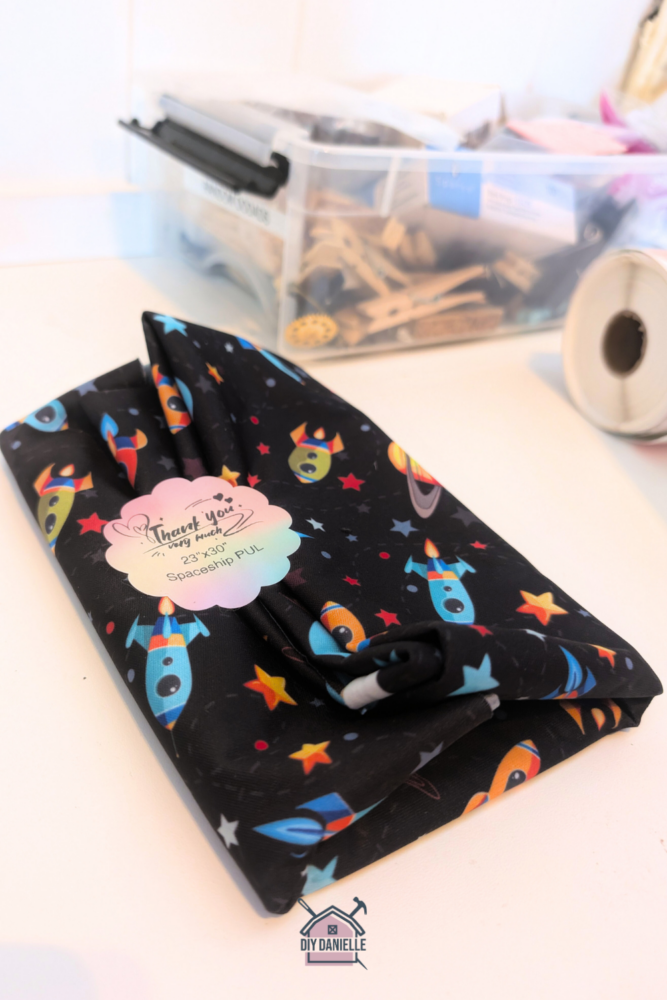
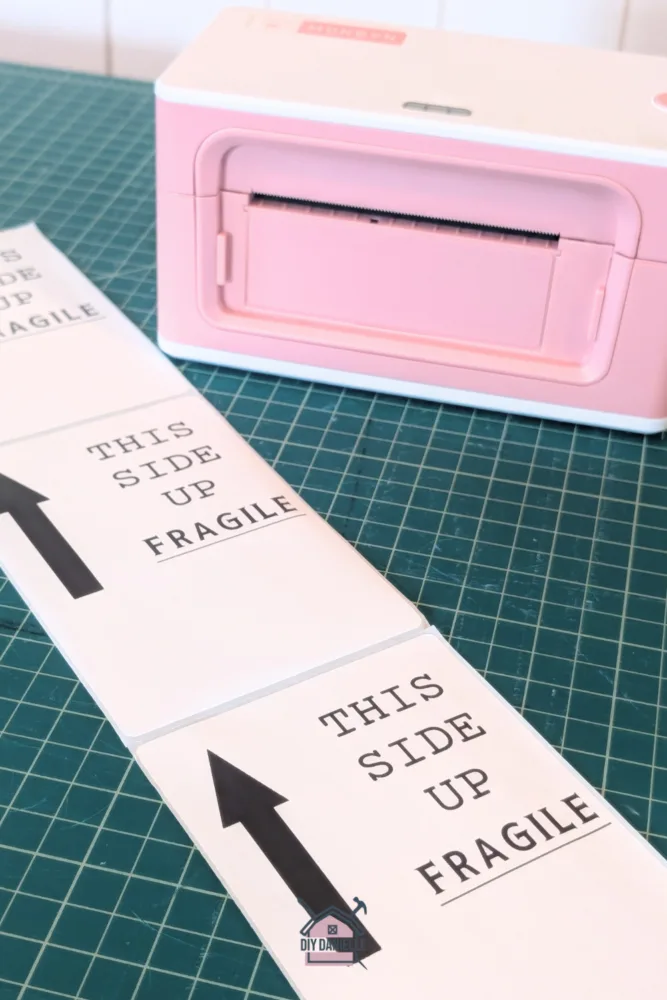
Step 7: Place your sticker on whatever you’re using it for! I’m going to show you a couple of items that I used my label maker with!


Types of Custom Labels To Make
- Thank-you stickers
- QR code labels
- Logo stickers
- Instruction labels (if applicable)
- Warning labels
- Price tags
- Wash instructions
These would have been FANTASTIC for the pool party favor stickers that I made last year as the ones I did at the time weren’t waterproof.
As you can see, these labels are GREAT for the uses I’ve outlined. If you need a more permanent option to label or sign, you could try using a laser engraver, Cricut Maker, or 3D Printer. While owning one of each seems a bit unnecessary, each has its own benefits and uses that make it worthwhile!
Munbyn RealWriter 941B: Munbyn Bluetooth Thermal Printer
The Munbyn RealWriter allows you to print high resolution, clear sticker labels. The machine supports both USB and Bluetooth connection so you can print directly from your phone. You can print a variety of different shapes and sizes of labels, and it’s FAST. The best part is that there’s no ink so your labels aren’t going to smudge!
Don’t forget to take advantage of the discount code “BLOG12OFF” for a 12% discount on orders, with no minimum purchase required. Visit the website to buy your own label printer.
Please share and pin this post! If you make this project, share it in our Stuff Mama Makes Facebook Group. We have regular giveaways for gift cards to craft stores. You can also tag me on Instagram @doityourselfdanielle; I love seeing everything you make!