
Learn how to safely remove a non-load-bearing half wall in your home with our step-by-step guide. Perfect for creating open spaces and updating your space!
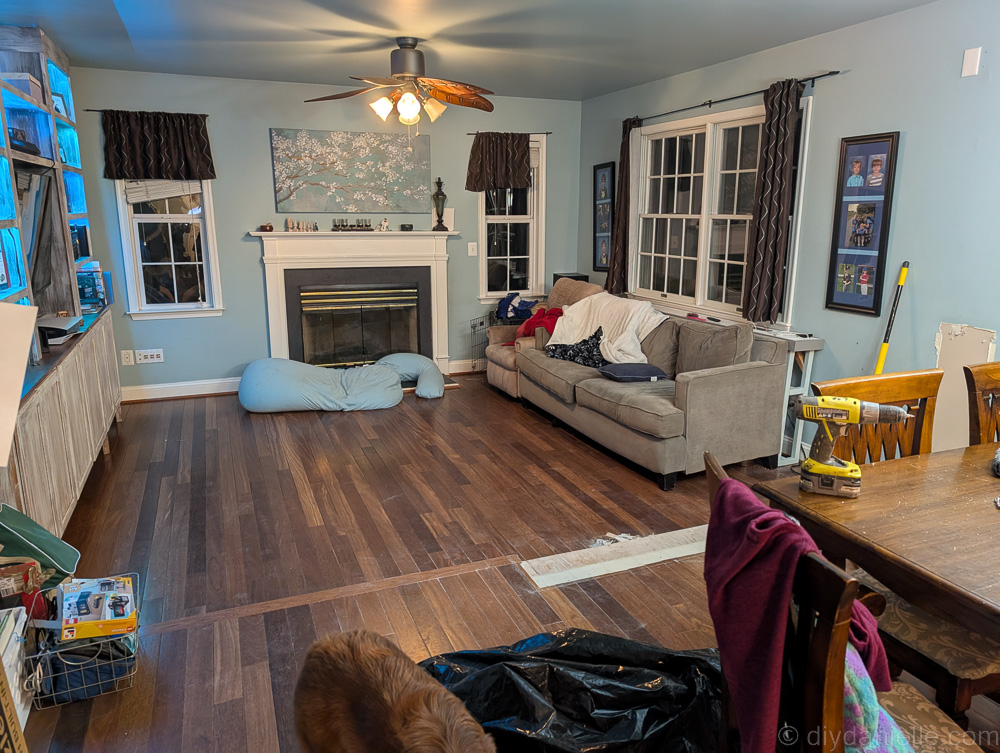
Our house has a half wall between the kitchen and the sunken living room. We wanted to remove the half wall because we’re working on a home renovation. The living room is simply too small and the kitchen seating area is too small.
Our plan is to renovate the garage into a new living room and to convert this current living room into a larger dining room to hold a bigger table.
The other thing we are doing is raising the sunken living room so it is flush with the rest of the house. This will keep it from being a tripping hazard.
While we are hiring some of this work out, I decided to remove the half wall myself.
I knew it wasn’t a load-bearing wall and I was curious what the process would look like. A quick Internet search told me that it might cost me $500 to $2,000 to have somebody else remove the wall. I figured it was worth giving it a shot to do it myself, hopefully allowing me to save a few extra dollars on this renovation project.
It was really quick and easy and I was able to save some of the materials for use on other projects.
This post may contain affiliate links which may earn me commissions should you click through them and take certain actions. As an affiliate for Amazon, Cricut, xTool, Home Depot, and other sites, I earn from qualifying purchases. Please DIY carefully. View my full legal disclosures here.
The majority of my content is generated by me, as are 99% of the photos and videos, but I utilize technology for titles, descriptions, video editing out all of my ums, and occasionally for text overlay on images.
Please read the whole post so you don’t miss any important information!
Removing a Half Wall
Assessing the Half Wall
1. Determine if the Wall is Load-Bearing
The most important thing is to ensure that the wall is not load bearing. Removing a load-bearing wall without the proper adjustments can ruin the structural integrity of your home, and potentially cause a safety issue.
A load-bearing wall is a wall that holds up the weight of the house, like the roof and upper floors, and helps spread that weight down to the foundation. It’s important because it keeps the house strong and stable. If you remove or change a load-bearing wall without adding support, it can cause big problems, like parts of the house sagging or collapsing.
While you can replace or remove a load-bearing wall, you want to ensture that you’re pulling a permit, have a licensed and insured contractor involved, and likely you’d want a structural engineer of some sort involved.
We have another wall we were considering removing, and a contractor stated that they could add a cross beam to help support the weight that the wall would have otherwise held. I was told that the anticipated cost would be $10-20,000 for that project so we opted not to do so.
In the case of half walls, generally they shouldn’t be load bearing if they are a true half wall (no supports coming up from it).
Ours had a column so it could have been load-bearing.
We had multiple contractors confirm that it was not load-bearing, but we were also able to look in the basement and upstairs and note that there were not supports in those same locations.
Not only that, but the column has been loose for quite some time. It came off easily and there was not a steel beam in the middle of it. We slid that column right off, and didn’t need to cut it apart.
Our old house had a steel beam support in the basement and we had a contractor cover it up when we finished the room. That project was done in drywall so little it was a little different but there was no way we would have just pulled that off easily. We would have needed to cut through the metal support.
BUT some load bearing walls are done in wood which is quite easy to accidentally cut and have a structural issue in your home.
We are about 4 years into planning for a renovation of this house and I’ve talked to so many people at this point, including multiple architects, that I’m fairly confident about what can and cannot be done in our home.
Long story short- MAKE SURE that any wall you remove isn’t supporting the rest of your home before you tear it down.
2. Check for Utilities Inside the Wall
The other consideration is to ensure there aren’t any utilities in the wall. In our case, we had converted the half wall to a bookshelf on one side, so we’d already opened it up and knew there wasn’t any wiring.
One thing to look for is an electrical outlet in the wall. Ours did not have one, although I wish I had removed the outlet cover on the perpendicular wall because it ripped off when I removed the half wall.

Whoops. Not a big deal. We just replaced it. It was messed up anyways because they had placed the outlet too close to the half wall, requiring them to cut off part of the face plate. Shoddy work.
You can also look for vents and try to puzzle out where plumbing and HVAC components would be naturally.
This is a situation where you want to ensure you get a contractor involved or an electrician, etc. if you need to move any existing utilities.
I am only going to cover the process of removing a half wall when there are no complicated things to worry about. This is a pure decorative wall. Nothing exciting. We didn’t pull a permit because we weren’t doing anything that the permit office would care about.
If you’re moving any utilities then you want a contractor and you probably want permits.
Preparing for Wall Removal
Begin by gathering your tools and supplies. I used a small mallet, a small pry bar, a hammer to remove the nails, a utility knife, and a screwdriver were ever needed. I also had a contractor garbage bag to put any garbage in.
This is what I used:
- Contractors Garbage Bag (or use an old feed bag): 42 Gal. Contractor Bags (50-Count) homedepot.sjv.io/QjKN13
- Mallet https://homedepot.sjv.io/gbZGZA
- 12 in. Wonder Bar Pry Bar homedepot.sjv.io/xLn2dv
- Hammer
- Utility Knife https://homedepot.sjv.io/e4VNVO
- Ryobi Drill https://homedepot.sjv.io/a1EdkQ
- ShopVac for cleanup
Please keep in mind that I was very neat and organized about removing this wall. I did not go in there with a hammer and start ripping s*** down like you see on HGTV. I was a lady about it. 😆 Mostly because I like to conserve wood and other supplies. Have you seen the wood prices!??!
I did not do anything particular to protect my home from dust because I was not kicking up a lot of dust with this process.
That is not necessarily going to be the case if you are using a reciprocating saw or some power tools. Like I said, I was being very careful to remove stuff gently without a lot of mess.
If you plan to kick up lots of dust, protecting your furniture, floors, lungs, eyes, etc. is a good idea.
Step by Step Half Wall Removal
Step 1: Removing the Decorative Column
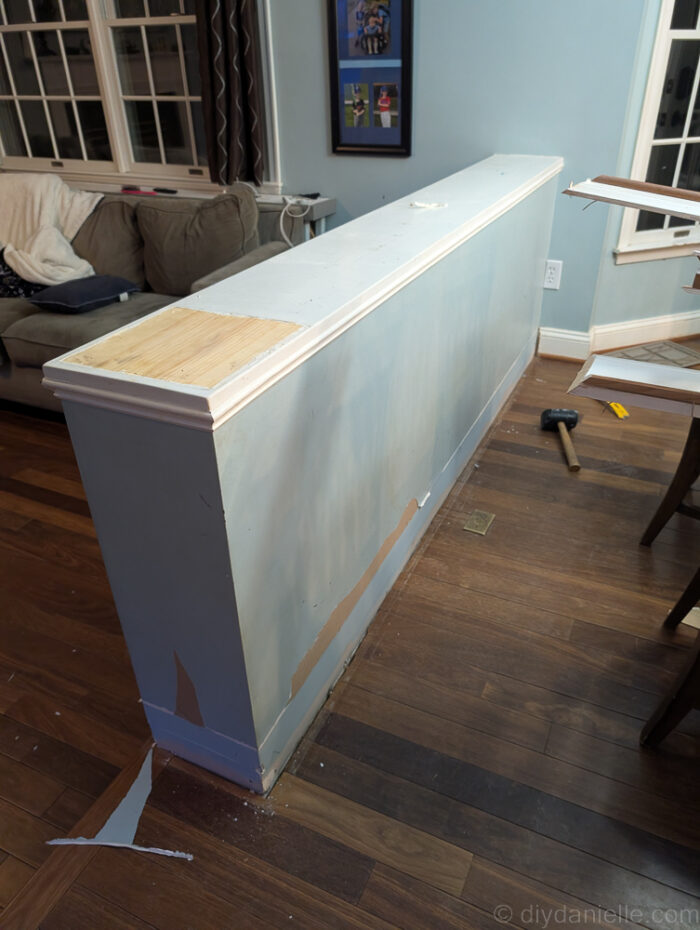
Our first step was to remove the decorative column on the end of our half wall. It was already really loose but we cut the caulk that was left.

Then we unscrewed the screws that attached the top to the ceiling.

Then we wiggled it off the half wall. I wish I had a video because we legitimately just wiggled it off and it feels like that shouldn’t have been possible.
It’s now sitting on my front porch where it might be for three months before I commit to doing a craft with it or selling it (yes, sometimes you can sell old building materials).
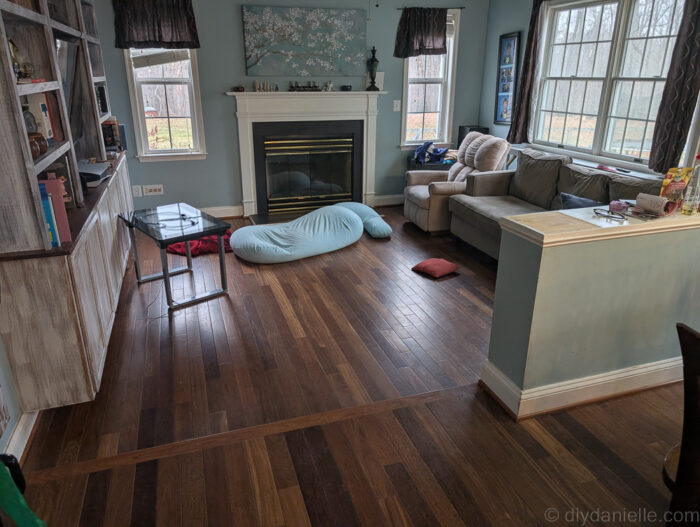
This is what the space looks like without the column.
Step 2: Removing Trim and Baseboards
My first step was to remove all of the pieces of trim and the baseboards around the half wall.
Start by cutting any of the caulk around the trim and baseboards with your utility knife. Sometimes you can peel it off which can be a bit satisfying and fun for a very short amount of time.
My first step was to remove all of the pieces of trim and the baseboards around the half wall.
When you’re removing this wall, remember that you’re probably not going to be able to conserve most of the drywall. You may be able to save a large piece to do patching of other walls as needed, but that’s the piece that I worry less about hurting. So dig the end of your prybar into the drywall near your trim and not the trim itself.

I gently pushed the end of my pry bar into the drywall next to the baseboard, tapped it with my mallet to get it underneath the baseboard or trim, and then I gently pulled up.
I try to pry it up little by little so that I can get the whole piece of trim off without it breaking. I still broke a few pieces, but I conserved a lot.
I just removed every piece one by one until I couldn’t see any other trim to remove. That thing had a lot of trim on it though!
Step 3: Removing the Shelves
I also needed to remove all of the trim and the shelves from the recessed bookshelves. Again, I mostly tapped it with my mallet and popped the pieces off to save for another project.

I stacked wood as I went, removed nails with my hammer, and cleaned up as needed.
Step 4: Removing the Drywall
Your next step is likely removing the drywall. Some of those pieces are going to be screwed in using drywall screws, which are Phillips head screws.
Go around and unscrew all of those.
If you unscrew them, there is a lot less dust kicked up. You could obviously just take a hammer and smash the heck out of it, but you’re going to have a bigger cleaning job to do if you do it that way.
I had a few screws that I had a hard time finding, but I had removed most of the other ones so I just pulled the wall away a little and I could see where the screw was.
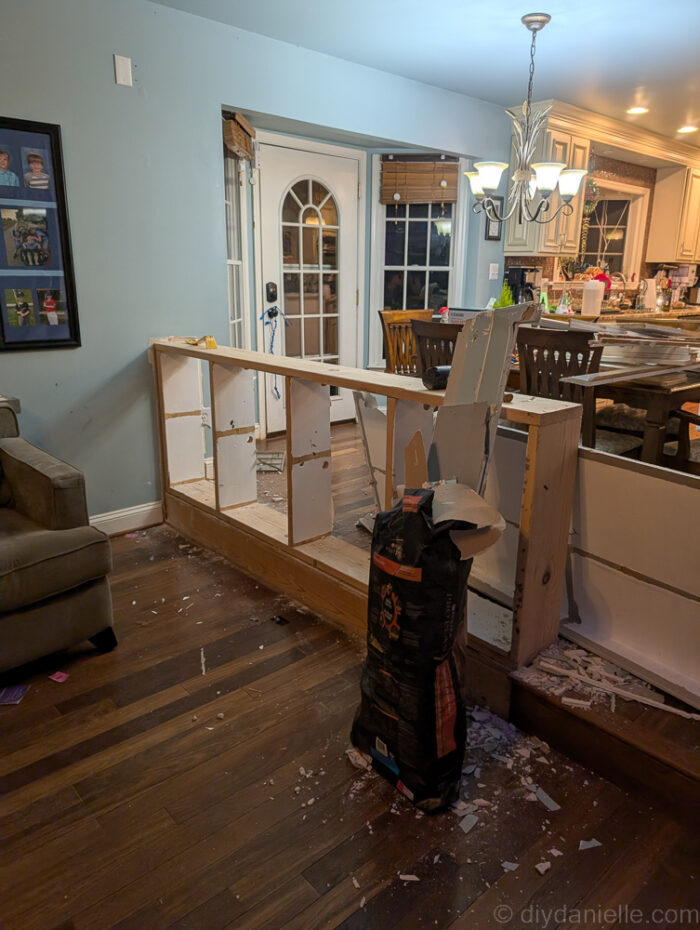
Step 5: Remove the Framing
Once the drywall was off, I was able to pull out the 2x6s that framed my half wall. Again, this is an item that I kept for future use because 2x6s are not cheap.
They were all nailed in so I was able to hit the bottom of the top piece, pop it off, and remove the nails afterwards.
Then I removed the side and middle pieces, and last I did the bottom piece which needed to be pried up.

I was able to do all of this in about 2 hours.
There’s a lot more to this project if you plan to DIY the whole thing yourself. My plan is to hire someone to raise the floor and to add a door. It’s something I feel confident about tackling, but don’t feel confident about doing the math for… I feel like there’s a lot of room for error if I try to raise the floor and it’s off by a quarter inch.
If I wasn’t hiring someone for the rest of this project, I would need to patch and repair the perpendicular wall, patch the floor, and patch the ceiling where the column had attached.
I would need to make sure that I could blend this all together so it wasn’t obvious that the half wall was there before.
In this case, I’m going to be destroying this room before the contractors come in, and trying to either upcycle, reuse, or sell leftover materials.
I’m hoping this will speed up the process for getting work done and hopefully save us a few dollars that we can put towards other parts of the project.
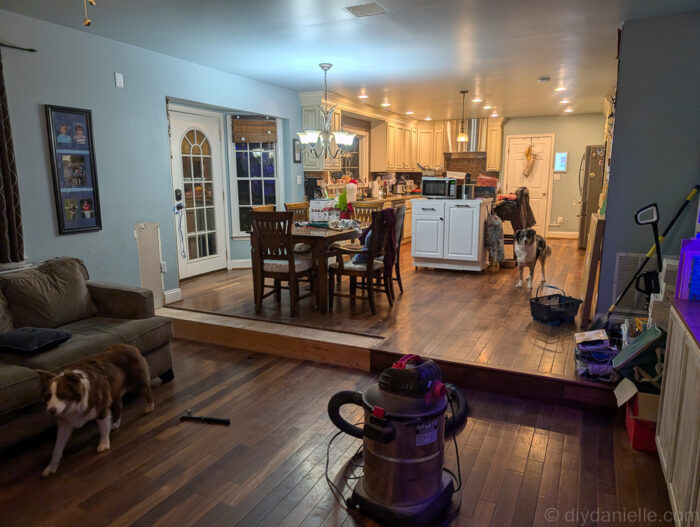
In the meantime, I pushed our couch against the step down so my kids don’t accidentally fall over the step during dinner while rocking in their chairs.


What do you think? I know it looks funky now because of the flooring and the drop, but I feel like removing that wall opened up the space so much better! I’m really happy about it.

Other posts about our living room renovation:
- Replaced the Wood Fireplace with Electric
- Added a Sliding Glass Door to the Future Deck
- Replacing the 2 Windows with a Sliding Glass Door
- Raising the Living Room Floor
Please share and pin this post! You can also post your project and tag the DIYDanielle team on Instagram @doityourselfdanielle!