
Learn the best techniques for removing nails from boards efficiently and safely. Discover the tools you’ll need and step-by-step instructions for both beginners and professionals.
I recently did a lot of work in my barn and ended up removing quite a few kick boards. I wanted to reuse the wood so I needed to remove nails from every single board.
There were so many nails! I’m going to show you how to remove nails the old-fashioned way, AKA with a hammer.
But I’m also going to show you how to do it with a special tool that will make the process way faster. I think this cost me $40 and it was worth every penny because of how many nails I needed to remove. This works well for regular boards, or removing nails from pallets that you’re trying to upcycle too.
Just remember to be very careful when doing this.
This post may contain affiliate links which may earn me commissions should you click through them and take certain actions. As an affiliate for Amazon, Cricut, xTool, Home Depot, and other sites, I earn from qualifying purchases. Please DIY carefully. View my full legal disclosures here.
The majority of my content is generated by me, as are 99% of the photos and videos, but I utilize technology for titles, descriptions, video editing out all of my ums, and occasionally for text overlay on images.
Please read the whole post so you don’t miss any important information!
Safety When Removing Nails
- Wear protective gear, particularly if you plan to use the high-powered tools to remove nails. They will go flying.
- Make sure to use a tool to pick up nails after you’re done so you don’t accidentally step on one. It’s very easy to miss them.
- Do this over something that’s easy to clean up and find the nails on afterwards. Grass is not a great space for it.
- Wear jeans. The tool will kick the nails out quite hard and if you have shorts on, you might cut yourself.
- Don’t leave boards sitting there with the pointy end up of the nail. It’s really easy to knock one over and step on the nail. They will go through your shoe. I field tested this. My son says I need a sign for my barn that has a countdown since my last workplace accident.. Isn’t he hilarious?
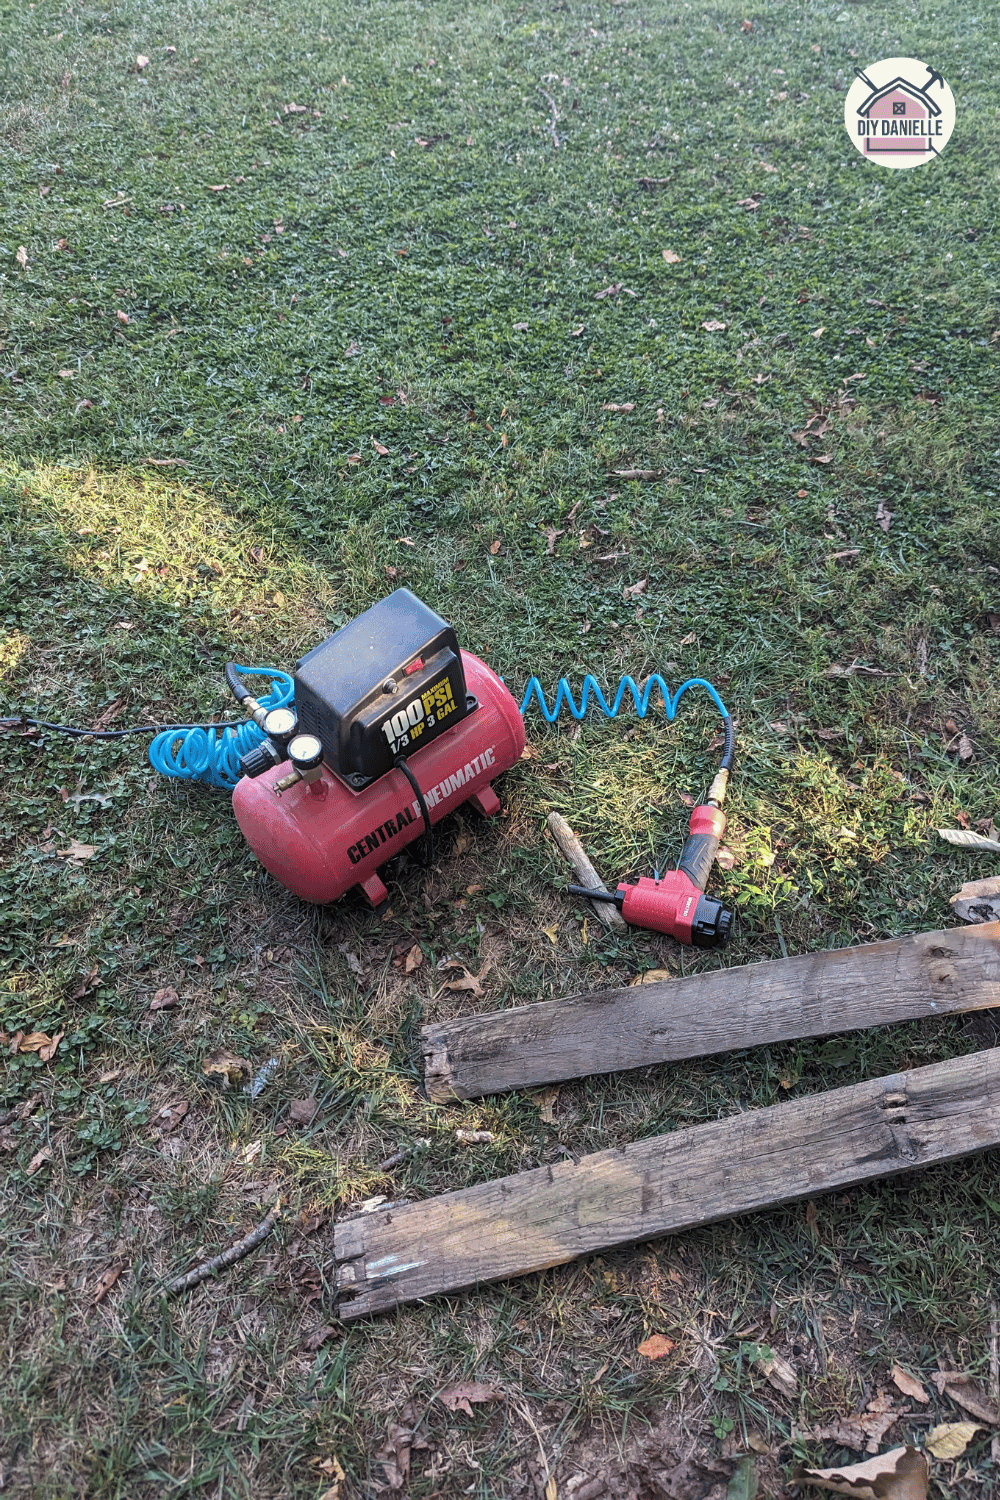
Project Supplies
- WORKPRO Pneumatic Nail Remover, Professional Heavy Duty Punch Nailer/Nail Puller/Nail Remover for Wood Workpieces, 60-100 PSI Denailer Removes 9-16 Gauge Nails: https://amzn.to/407N8xb
- Toolwiz Magnetic Pick Up Sweeper 24-inch Large Magnet Pickup Lawn Sweeper Roofing Tools, 33Lbs Yard Magnet with Telescoping Holder and Quick Release Latch Industrial Magnets Heavy Duty: https://amzn.to/4gPx6gR
- Air compressor
- Hammer
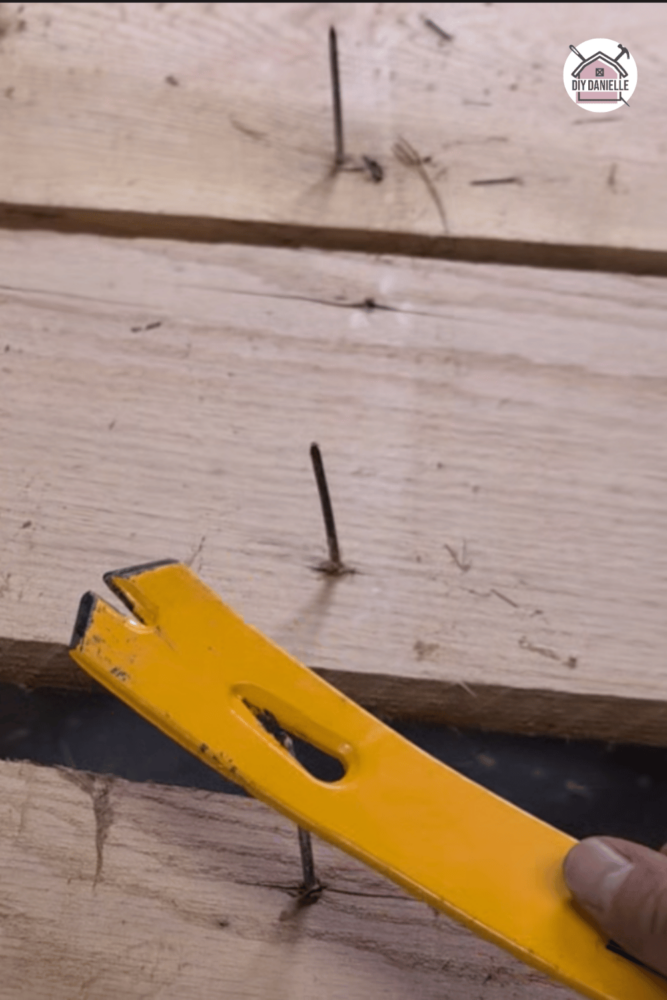
- Pry Bar
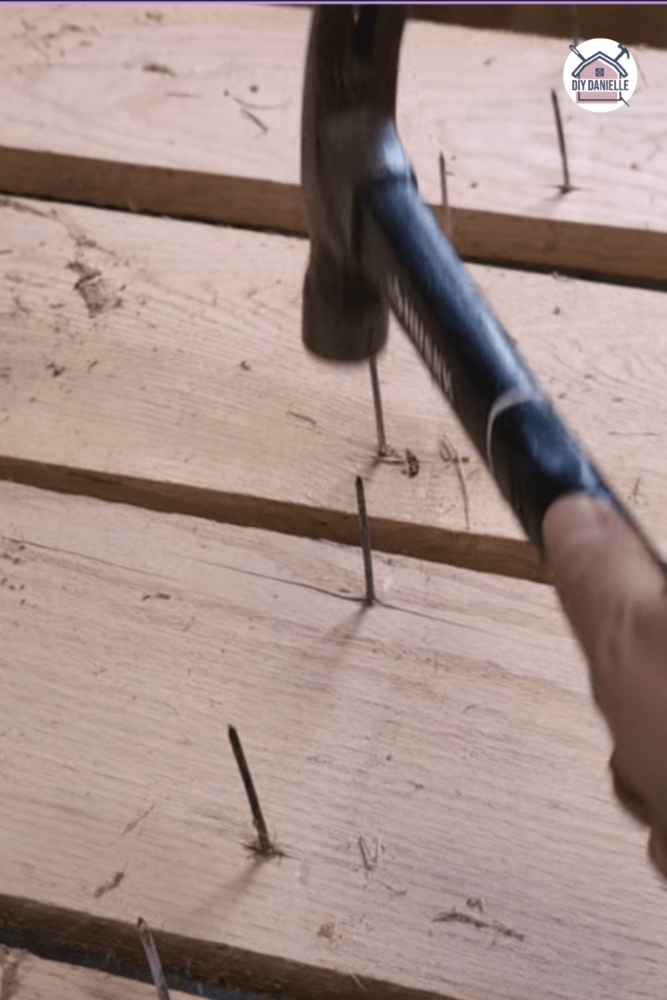
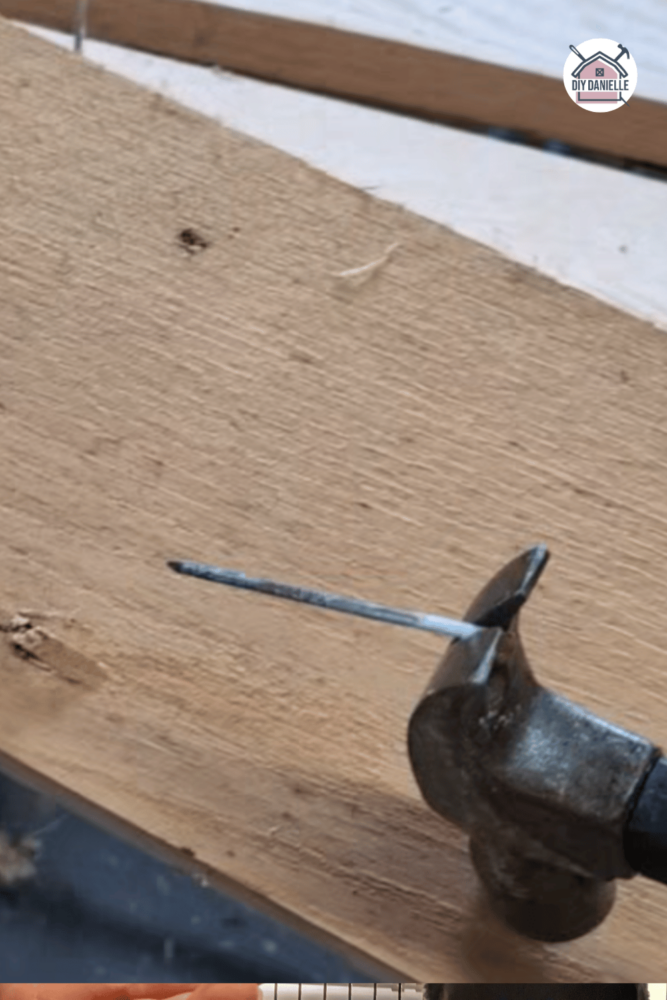
Removing Nails: With a Hammer and/or Pry Bar
Start by placing your board with the pointy side of the nails up on some saw horses or other solid supports. Hit the tip of the nail with your hammer, forcing it down. Flip the board and use the other end of your hammer, or the pry bar to pull up the nail. You may need to repeat this a few times with difficult nails.
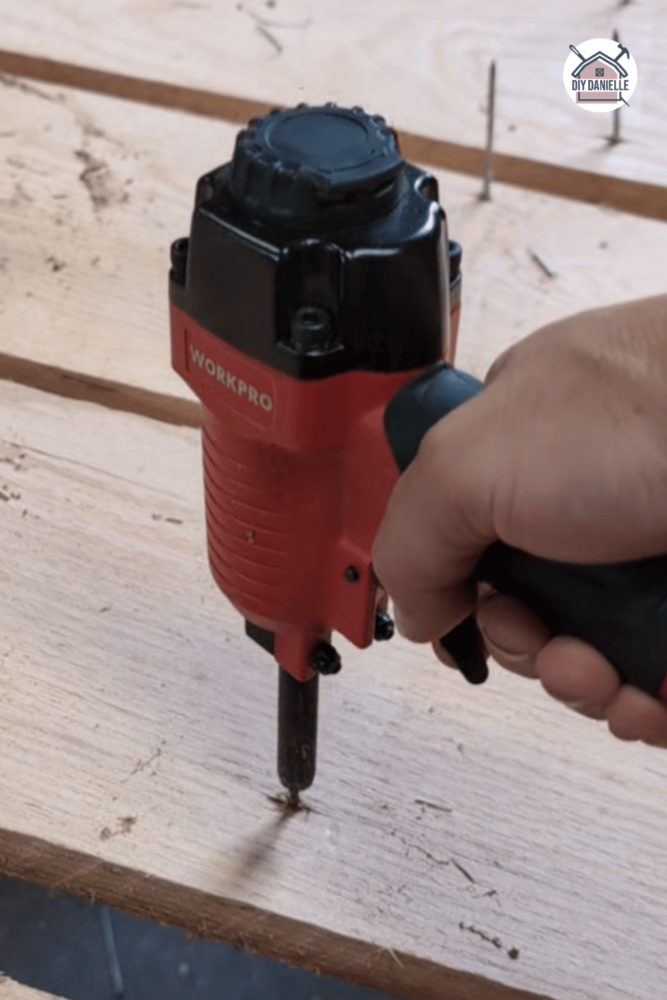
Removing Nails: With a Pneumatic Nail Remover
This is MY JAM. First you need an air compressor… preferably one without a leak like mine has. We finally fixed it recently and it works SO much better.
Hook up your tool to the air compressor, get your air compressor started, and let it … prime? Not sure the correct word here. But let it build up pressure so it has some oomph to work with.
While it’s prepping, I like to lay my boards out with the sharp side of the nails up on my saw horses. Ensure the nails are not over the saw horse themselves. I try to line up a few of them because this goes pretty fast and I might as well get something done while waiting for the air compressor.
Once it’s ready, pop the nail remover over the tip of your nail. Try to straighten it so it shoots straight down… you don’t want to send it flying towards your foot/legs/etc.
I find it works best to remove the nail if I don’t push the nail remover all the way down- instead I just put it over the tip and hit the trigger. The nail should shoot out of the wood pretty easily, but occasionally it takes a few tries.
Whenever your air compressor needs a break, organize your completed wood in a neat pile and use your sweeper to pick up any nails that are on the ground. This is a good opportunity to make sure you won’t hurt yourself later.


I also setup my next boards to get them prepped.
And that’s pretty much it- your biggest job here is SAFETY. Be careful. But it works GREAT.
Please share and pin this post! You can also post your project and tag the DIYDanielle team on Instagram @doityourselfdanielle!
