Build a loft in your shed to add storage space wherever you need it! These step-by-step instructions will help you craft a storage loft from scratch using just 2x4s, screws, subfloor or plywood, and a few common household tools.
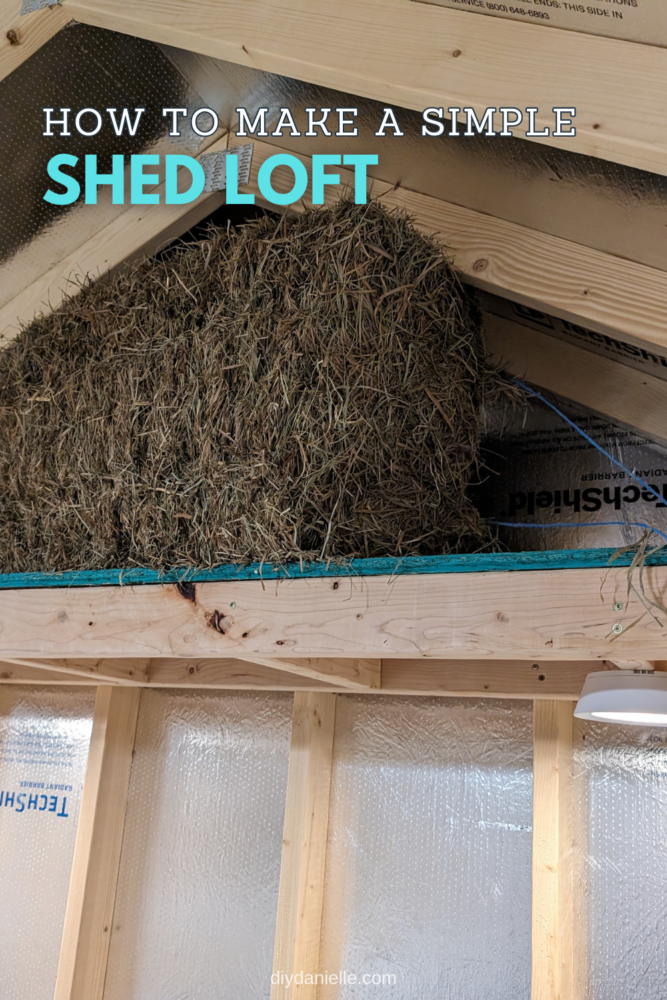
This loft shelf is an easy way to add extra storage space. I added it to my guinea pig and rabbit shed to hold hay, but you can use a DIY loft to add more space in attics, unfinished basements, and garages. You can customize the loft to fit your space–you’ll just need to buy longer or shorter 2x4s depending on your storage needs.
I built two of these for the guinea pig and rabbit shed, but I’m currently in the process of making several more so I have extra storage in the chicken coop and ruminant shed. It’s such a quick and easy process that makes storing supplies in convenient places easier. In turn, it makes it easier to find everything when it’s stored with the animal that it belongs to. The 12-18″ depth works well for a lot of storage bins as well, and my plan is to find some good bins to store empty egg cartons so they’re easy to grab when I’m collecting eggs.

Follow along with the tutorial video for a visual walkthrough of the entire process of making this DIY shed loft or check out some of my other DIY home and garden projects here!
This post may contain affiliate links which may earn me commissions should you click through them and take certain actions. As an affiliate for Amazon, Cricut, xTool, Home Depot, and other sites, I earn from qualifying purchases. Please DIY carefully. View my full legal disclosures here.
The majority of my content is generated by me, as are 99% of the photos and videos, but I utilize technology for titles, descriptions, video editing out all of my ums, and occasionally for text overlay on images.
Please read the whole post so you don’t miss any important information!
Supplies
- 2x4x8, Prime stud https://homedepot.sjv.io/m535PM
- Drill
- Subfloor or plywood, I like to go cheap for a shed like this and something nicer in an indoor area like my she shed. 19/32″ OSB: https://homedepot.sjv.io/k03vzv, 7/16″ OSB: https://homedepot.sjv.io/VmeKZk, 11/32 in. x 4 ft. x 8 ft. Rtd Southern Yellow Pine Plywood Sheating: https://homedepot.sjv.io/Wqaz4n
- Measuring tape
- Level
- Screws
Tutorial
Step 1: Cut your 2x4s. Measure your space and determine the dimensions of the shelf you’ll need. I made my DIY loft 85 ¼ inches long and 18 inches deep to store a few bins and bales of hay for the guineas and rabbits. Make sure to account for the width of the wood when cutting the cross pieces for support! I made mine only 15 inches, because when they are sandwiched between the longer pieces there will be an additional 1 ½ inches of wood on each side.
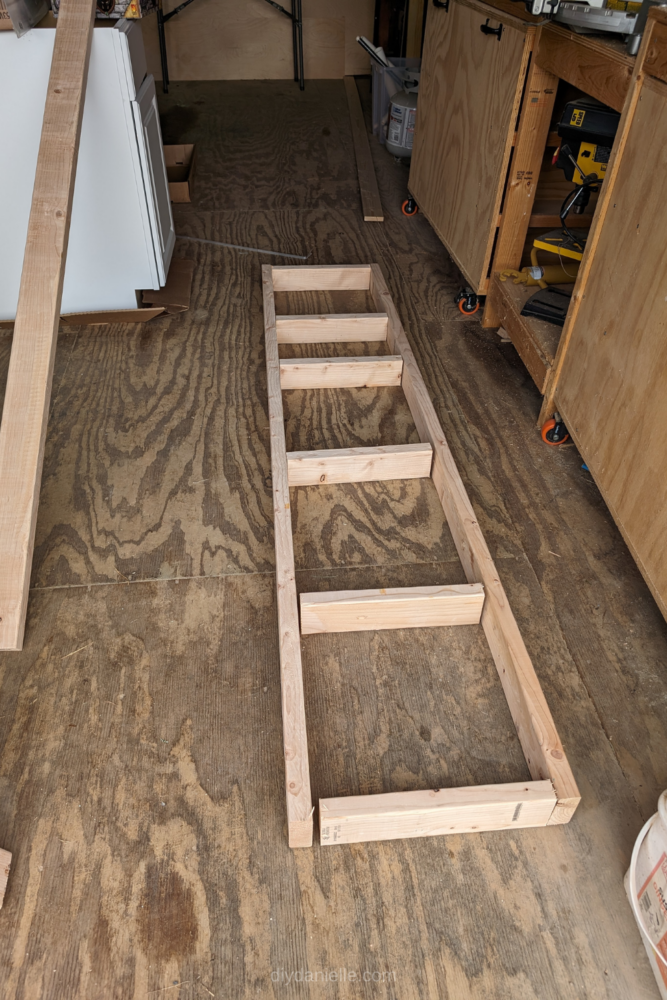
Step 2: Attach the wood pieces together to form a frame for the storage loft. Attach the cross sections by drilling through the long sides into the top and bottom of the support pieces and secure them with screws. Make sure they’re decently square–you can eyeball this if it’s just going in your shed like mine is, but you might want to make sure the pieces are perfectly perpendicular if the loft shelf is going somewhere highly visible.
Step 3: Place and level your loft frame. You might need an extra set of hands for this! Get the storage loft into place and use the level to make sure it’s perfectly flat so things won’t slide around when you’ve got them up there. Adjust as necessary.
My husband helped me hammer mine into place a bit because it fit very snugly between the studs and I was getting frustrated.
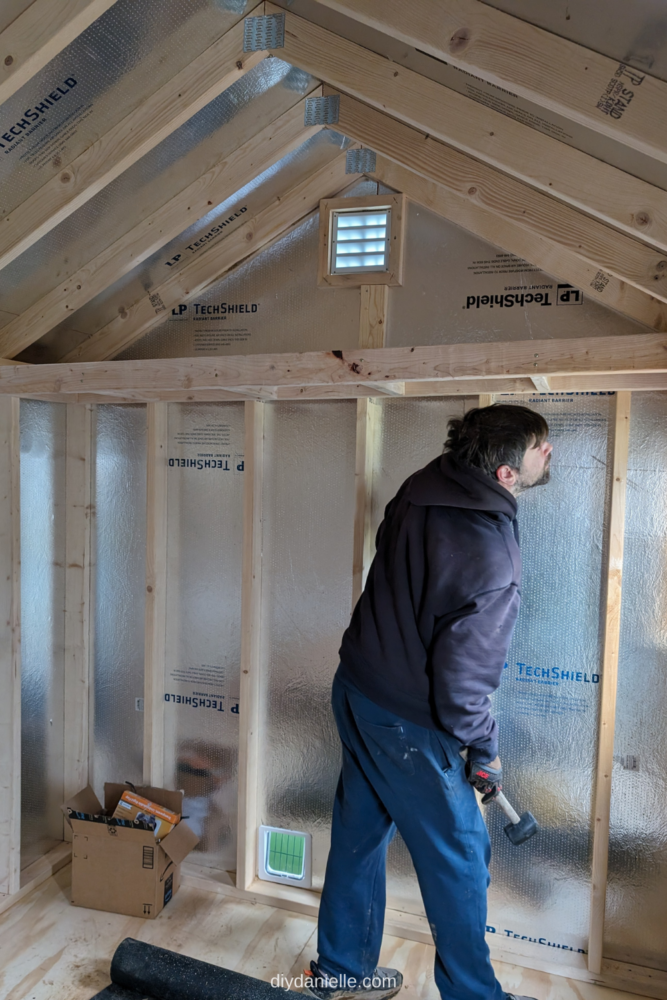
Step 4: Attach the loft to the studs of the shed using 3-inch screws (you can use longer screws if necessary but they have to be long enough to pierce all the way through the loft beam into the stud). Add screws to as many of the studs as possible to make sure the loft is secure and can bear weight without buckling.
Step 5: Cut a piece of wood for the top of your loft. This will create the actual shelf your items will sit on. I used subfloor and cut it to fit the length and width of the loft, which was 85 ¼ inches by 18 inches in this case.
Step 6: Place your subfloor and attach it to the frame. I used screws to attach it to the frame to make it stable. That’s the last step–you can immediately start using it for storage unless you plan to paint or decorate it!
Please share and pin this post! You can also post your project and tag the DIYDanielle team on Instagram @doityourselfdanielle!