
Dive into the world of permaculture and sustainable gardening with a comprehensive guide on creating a food forest in your backyard. Learn how to design, plant, and maintain a food forest that provides an abundance of fruits, vegetables, nuts, and herbs.
Gardening was always something that I attempted and had mixed results, but in the past few years, I’ve really dug into learning about permaculture and sustainable gardening. I have grown so much in what I know and understand about gardens, growing things, and food forests.
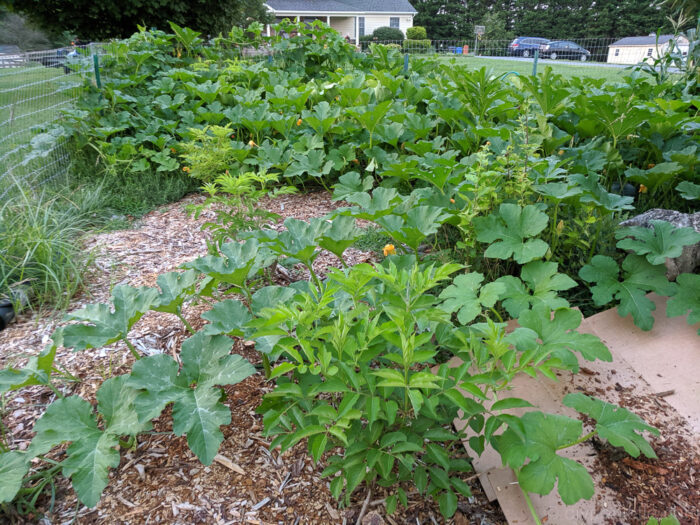
I started my garden as a food forest because I LOVED the idea of walking through a peaceful microclimate with shade trees, fruit to eat off the vine, and the sound of the water fountain in the pond! But it wasn’t easy! It took me several years of hard work to get it where it is today… and I can imagine that it will evolve and grow over time. I have learned SO MUCH.
I’m going to share some information about food forests, what I’ve learned, what has worked or not worked, and more. My #1 piece of advice though? Start small and expand as you grow. And plant the trees early. Trees and asparagus are a huge waiting game.
What is a Food Forest?
A Food Forest is a garden that is set up in a way similar to a traditional forest ecosystem to encourage biodiversity and sustainability.
The focus is more on using interplanting to encourage pollination of plants, pest control, and water management.
It’s a clever way to garden that may be frustrating to people who like a neat and orderly space. I love it, however, because it’s an incredibly intelligent way to garden and learn about gardening.
In many ways, once it’s set up, it’s a lot less work to manage than a traditional garden. But it’s also more difficult initially.
Nobody told me how hard it would be for the first few years. We dealt with weeds and not having enough plants and the cost of setting everything up. Moving around wood chips for mulch was backbreaking work for such a large garden. I’ve definitely found things that work and don’t work along the way. And some things don’t work for me, but might work for other people. Some things work for me and my climate but might not work for you in yours.
We are on year five of the garden and it’s finally to a place where it feels manageable and satisfying. The amount of joy I get from going out there and seeing my hard work pay off is immeasurable.
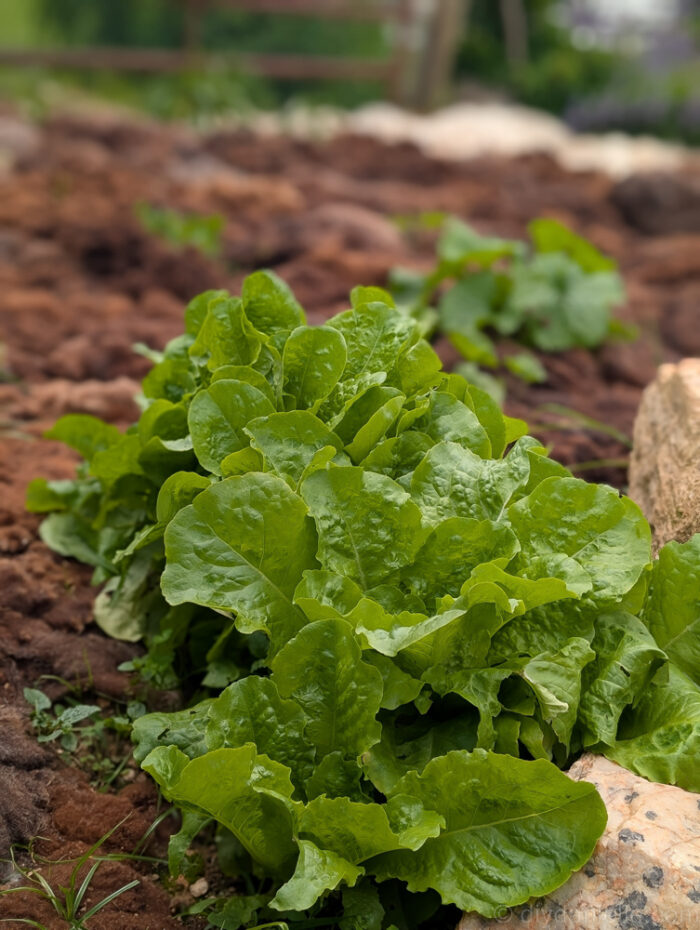
One of the benefits of doing a Food Forest is that you’re creating a miniature ecosystem in your garden. This even includes creating a microclimate. You’ll be able to walk in and see how the temperature drops with the different shade plants and trees. It makes for a much nicer environment to work in. It also makes a nicer environment for certain plants that have difficulty in the heat of summer such as broccoli or lettuce. You can grow them in shadier spots of your garden during the hot months.
What is Permaculture?
Permaculture refers to a method of gardening that focuses on paying attention to what happens in natural environments that works well for plants to grow. Then you implement that in a way in your garden that makes your garden less time intensive to manage.
The idea is that in the long run you will have a garden that is hands off and requires less watering, less pest management, and less weeding.
In theory, if there was an apocalypse and your garden was left alone for 10 years, you would come back and see all of the things still growing in there, although you’d likely end up with wild version of the food forest.
With a Food Forest, you set up fruit trees and other beneficial trees with diverse and beneficial plants underneath. While you might have other plants for food, you’ll also have flowers and vines as well.
These are called fruit tree guilds and different plants are beneficial for different fruit trees.
Layers of a Food Forest
These are the layers of the food forest. These are based on the layers of a real forest and how things grow in nature. Some plants can be in more than one layer.
Canopy
The canopy layer of your food forest is made up of your trees. You can add fruit trees and nut trees, or even other types of trees if you desire.
Not having all of your apple trees right next to each other can be beneficial for preventing disease from spreading.
Making sure to space them all apart appropriately so they have enough nutrients and sunlight to go around is important.
Sub-Canopy
The sub canopy is the layer in the forest where smaller trees or bushes grow. This layer can also include things like vines.
If you walk into a traditional Forest, you’ll see things like poison ivy growing up the sides of trees. These plants get less light, but thrive regardless. And often the plants work together in a way that supports their survival.
Shrub Layer
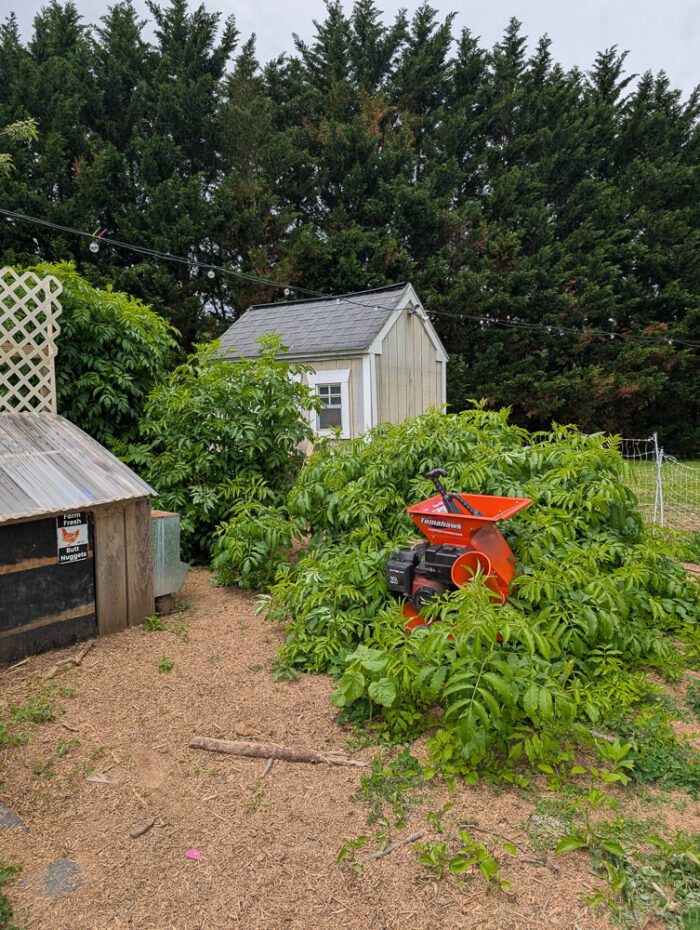
The shrub layer of the food forest is made up of smaller plants and shrubs that are perennial and will come back each year. Blueberries and raspberries work well here, and I also like elderberry. Some of these may need to be trimmed down or they will go crazy, however.
The idea is that your shrub layer shouldn’t get higher than 10 ft.
Herbaceous Layer
The herbaceous layer is the layer of plants that make up everything between the shrubs and ground cover.
Sometimes people also include ground cover as the herbaceous layer or use annuals in this layer as well.
Ground Cover
Your ground cover layer are the plants that grow close to the ground. They can actually create what’s called a living mulch. They help prevent weeds from coming in.
This takes time to develop. I have a few favorite ground covers including thyme and strawberry plants. They work well, but it’s an exercise in patience to let them grow in.
Rhizosphere
Your rhizome layer are the root crops like potatoes, carrots, and horseradish. These are predominantly annuals.
Vertical Layer (Climbers)
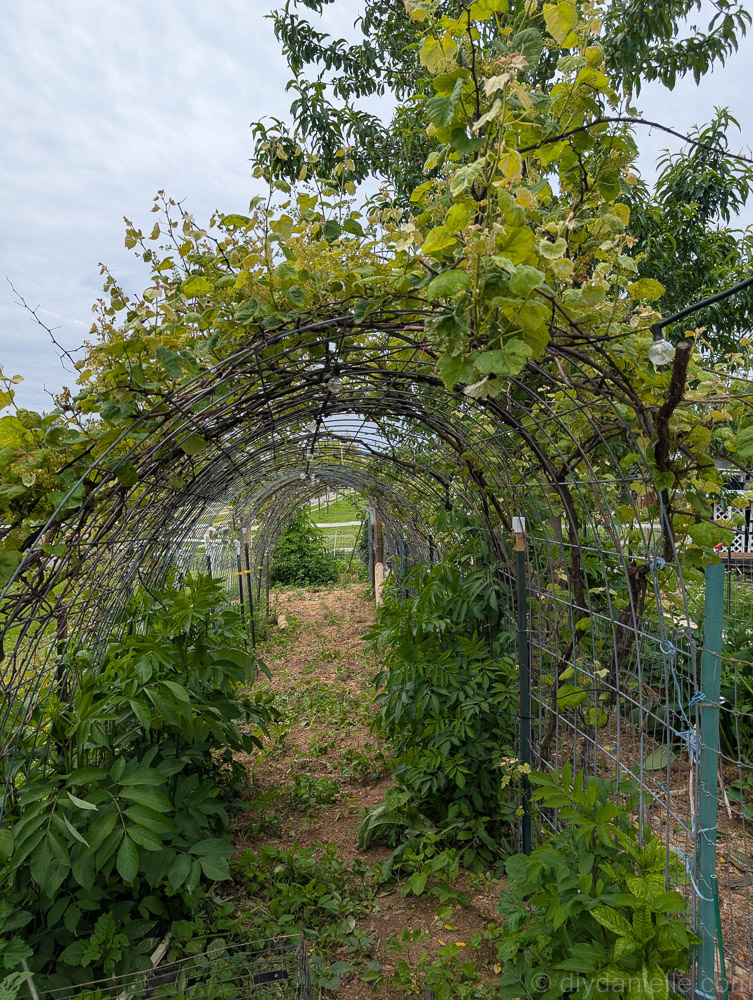
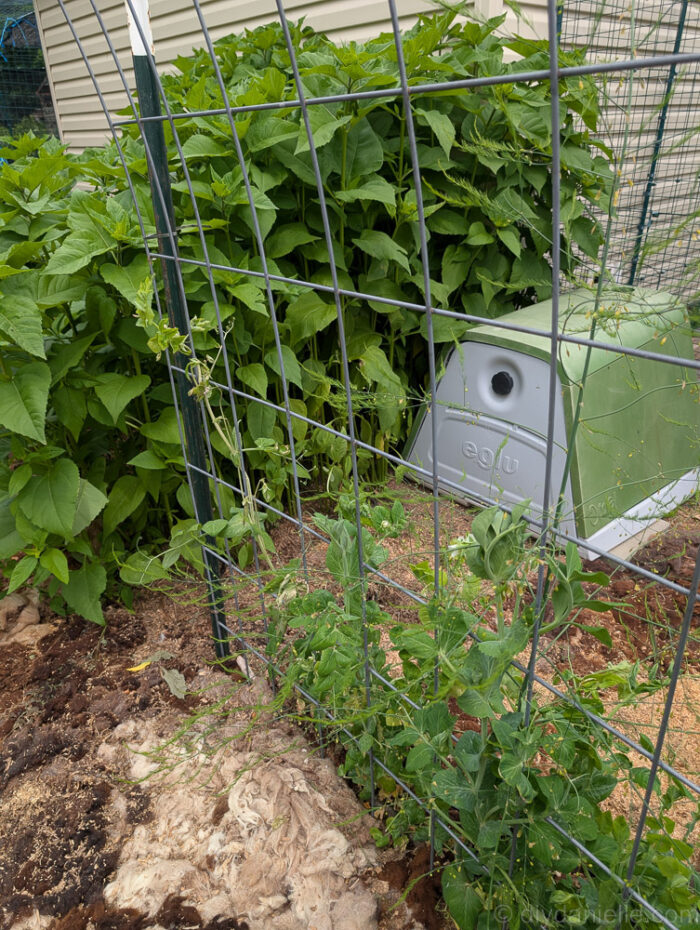
Your vertical layer can be made up of things that climb your trees or your arches or your fencing.
I really enjoy using grape vines like this and recently, I’ve let the native wineberry grow up one of my apple trees.
Letting those items grow up instead of out can help save you space in your garden and give you more space to walk.
I grow cucumbers and loofah over my guinea pig and rabbit cages to give them shade in the summer.
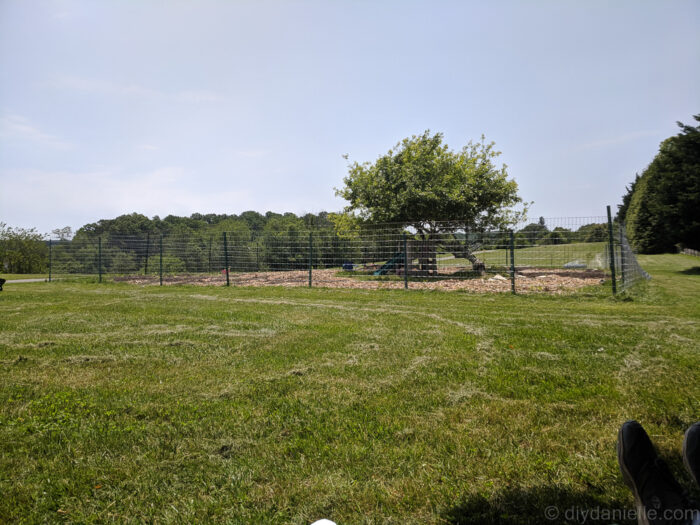
I also have large cattle panel arches over the chicken moat that surrounds my garden. I grow grapes and other items over those. That allows me to walk around my garden in the shade, and it also gives my chickens protection from predators and shade as well.
Mycelial Layer (Mushrooms)
Lastly, there’s also the mycelial layer which is the mushrooms that grow in the soil. Often you will find mushrooms growing in your food forest, even if you didn’t plant them there.
You can strategize and add spores if you want edible mushrooms, just ensure that you are able to safely identify the mushrooms that you pick and eat.
Mushrooms can be beneficial to your garden regardless of if they are edible or not, however. Mushrooms are thought to remove toxins from the soil and improve the soil health, helping boost the health of other plants nearby. Fungi helps break down organic matter, infusing nutrients into the soil.
Planning Your Food Forest
Factors to Consider When Planning: Climate, Soil Type, Space, Sunlight, and Access to Water
Factors to consider: climate, soil type, space availability, sunlight, and water access
When choosing the location of your Food Forest, consider the fact that it’s going to look pretty messy during the winter months unless you live in a really nice climate.
Mine is in my front yard because that was the only space that would really work for it, but it’s a bit of an eyesore in the winter.
It’s worth it though to see people’s reactions when they see it in the summer.
It’s just not something everyone can handle. A friend of mine does some pretty neat and organized gardening in these gorgeous raised beds and he shudders when he sees my garden. And occasionally I’m a bit jealous of how neat and organized his garden looks… Particularly those first few years.
Make sure your garden gets sunlight. This is pretty obvious, but you’re going to want to plan for that very carefully. You also want to make sure it’s not the wettest or driest spot on the whole property. You’ll need to be able to get water out to it and electricity is really useful as well.
The further from your house it is, the more expensive and the more difficult it is to run electric or water.
You’re also going to want to consider fencing. While your food Forest could eventually be open and accessible to wildlife, you do not want that to be the case initially. The idea is to plant enough food to feed the wildlife as well, but I found that wildlife will also eat your seedlings and not give anything a chance to grow.
I find it very helpful to have a solid fence that keeps the deer and my chickens out of the garden. I use electric fencing so having the electric available is really helpful.
The last thing to think about is your soil. Personally, I don’t stress too much about this.
I can amend the soil, assuming nothing is terribly wrong with it. The soil on my property is pretty crappy overall so I started my garden planning to amend it.
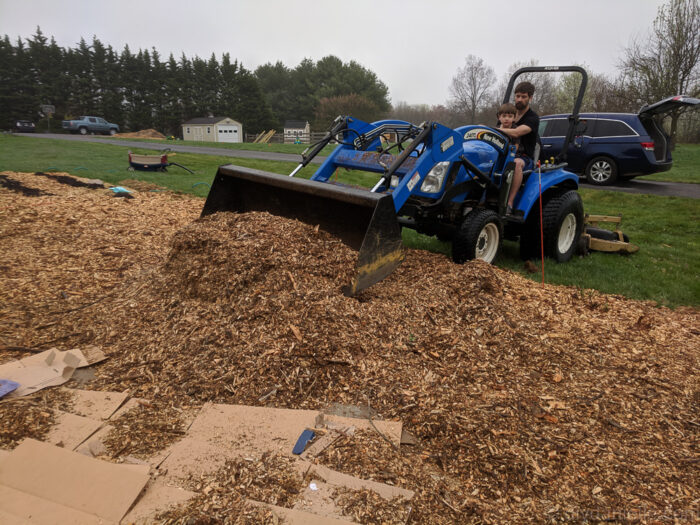
I ordered a ton of compost to put down and wood chips that eventually broke down and became part of the soil.
We have quite a bit of livestock and other animals whose manure we compost to add to the garden.
Being able to easily transport the compost into the garden is one thing to consider, although the downside of a food forest is likely that it will be hard to get a tractor into the garden once it’s truly grown up.
I keep one area where there is a large gate so I can pull a tractor in with a load of compost. I still need to manually spread it and move it around once in the garden, but at least it gets it a little closer.
Tools and Resources Needed for Planning
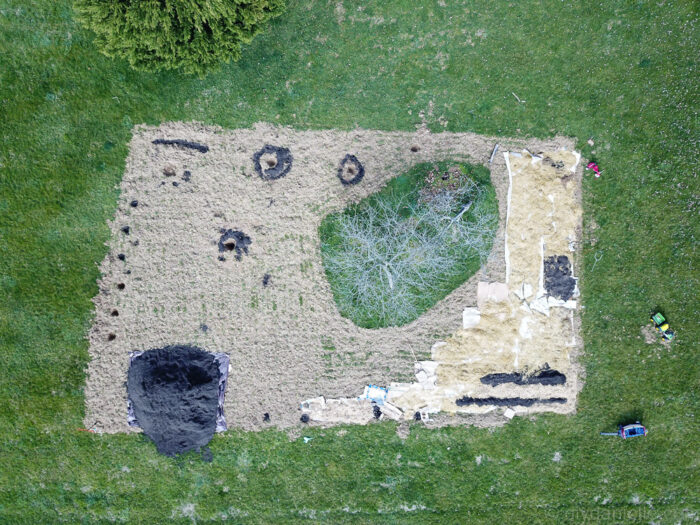
It’s really helpful to have an overhead view of your garden or the area where you hope to plant the food forest. I recommend starting small and working your way up unless you have a ton of money to invest initially. And ideally a ton of help for the physical labor as well.
If you have a friend with drone, getting a photo of the area beforehand may help you sketch out what you want to do.
You can also use something like Google Earth to get an image of your space.
Make sure to take measurements.
Initial Food Forest Setup
Cut your grass VERY low in the future garden area. I am able to cut mine to 2″ on my zero turn. You could also till the area if you prefer, although tilling isn’t generally recommended in the permaculture crowd.
Start by using cardboard to cover up grass. This will act as a weed barrier to keep grass from coming through. It will not prevent weeds from seeding from above.
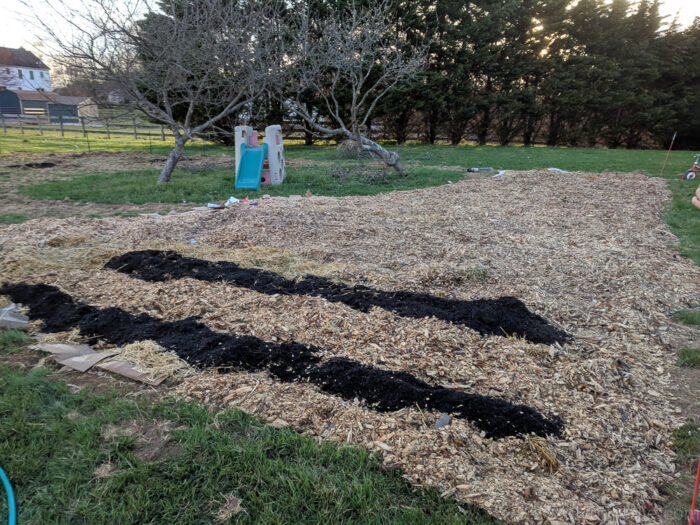
Have your chip drop and any soil unloaded near your space. If you have poor quality soil, you’ll likely want to add compost. In the drone photo below, you can see that we started covering the areas with cardboard, then compost.
This is an alternative view… there are wood chips, but I also laid in compost to plant in… you need to plant your plants in soil- not in woodchips. The chips will eventually break down and become nutrient rich soil in your garden, but for now, they’re there as a weed preventative and mulch.
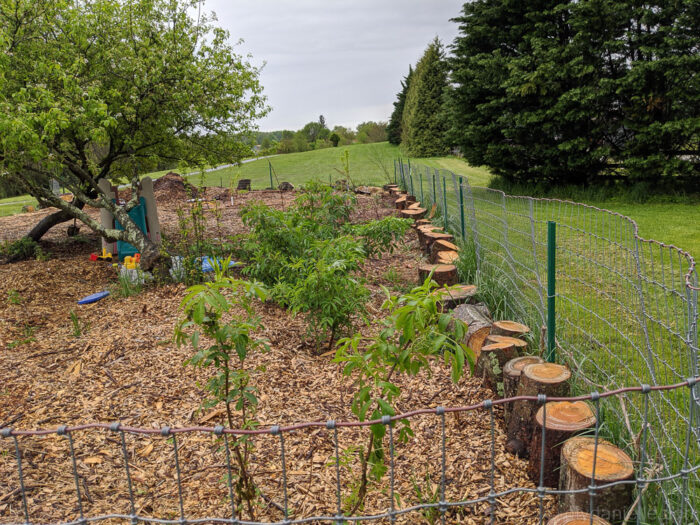
We added no climb horse fencing with t posts around the garden to keep out deer.
Pumpkin and elderberry growing later on that summer…
This is the area under the apple trees. I kept adding cardboard through the summer whenever I could get some… haha.
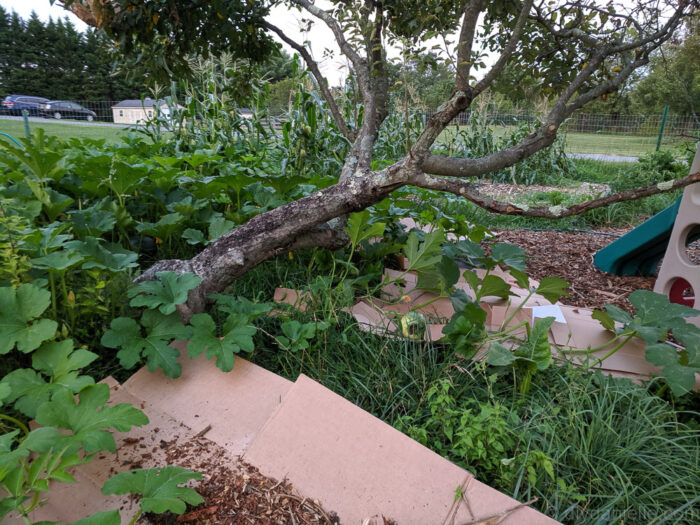
Elderberry grew quickly… it does well when it takes.
Here’s another view of it at the beginning of the Spring.

Soil Testing & Amendments
If you initially add garden soil, the soil may not need to be tested (depending on where you get it from). But once your garden is established, soil testing is helpful to determine if you have anything missing in the nutrient needs for your plants. Different plants need different pH soils, different nutrients, etc. and some nutrients are more vital than others. We did nutrient testing for our garden and pasture this year and I learned a LOT. I also realized that I’ve been missing a pretty important step.
Once you get the soil tested, you can either decide if you want to grow what will be happy in the garden or if you want to amend your soil to be better for what you’d like to grow. Eventually, the goal is for the garden to be self sustainable with less human intervention.
We opted to amend the soil this year and my plants are doing really well so I’m happy I did this. I also planted a bit earlier which was helpful for our location- usually I wait until the chance of frost has passed but we had a really warm Spring and I took my chances. The plants had much better luck getting established this year in the earlier Spring weather… our Mays tend to get really hot fast and this can stunt growth.
We also saw more rain than in previous years which is helpful and I’ve been more consistent about watering.
Maintenance and Care
Watering Strategies Specific to Food Forests
Initially, you’re going to need to water your garden quite a bit. The long-term goal is to create an ecosystem that needs less watering than a traditional garden would. But that takes time.
I really like having automated watering systems set up and that’s something that has been a priority this year. Prior to this I was trying to manage watering by hand or using sprinklers, but sprinklers water your weeds too. Not that the weeds ever have issues with drought… It seems like they can grow in the worst weather.
Using good mulch can help your soil retain water so that’s important to start immediately and keep up with over the years.
Mulching to Maintain a Healthy Ecosystem
Mulch, again, is a priority. I initially started with wood chips and did a lot of research into the Back to Eden Garden style. They rely heavily on wood chips and pine straw.
However, I found that wood chips were a giant pain (in my back) to move once stuff began growing in.
They’re very heavy, you get huge loads and it’s very difficult to scoop it up with a shovel or your tractor bucket due to the diversity of wood chip sizes in the loads.
While it’s certainly a good option and generally free to get loads of wood chips, there is a pretty substantial price in terms of upkeep. You’ll likely want to do a load every year.
Bags of mulch are a similar issue.
I have used pine straw quite a bit in my front garden, but my food Forest is quite large so it’s not my top choice there. Pine straw tends to be pretty pricey when you need a lot of it and it breaks down pretty quickly.
Like a lot of commercial mulch products, you’re probably going to be replacing or adding more of it twice a year, in the Spring and in the Fall.
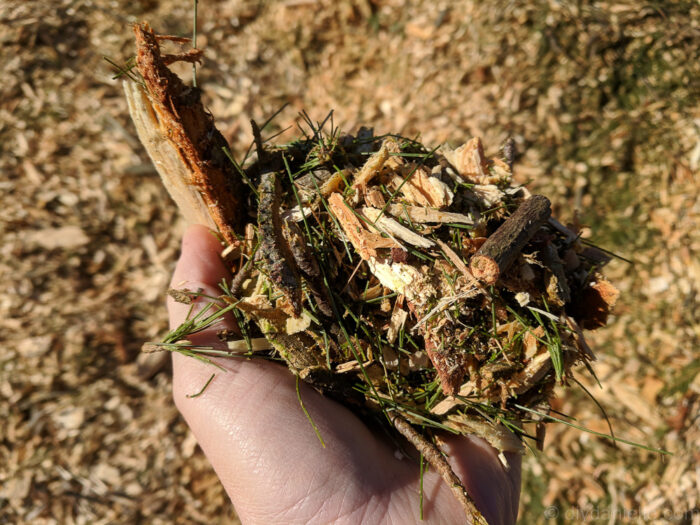
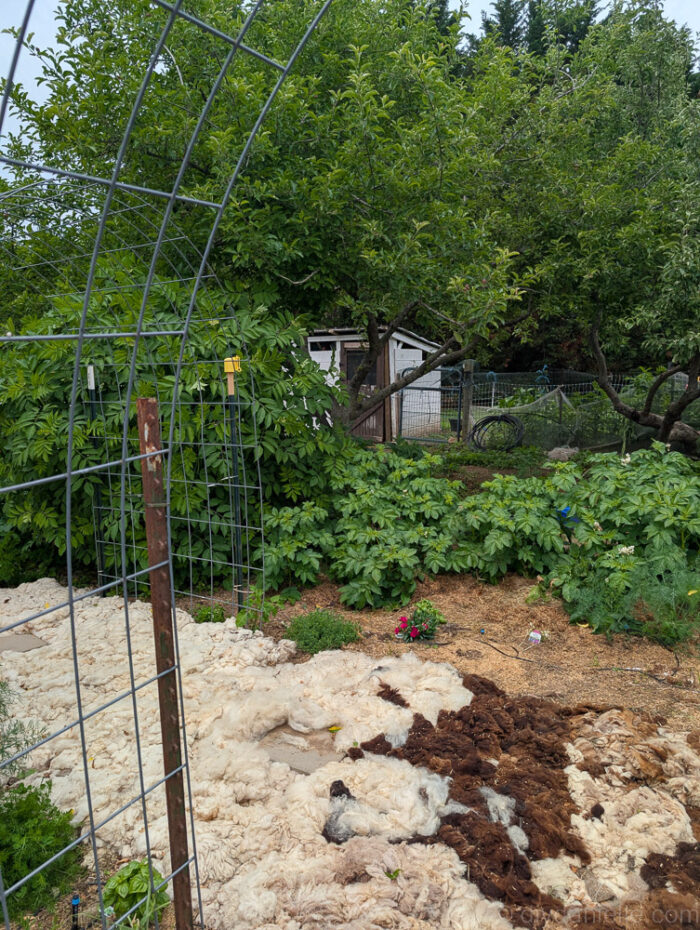
I can’t speak to how this will work long-term, but this year I decided to try wool as mulch because I have three sheep and their wool does not have a lot of uses for me.
I ended up needing quite a bit more than I had so I purchased large garbage bags of it from farmers who were going to toss it otherwise. The bags tend to sell for around $10 a bag.
The wool tends to be bad wool which has manure in it, hay, sticks, etc. This can have some downsides.
But overall, the wool is fairly lightweight to handle and I’ve found it to be a very good mulch. I also think it’ll take much longer to break down, so hopefully I will only need to replace it every 2 years or so.
The only thing I’ve really disliked is that it tends to have a little bit of a smell after the rain. It can be a bit musty.
It’s also really hard to pull the weeds out that do grow. They tend to wrap around wool and I don’t like to waste the wool by tossing it with the weeds.
But I’ve had a lot fewer weeds grow in through the wool than I’ve had with any other type of mulch.
The other option for mulch is to use a living mulch. This is really encouraged in a food forest. That said, it takes time for all of those living mulch plants grow and take over. So you’ll likely need some other types of mulch in the meantime.
The Importance of Pruning
Pruning is one of those things that you can ignore, but you might regret long-term.
Initially, a lot of plants benefit from pruning when they’re first planted. It tells the plant to put more energy into the root systems so the garden perennials have a strong base. This is a very beneficial thing long-term.
Once your plants are established, you want to continue to prune so that nothing gets shaded out too much. If you have too much shade, you won’t get the growth you’d like.
It’s a tricky thing because you need to be familiar with pruning for all of your different trees and plants. Everything has a different need.
Some plants need partial light. Some like shade. Some like full sunlight. Some get burnt in the full sunlight.
I often go into my garden and prune back items that are possibly shading plants I want to grow in better.
I let my peach tree get too tall and now I can’t reach some of the peaches. Some people prune them to keep them shorter so it’s easier to reach the fruit.
You end up doing a lot of walking through your garden and checking to see what needs love or what doesn’t.
Strategically pruning trees can also be quite beneficial to help them grow and survive.
I have two apple trees that are very old and the previous owner told me that they were always wormy. I’ve done some strategic pruning over the years to help the trees become healthier. I now get good fruit from them which is been extremely exciting for me.
How to Naturally Manage Pests and Diseases
Generally, people that have a food Forest want to do things in a way that uses the least amount of chemicals possible. That does not mean that we always avoid chemicals. Sometimes it means being strategic about when we spray pesticides or herbicides. Sometimes it means being strategic about how we spray them.
For example, we have an invasive tree in Maryland called the Tree of Heaven and it will absolutely take over any space in a very short amount of time. And we do something called the hack and slash method to kill it- we wait until the fall when the tree is sending all of its nutrients and energy back into the roots. We cut a gap in the tree trunk, then we spray herbicide into the gap and let the trees suck that herbicide into its roots.
This helps kill it and allows us to cut it down without ending up with tons of baby trees popping up the next year. It’s one of the only ways to kill this tree and even then it’s not perfect. We have tried digging it up by the roots, but it’s just not manageable to do without an entire gardening staff.
Controlling invasive species can be a very difficult thing to do in your garden and it’ll be important for you to find ways to manage it effectively.
Frequently fruit trees do need to be sprayed to control pests and disease. Some types of fruit trees are very prone to illness. Many farmers who want to be as organic as possible will choose when to spray them in a strategic way so they’re not spraying every week… There are certain times of the year that are good to spray for certain diseases or pests.
It’s all very complicated and a lot to learn, but you can always learn it along the way. I certainly didn’t walk into this with the knowledge that I have now. It’s been such a great opportunity for me to grow as a gardener and learn more.
Expanding and Evolving Your Food Forest
How to assess the success of your food forest and make adjustments
You will want to assess the success of your food forest each year. I like to go through and figure out what worked for me and what didn’t. I try to troubleshoot and ask gardening groups where I went wrong.
I discovered I hate wood chips and love wool mulch. Some people might hate wool. So much of this is personal.
I was killing every single lavender plant for a while until somebody told me they like to be dry. I loved lavender so much that I was watering it obsessively, hoping that would help it grow. Now I neglect it a bit and it’s thriving.
Ideas for scaling up and adding biodiversity over time
Scaling up is a lot easier once you’ve gotten an established Food Forest. It’s also a lot cheaper. Many of my perennials will come back each year and send out seedlings or seeds that I can collect and add to other areas.
Density in your food forest allows you to weed less and have fewer gaps for unpleasant plants to grow in.
Make sure to have a network of other gardeners to swap plants with.
Ensure you understand which plants are going to be invasive and if you want to try to control that or if you want to plant them in a container instead. I grow catmint, which takes over like every other mint plant, but it’s manageable because I dry it and use it to make cat toys.
I planted horseradish in one spot and decided that the chickens were killing it so I should move it. I ended up moving at and it’s come back in both spaces and I will never be able to get rid of it. It’s not a problem because I’ll harvest it and use it, but that might have been pretty inconvenient if I had put it in the wrong spots.
I’ve added quite a few plants that I know are invasive and quick to grow. I asked them if I think they’ll be beneficial. For example, comfrey makes an excellent mulch if you want to just chop and drop. It is easy to grow and it grows well underneath the trees, even in shade.
Weeds frequently don’t grow in around it so I don’t have to do as much weeding in those areas.
That said, your best bet is to find native plants that do well in your soil and like to take over. This allows you to grow in your garden without spending as much money because over the years the plant will take over and spread, helping you expand your garden with less work on your end.
I frequently dig up plants from around my property that are native, or dig up plants that I’ve put in my garden and that spread. This allows me to grow my garden and start new garden areas with those plants in them without spending any money.
Food Forest Plant List
Here’s a list of the fruit trees that I keep in my food forest:
- Cherry bush: Originally I planted 3, but I have 1.5 that appear to be alive.
- Apple trees (2): These two apple trees were originally here and I built my food forest around them.
- Pear trees (1): Originally I started with two, but one died. As they need a cross pollinator, I’ll be unlikely to get fruit from this.
- Peach tree (1): Redhaven
Here’s a list of the perennials that I keep in my food forest:
- Comfrey
- Raspberries
- Grapes
- Elderberry
- Yarrow
- Oregano
- Horseradish
- Hardy kiwi
- Asparagus
- Milkweed
- Thyme
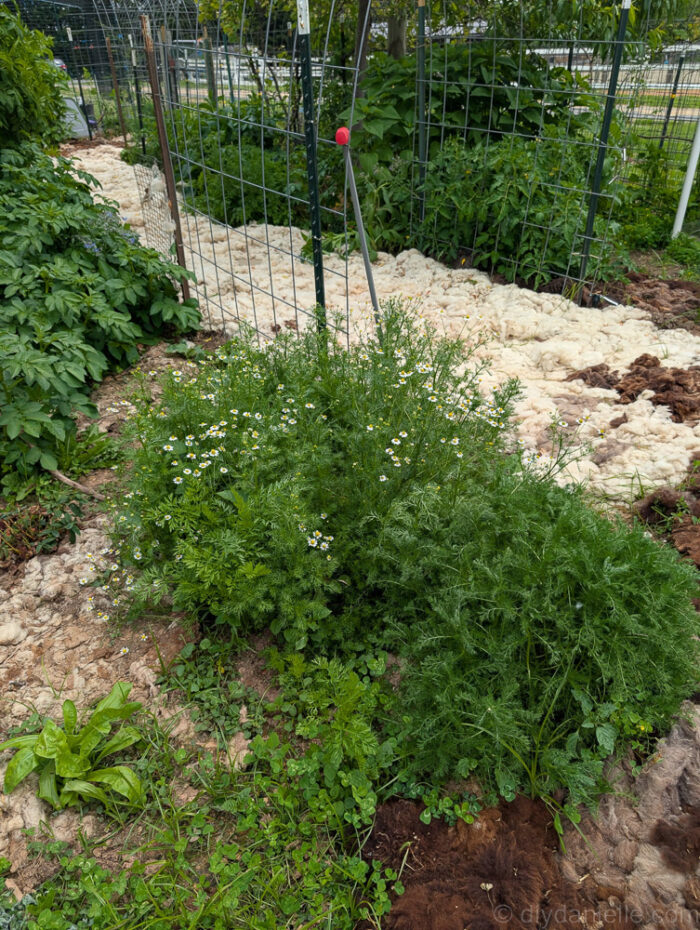
- Chamomile
I also have blueberry bushes with thyme and strawberries as ground cover next to my house.
My wish list items include:
- Paw Paw Tree
- St. Johns Wort (attempting this, but the plant is unhappy with me)
Here’s a list of the annuals that I plant in my food forest:
- Tomatoes
- Luffa
- Marigolds
- Pumpkin
- Watermelon
- Cantaloupe
- Zinnias
A few thoughts on selection of plants for a food forest:
- Certain plants are really hard to contain. This can be beneficial or not.
- Elderberry has been one of the hard to contain plants. I’ve had better success managing elderberry when it’s been placed with a wall on one side (ie. my barn) and then grass on the other. I can mow the area and keep seedlings from taking hold. This has been much easier than managing the elderberry popping up in my garden. Elderberry gets so tall that it can shade out plants that need a lot of sun which can be troublesome.
- Smaller plants, like comfrey are easier when they are hard to contain. They can provide value such as blocking weed growth or can be chopped and dropped as mulch. I really like chamomile, comfrey, strawberries, and thyme for this.
- Some plants enjoy shade: use those shady zones wisely or weeds will volunteer. I can never seen to plant enough under my apple trees!
Conclusion
Creating a Food Forest is extremely beneficial for pollinators, and you’re going to see a lot of biodiversity in it long-term. While it’s an initial investment, that investment pays off long term.
I’m hoping that by the time I’m a bit older, this garden will be a lot more hands off. This will give me more time to sit and enjoy my garden, and to walk through the space and appreciate all of the time and effort I dedicated to it.
After 5 years, I’m finally getting there. I’m still trying to control a few invasive weeds that have popped up. And I still have a couple of spaces that need filling in. But I love what I’ve created.
The plants survive with a lot less watering because of the mulch and the way the garden was set up.
I’m not using pesticides or herbicides on my fruit trees.
I’m able to use my garden to provide food for my family, my livestock, and pets.
And my garden works for me… I can sit under the apple tree to weed and utilize the shade as much as possible. My pond watering system sends dirty water to fertilize and water my plants.
Plants provide shade and protection to my chickens, myself, and the other animals.
The animals provide manure that can be added to the garden as compost. I love that it’s a sustainable system that eventually will mean less work for me.
I hope this helped you in your journey. I encourage you to give it a try, and remind you to not give up. Some things take time and effort, but they’re worth it.
It’s absolutely worth it.
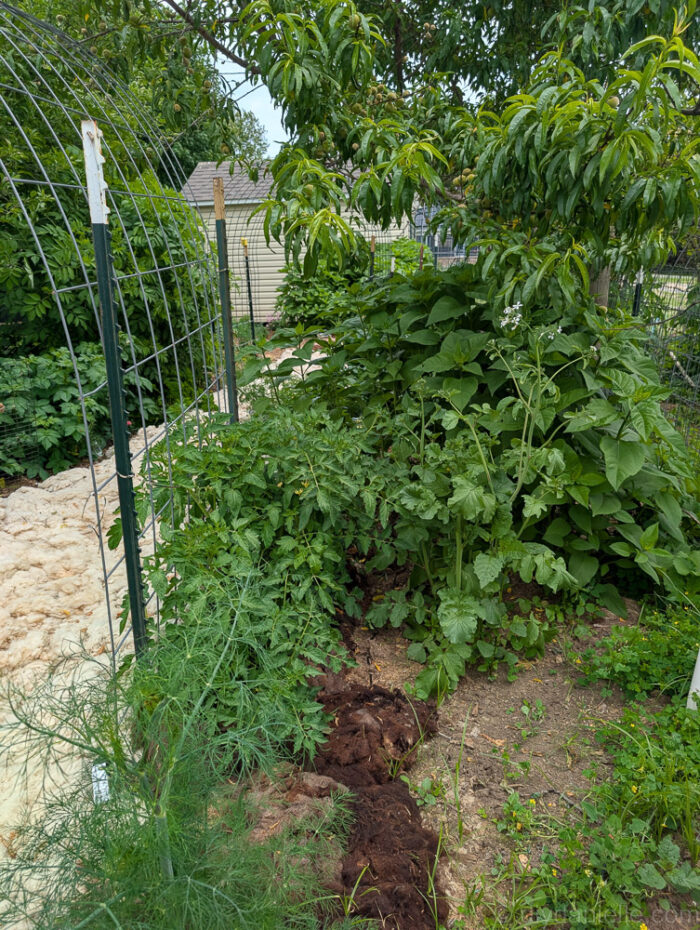
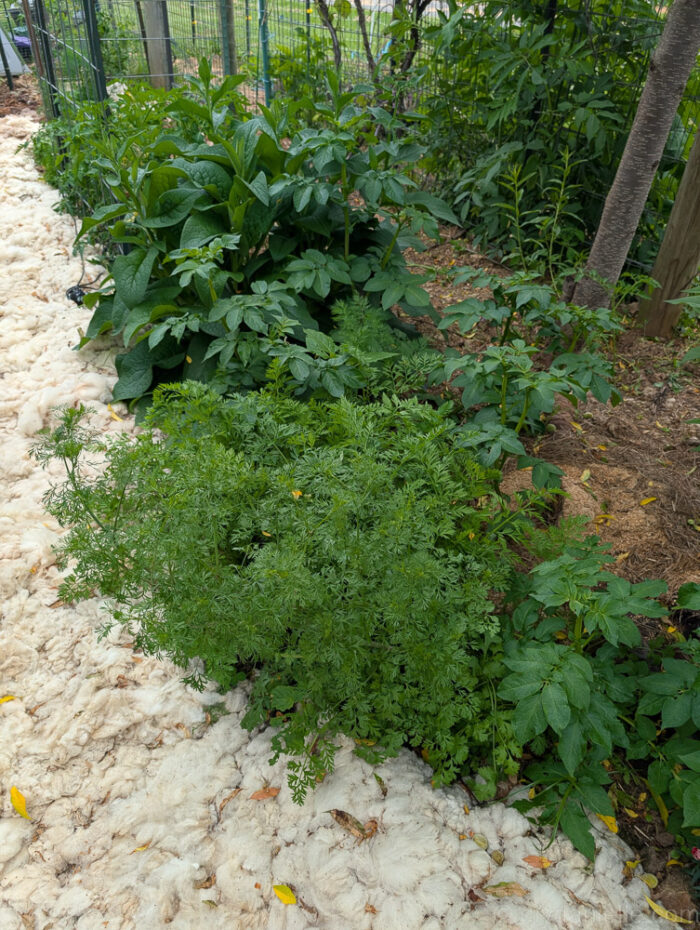
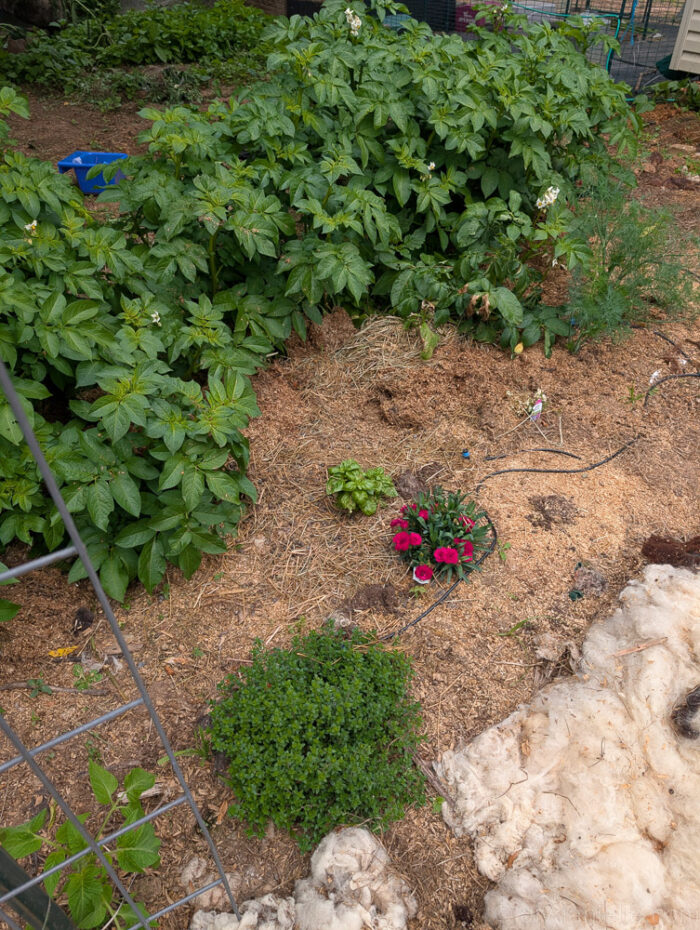
May 2025 Food Forest Photos
- Cattle panels and t posts make a great arch to walk under and a place to grow vining plants vertically.
- Wool lines the pathways to show where it’s okay to walk and to reduce weeds. When I get more wool, I’ll use it for around the plants once they’re larger.


Food Forest Progress Videos
I have a bunch of videos that I’ve put together to give a virtual tour of the progress on my food forest.
- Food Forest: Initial Setup: https://youtu.be/_GAE3SAeGi8
- Food Forest Tour, May 2025: https://youtu.be/MS1Ili4y1ME
- Chicken Moat Tour, June 2024 (this shows the garden as well): https://youtu.be/4r3wwz4KuQo
- Wool as Mulch in the Garden: https://youtu.be/IRw3KOLRj6E
- Food Forest Tour, Fall 2022: https://youtu.be/0BugGHV_MW4
- Food Forest Tour, July 2022: https://youtu.be/ErBqh0NcV0E
- Food Forest Tour, June 2022: https://youtube.com/live/4XBADR2pkWk?feature=share
- Food Forest Tour, Early Spring: https://youtu.be/D0tGThtUeCY
- DIY Chicken Moat Garden: https://youtu.be/fHflFcYVFY4
Further Resources
- Gaia’s Garden: https://amzn.to/4cGgvdb
- Mushroom Cultivation: An Illustrated Guide to Growing Your Own Mushrooms at Home: https://amzn.to/45PDsZy
- The Fruit Gardener’s Bible: A Complete Guide to Growing Fruits and Nuts in the Home Garden Paperback: https://amzn.to/3VOGGb7
- Edible Landscaping with a Permaculture Twist: How to Have Your Yard and Eat It Too: https://amzn.to/3xQIYhE
Please share and pin this post! You can also post your project and tag the DIYDanielle team on Instagram @doityourselfdanielle!