Looking to convert a shed into a living space? Here’s tips on running electricity to you shed and how to save money.
When we started our she-shed project, we were hoping that the electric currently run to the space would be sufficient. It quickly became apparent, however, that we would need to do additional work. Electricity was the number one expense for our she-shed project because we weren’t comfortable DIYing it and we didn’t have the equipment to trench.
I won’t speak on how to install the electric as I don’t like to cover electric or plumbing work on this blog. We often hire this sort of work out unless it’s a very small project because there are a lot of risks if you do electric or plumbing work incorrectly.
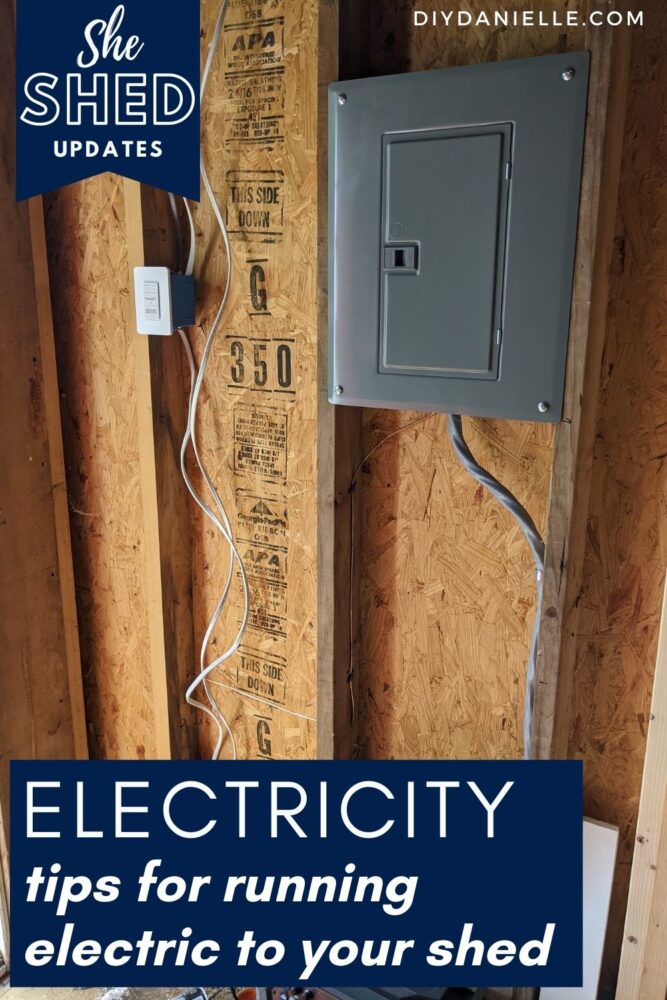
For this project we did some minor electrical work inside the shed such as installing the ceiling fans and installing outlets. We hired an electrician and a boring company to run electric from our house and put a panel in the shed.
The shed can now support the electricity for a computer, my heat press, my sewing machines, and the mini split that is heating and cooling the room.
Here are my tips for saving money on running electricity to your shed renovation project, as well as some other things to consider.
This post may contain affiliate links which may earn me commissions should you click through them and take certain actions. As an affiliate for Amazon, Cricut, xTool, Home Depot, and other sites, I earn from qualifying purchases. Please DIY carefully. View my full legal disclosures here.
The majority of my content is generated by me, as are 99% of the photos and videos, but I utilize technology for titles, descriptions, video editing out all of my ums, and occasionally for text overlay on images.
Please read the whole post so you don’t miss any important information!
What is Conduit? Should I Use It?
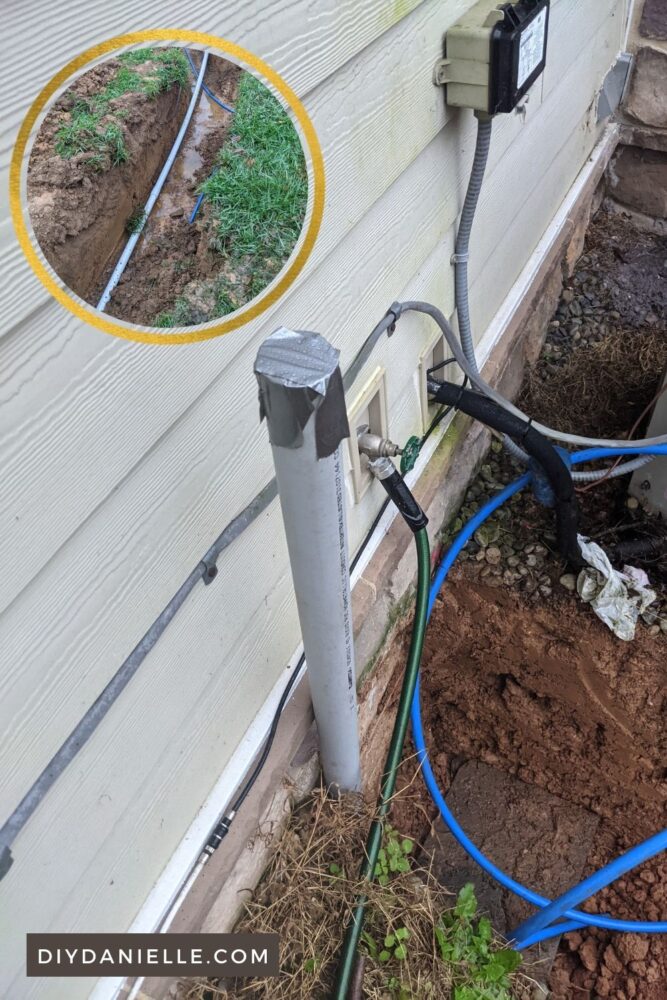
Conduit has two main definitions: it’s a channel for moving some type of fluid OR it’s a ‘tube or trough’ for protecting electrical wiring.
In our project, the contractors used PVC pipe for conduit; the electric lines were run inside the conduit. The benefit to running conduit is that you can replace electrical lines more easily, without needing to dig up your yard again. Your wiring also has more protection from moisture, digging, etc.
While conduit will cost you a little bit more money to have put in, it can be helpful if you think you might have further renovation projects that may need it. We run conduit for most projects that we do which allows us to upgrade electric at a later date if needed.
For shorter distances, conduit may not make sense. But for the 250′ that we were running our electric, the cost of digging was quite substantial. We don’t want to have to dig it up again.
Distance Impacts Cost
One of the factors that impacted the cost of our project the most was the distance of our shed from our house. Boring is very expensive and currently the supplies for electrical wiring are also at a high. This really drove up the cost of our project.
Our shed is 250 ft from the main electrical panel in our home. Pricing for the project was calculated by distance. I’ll break down those numbers at the end of this post.
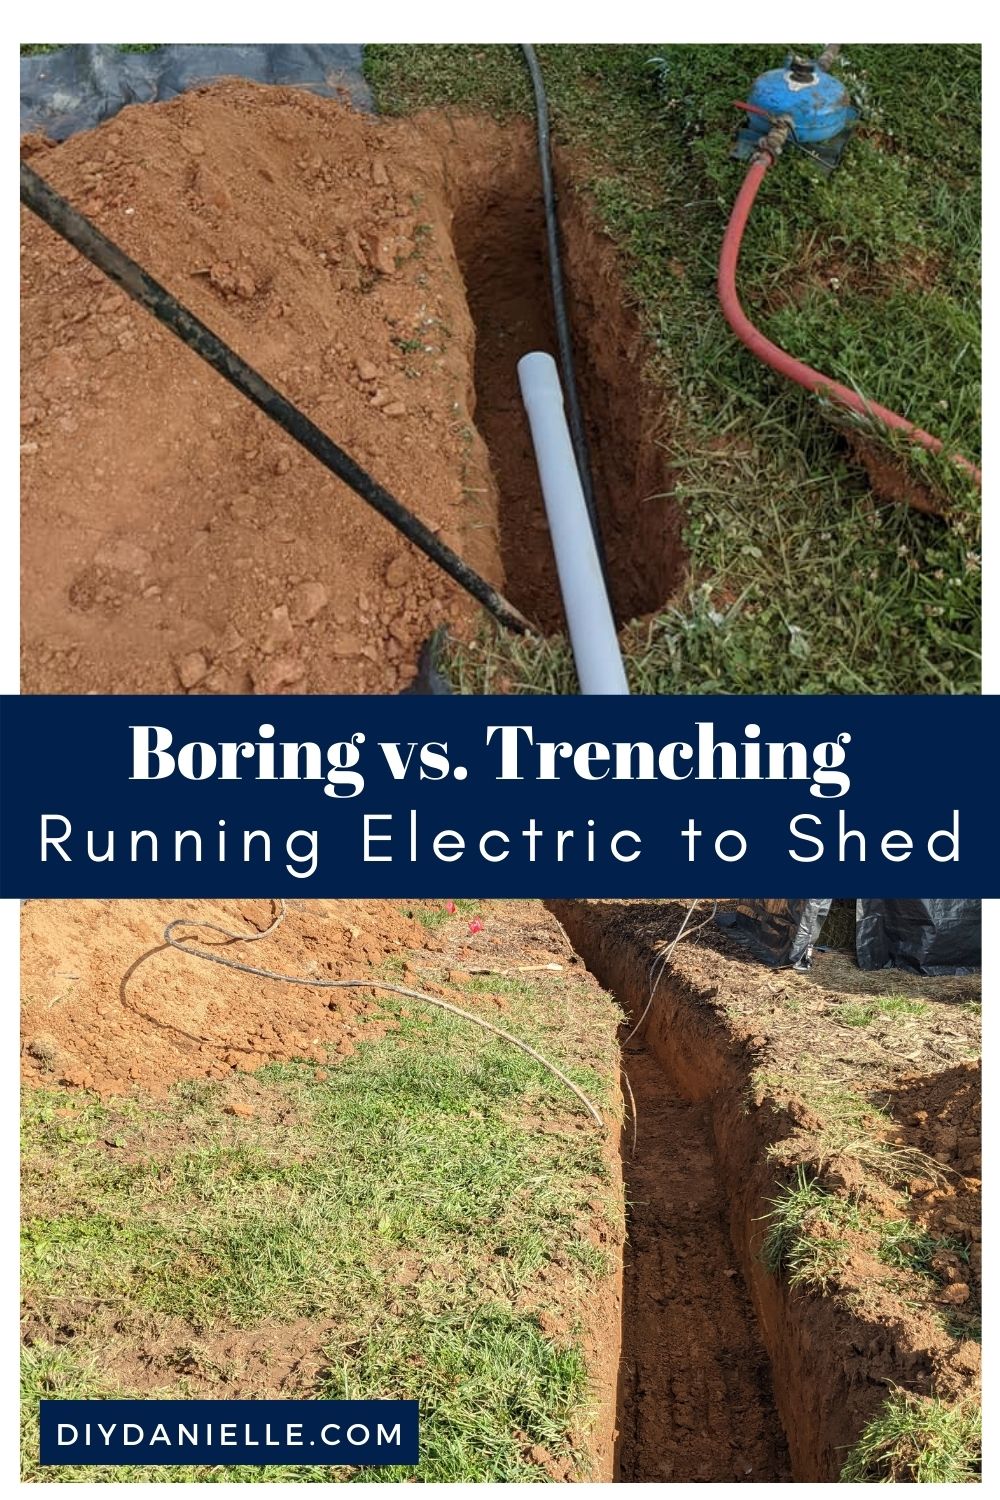
Boring vs Trenching
We opted to do boring instead of trenching for this project, but I believe it’s worth pricing both out.
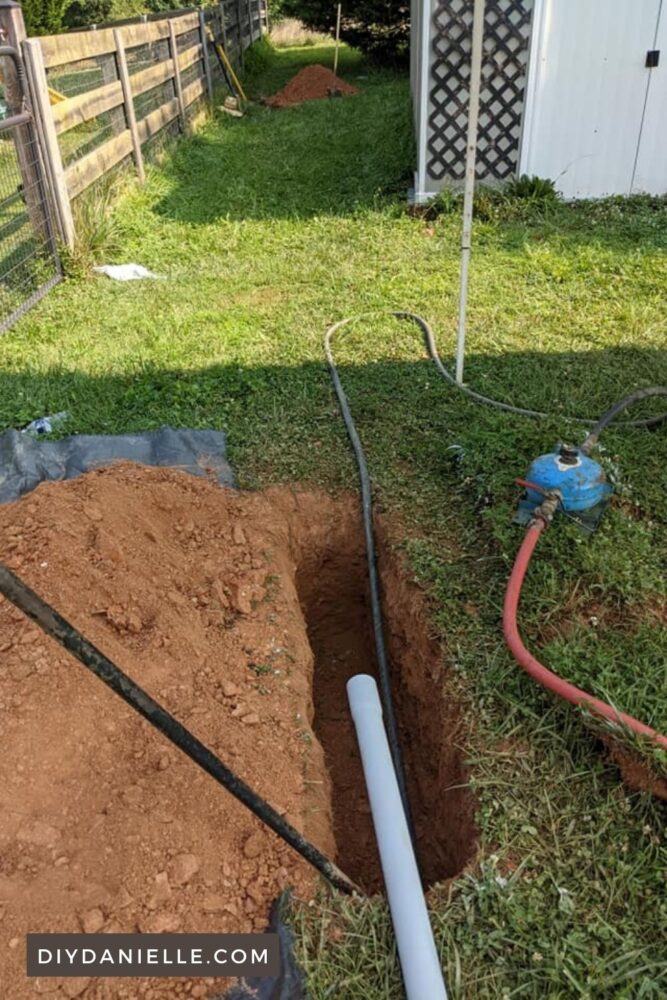
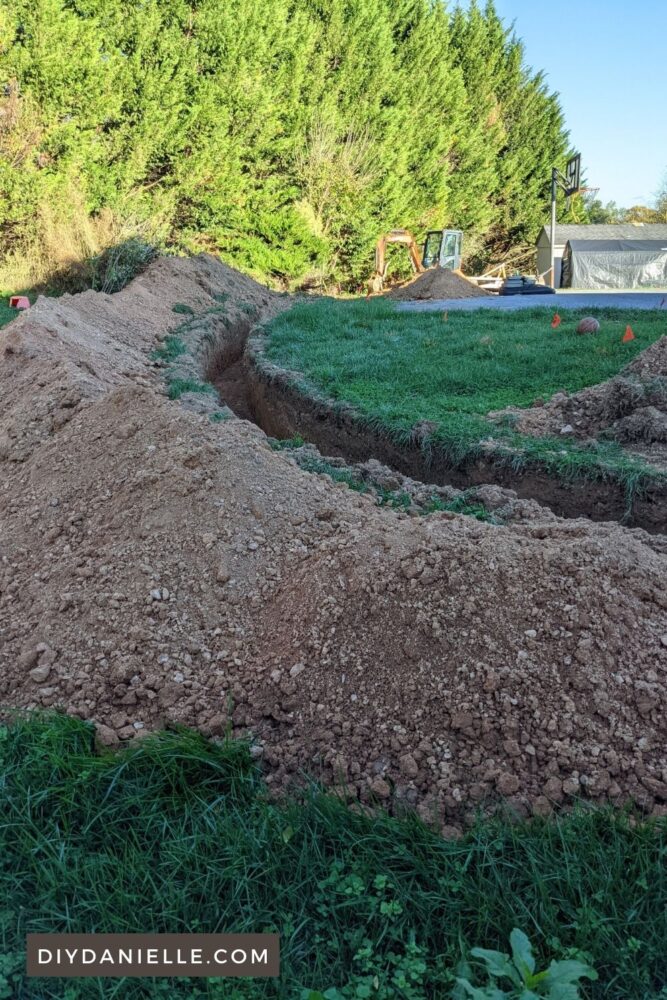
Boring is beneficial if you have a lot of wiring or a lot of other stuff going on underground. They dig a hole at the beginning, the end, and at any turn. Then their machine digs a hole like a gopher from hole to hole.
Once the area is completely dug, they can push the conduit inside the tunnel and then the electrical wire gets run through the conduit.
As an alternative, trenching will dig up a deep hole from your start point to your end point. This can destroy grass and may impact landscaping. I believe trenching may be slightly cheaper, however. Trenching is also much easier to DIY and you can rent equipment to do it yourself.
In our case, the distance was so substantial that we felt it made more sense to do boring. We have another project we worked on later and that project was trenched. It tore up our lawn and we need to do some reseeding.
I believe boring and trenching costs will be impacted by the soil in your area, as well as how far below the soil your frost line is. You can search for your address on this National Weather Report website to see what your frost line is, or check your local codes. Usually they have rules for how deep to bury wiring. In our area, we need to bury them 36″ deep.
We are in Maryland so we have winters that are fairly cold but it’s not as bad as Montana. In an area like Montana, your frost line is going to be much further below ground and cost more money to dig up. That said, our soil is very, very rocky and hard to dig through so I think that impacts the price as well.
Always make sure you call Miss Utility to have your property marked for underground electric, water, gas and cable lines if you plan to DIY.
When we hired a company to put in underground water to our horse field, they trenched and hit the cable wire DESPITE digging about 2-3′ from the Miss Utility markings. As we have completely documented the distance and have photos to prove they dug per the rules, we shouldn’t need to eat the cost of that epic mistake.
Here’s a photo of the damage… yikes! They actually hit a few lines… one was an old telephone line that wasn’t in use. But the other was our internet and it took a few days to get us back up running completely.

Project Jobs to DIY vs Hire Out
If you’re comfortable with DIY’ing parts of the project, you can save money. Most of the time you need to get your electrical work inspected and you may need a permit. Personally, I prefer to hire out that part of the job.
The main part of this job that could be easily DIY’ed and save you money is the trenching. You can rent a trenching machine and DIY that part of the project. You can even purchase the wiring you need and have it ready for the electrician to install; just make sure to buy the right products.
Don’t skip the inspection or permit, particularly if you’re DIY’ing. Otherwise you might end up burning down Cheryl’s She Shed.
Size Matters: Getting the Right Wire for Your Needs
Choosing the right electrical wiring for your needs is important. If you overload the wiring by running something that needs more “oomph” than your wiring supports, you can overheat the wiring and potentially cause the wires to melt. This is a fire risk. Circuits are designed to help prevent this by shorting out if you do the bad thing, but they aren’t fool proof.
The electrical wiring that was originally run to that shed was perfect for charging my phone or running a lamp so I could see. But it couldn’t support anything significant. Some products require more power, such as HVACs or appliances.
Electric wires in the USA are color coded. I recommend speaking with an electrician to decide what you need to have installed base on your plans for your space. If you’re making a fun reading nook or drawing space in your she shed, you may not have the same needs that I did.
Breakdown of Cost for an Electrician Installing Shed Electricity
Running electricity to the shed and using a qualified electrician was over half the cost of our total renovation. We paid $8,000 to have the electric installed (including boring).
We also had additional electric costs, such as the two ceiling fans for $258, as well as the cost for individual outlets and the wiring for inside the shed.
The person that installed our mini split charged $780 for the project and he did some of the electrical work inside the shed to hook up the mini split to the electrical panel.
This the breakdown of the electrician’s bill, which included the boring costs:
- Main breaker panels 100/125 AMP surface: $1561
- Main ground system: $664
- Full day helper: $268
- 250′ of underground boring: $2390*
- 40-80A 240V circuit: $3999*
*The two items with the asterisks are both impacted by distance I believe so you can see that the price was way higher because of how far the shed was from our house.
We did not believe our shed could be easily moved because it is quite old and built on heavy duty posts in the ground. But it might have saved us money if we could have moved the shed closer, even considering the cost of moving the shed.
Please share and pin this post! You can also post your project and tag the DIYDanielle team on Instagram @doityourselfdanielle!