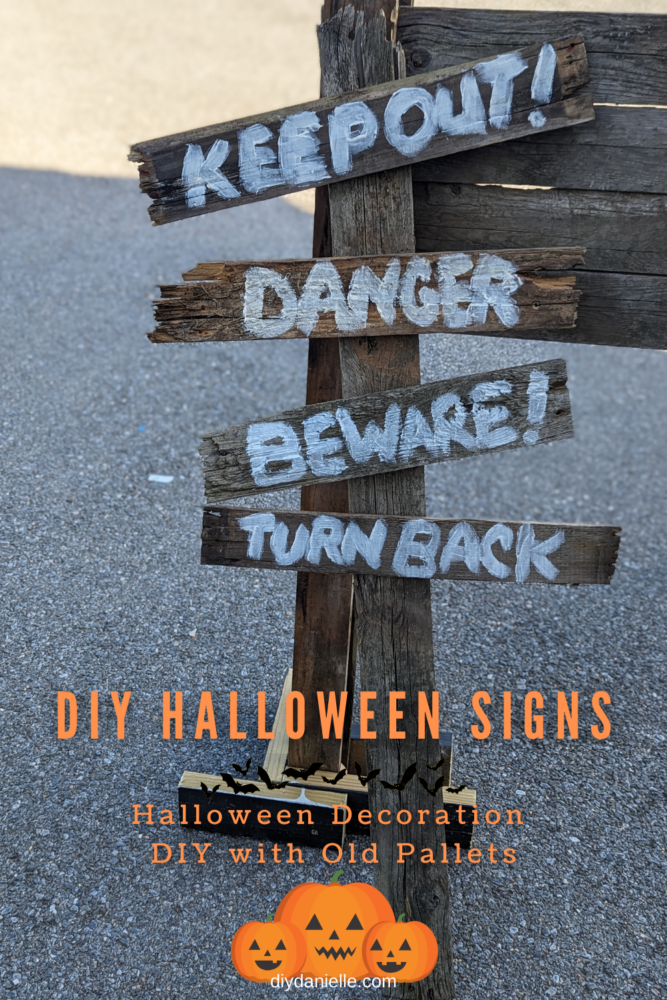
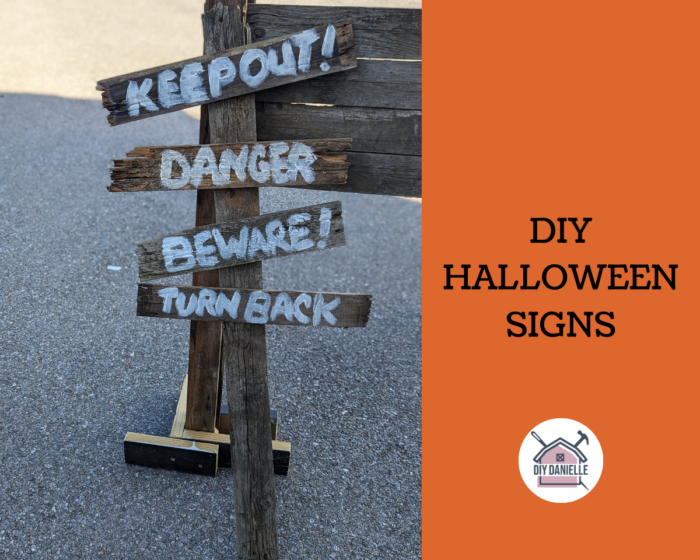
How to make some spooky signs for your Halloween trail! These signs are easy to make with acrylic paint, wood glue, and old pallets.
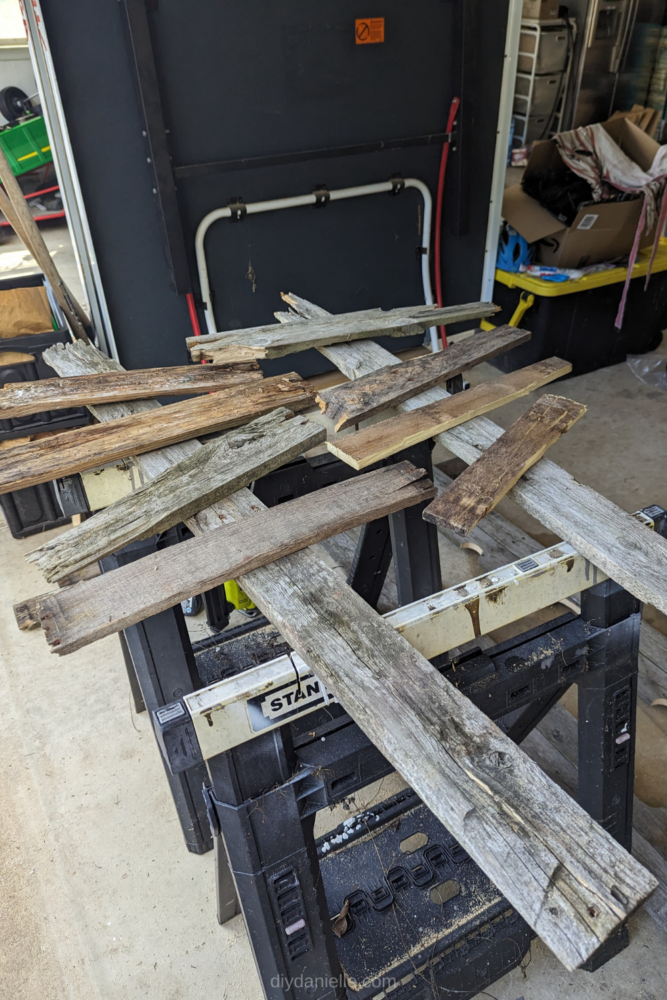
We do a Halloween trail every year and I am currently working on some new decor for our trail. I’m using old pallets for a lot of the projects as they have a rustic look, but they will last longer than some of the cardboard items that we made last year. I used the WORST pallet pieces for these… I really like the look of them broken and aged. It gives it that extra spooky feel!
Make sure to check out the DIY Stocks that I made for our skeleton in the jail section of the trail!
This post may contain affiliate links which may earn me commissions should you click through them and take certain actions. As an affiliate for Amazon, Cricut, xTool, Home Depot, and other sites, I earn from qualifying purchases. Please DIY carefully. View my full legal disclosures here.
The majority of my content is generated by me, as are 99% of the photos and videos, but I utilize technology for titles, descriptions, video editing out all of my ums, and occasionally for text overlay on images.
Please read the whole post so you don’t miss any important information!
DIY Halloween Signs
This one is super simple.
Supplies
- Old pallets, disassembled
- White acrylic paint
- Small paint brush
- Wood Glue https://homedepot.sjv.io/5b4JQo
- Ryobi Airstrike https://homedepot.sjv.io/qn7Zbj
- Optional: Cricut and Permanent Vinyl
Tutorial
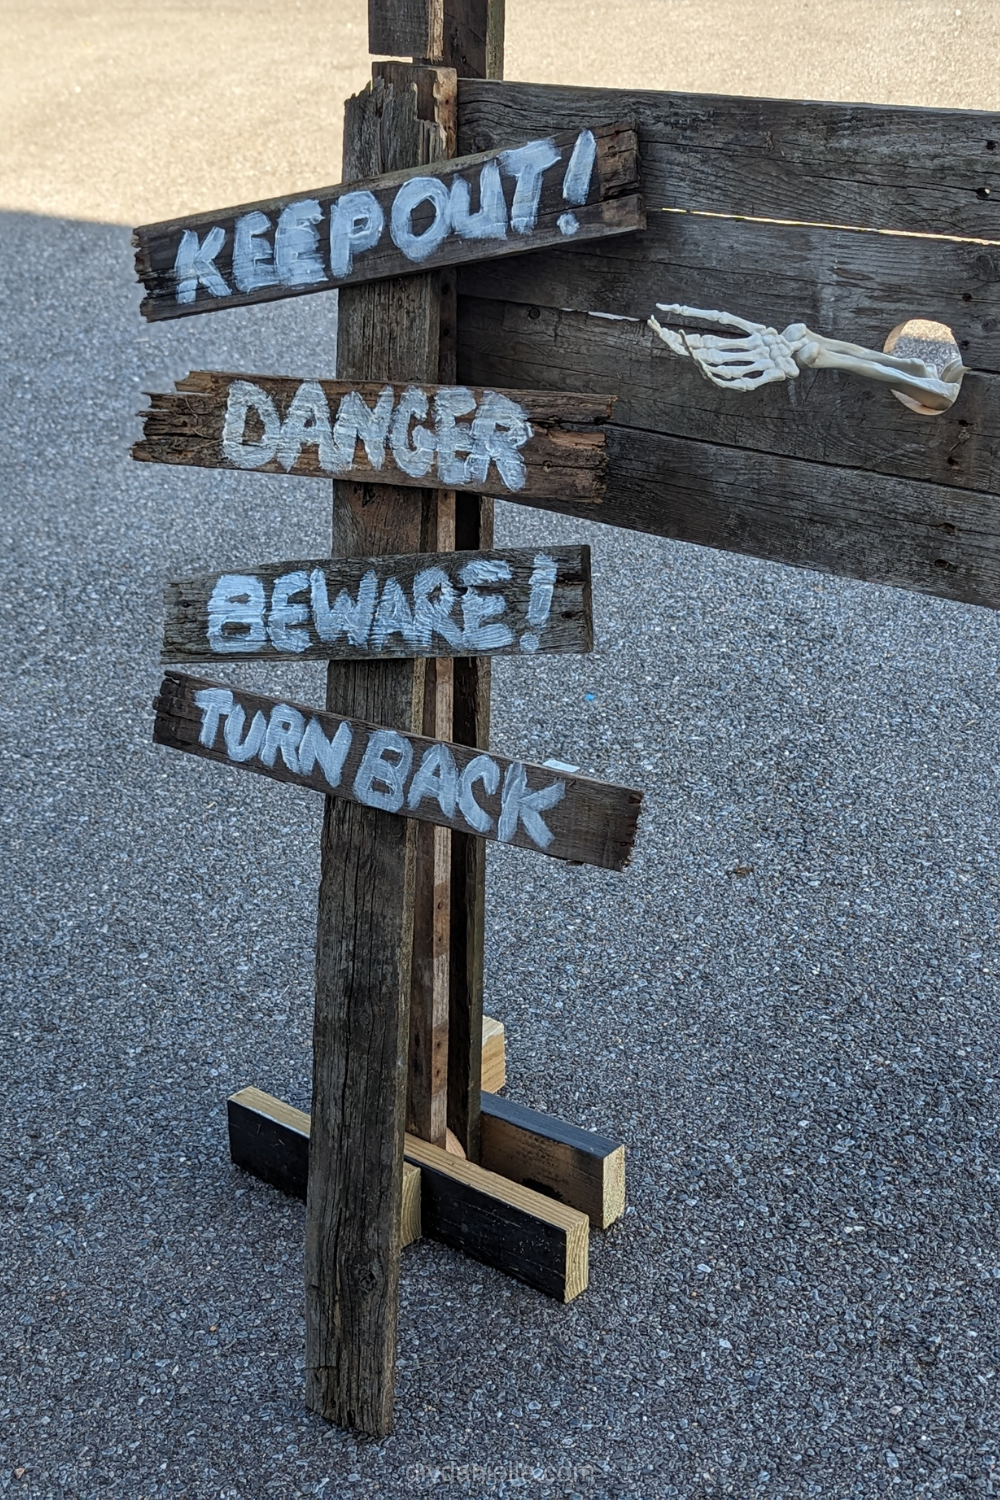
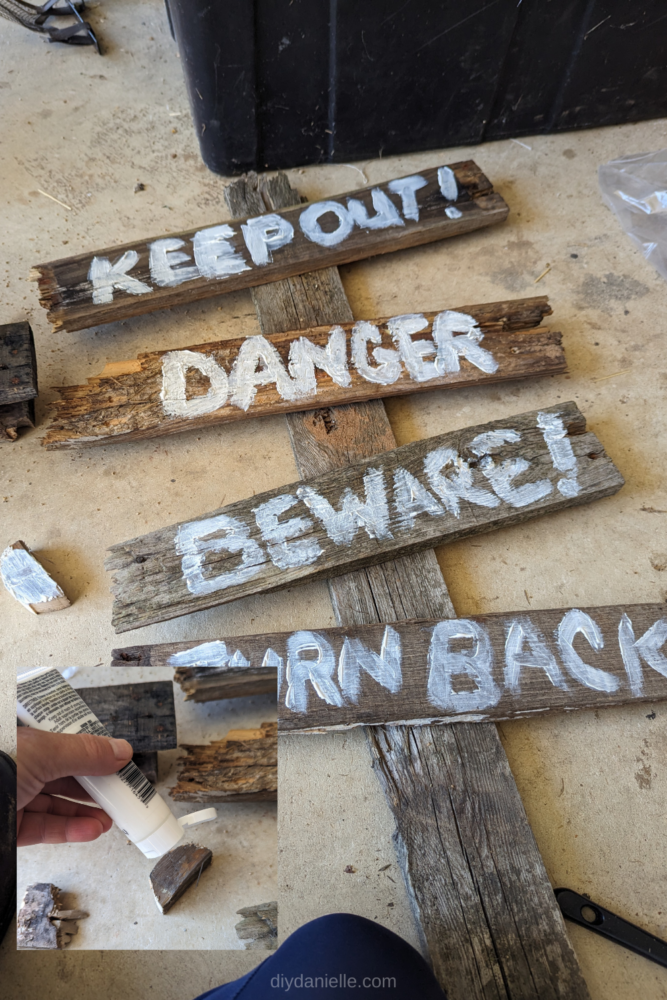
Step 1: Disassemble some pallets. Grab your SHORTEST pieces… preferably ones that broke a bit and look rough. Also grab a piece for your post.
Step 2: Glue 4 short pieces to your post, in varying positions. I wanted it to look messy- not nice and neat. I laid them out first to eyeball it and see what I liked best.
Step 3: Let glue dry. You can weigh the wood down or use brad nails to attach the pieces so they don’t shift while drying.
Step 4: Use a small paint brush to use white acrylic paint to write in your text. It takes a few coats of paint to get thick enough… let dry between coats.
Alternatively, you could use a Cricut and permanent vinyl to add lettering, but I like the messy look to the painted version better.
Use the Discount Code DIYDANIELLE on cricut.com for 10% off any cutting machine or heatpress (no minimum). Excludes: materials/accessories/mystery boxes/etc. Applies to US/CA only, code expires 12/31/23.
Here’s what the Cricut version looks like… meh. I normally like Cricut projects, but this one was too neat for a project that isn’t supposed to be neat.
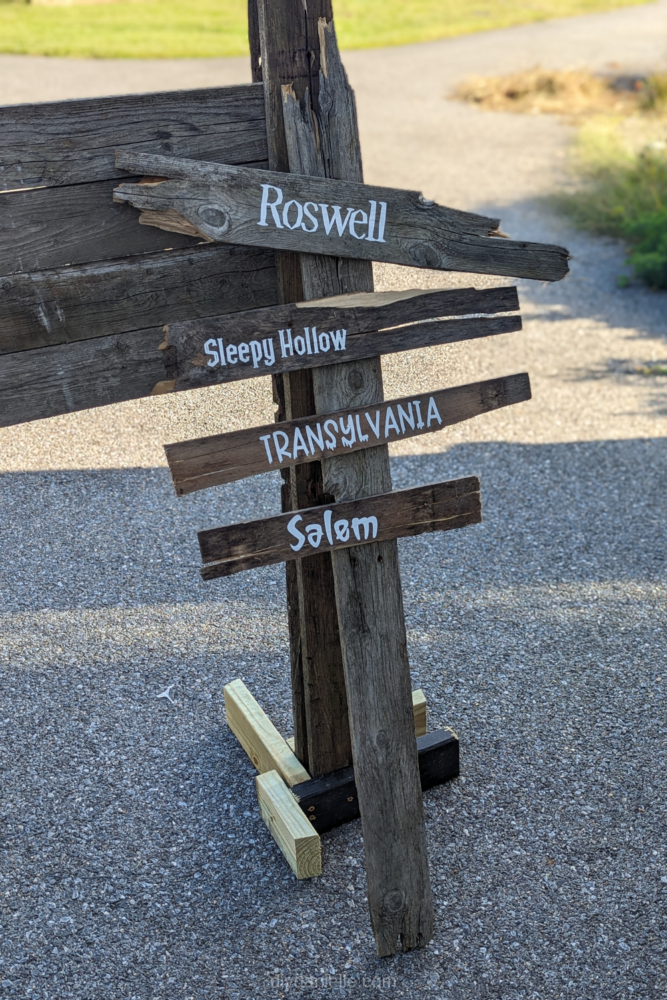
Step 5: If desired, you could seal this with a clear matte spray. You may also want to cut the bottom of the post to a point so it’s easier to stick in the ground. I have no fantasy that it would go into my super rocky soil so it’ll get leaned up against a tree probably. Or attached to a short t-post with zip ties if I can do that subtlety.
I LOVE how these came out. Here’s the video tutorial:
Please share and pin this post! You can also post your project and tag the DIYDanielle team on Instagram @doityourselfdanielle!