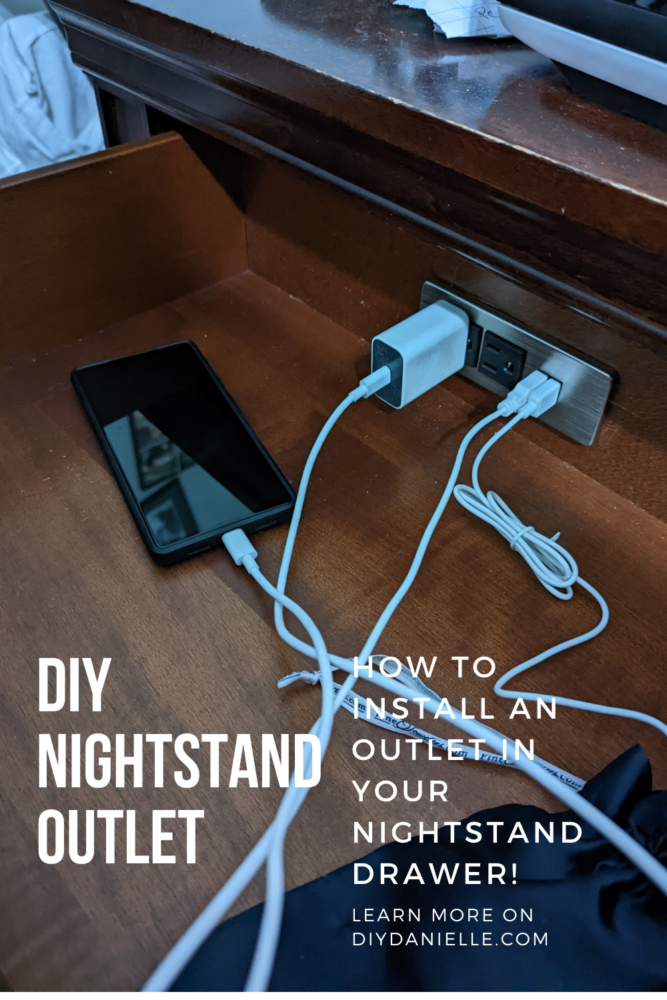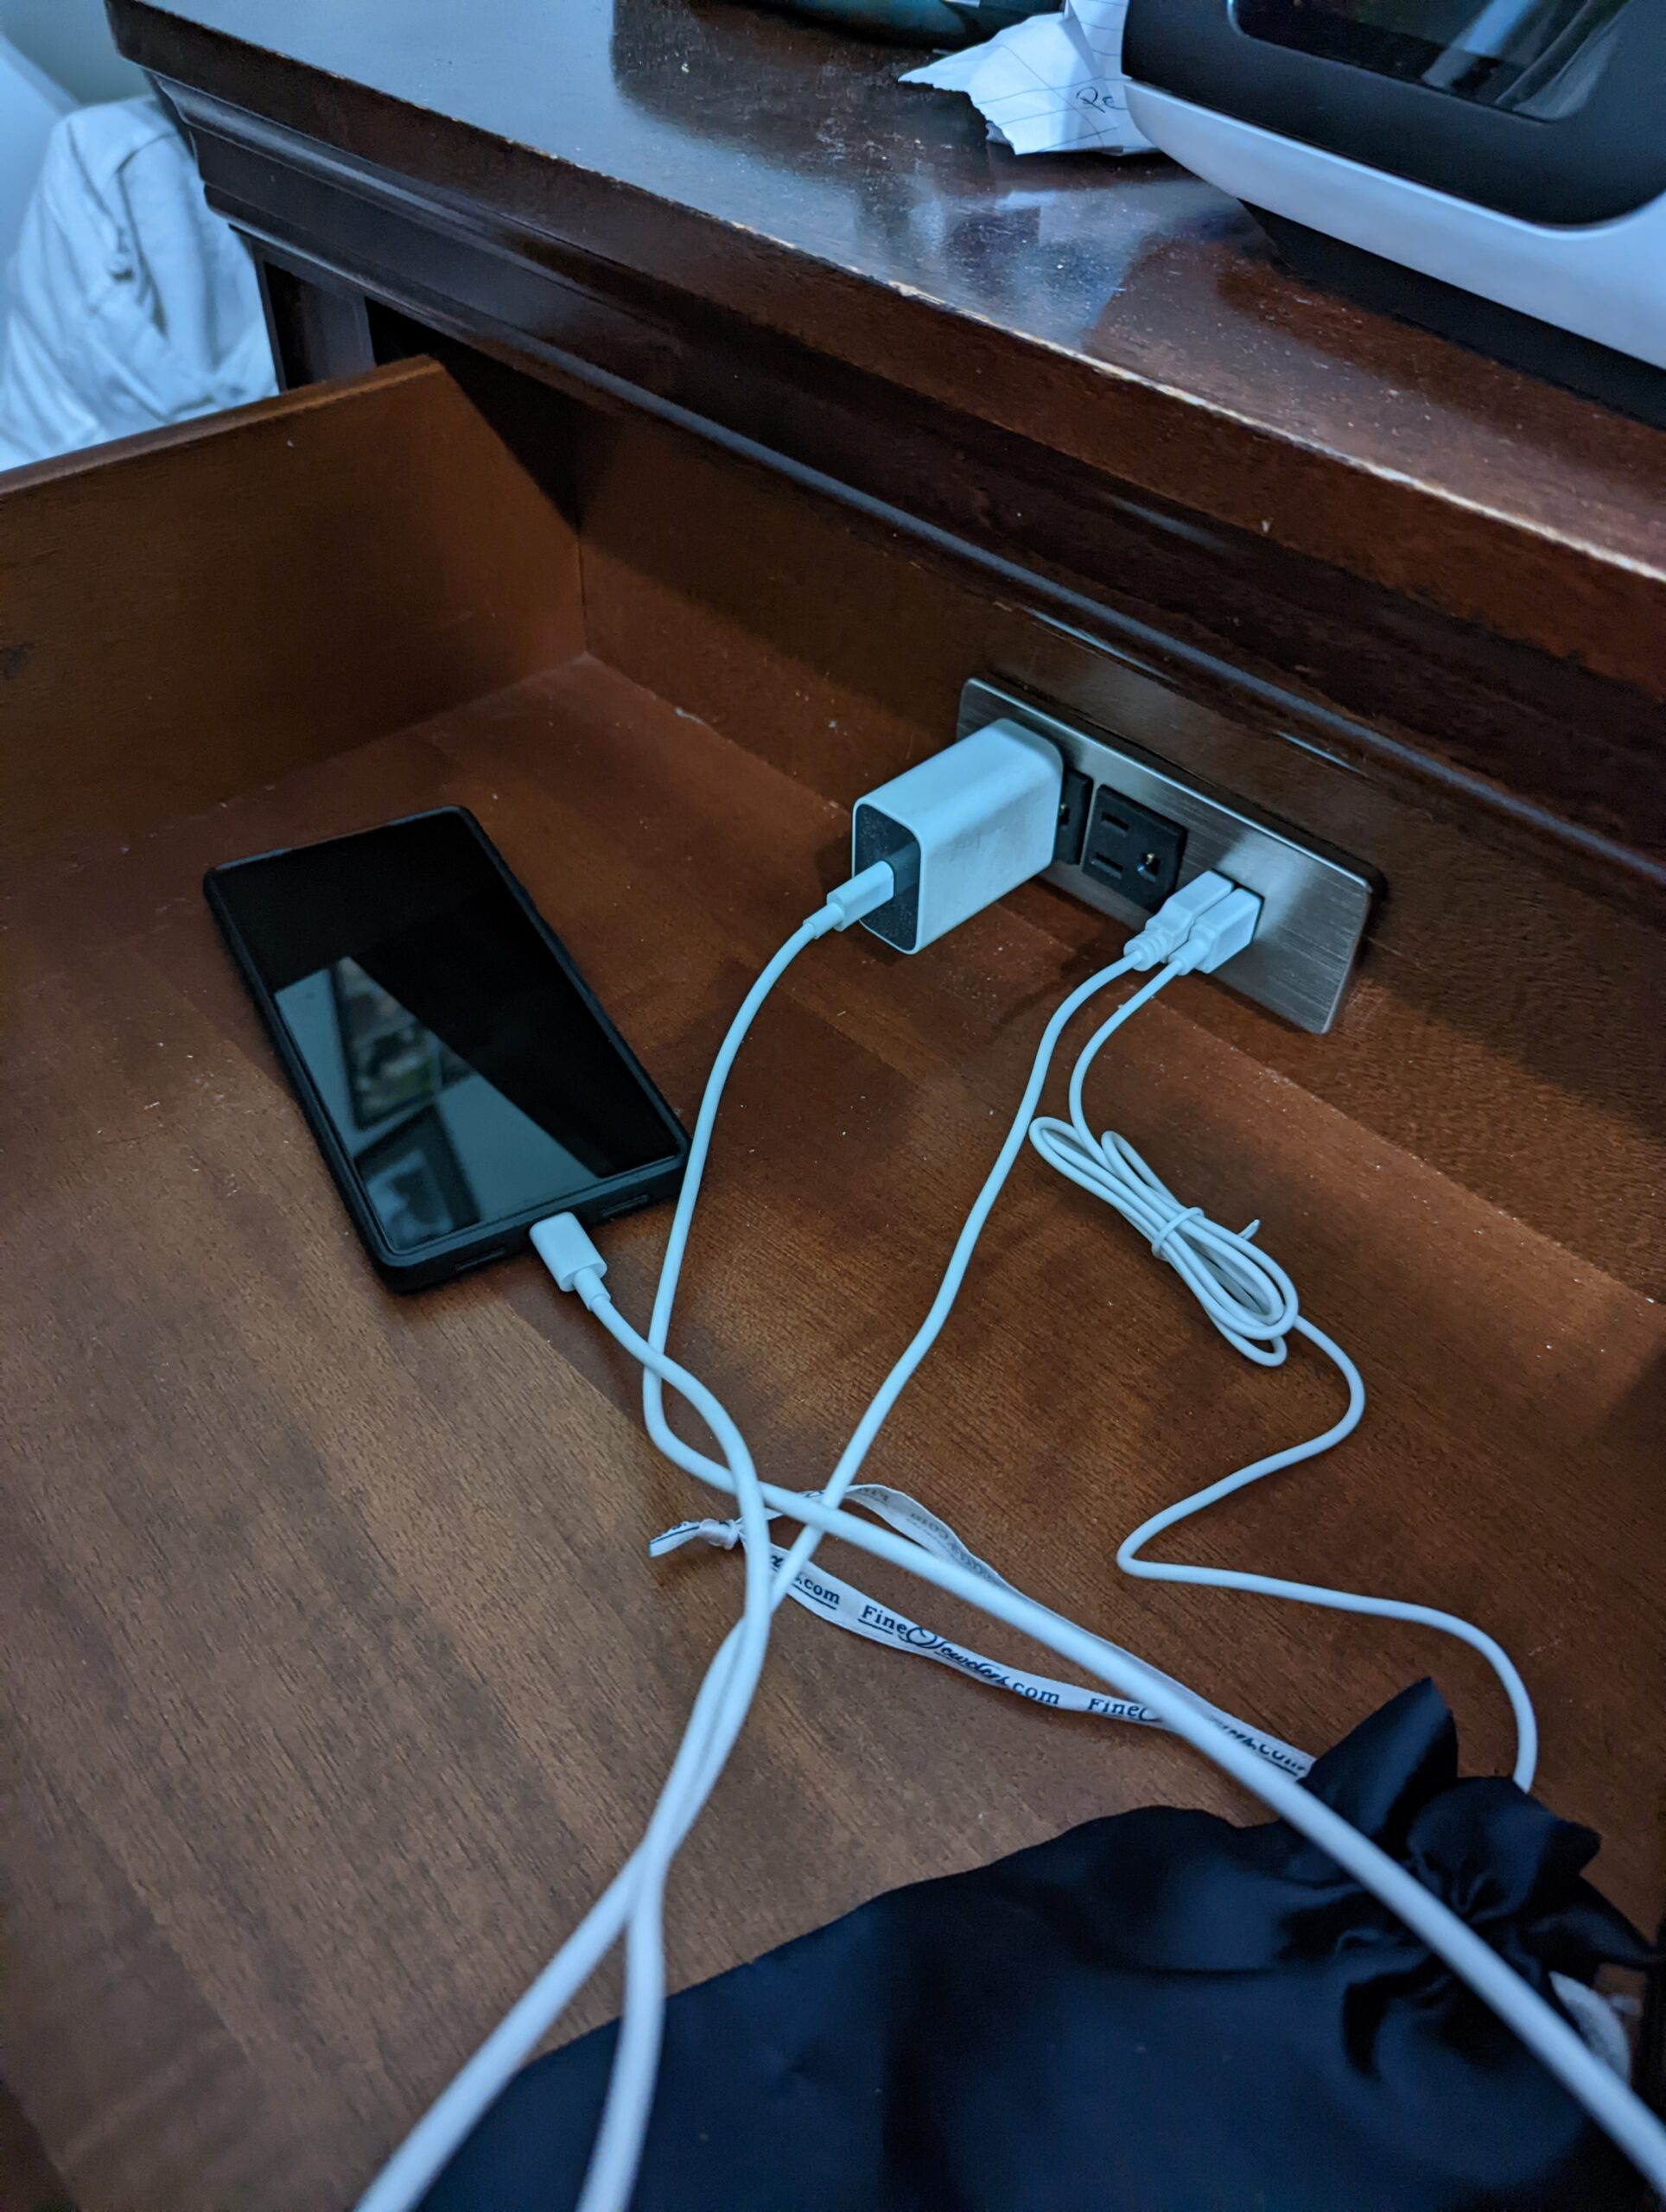
Learn how to install an outlet inside a nightstand so you can charge items like your phone, headphones, and more in a private space, avoiding clutter on the top of your nightstand.
I’ve been wanting an outlet in my nightstand for quite some time. I have a TON of stuff on my nightstand currently, particularly given that I use a CPAP machine to sleep and it takes up a lot of room. If I spill a drink or the water from my CPAP, having the phone and my headphone laying next to them isn’t ideal. It’s a recipe for disaster. Needless to say, being able to charge some electronics inside my top drawer was perfect: it kept things out of sight, away from potential water damage, reduced clutter, and it meant that I could charge things I wanted out of sight as well.
My actual outlet is directly behind the nightstand so the outlet cord would come out of the back of the nightstand and plug directly into the outlet. This helps me avoid moving my nightstand frequently to access the outlets.
It’s fairly simple to install. Here’s how.
How to Install an Outlet in a Drawer of a Nightstand
Supplies
- Outlet: https://amzn.to/3MxEsb4
- Ryobi Jig Saw: https://amzn.to/3Tl1KCY (Note this is without the battery- I have mostly Ryobi products so I usually buy them without the battery as I have plenty).
- Jig Saw Replacement Blades: https://amzn.to/3yFLVyV
- Drill with a Phillips Head and a drill bit
- Spade bit 1.5″
Step 1: Remove your drawer from your nightstand.
Step 2: Make a template the size of the back of your outlet. Attach it to the drawer where you want to place the outlet. Or simply draw the rectangle on the drawer using chalk or a marker. MAKE SURE YOU DON’T MAKE IT TOO BIG. The lip of the outlet needs to rest on the wood with only the back going through the hole.
Step 3: Use a large drill bit to drill a hole in the center of, or in the inner corner of, your rectangle.
Step 4: Use the hole you drilled to insert your jig saw blade and carefully cut out your rectangular shape.
Step 5: Ensure the rectangle is the proper size by inserting your outlet inside. If it fits, you’re ready for the next step. Otherwise, use your jig saw to enlarge it slightly.
Step 6: Sand the edges as needed.
Step 7: Insert your outlet, using the screws to attach the outlet to the drawer.
Step 8: Pop the cover plate over the outlet.
Step 9: Put your drawer back into the nightstand. If you have a back to your nightstand, you may need to use a 1.5″ spade bit (or your jigsaw) to cut out a hole that allows your cord to pass through. If the drawer won’t close because the outlet is too deep, you may need to cut a rectangle out of the back of the nightstand as well.
Step 10: Once finished, you can plug in your outlet. You’re finished
Just don’t charge anything that puts off too much heat inside your drawer. I could be wrong, but it seems like that could be a fire hazard, although probably charging anything like that next to your bed (and your sleeping person) is probably a bad idea. I’m visualizing the phones that were blowing up a few years ago.
Please share and pin this post! You can also post your project and tag the DIYDanielle team on Instagram @doityourselfdanielle!